Hello everyone and welcome back to the Cocoa Vanilla blog.
For today’s page I decided I wanted to create my own background using some Distress Oxides so I chose the colours Evergreen Bough, Chipped Sapphire and Fossilized Amber which match with the ‘No Limits collection’. To add them to my white cardstock I simply added the oxide to some plastic packaging, spritzed them with some water then pushed the plastic down on to my page. I placed the colour more to the right hand side of the page where I wanted to place my photo.
To balance the page I added a strip of the ‘Latitude’ paper to the left hand side of the page with a slight strip of black cardstock showing through. This also balances my black and white photo.
For my photo I added some different papers from the ‘A5 paper stack’ and popped my photo up on dimensional foam.
I decided to cut some hearts from the papers and added some hand stitching around them to create some texture. I placed the hearts and the top left and bottom right of my photo.
Next, to finish off the embellishing around my photo, I added pieces from the Chipboard Sheet, Ephemera pack and some of the Wood Epoxy Stickers.
For my title, I used the ‘Awesome’ from the ‘Chipboard Sheet’ and I decided I wanted it darker so I simply used a Sharpie to colour it black.
The page felt very right heavy so I decided the top left needed something so I used a tag from the ‘Ephemera’ pack, another stitched heart and ‘You rock my world’ from an A5 paper.
I hope you enjoyed today’s share and you are inspired to create !
I will be back soon with my last page as Guest Designer.
Hello Beautiful Friends,
Lina here today on the blog and YouTube channel featuring a layout I created using the These Days collection and the very colourful and inspirational mood board for the month.
You’ll be able to click HERE to be taken to YouTube to watch the process video for this layout.
The mood board this month is filled with lots of brightly coloured and fun Spring and Easter goodness. I drew my inspiration from all the colour and florals. I just could not resist! And using the These Days collection to create was just perfect in my opinion.
I started with a white sheet of cardstock and used my Silhouette Cameo to cut a circle in the middle that roughly measured 8×8 inches. Then I adhered my white cardstock to the lovely butter yellow gingham paper called Home Grown. The combination of the yellow gingham and the white cardstock made this background feel so light and airy. I then cut a circle frame with the patterned paper, Family Ties, to anchor the circle and give it more weight.
Next, I went to town and used alllll the florals, foliage, and butterflies. Using the Floral Ephemera, I created a (semi) frame around the circle to create somewhat of a wreath effect.
I (carefully) arranged my florals around my frame being extra generous on both the right and left sides. I finished off the layering with lots of foliage and butterflies that just add extra dimension. I also took this opportunity to add metallic gold thread behind my popped up photograph for a different type of texture.
For my title, I used the Foam Title Stickers and chose the words happy and together… voila`! My title easily came together, easy peasy! I also added some Wood Buttons and adorned the frame with teeny tiny hearts from the Puffy Stickers.
I had lots of fun creating this layout because of how bright and colourful the mood board is. It really out me in the mood for Spring and beautiful weather. I hope you’ll use the inspiration yourself and show us what you create with it.
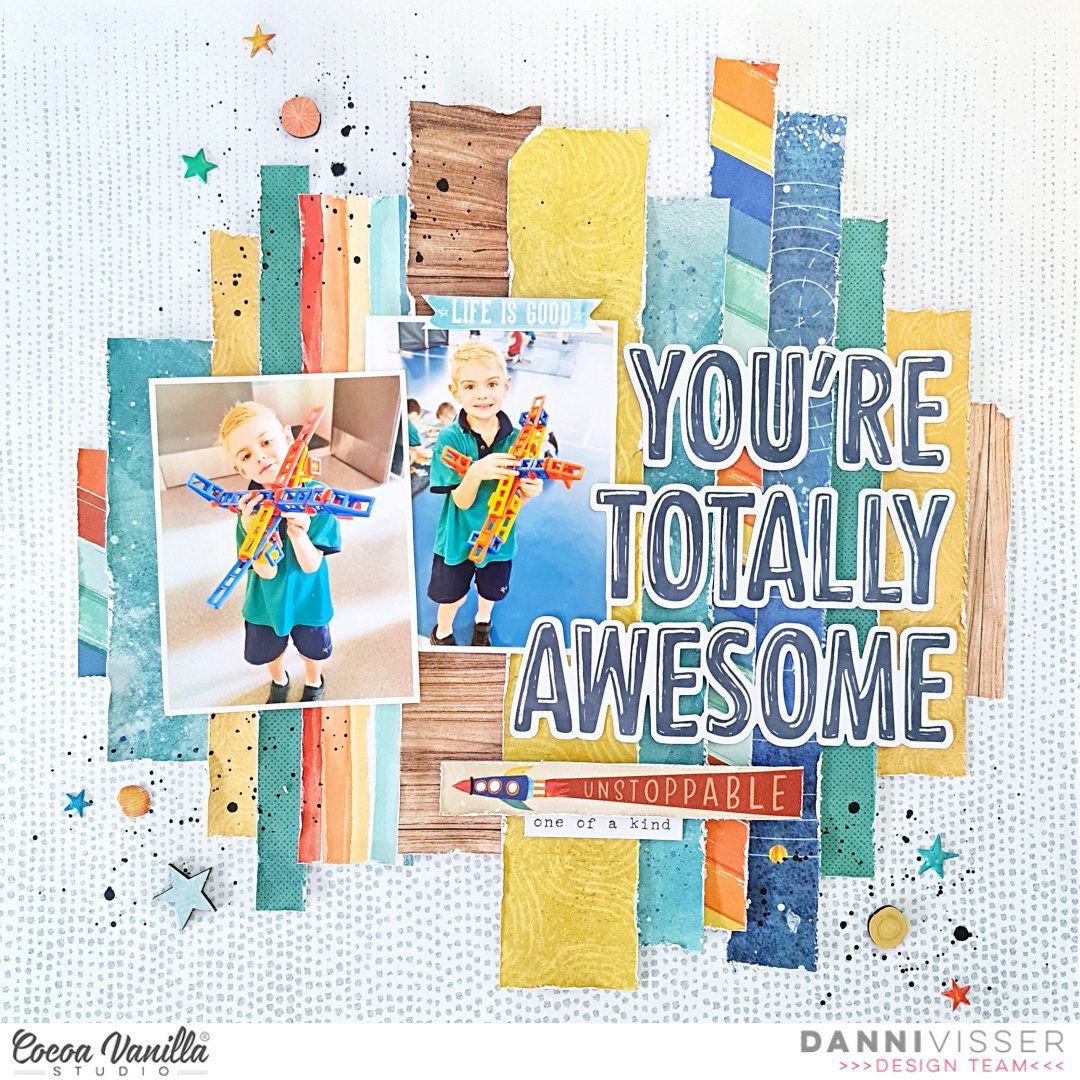
Hi everyone! Danni here with a new layout featuring the amazing new No Limits collection by Cocoa Vanilla Studio. I have fallen hard for this collection and it’s easy to see why. Those bright colours and amazing patterns are perfect for documenting those childhood photos! For this layout I used two photos of my son showing off his built creations.
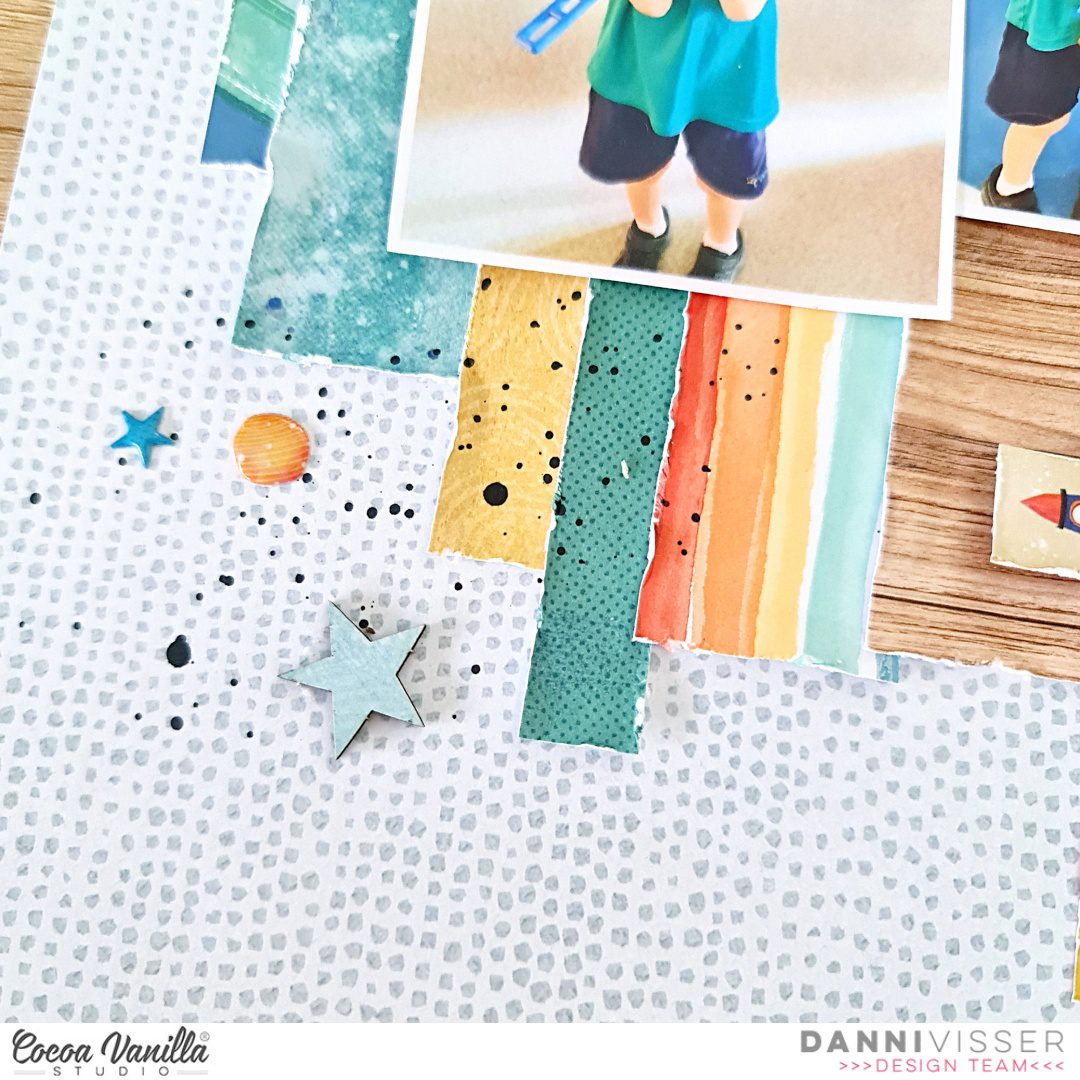
I started off with Universal 12×12 patterned paper as a base for the layout. I wanted a subtle pattern and this soft grey spot was perfect.
Next I began cutting strips of varying lengths and widths from the cut-apart side of Universal 12×12 patterned paper as well as a variety of papers from the A5 paper stack. I then distressed all the cut edges of the paper strips with my edge distresser for texture and visual interest.
Using tacky glue I layered the paper strips across the page, staggering the positioning of the strips so that the top and bottom edges fell at different heights. I tried to keep a balance of colours and patterns while still keeping the placement fairly random.
I placed my photos over the paper strips towards the left of the page, overlapping them slightly. I used the die cut titles to create a large, bold title to the right of the page, adding some white gel pen highlights to add my own personal touch to the title pieces. I added a small phrase piece from the cut-apart side of Universal 12×12 patterned paper below my title, as well as some accessory sticker phrase pieces.
Because the layout was already bold and full of visual interest, I didn’t need to do any heavy embellishing. I simple created three small areas of small black ink splatters, followed by some small pieces from the chipboard stickers and a sprinkling of adorable puffy stickers to create a subtle visual triangle around my photos.
I love how this turned out and I hope you enjoyed joining me today. There is a process video on the Cocoa Vanilla Studio YouTube channel linked below if you would like to watch the layout come together. Happy scrapping!
Hello CVS fans and welcome back to the blog today to see my 2nd creation using the new ‘No Limits’ collection.
For this layout I decided I wanted to make a big rocket for the main focus of my page. I took one of the rockets from the ephemera pack and recreated it using different papers from the collection.
Now, I am a BIG fan of hand stitching on my layouts. I love the texture it adds and I actually find it relaxing… I know this is not everyones cup of tea as it is time consuming. You can see I have stitched in co-ordinating threads on my rocket and it really helps to make the rocket pop from the page. To finish the rockets off I also added some of the wood epoxy stickers and puffy stickers …so fun!
To add to the ‘space’ theme I created some clouds to the top of my layout. I just used white cardstock and free hand cut them out…again you will see I stitched my clouds. I then cut a moon out of the ‘Orbit’ paper and then added a bunch of stars to the top of my page both from the chipboard sheet and some of the puffy stickers.
For my title I used ‘Love You’ from the Die Cut Titles then for ‘Moon’ I just cut apart some of the other words to make it work!
I backed my photo with a piece of the ‘Latitude’ paper….yellow is one of my favourite colours in scrapbooking…it helps to make the photo stand out on my page.
Lastly I added a few stickers from the ‘Accessory Stickers’ under my photo and thats it!
I love how this page turned out and I hope you do too!
See you in a few weeks for more ‘No Limits’ inspiration.
Hey Hey crafty friends, it’s Michelle back here today with another layout share for this month using our amazing NEW collection – No Limits. I’ve found another way to use this awesome collection for a non boy related layout which is just perfect for our not so girly daughter Leila. It also shows a way in which you can scrap multiple photos without overcrowding the page.
Grid layouts. These are a great way to get back into creating when you’re stuck in a creative ‘rut’ or like me, when your chaotic world is spiralling and you’re lacking time, but know that you need a therapeutic crafty sesh. This layout came together in no time and all and was the perfect way to document a couple of photos from Leila’s birthday back in December.
The patterns in this collection are just perfect to mix together, especially web using the smaller A5 prints. I’ve cut 8 patterns into 3x3inch squares and sewed around the edges to add a little extra detail
Each photo was printed in a slightly smaller size to the pattern paper, and I kept them all black and white to ensure no colour clashing happened. Each grid piece was adhered to the cardstock background using foam to add a slight hint of dimension across the entire layout.
Rather than massive clusters I’ve kept the embellishments to a small grouping of similar elements using ephemera and stickers combined with a mix of chipboardpieces and puffystickers
There’s a few title choices within the awesome Chipboard sticker set, this one I’ve mixed with some accessory word stickers to give a mixed font look.
Still cant believe this kid of ours is now 11! I honestly don’t know where the days go..
One of my favourite mini clusters using a sticker tag, ephemera piece, fussy cut and puffy stars and some threads
I finished the layout off with a splattering of black ink and called it a day. Dead set total legend for sure! But I am totally not biased at all right? lol
Well friends thats all from me today. Super short and sweet today sharing another great way to get multiple photos documented in a really quick yet effective way, plus using a collection thats not specifically designed for girls.
Thanks so much for stopping by. Until next time Happy Scrapping
Hello everyone. It’s Anna here with my next project made with amazing “No limits” collection. Super talented CVS Team has been playing with this line for a while and girls created all sorts of inspirational and fantastic layouts. Their ideas blow my mind! That’s why I though I will surprise you with something a little bit different this time. I made cards! Yep, not a common thing in my scrappy portfolio but I like to make a card or two from time to time. Especially when the idea comes to my mind for a specific products. That was the case this time. When I saw all those space related items like planets, stars and rockets, I though it would be fun to use them in an interactive design. I made three quite simple and easy to recreate cards.
First card has a slider, that moves the rocket up and down. It was the easiest and fastest to make and didn’t required any special tools. I started with cutting the background from A5 Paper Stack twice, in the same size. Then I took a craft knife and a ruler and cut out the strip of paper from one of the backgrounds. To estimate how wide the strip has to be, check what size of foam dots will you be using and add 1mm of each side. You will also need something small and heavy, like a coin. I used 1 cent, which was just perfect.
Next step was to add pieces of foam tape under the first layer of background leaving the tunnel for the coin to move up and down. Put the coin on the first layer of background, add second layer with the foam and glue them together. You should be able to see the coin under the strip. Next, add a foam dot on top of the coin and place the rocket. I used the one from Die Cuts pack, but I trimmed off the white outline to better fit the dark background. Slider is ready! Now you can finish the card by adding the planet on the bottom and some stars and smaller planets. My “Earth” was fussy cut from “Universal” paper. Stars come from Chipboard Stickers sheet and Puffy Stickers.
Second card also has a slider, but in a round shape. This time I had to reach out for dies and die cutting machine. I used to sizes of circles, one slightly smaller than another, to make a round tunnel for the rocket. Rest of the process was pretty much the same – foam layer, coin, foam dot. Decorating the card was also simple as I wanted the rocket to shine. You also need to remember to let the tunnel open so the slider can work smoothly.
This time my planet was fussy cut from the globe from Die Cuts pack. It was just a perfect size. Title for the card was created by cutting one of the stickers from 6*12 Sticker Sheet into pieces. I wanted it to match the “space” theme. Super cute Puffy Stickers stars are a perfect match for any project.
Last card doesn’t have any movable element. It has a shaker instead. I used one of the stars from Die Cut pack to make it. I actually used two of them (from the secon pack) becasue I wanted my star to hang of the side of the card, thus the other side of it would be visible too. If you are planing to place the shaker in the middle of the card, one star will be enough. I started making my shaker by adding a layer of think double sided tape on the left side of the star. I then added a piece of transparency and cut it into the proper shape. I did it twice, with both stars. Next step was to add a layer of foam tape cut into narrow strips on the edges of the star. It was ready to be filled with sequins and glitter. After that, I sealed the shaker with second star. This way, you can use either side of it.
Decorating the card as simple and easy, as with the previous cards. Rocket and few stars make the whole composition. “Reach for the stars” sticker was a perfect finishing touch.
That is all for today! I hope you liked my ideas for simple yet entertaining cards using amazing “No limits” collection.
Thank you so much for stopping by and see you in two weeks <3
Hi everyone, its Melissa and I’m so happy to be back with you sharing another layout created with the amazing No Limits collection. For this layout I decided to document an outdoors photo to show you how this masculine themed collection can be used to document adventures. The photo is of my daughter just last weekend when we explored a beautiful beach that is new to us. We live in an area of New Zealand very close to the Catlins which has lots of beaches, and as we’ve only been here 9 months its always fun to explore new ones!
I used a free cut file by Paige Evans, and I thought I would find this one challenging due to the unevenness of the letters. I decided to back it with Latitude because it has two different tones of stripes which I alternated. I backed the parts of the letters that cross over with solid patterns in yellow and blue from the A5 Paper Stack.
I used Universal for my background, and placed it upside down to have a more saturated pattern at the top. I added splatters of Distress Oxides in corresponding colours, concentrated across the centre of the paper where I positioned the cut file.
For my embellishment I used three of the Die Cut Ephemera stars which I placed up on dimensional adhesive. I layered the large cut out star over the corner of the photo and I love how it looks! I also added an ephemera banner.
My finishing touch was to add some of the adorable Puffy Sticker planet-type circles (which I can’t get enough of) and a Wood Button. I also added an Accessory Sticker and underneath that wrote my journaling.
I kept this layout simple to focus on the photo, and I love how it turned out! I hope I’ve inspired you to scrap your outdoor adventures with this gorgeous and versatile collection.
Welcome to the Cocoa Vanilla blog today! It’s Josefine here showing you a new scrapbook layout. My assignment for this layout is, use an older Cocoa Vanilla collection. I chose the “These Days” collection. The beautiful soft colors match perfectly with the spring weather that is coming.This photo of my son has been a while. But his dreamy look he still has. I enjoy seeing these moments reflected in photos. They are beautiful and happy memories that I like to use for my scrapbook projects.Today I’m going to tell you how I made this layout.
I grab a 12×12 white cardstock paper and choose the colors of Distress Oxide I want to use. The colors I chose are, antique linen, fossilized amber, worn lipstick and spiced marmalade. I start by blending the Distress Oxides and use my blending tools. I start with the color antique linen. Then fossilized amber, spiced marmalade and lastly worn lipstick. I gently blend the colors together and the soft tones in my background come more and more to life. I splash some more with the different colors of distress oxides. Now it’s time to decorate my layout with the awesome collection “These Days” and the cute picture of my son.
I cut three hexagons from the pattern paper and stitched the edges with gold sewing thread. I also cut the photo into the shape of a hexagon. I placed the hexagons in the center of my mixed media background and begin making clusters around the hexagons.
I used different metal dies sets for the leaves and twigs. Some leaves I stitch with gold and white sewing thread. I like lots of little different details in my layouts. I select several die-cuts and along with the leaves and twigs I make clusters on both sides of the hexagons. I use the cute wooden buttons as additional decoration.
I combine the title for this layout with the black foam words and the colored mini alpha set. I find it fun and playful to make titles with different alpha sets. The title for this layout is “Love this cute face”. It is now time for my signature and splash some white splatters around with white gesso that I mixed with a little water. I love the festive effect the white splatters give.
I also splash some water droplets on my mixed media background. I let them soak in the Distress Oxide ink for a while and then I dab the drops with a piece of kitchen roll. I love the effect of water splashes on the oxide background!
I hope I was able to inspire you with this mixed media layout today. I had a lot of fun creating the mixed media background. The “These Days” collection is a fantastic collection and can be used for many different themes. I wish you a very happy and creative day and until next time on the blog! Thank you so much for stopping by.
XoXo, Jo
Hey y’all! Laura Alberts back again with another layout using the stunning new No Limits collection from Cocoa Vanilla Studio! I absolutely love the versatility of this collection. I’ve used it for boy layouts, this is a teen layout, and I have plans for a baby layout! One of the many reasons I love Cocoa Vanilla designs is that they are so easy to use. This star explosion design was a lot of fun and uses the Big Bang patterned paper as a background with the Orbit patterned paper as a border. Loving this space theme!
Bursting out from behind my photo of my teenagers are a plethora of stars fussy cut from the 12×12 and A5 paper stack versions of the Nebula patterned paper. Having both sizes gives me a wide variety of stars to use as I scattered them out from the photos. Largely, I followed the lines on the Big Bang paper, but for some of the small stars, I just placed them randomly. To get a little pop of red on the page, I punched some tiny stars from the multi-colored stripe paper and added a word phrase from the cut-apart sheet.
For an extra pop, I used alpha dies on the A5 bright green patterned paper, then matted my photo with the same paper. Loved going a bit silly with this title as I point out the distinctly different styles my two oldest kids have. One has gone for super short with a shaved undercut and the other is growing super long hair! Love that! This title is an homage to their amazingly unique senses of style. To finish off this layout, like I always do, I added gold Nuvo and splattered with gold ink spray.
I hope this layout inspires you to give an explosion layout style a go! To see how the ‘Hair-mazing’ layout came together, check out the process video below:
It’s Tarrah back with you and today I am excited to share a new scrapbook layout featuring the awesome No Limits collection!
I am documenting a photo of my eldest son from his first day of starting work at KFC as a casual. He was very confident and we knew he would be fine. 2 years on he still loves his job and everyone he works with also. There were so many cool elements in the No Limits collection to help tell the story and document the occasion!
I decided on a horizontal design for this layout, taking the A5 paper stack and cutting some strips from some of the patterned papers in the A5 paper stack.
I arranged them in different positions on the page and then added some machine stitching to the centres of each strip. I also bent up the edges of the papers just with my fingers, I love how the machine stitching and the bent up edges add some extra texture and interest to my page. I placed my photo slightly to the left of the page using craft foam and I layered 2 of the cards from the 3′ x 4′ Journal Cards pack under my photo here. I also stapled one of the banner stickers from the Accessory Sticker pack to the photo and layered another small rainbow sticker under the 3′ x 4′ journal cards.
To the right of my photo I placed my title that is made up of the die-cut titles from the No Limits collection. I used foam tape under the title also to give some dimension and to help it stand out. I also added the cool banner die-cut from the Die-cut Ephemera pack that says ‘Go For It’ and those super cool hand gesture die-cuts had to be added too, these are so fitting for boy layouts!
On the bottom green paper strip I added a small cluster of embellishments including an arrow from the Chipboard pack, another phrase sticker from the Accessory sticker pack and a phrase die-cut too. These phrases all help to tell the story and are suited to the message I am trying to portray to my son in my layout. I also added a few of the die-cut stars around as well, you can never go wrong with stars on a boy layout!
On the left of my photo I added another cluster of embellishments including the wood/epoxy button, the hand die-cut and another of the stars. When I create my clusters I always try to include similar colours from clusters I have previously created. This helps draw the eye around the layout, helps with visual design and makes the page aesthetically pleasing to look at. You can see on my layout that in each cluster I have added the red/orange colour, this is a great colour to use as it pops against most other colours. Another great colour to use for this is yellow.
Lastly I sprinkled some black mist and stamped the date stamp also. I hope you enjoyed my layout today?
Thank you so much for stopping by the Cocoa Vanilla blog! Make sure you get your hands on the awesome No Limits collection from your local scrapbook shop or wait until it becomes available in the Cocoa Vanilla Studio store!


 For my title, I used the Foam Title Stickers and chose the words happy and together… voila`! My title easily came together, easy peasy! I also added some Wood Buttons and adorned the frame with teeny tiny hearts from the Puffy Stickers.


 I grab a 12×12 white cardstock paper and choose the colors of Distress Oxide I want to use. The colors I chose are, antique linen, fossilized amber, worn lipstick and spiced marmalade. I start by blending the Distress Oxides and use my blending tools. I start with the color antique linen. Then fossilized amber, spiced marmalade and lastly worn lipstick. I gently blend the colors together and the soft tones in my background come more and more to life. I splash some more with the different colors of distress oxides. Now it’s time to decorate my layout with the awesome collection “These Days” and the cute picture of my son.
 I used different metal dies sets for the leaves and twigs. Some leaves I stitch with gold and white sewing thread. I like lots of little different details in my layouts. I select several die-cuts and along with the leaves and twigs I make clusters on both sides of the hexagons. I use the cute wooden buttons as additional decoration.


