Hey y’all! Laura here with a bouncy, energetic layout featuring my darling girls enjoying their favorite outdoor activity, jumping on the trampoline! I decided I wanted this layout to have just as much energy as these two bunnies! Using the stunning Happiness collection’s 6×8 paper pad to back this sweet heart wreath cut file from Paige Evans made a super easy background when layered on this mixed media styled Sprinkles patterned paper.
In the top right corner, I tucked in a tag, ticket, and a heart behind one of the sweet little word phrase banners for a cute cluster. As a bonus, this adds a journaling spot amidst the business to add a quick reflection on the twins’s favorite activity. In the bottom left corner, I added a floral/heart cluster with my title phrase banner, “Stay Colorful,” which came from the ephemera pack.
To add a bit of detail, I stamped some teeny tiny hearts as well as some Nuvo drops and splatters around the outside of the wreath. In random places, I tucked in clear stickerhearts for a fun, peek-a-boo effect. This layout is such a fun, happy, bouncy design that perfectly matches these two wild bunnies jumping around!
I hope this cut file layout inspires you to look at your patterned papers a little differently! It’s fun to see how you can use every little scrap up in a new way. If you’d like to see the Stay Colorful layout come together, I have the entire process in the video below!
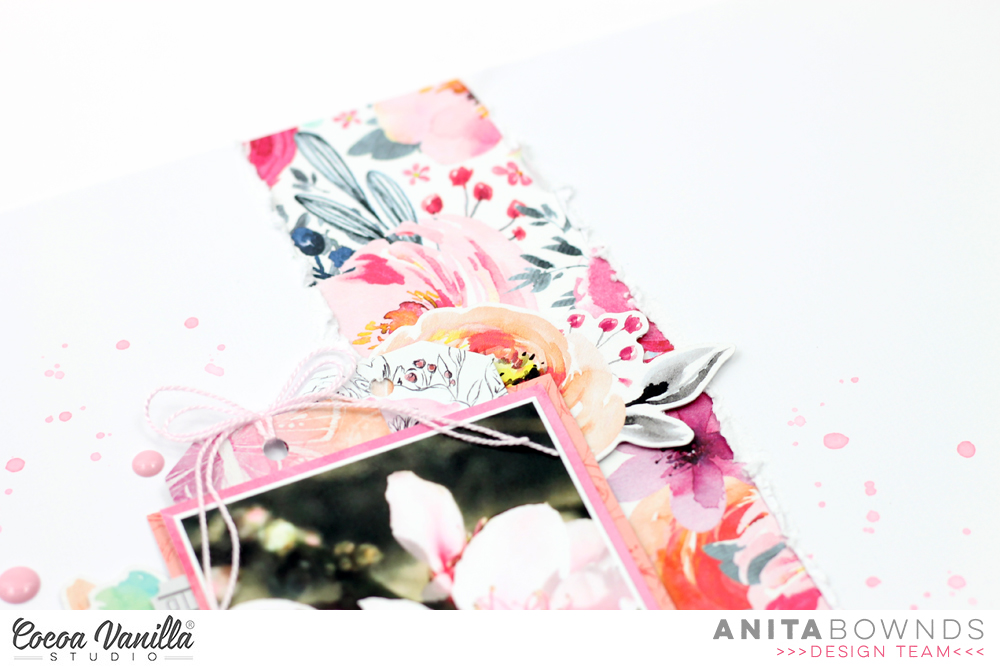
Hi there crafty friends , Anita here sharing a fun sweet adventure layout using the beautiful Unforgettable collection
Our kitty Luna and I love going on little adventures around our garden..she manly just follows me around while I take photos of pretty flowers but she enjoys it as my girls are grown up now but she used to follow them around when ever they where playing…
With my layout today I wanted to try something new and tear my white cardstock down the middle removing about 2 inches to add a strip of glorious patterned paper behind.
Then I tore a bit from top left and bottom right to add more glorious patterned paper behind
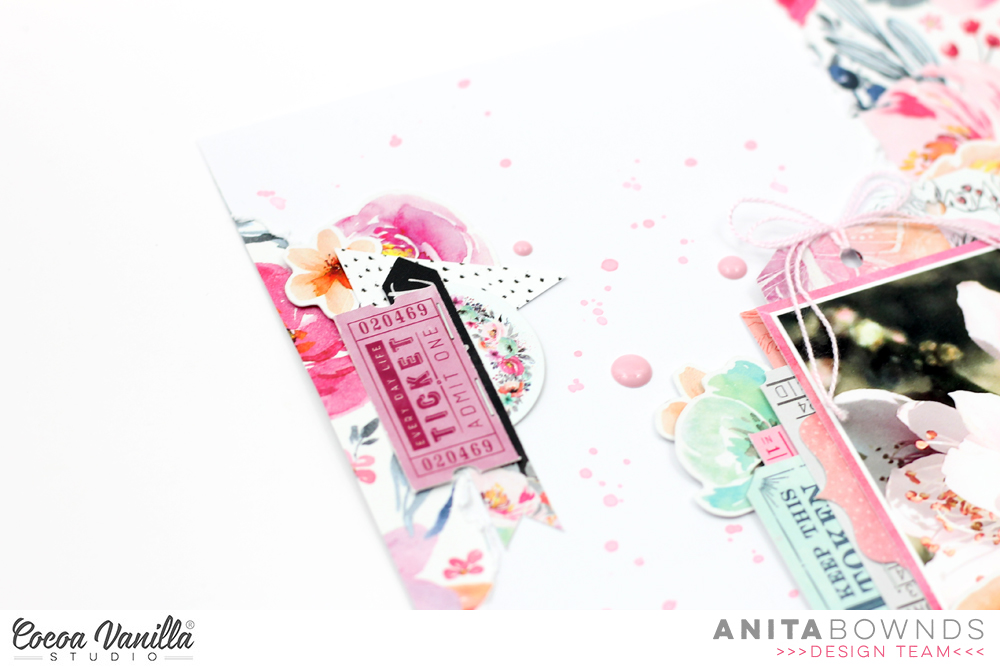
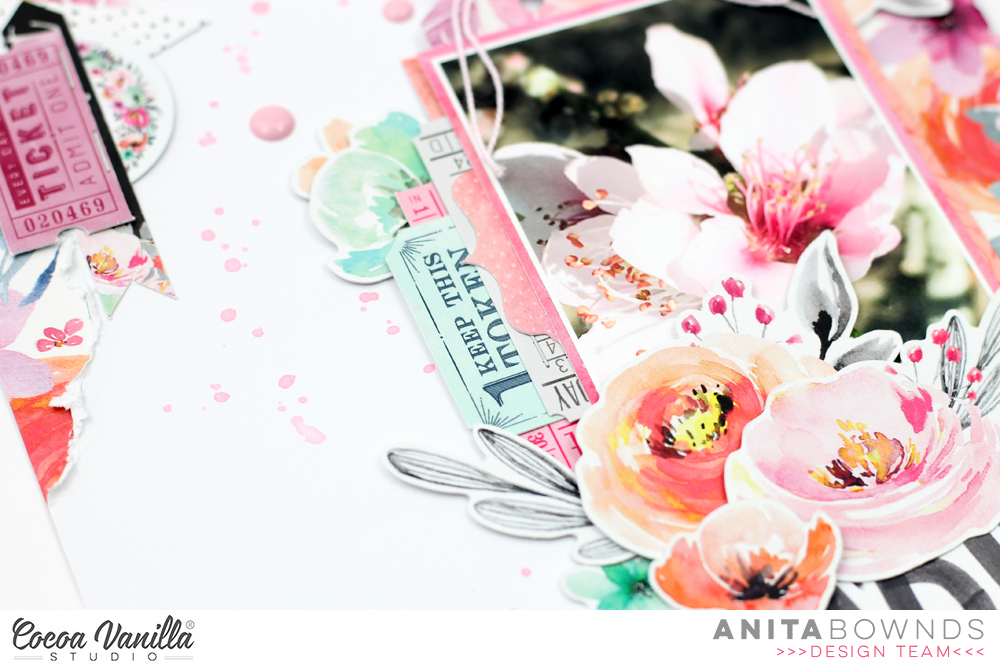
Then I matted my photo on papers from the 6×8 and tucked ephemera into the layers to add colour and dimension
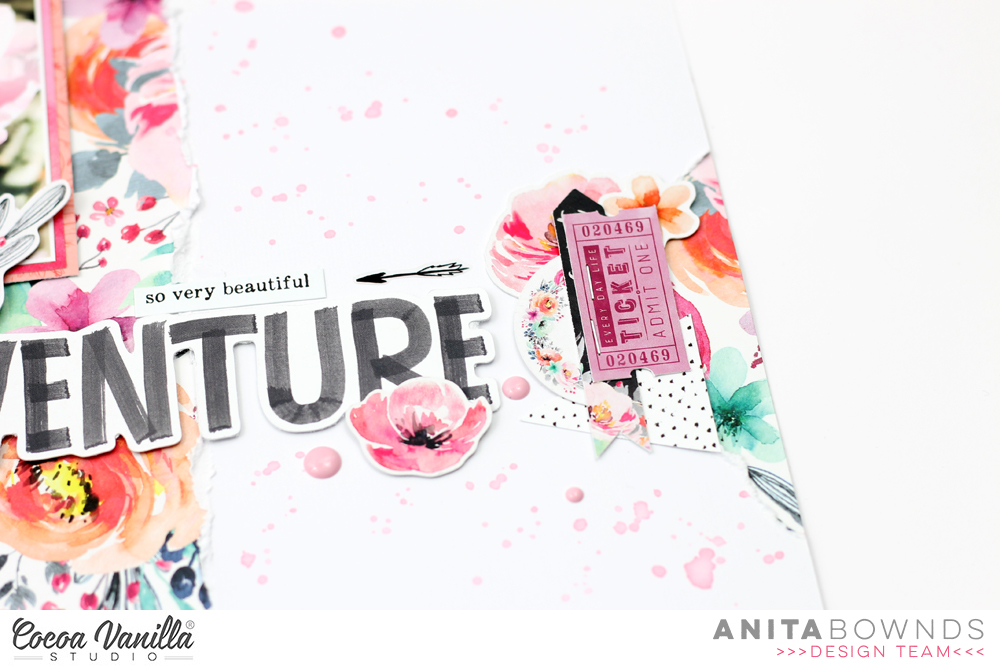
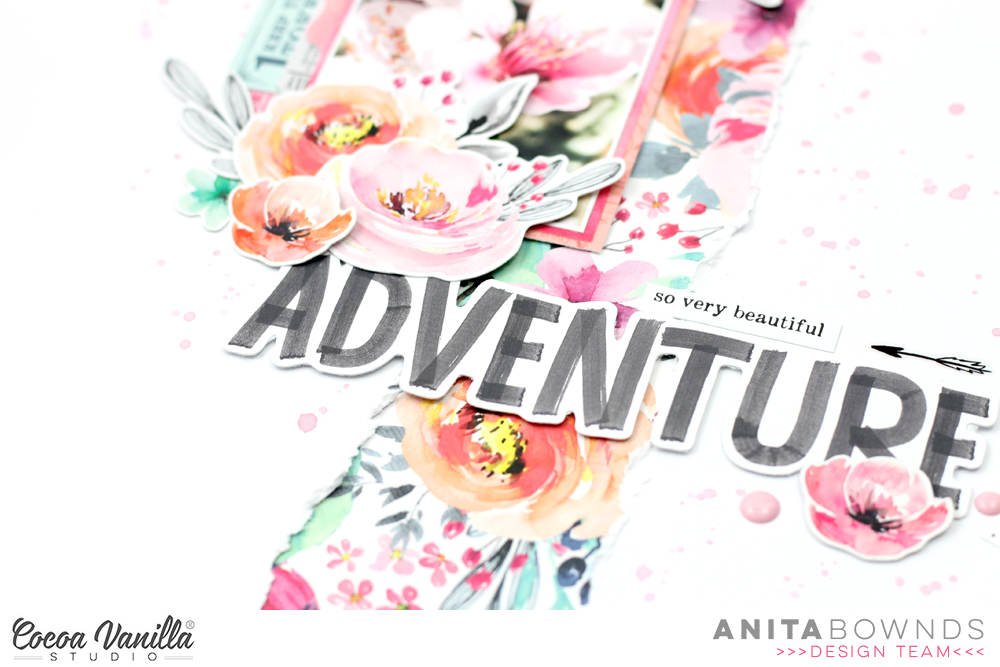
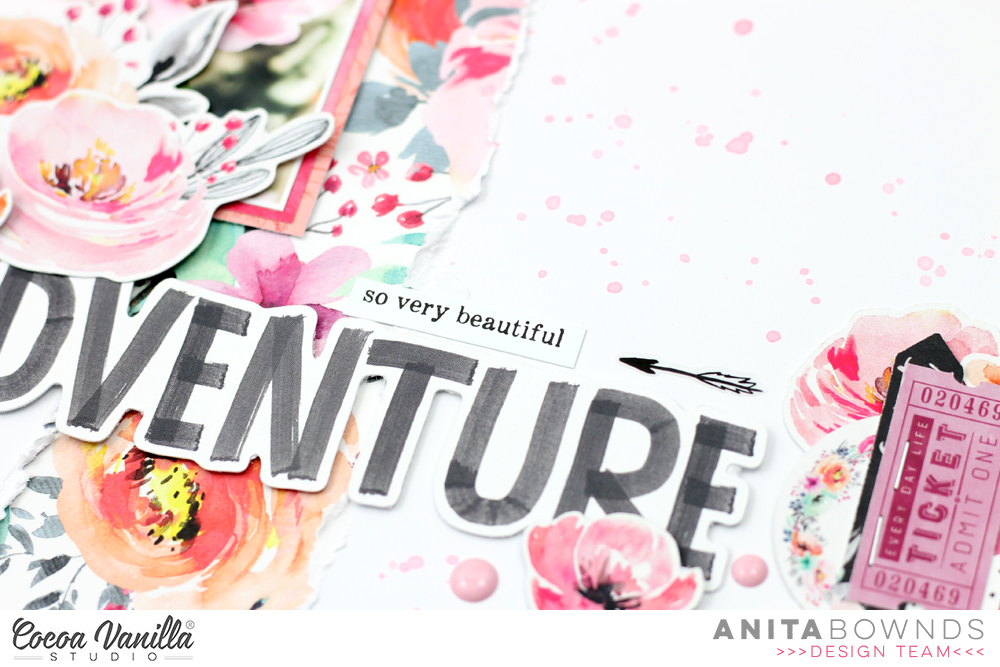
Then using one of the cardstock titles from legendary I added adventure below my photo
Then on the 2 sides that I add the patterned paper I clustered ephemera and adhered it down
Then I selected flowers from the ephemera and started layering them around the photo and a few in the clusters of ephemera
I added some accessory stickers to my photo layers and one to the top of my title along with a clear sticker beside it to add more colour I then add splashes of ink across the layout to add more colour in the background .
Hey y’all! Laura back again and this time to spread some Happiness! When I saw these two photos, the first thing that popped in my mind was to make a quilt pattern. Inspired by my lovely grandma, I cut several of the papers from the 6×8 paper pad with a 1 inch hexagon punch and then puzzled the pieces together to create a quilted flower effect. Such a fun design and so easy to make!
Once I punched all of the hexagons, I cut out small 1 inch square papers to use as a base and then taped each individual hexagon piece into a simple flower design. It doesn’t really matter which piece starts in the center, I changed up each of mine a little bit from the others. It’s a lot of fun to play with quilted designs!
To add a bit of movement along the page, I added fussy cut butterflies all throughout the quilted flowers and even created little Nuvo gold trails behind them, this gives the appearance of movement! Plus, I added clear stickers underneath clusters and butterflies to give it the appearance of depth. This works because the butterflies’ wings are popped up just a bit.
I hope this quilted floral layout inspired you to look at your patterned papers a little differently! It’s fun to see how you can use every little piece up in a new way. If you’d like to see the Happy Times layout come together, I have the entire process in the video below!
Hey all Rachel here! I recently realised I had never used the pre cut cut files, so I decided it was time! This geometric heart cut file from the Happiness collection it is so gorgeous and all I did was add some machine stitching! The photo is of my girl caught on our bed, but she looked so cute instead of telling her off I grabbed my camera!
I love the black foam sticker titles (from the Unforgettable collection) and against pinks and florals it creates a stunning contrast and visual impact. I plan ahead where I am going to position them as I wanted to add several.
I matted my photo on the frame of mind paper using the green side (all papers from the Happiness collection). I added it with foam tape as I wanted to tuck elements under it. From the Happiness die cut ephemera I added a floral bunch and two of the tassels and finished off this embellishment cluster with a gorgeous Happiness flair button.
On the other side of my photo I added a floral bunch that I fussy cut from the so fresh paper finished off with fussy cut butterflies from the bright and beautiful paper which I adhered with foam to create a 3d effect.
I next created my title using a mix of the foam titles (and hearts) and accessory sticker phrase sentiments. I added a Happiness clear sticker paint brush strokes over the sentiments.
I added another foam sticker title which I slightly curved to fit the shape of the heart. Lastly I added another row of machine stitching to border the page.
I love how this turned out and it’s just perfect to document my much loved girl! Thank you for stopping by today and I hope you all have a wonderful week and manage some scrapping time.
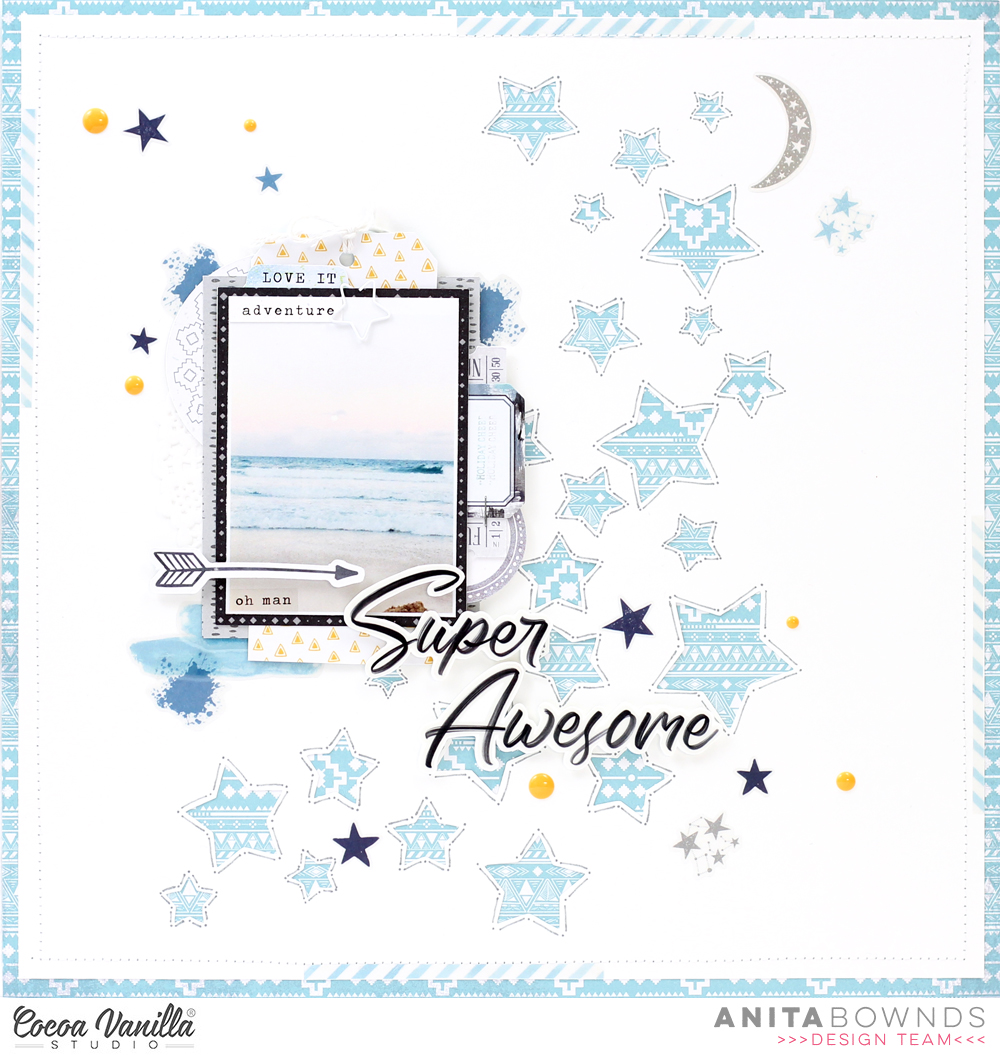
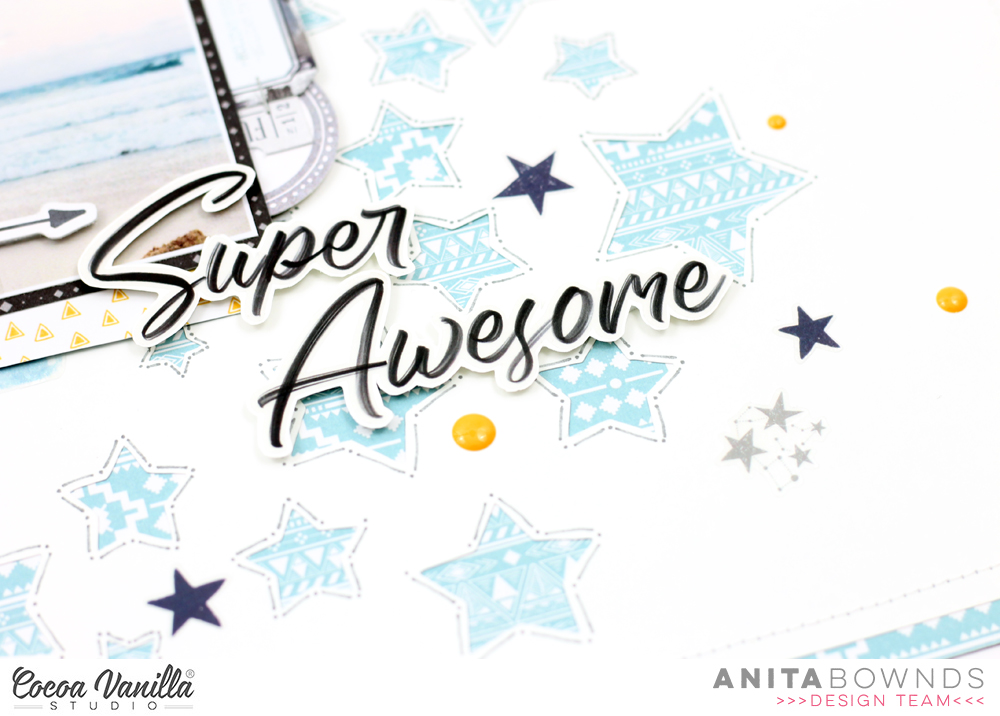
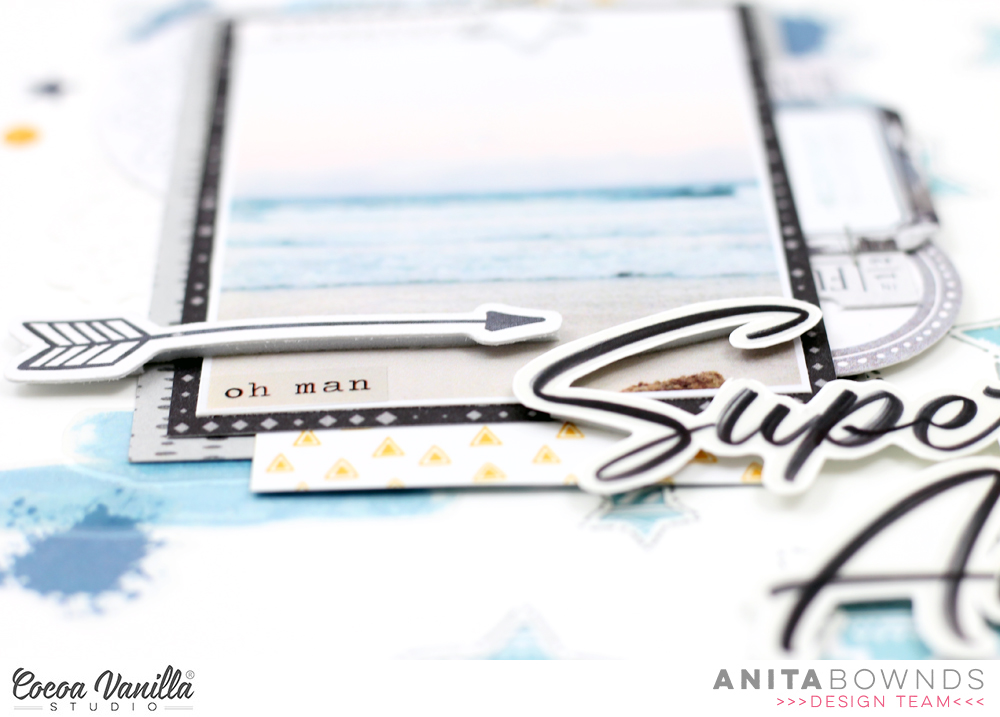
For my layout I decided to do one with stars , I know it doesn’t really go with a beach theme but this photo was taken late in the afternoon and the moon was out already totally weird I know but it was a beautiful afternoon just sitting on the beach enjoying the view…
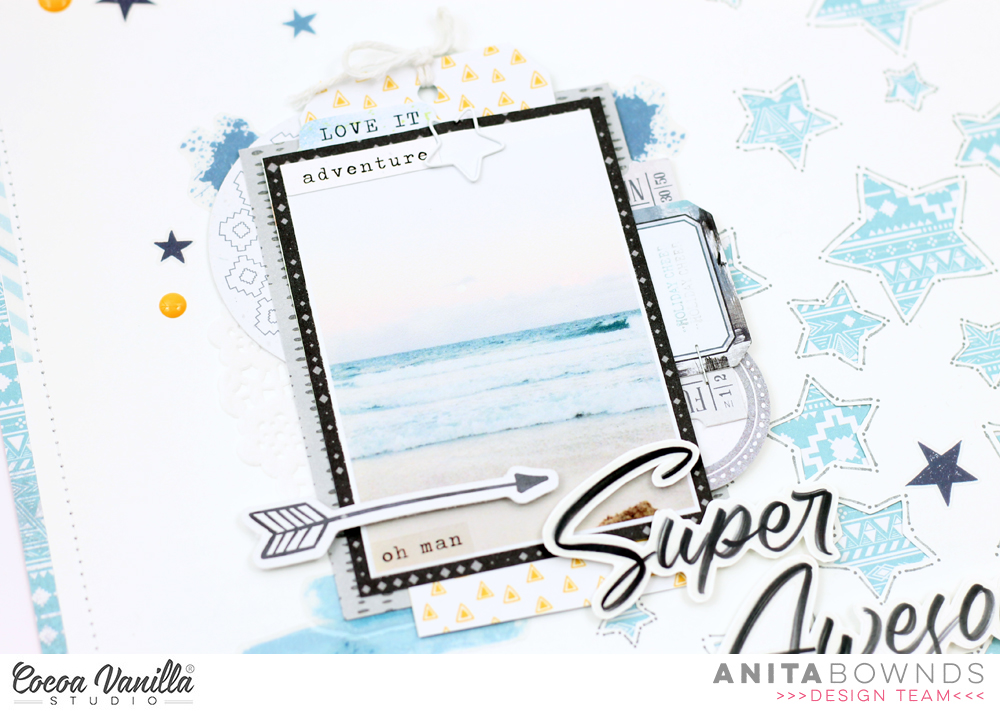
I started off by cutting out a star background cut file from @neatndcraftycutz
And adhering it down on total legend patterned paper then I machine stitched around the border and using a fine tip grey pen I added dots and lines around the stars to add more texture
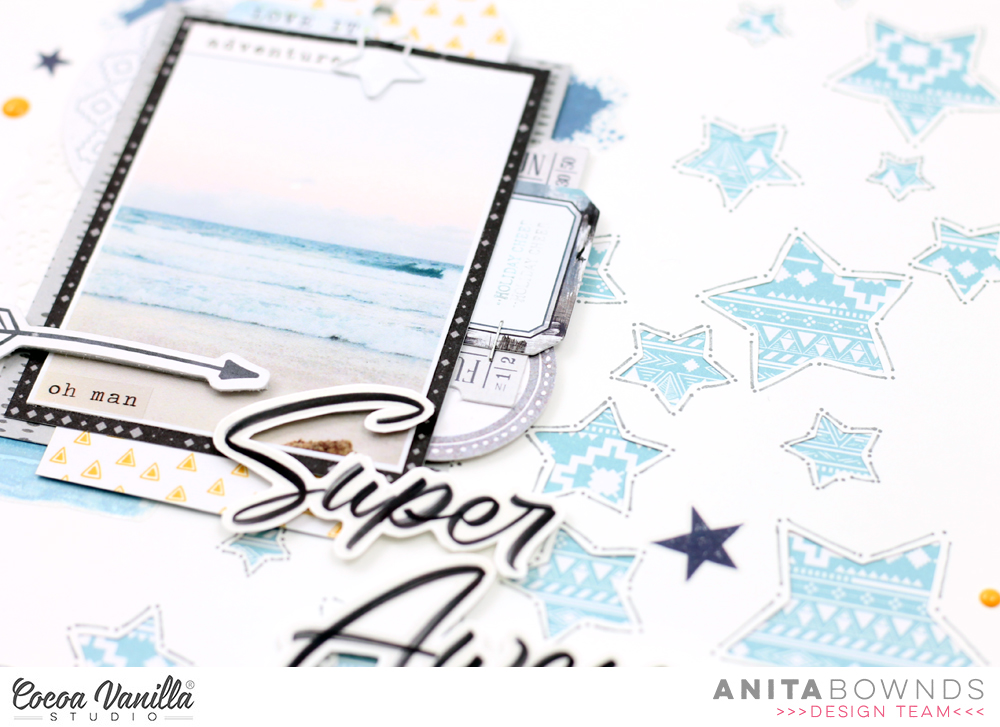
I then layered a doily and patterned paper behind my photo using total legend and all star
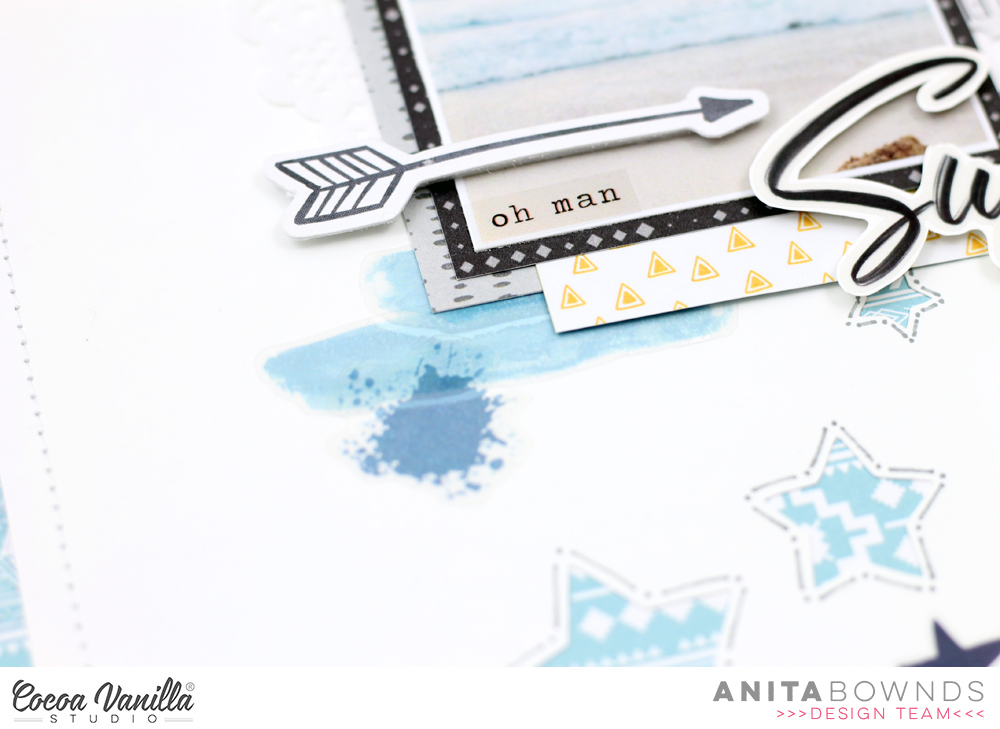
And to add more texture and dimension I tucked accessory stickers and ephemera in the layers of the photo. I add a hand made take using patterned paper and tucked into my photo layers.
Using double sided foam tape I popped up my title using the clear stickers adhered on cardstock
I then added more of the clear stickers around my photo just underneath
I scattered the stars stickers around the layout and title along with a few enamel dots to add more texture and dimension are the cut file stars
I also used a few stickers from boys ruleaccessory stickers and clear stickers.
Hi Cocoa Vanilla fans! Danni here, back with another layout using the incredible Legendary collection. This one is a super simple dimensional rainbow layout that doesn’t require any fancy equipment, just a pair of scissors! I added some machine stitching for extra interest, but that step is definitely optional.
I started with a white cardstock background and added a border with Wild One 12×12 paper to echo the rainbow theme. Next, I cut curved sections of paper in the shape of rainbow arches with scissors, using a dinner plate as a template guide. I used One Way, Offbeat, Wild One, Explorer and Total Legend 12×12 patterned papers to get a good mix of mostly solid colours and spaced them evenly on the page so the white background showed through between each stripe. I distressed all the edges to hide any imperfections in my cutting and added some machine stitching along the edges of each stripe.
My photo is a very special one to me, of my husband and I walking with our son and holding hands. You can’t see any of our faces, but the love and feeling is still so clear. I kept the photo mats simple with a layer of plain vellum followed by Epic Tales 12×12 paper. I used a combination of accessory stickers, clear stickers and die cut ephemera to embellish around my photo. I especially love how the clear stickers really pop on a white background, so I took the opportunity to add several of them, including the watercolour brushstrokes.
I added a small cluster at the bottom of the rainbow to help balance out the heavy embellishment near the top of the page. I popped the die cut title “Adventure” up on dimensional foam and added some black alphas to complete my title, positioned underneath my photo.
I wanted to add some of the amazing stars from this collection to echo the star pattern on my son’s jumper, so I used a combination of die cut ephemera and fussy cut All Star 12×12 paper and added them around my embellishment clusters and title. I used a sprinkling of enamel dots to help fill in any gaps between the stars.
For a finishing touch I used some diluted black acrylic paint to add some splatters around my embellishment clusters. I find black splatters add the perfect bold accompaniment to the bright colours in this collection! Thank you for joining me today, there is a process video linked below if you would like to watch. Take care and happy scrapping!
Hi everyone its Melissa here and today I’m going to be sharing something a little bit different. Did you know that you can make your own Traveler’s Notebook inserts? I started doing this because I couldn’t purchase them here in New Zealand, and I found it a perfect way to feature beautiful patterned papers. I also love having control over the weight of paper inside the notebook. This is by no means my own idea, and there are lots of videos on YouTube for how to do this in lots of different ways. Anyway this way is definitely the lazy girls technique because no measuring is required, just an existing notebook to use as a guide. In terms of the actual making, I suggest you watch my process video (at the end of this post) where I demonstrate what you need and exactly how to create them.
I let each of my 4 children choose a patterned paper from limited selection from the Legendary and Unforgettable Collections to make each of the notebook covers. I was pleasantly surprised that two of my girls selected a paper from Legendary which tells me its definitely not just for boys!
Sam (age 13) ended up with the arrow paper by default, but I knew it would be perfect for a teen boy. I embellished with two cut aparts from Epic Tales, one that I tore in half and distressed the edges of, and the second that I fussy cut the word “EPIC” which was perfect for his cover. I did some subtle mixed media splatters and splatters on the background with some shiny mist. I finished his cover with a couple of Accessory Stickers, and I also used some of the Clear Stickers.
Here is a close up of Sam’s notebook.
Next up was Azaria (who has just turned 11), who completely surprised me by choosing the Brave Heart paper for her cover. She loves neutrals, so I decided to mix in some of the gorgeous Unforgettable, and based the embellishment of her cover off the cut apart from the Story Teller paper. I altered the cut apart by cutting off the floral pieces, distressing all edges and then glueing them back together. I love doing this!! I minimally embellished with some Clear Stickers and a Die Cut Ephemera piece. Edgy and girly all at once!
Here is a close up of Azaria’s notebook.
Next up was my girly-girl Brielle (6) who I knew had to have her entire notebook made from Unforgettable! She immediately fell in love with the Glorious paper! For her cover, I started with layering the wreath cut apart from Storyteller over a piece of paper from the 6×8 Paper Stack, and added a Clear Sticker arrow with a heart layered over the top. I distressed all of my edges of course! I needed something to break up the busy floral from the embellishment, so I used white acrylic paint applied with a dry brush, and I applied it very thickly. Once it was dry I added one of the Clear Stickers (cut in half), punched a tab and stapled it on, and my final touch was to add a clear sticker heart on the tab.
Here is a close up of Brielle’s notebook.
Onto the final notebook which was for Ava (3.5) who is my rough and tumble little girl. As soon as she saw the selection of papers in my hand she said “I want the stars” so the Legendary All Star paper was hers! I wanted to challenge myself to use more of Legendary on Ava’s notebook so I used a cut apart from Epic Tales. I distressed all of the edges like I did with the other three notebook cover papers, and for a subtle girly touch I added a Clear Sticker flower from Unforgettable and I totally love the resulting mix of grey and pink!
Here is a close up of Ava’s notebook.
I bound my notebooks by hand stitching with 3-hole pamphlet stitch, and the centre of the notebook looks like this.
And here’s a lovely photo of all the notebooks stacked up. Now to convince my children that they’re not actually getting the notebooks, but they’re for me to document their stories that don’t require a full 12×12 layout!!
You can watch my process in the following video, and I also show the embellishing of the notebook covers.
I hope I’ve inspired you to make your own Traveler’s Notebooks!
Anna here today with you sharing a new layout featuring the amazing Legendary Collection. I don’t usually use photos of me in layouts, but this week my husband and I have celebrated our ninth wedding anniversary, so this is like a little commemoration. We have been together for 21 years, and we have grown together and formed a family.
For my page, I used the Offbeat paper as my background, and I added some mix media. I took a 12×12 stencil and applied white stencil paste. Before I removed the stencil, I spread some pigment powders and water. So this way, the color is only deposited on top of the stencil paste. I used the same colors on the paper.
I matted my picture with the Outdoors Type paper and used some circular die cuts from the Die Cut Ephemera pack to layer it. I also stacked some stars, because there’s a star in my husband’s cap. With foam dots, I raised all the elements to give more volume to the composition.
The title consist of two different words, one from the Die Cut Titles and another one from the Clear Stickers. On top of the photo, I also added a tab and the word love from the Accessory Stickers to complete the title: “Love this adventure”.
Finally, I embellished my page with more clear stickers and two enamel dots. I didn’t want to overload the layout, to give prominence to the photo and the wonderful distressed pattern paper. As I always say, less is more.
Thank you so much for stopping by today. I hope you like this layout and inspired you to create something special with your memories. Have a great week!
Hey CVS friends Rachel here. Last week I decided it was time for a sort out of my CVS collections, as often when I am creating I get messy and end up throwing my product back in its pizza box and close the lid to hide my laziness! Well it took me far too long but it was worth doing as I discovered I had more than I thought (of course) and I also realised how many papers from different CVS collection go together beautifully. This is what inspired this layout and it is a CVS all sorts!Firstly I chose this super sweet rainbow with cloud cut file (Silhouette Design store). I kept to the rule of thirds choosing three papers that coordinated. I used Navy flower vellum paper and Grow wild paper from Wild at Heart collection, the third paper is from the Midnight collection Moonlight. I added the rainbow with foam tape knowing I would tuck elements under it (and it creates a 3D effect). I used a polka dot embossing folder on my cloud which added texture and design (this stops it looking flat), I added the cloud with double sided tape.
I added a flair from Happiness collection, I chose the hot pink ‘good vibes’ one as it contrasted against the white.
I then used a mix of embellishments from various collections to pretty up this page. As always I added a paint/watercolour clear sticker behind my cloud and adding a die cut butterfly over it, both these elements being from the Unforgettable collection.
On the opposite side I added a floral cluster using die cuts again from Unforgettable, finishing this cluster off with a phrase sentiment and enamel dots.
I found a chipboard polaroid frame for my photo in a pretty polka dot peach and used a grey min bow to finish off. I added a die cut camera under the rainbow, added an enamel dot to the lens centre and lastly added another phrase sentiment.
I created my title using a mix of chipboard word (using a paint brush stroke clear sticker behind it) and accessory sticker phrase sentiment and a clear sticker butterfly. To create a visual break between the cloud and title I added a peach scallop die cut.
All thats it from me today! Thanks for taking the time to stop by and I hope you have a wonderful week.
Hi everyone! It’s Sue here to share my latest design team project with you. Today I am sharing a 12×12″ layout I created featuring the beautiful ‘Unforgettable’ collection and some recent photos of my daughter at the beach. As my daughter gets older (she’s now 12), I am finding it increasingly difficult to get photos of her, as she doesn’t enjoy posing for me as much as she used to. (Unless she is dressed up in a costume, but that’s a whole other story!) So you can imagine my delight when I managed to capture these photos of her, and I couldn’t wait to scrap them.
I chose to use the ‘Unforgettable’ collection because I just can’t pass up the chance to create something gorgeous and girly whenever I have the chance. I began my page with one of my favourite papers from the collection – the fabulous aqua diagonal stripe print on the reverse of the Sprightly paper. Instead of keeping the sheet as a whole, I decided to add some extra interest by cutting off a strip along the left edge and flipping it over to reveal the abstract watercolour pattern on the other side. Before re-joining the two, I also added a narrow strip of the Unscripted paper between them. I also distressed the edges of the joins slightly to add some extra texture.
With my page base constructed, it was then time to create a focal area for my layout. I layered several smaller pieces of paper (Sprightly; Garland; and Pretty Bits) to form a mat for my photos, adding some cardboard behind the left photo to lift it up a little higher than the other. Then it was time to play with some pretties!
I decided on three main embellishment clusters placed in the bottom left, top right and bottom right corners of my photo mat. Beginning with the top right cluster, I used a die cut circular frame and a large floral piece from the Die Cut Ephemera pack as the anchors for the cluster. It was at this point that I realised I really needed to draw in the stunning blue colour of the water in my photos. Unfortunately, this colour didn’t feature in the collection so I had to come up with another solution. I found a small floral cut file called Flower Bunch (designed by Paige Evans) that I had cut previously, and coloured it using watercolour paints.
Once dry, I cut it into three pieces so that I could use a portion of it in each cluster. I tucked the largest of the three pieces in underneath the die cuts I had started my first cluster with. I then added two smaller die cut flowers; and a small tab and phrase from the Accessory Sticker sheet. I then finished the cluster with a beautiful die cut butterfly.
For my second cluster in the bottom left corner, I again used a large die cut floral piece from the ephemera pack combined with another section of the painted cut file. In behind the floral piece I tucked a pretty little tag (also from the ephemera pack), which I tied with a little twine. I then added the little moments labelled arrow, which I popped up with little foam tape to give it some dimension.
My third and final cluster was to be my title cluster. I had already picked out the living the dream die cut from the ephemera pack for my title piece (it was an easy choice – just look at that beach on a perfect Queensland winter day). I added another die cut flower and leafy branch, as well as the remainder of the painted cut file. I used foam tape under the title, which allowed me enough room to add a watercolour style Clear Sticker under the edge.
I finished off with a small die cut heart alongside my title cluster and then some tiny splatters of blue ink scattered around my page.
Thanks so much for stopping by today so I could share this with you. I hope I have inspired you to get some supplies out and create something pretty too. (Besides, we all need to make room for the new ‘Daydream’ collection coming soon, right?!)


 I hope this cut file layout inspires you to look at your patterned papers a little differently! It’s fun to see how you can use every little scrap up in a new way. If you’d like to see the Stay Colorful layout come together, I have the entire process in the video below!
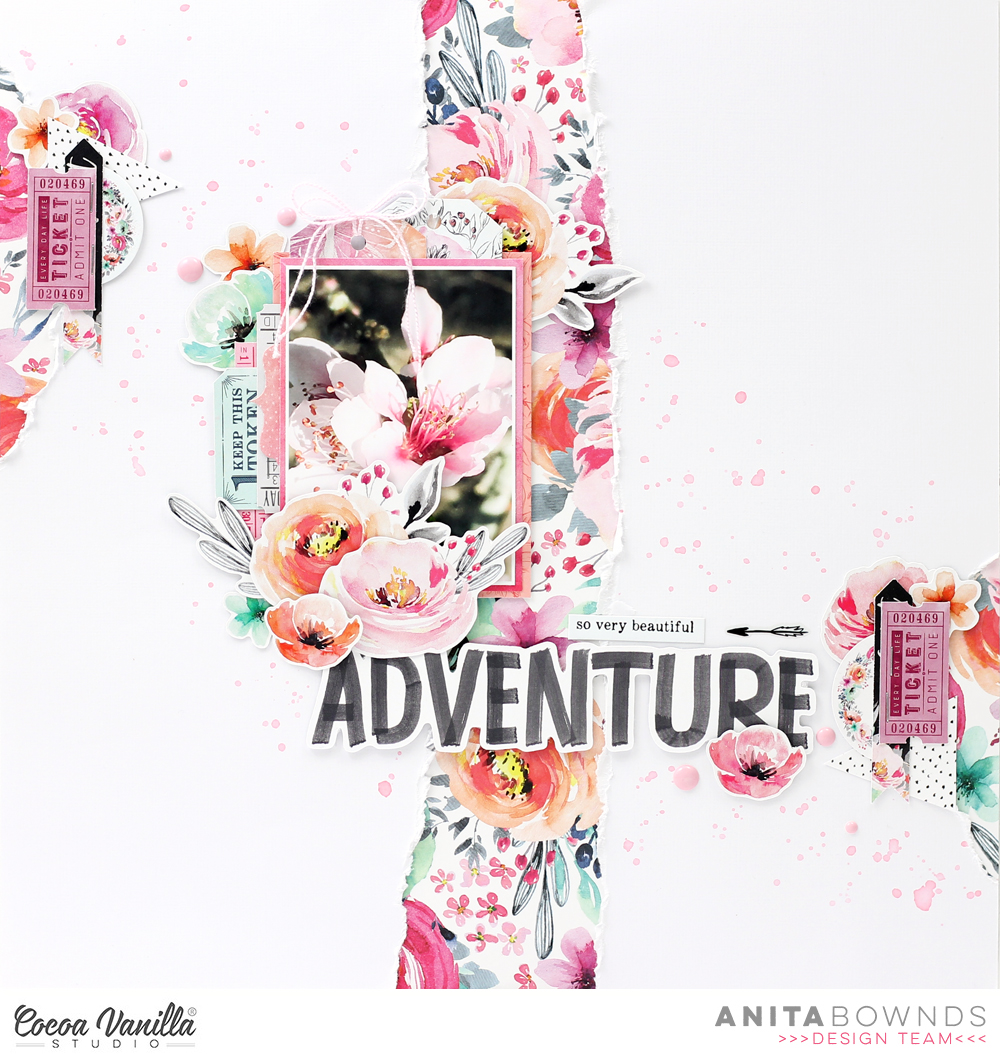


 Firstly I chose this super sweet rainbow with cloud cut file (Silhouette Design store). I kept to the rule of thirds choosing three papers that coordinated. I used
  I added a
  I then used a mix of embellishments from various collections to pretty up this page. As always I added a paint/watercolour clear sticker behind my cloud and adding a die cut butterfly over it, both these elements being from the
  I found a chipboard polaroid frame for my photo in a pretty polka dot peach and used a grey min bow to finish off. I added a die cut camera under the rainbow, added an enamel dot to the lens centre and lastly added another phrase sentiment.
 I created my title using a mix of chipboard word (using a paint brush stroke clear sticker behind it) and accessory sticker phrase sentiment and a clear sticker butterfly. To create a visual break between the cloud and title I added a peach scallop die cut.
 All thats it from me today! Thanks for taking the time to stop by and I hope you have a wonderful week.


