Happy B’Day | Happy Days collection | Sue Plumb
Hi everyone, it’s Sue Plumb here to share another design team project with you. Today I am sharing a layout that has been inspired by our April “Chasing Rainbows” challenge. This month the criteria is to use a BIG rainbow as the main design element of your layout. Now if you know anything about me, you already know I am not great at following rules, which is why anytime I try to follow a sketch I end up somewhere completely different. So it should be no surprise to you that my interpretation of this challenge is a little loose. Here’s what I came up with…

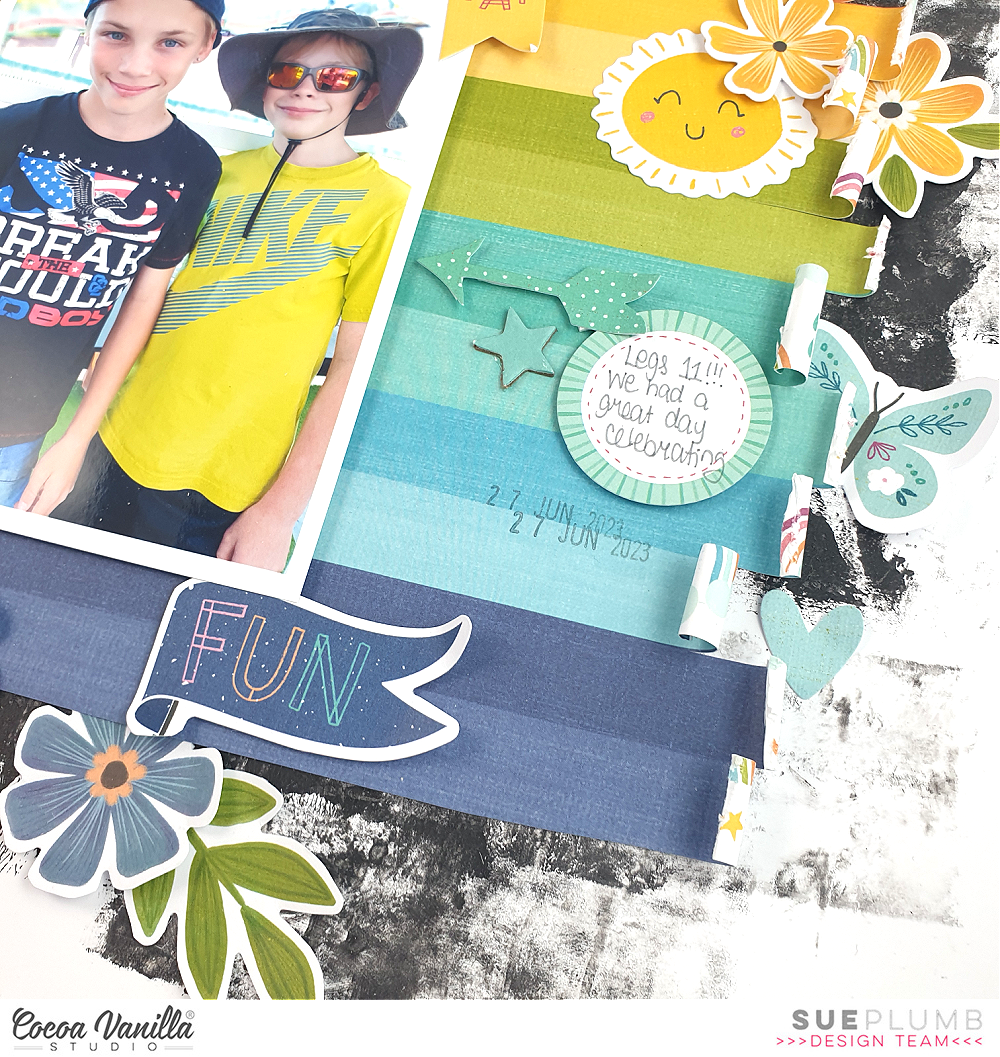
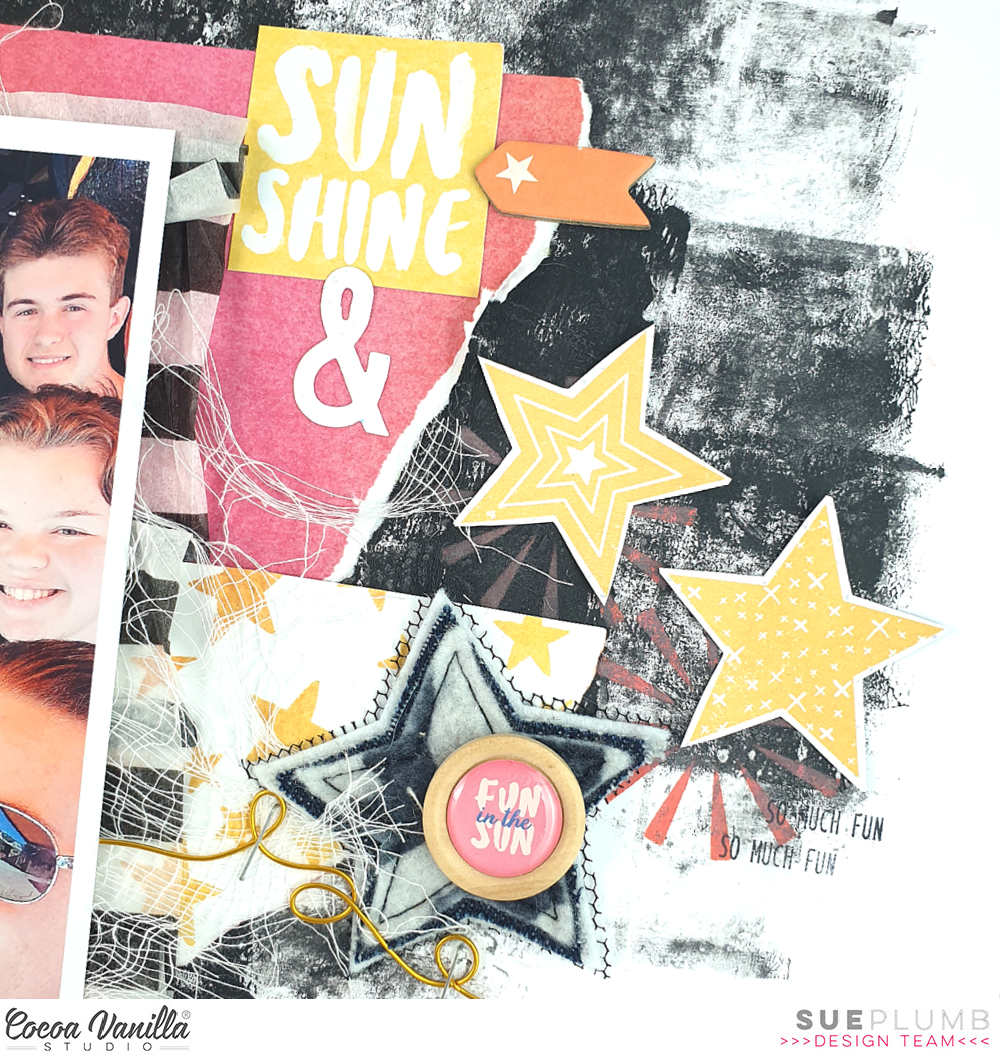
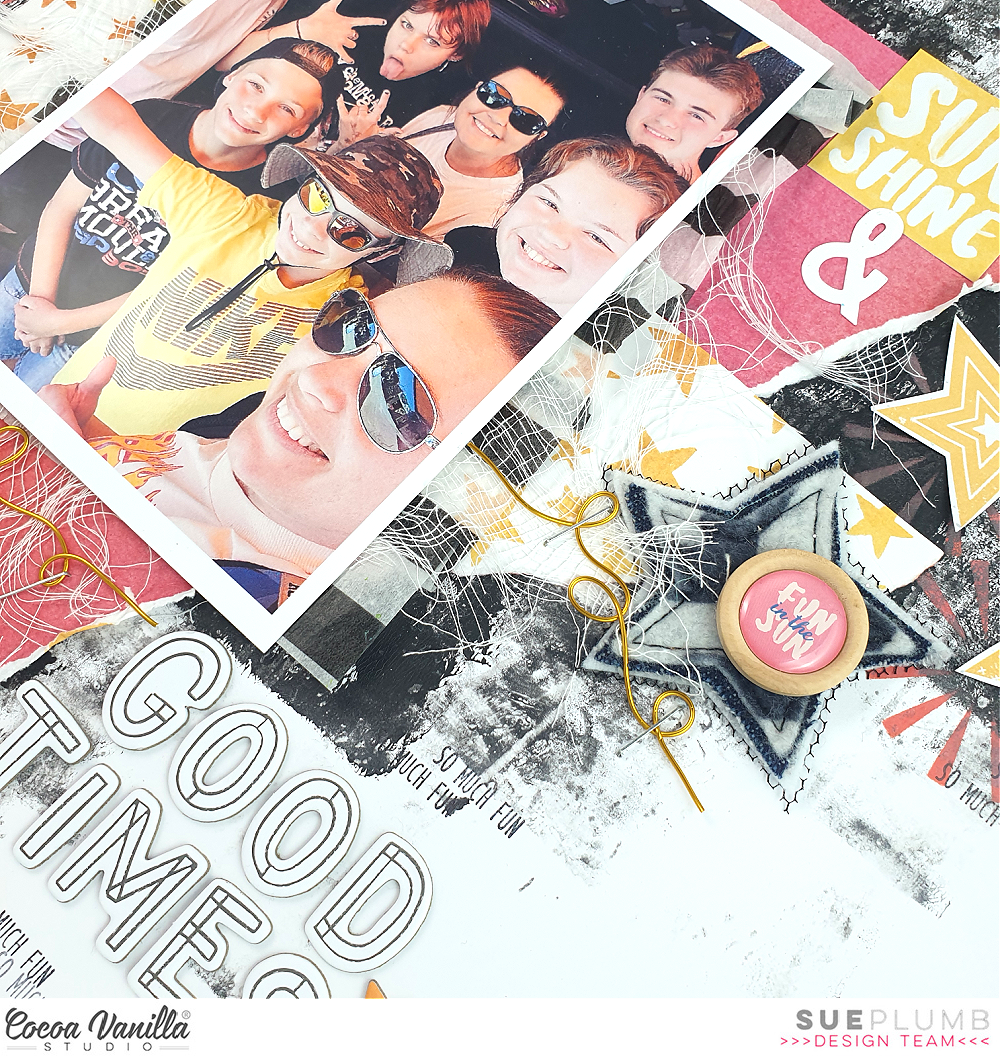
I was determined to create a boy page for this challenge, so how do you create a boy rainbow? Simple! You just cut the pink and purple off! I really loved this striped Sunshine Lollipops paper from the ‘Happy Days’ collection so decided to use it as my big feature. I really wanted the colours to pop, so I first added some dark grey acrylic paint to my cardstock for my background. I wanted to keep the paper intact for my main feature, but add some extra interest, so I snipped a little along the line between each colour and used a narrow wooden skewer to help roll the ends up (some I curled a little more than others).

The photo of my boys was taken whilst we were out celebrating their 11th birthday, so using bright colours was perfect for the occasion. As the rainbow was to be the main feature of my page, I didn’t want to mess it up by muddling the colours at all, so I decided to use the tone-on-tone technique for my embellishments.

I used a mix of pieces from the Die Cut Ephemera and Floral Ephemera packs (yes, you CAN have flowers on a boy page!) as well as Accessory Stickers. I placed the embellishments on top of (or as close to) the corresponding colours on the paper and used foam tape to add dimension to some of them.

I really love the effect that using this technique gives, and it makes it super simple to decide where to place things, so putting this page together was a breeze! I finished off the page by adding the Chipboard Title across the top (I ADORE these chipboard titles – the font is so awesome!)
Thanks so much for stopping by today so I could share this with you. I hope I have inspired you to tackle this month’s challenge (who doesn’t love rainbows?!) You can load your entry over in the Cocoa Vanilla Studio Community group to be in with a chance to win. I can’t wait to see all those rainbows!
Until next time, happy scrapping!


 I started this layout off by trimming down a sheet of white cardstock and matting it on the gorgeous magenta Flutterby paper. I added a doodled border around the white cardstock to add some further definition and interest. Next I cut two triangles, one larger than the other, out of the beautiful yellow Feel Good paper, and adhered these on each side of the page. I matted my photo with a paper from the A5 Paper Stack and adhered that over the larger triangle on the left hand side of the page.


 I finished the layout off with some cute banners in the top right hand corner of the page, a couple of little phrase stickers from the Accessory Sticker Sheet, and of course a sprinkling of hearts from the Die Cut Ephemera and the Puffy Sticker Pack.
 The Rainbow Bright paper made such a gorgeous background for this photo and really brought the layout to life! Once I had decided on this paper, I then matted my photo with one of the papers from the A5 Paper Stack. I adhered it to the page using craft foam in order to give it some nice dimension and to help it stand out against all of the bright colours in the background.
 For my embellishing I decided to keep it mostly tone-on-tone. So on the pink section of the rainbow I added pink embellishments, on the yellow I added yellow embellishments, and so on. I started with a fun little cluster on the bottom right hand corner of the photo. As this was on the blue and purple section, those were the colours that I chose for this cluster. I included some florals from the Floral Ephemera pack, as well as some that I fussy cut out of the Lush Blooms paper. I also added a couple of Die Cuts to the cluster.
 Moving over to the left hand side of photo, I added another embellishment cluster using similar items that I used in the first. I tucked some of the flowers under the edge of the photo and some on top to give the cluster some dimension. How gorgeous are the Puffy Hearts?! I couldn’t resist adding one to each of my floral clusters!


 I also printed my photo as a square and positioned it amongst the smaller squares on the page. I pieced it all together a little like a puzzle until I was happy with the placement of everything. The photo was adhered with craft foam in order to give it some extra dimension on the page.
 The fun part about creating a grid design layout is embellishing each of the sections in the grid. I added various die cuts and stickers to each of the squares in the grid, using foam tape to pop some up off the page. I tried to make sure that it looked well balanced by making sure that I didn’t have too much of one colour in any particular area.
