Hello sweet friends. It’s Kylie back with you on the blog today! For todays blog post it’s all about scrap-lifting one of our fellow teamies and I have been assigned the lovely Michelle! I have had a tough time choosing a layout of Michelle’s to scrap-lift as ALL of her work is simply beautiful. You can see for yourself HERE! Such beautiful inspiration am I right??
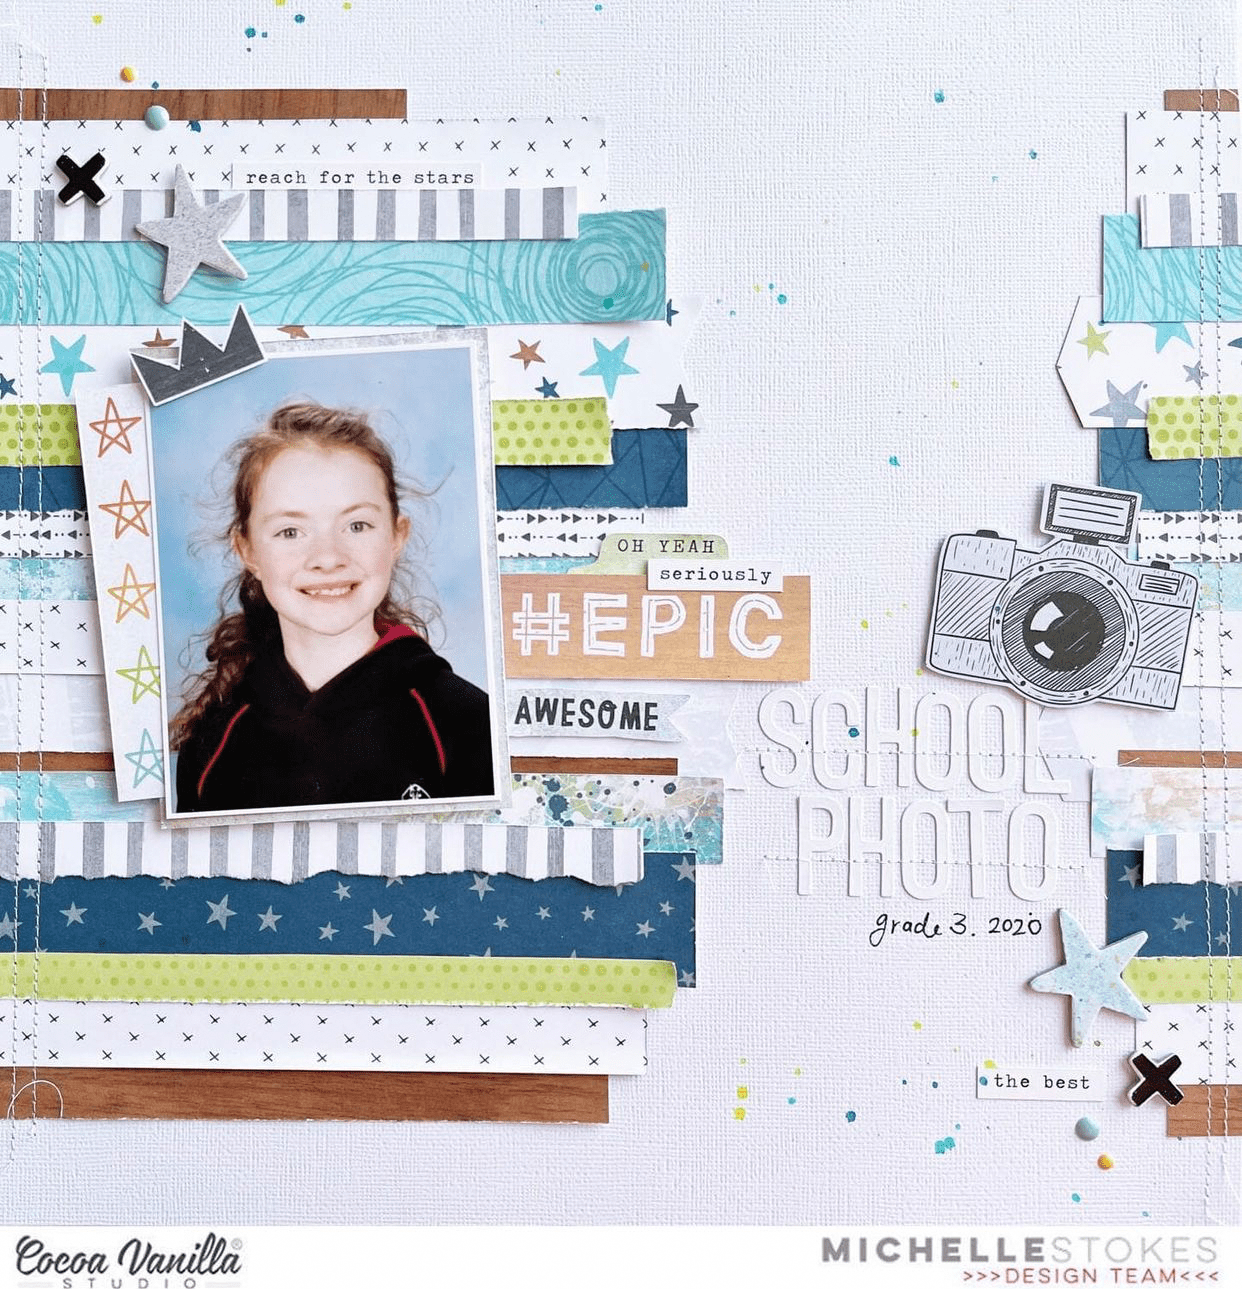
After much deliberation, I decided to scrap-lift the following, beautiful page from Michelle. I loved the clever placement of all those paper strips and the opportunity to use lots of different paper prints. I had a very small amount of my ‘BOHEMIAN DREAM’ collection left and felt this design would be perfect for using up those last few bits and pieces.
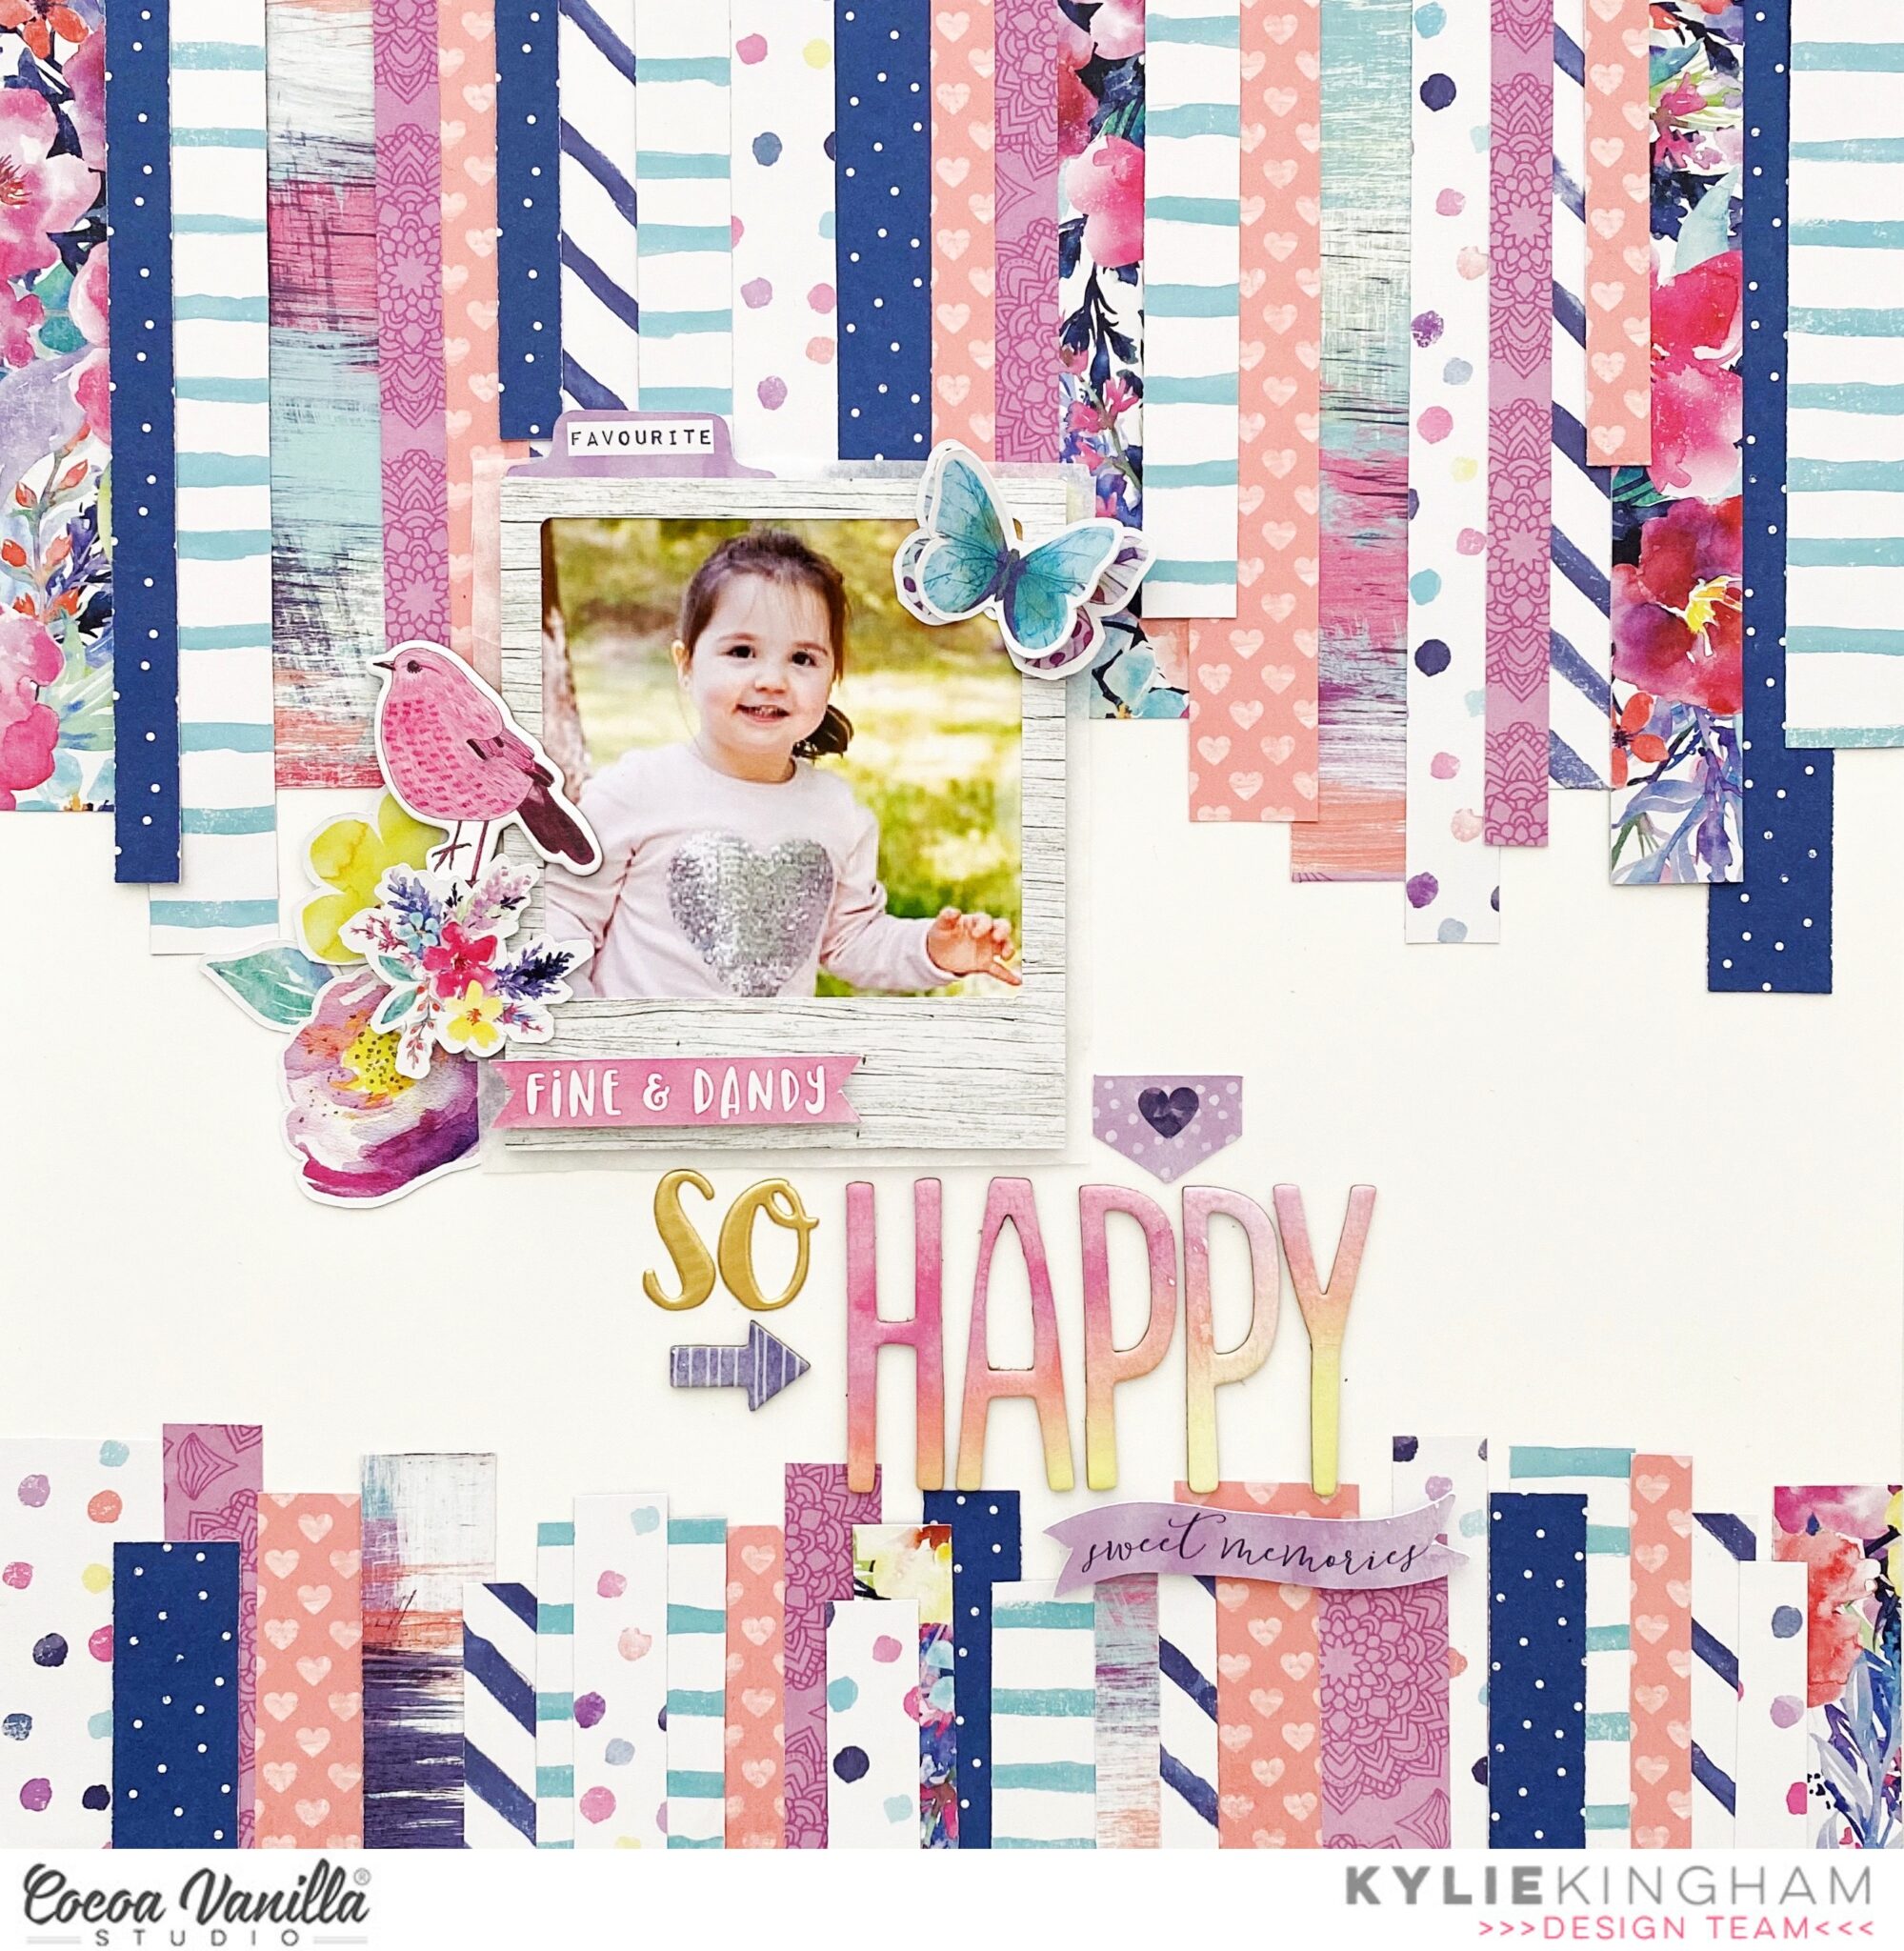
Here is Michelle’s design, followed by my take on her design…
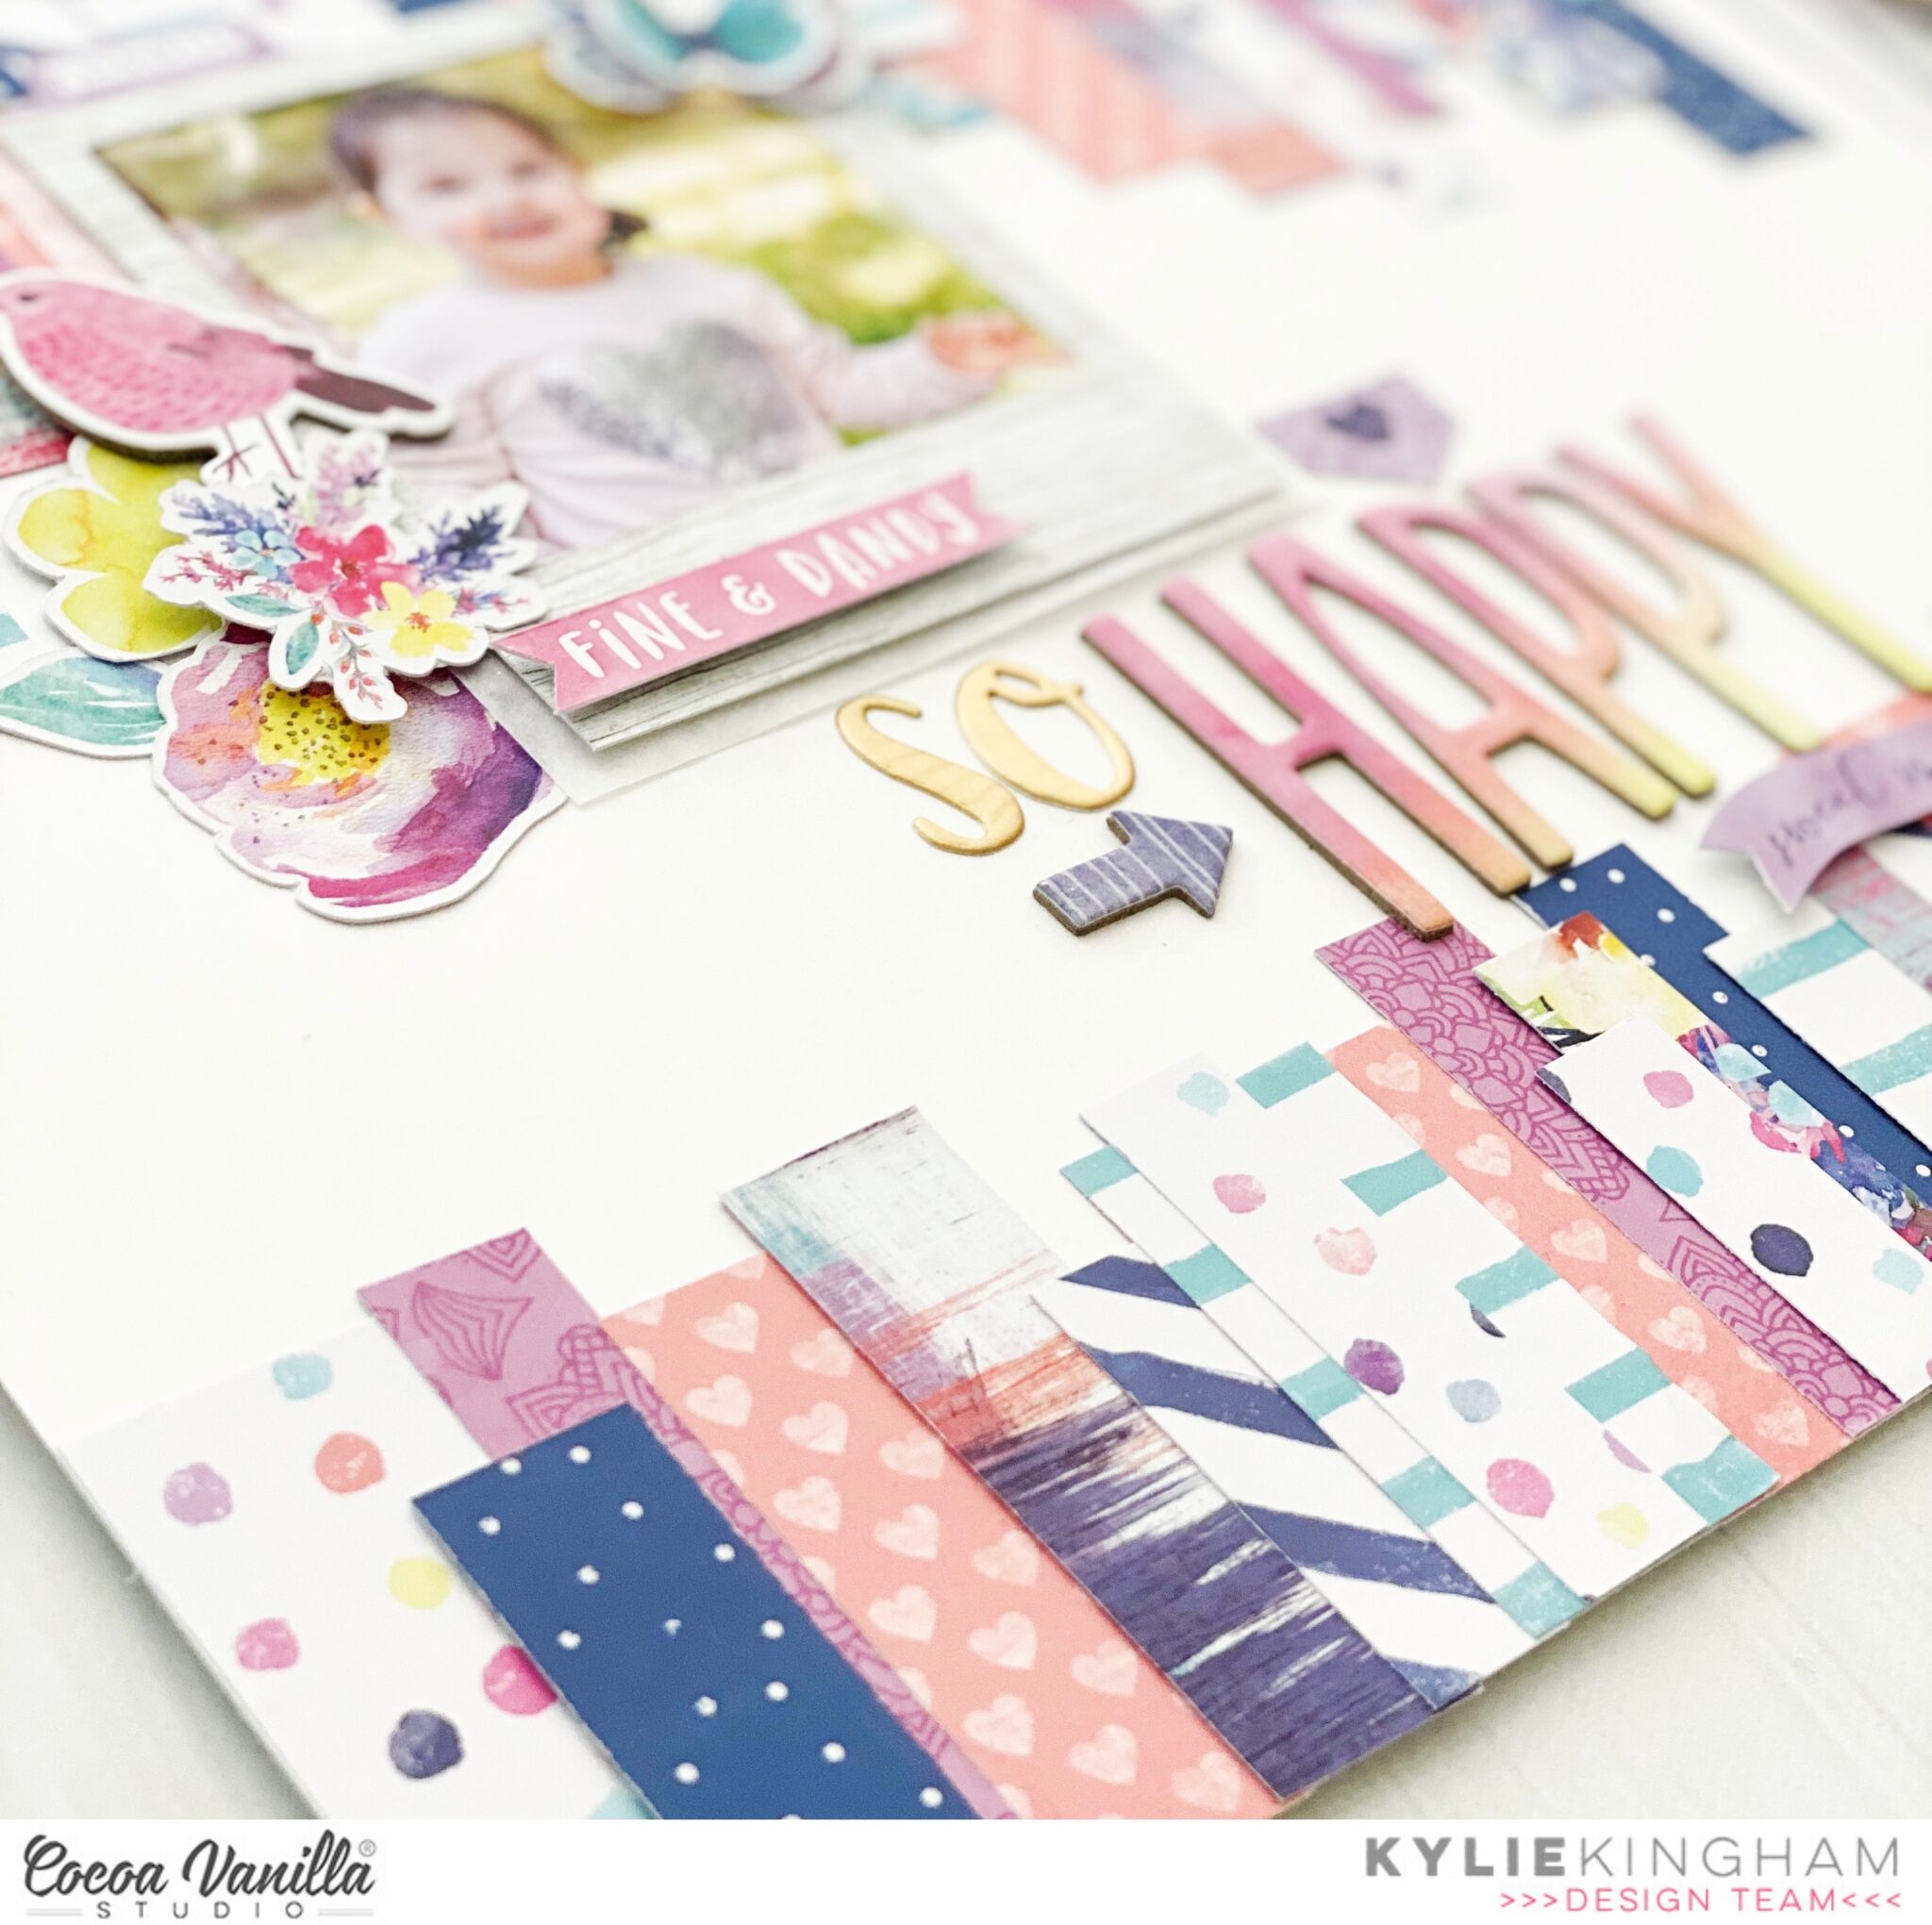
As you can see I have rotated my layout so the strips sit vertically on the background. Each strip of paper measures between 1cm up to 3cm wide and the lengths were cut randomly as I was placing them. For balance I also layered some strips over the top of others to create a layered, dimensional effect similar to Michelle’s page.
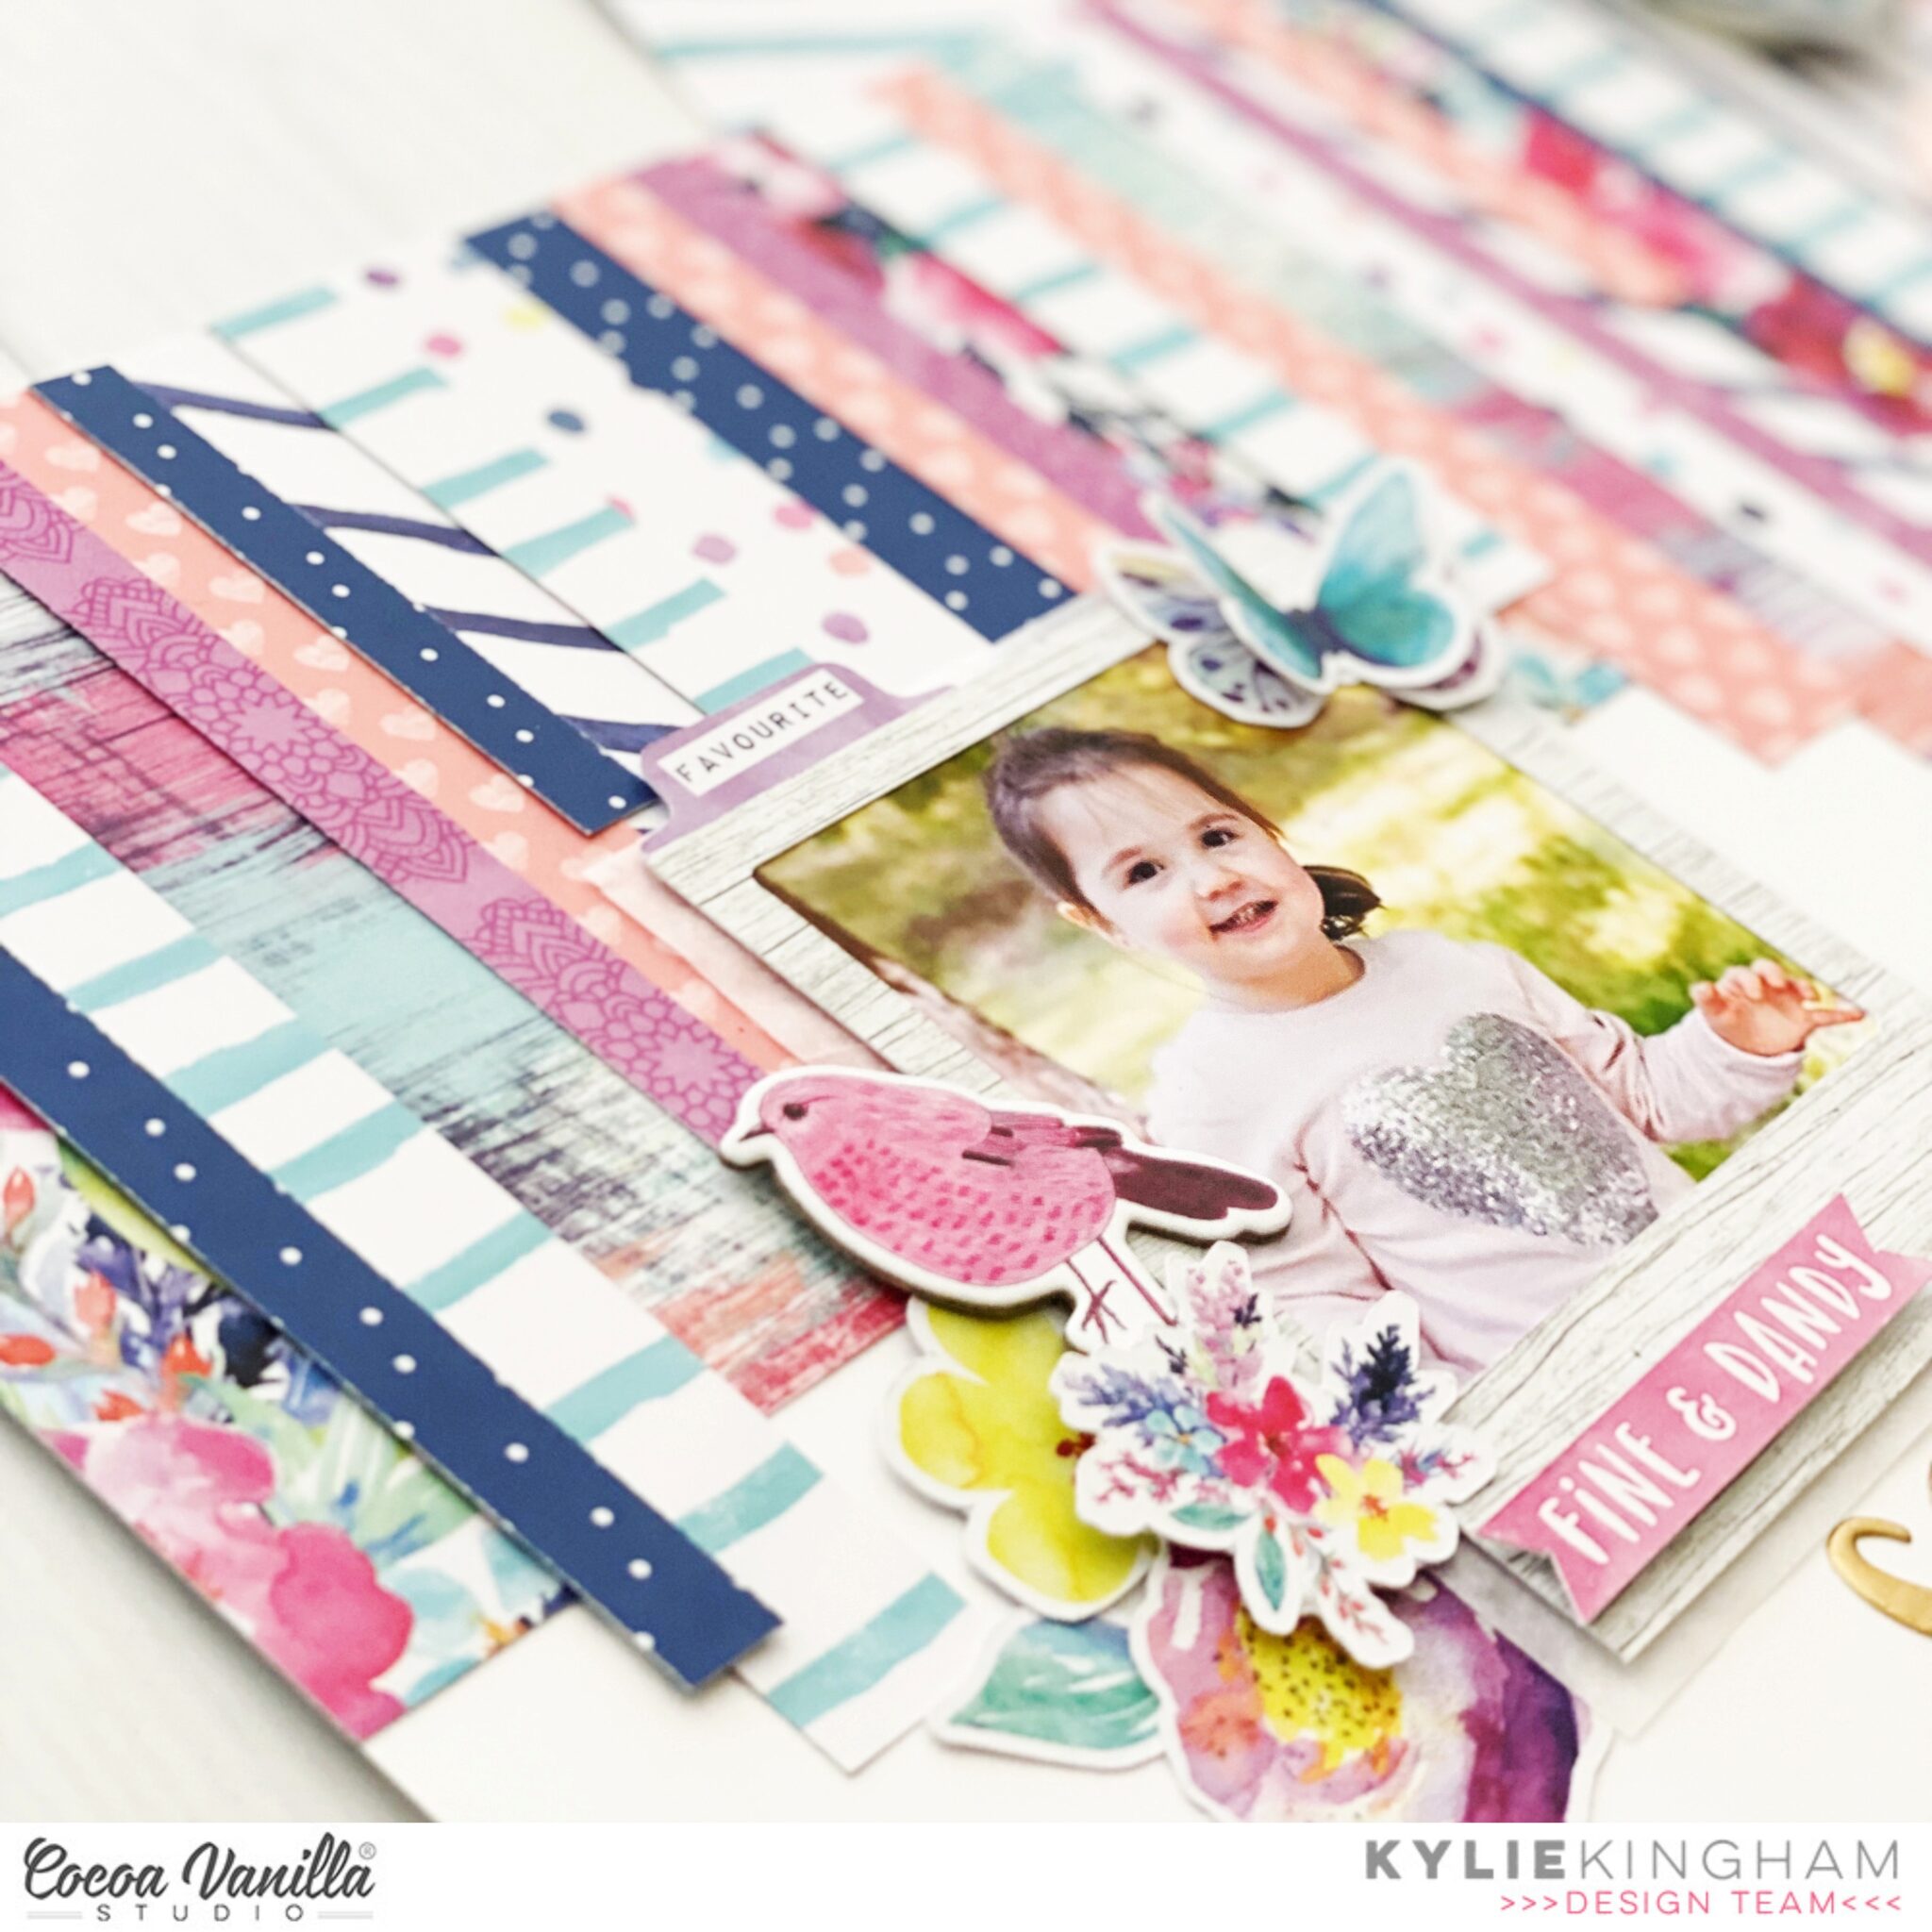
The frame from the die cut pack was perfect for adhering over the top of my photo. Once in place I cut off the excess of the photo for a snug looking fit. I then backed it with some white tissue paper from my craft stash, just to soften the look of the edges once adhered to the background. Next, I layered more die cuts to surround the frame for balance.
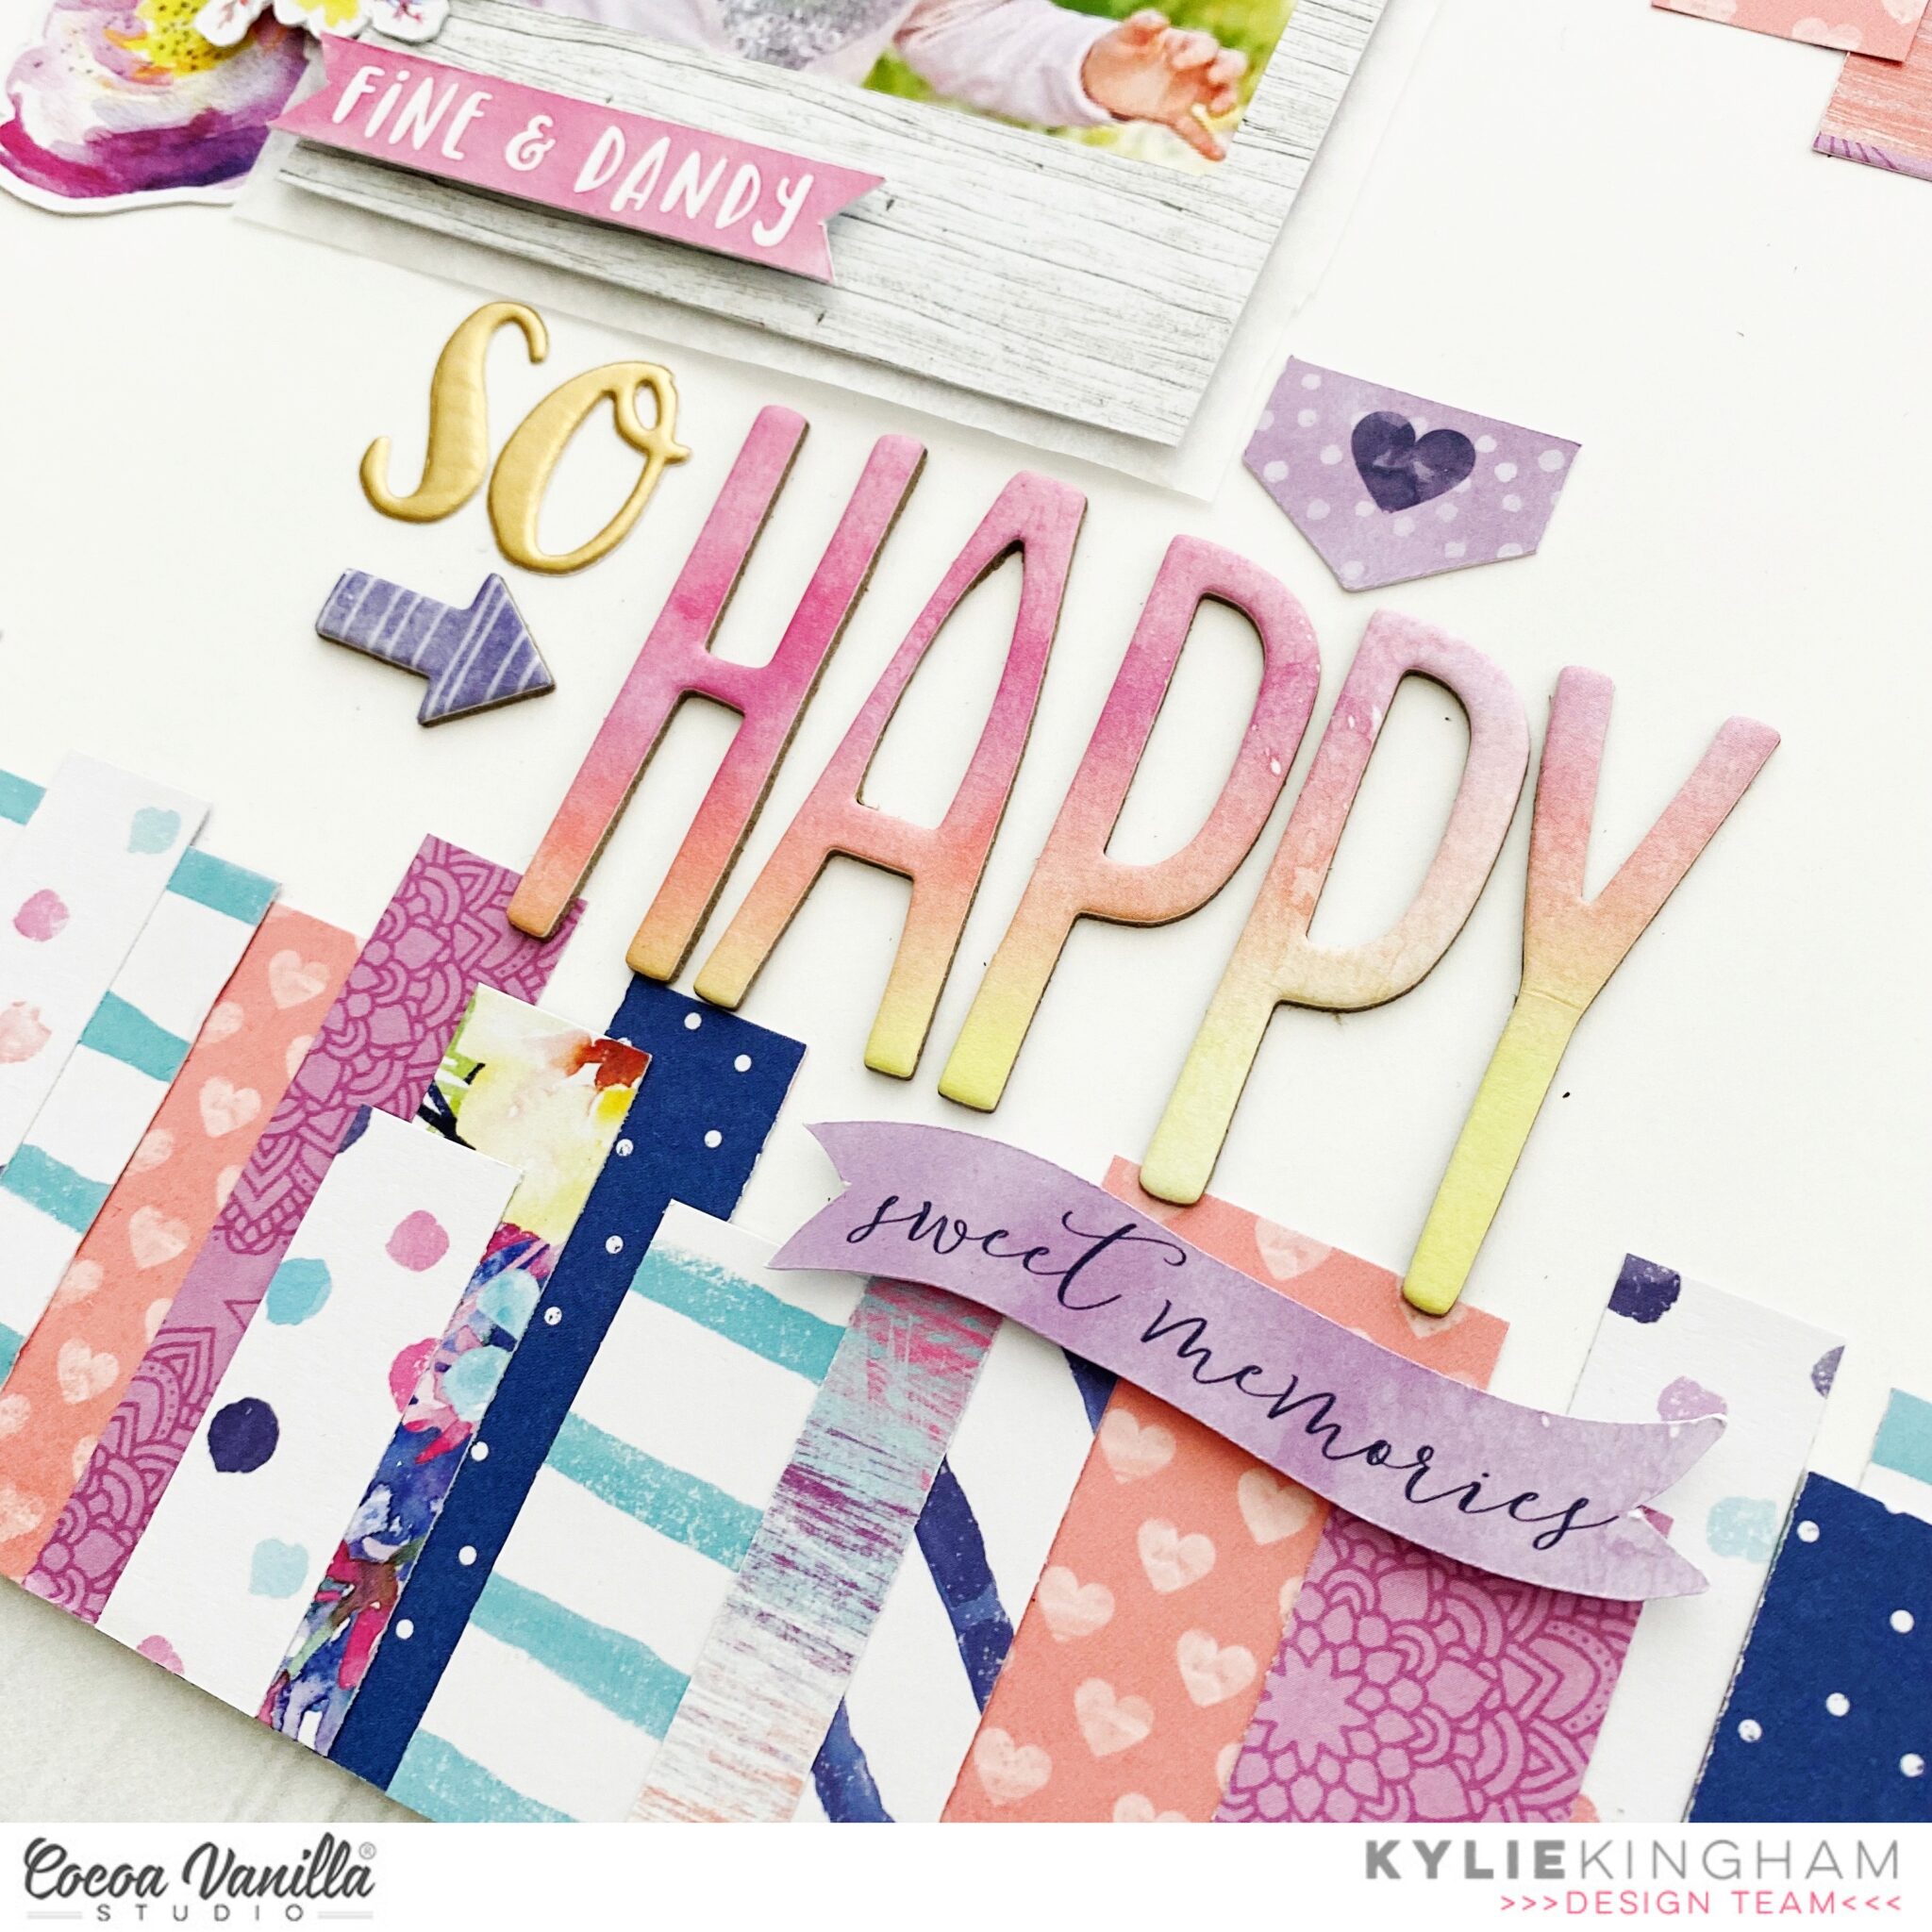
To complete my page I added a large title below my photo. The gold alpha stickers were from my craft stash but gave a nice pop of colour against the background and fitted well with the chipboard sticker ‘Happy’ title.
Thanks so much for stopping by the blog today! I hope you have enjoyed seeing my latest project.
Hey everyone. Happy Thursday! It’s Throwback Thursday here on the Cocoa Vanilla blog. I decided to throw it all the way back to ‘Bohemian Dreams’ one of my fave collections ever. Purple is one of my fave colours lately so this collection was certainly calling my name.
Here is the layout that I created:
This subject of this layout is myself and my bridesmaids at my Wedding. The image was taken by our photographer and one I just adore. The photo being black and white allowed me to bring in a lot of colours into the designing of the page. Normally I love to feature cut files on my layout but for this layout I wanted to focus more heavily on the papers and patterns within the collection.
I decided to make the ‘Beautiful Mess’ patterned paper a feature of this layout by cutting the individual 4×6″ and 3×4″ pieces. I layered these pieces below my matted photo in a somewhat vertical design, trying to distribute colours as best as I could. These were adhered together to form one piece and then adhered to my layout with a foam adhesive.
To the right of the photo I added a large photo cluster comprising of many pieces of ephemera and other embellishments. The title ‘so happy’ was also used from one of the accessory stickers.To achieve dimension on the clusters – elements are adhered to the page in varying depths using a combination of glue dots, double sided tape and foam adhesives.
Instead of journaling on this page I used the tiny word sticker sentiments from the accessory sticker sheet. These were able to tell my story, just in fewer words.
I think my favourite part of this collection, well actually most CVS collections are the florals. I have to hold myself back from adding more when I am embellishing.
One of my favourite staples in the ephemera packs is the small file tabs. They are one piece that I will add to most pages – usually to the top left corner of my photos.
As you can see from the image below the layout features a lot of dimension, particularly from the embellishments.
I hope that you have been inspired by my layout today for this Throwback Thursday. Thank you so much for stopping by the CVS blog to check it out.
Hey Hey! It’s Michelle here today with another instalment of what I like to call ‘Scraplift a follower’. The past few days members of the Design Team have been set a scraplifting challenge here on the blog and I’ve chosen one of our friendly CVS Community Group members to inspire my creation. I used the Bohemian Dream collection and even got a little messy with some mixed media on the background, which was kind of fun for this “clean” scrapper.
I love how this came together combining all the elements of the original, created by Petra de Vroege, with some slight changes to make it my own. I’ve scrapped a photo of Leila from 4 years ago when she was going through a hilarious dorky dress up phase. A time when she kept us constantly entertained, oh how I miss those days. Now its all Youtube, Roblox and Nintendo nonsense and hardly any dressing up at all. The colours in the photo worked so well with the patterns and colours from the Bohemian Dream Collection, which I must note its sadly no longer available as you all LOVED it so much it sold out! There are plenty of other gorgeous collections to choose form though
Heres a look at the layout Petra created..
Super cute! Those scattered stars down the page were what originally caught my eye, and I’m a sucker for cute photos and mixed font titles too!
What a character! This photo was around the time that Leila could finally wear this costume without tripping over the mermaid tail, which was about the same time that posing for photos was no longer fun.
To begin the layout I started with the stars, cutting out a range of different sizes on my silhouette using a free star cut file I found via Pinterest. I chose a few different pattern papers from the 6×6 paper pad that all complimented each other and the photo then popped them to the side once cut to continue with the background
I got a little messy and tried out the plastic packaging technique using the flat side of some bubble wrap and smooshed different coloured inks that were watered down on some white cardstock. The texture of the bubble wrap left a pretty cool pattern, although most of it was covered by the stars and photo and also my hands lol. I splattered a few extra colours that coordinated with the Bohemian Dream collection over the top then left it to dry. At this point I may or may not have freaked out a little when I saw how warped the paper was so I pilled a pack of cardstock on top overnight once it was dry to help it flatten out a little
To create the title I used a mix of Chipboard words (raised off the layout using foam tape and glue dots) older alphabet stickers (sewn through to keep them adhered for years to come) handwritten words and a banner sticker from the Legendary Collection sticker sheet.
Next I’ve added strips of pattern paper to the top and bottom of the layout, which is different to the way Petra has added hers to the sides. I tucked the half labels underneath and added word banners on top along with some chipboard hearts
Lastly I added the stars, scattered randomly at the top and bottom of the photo to recreate the vertical line Petra has used. I adhered the stars with foam tape, glue dots and tacky glue to give different heights of slight dimension. I added in a couple of enamel dots too
Here’s a final look at the entire layout inspired by Petra’s super cute creation
I love how it all came together and can happily say I will definitely be trying some more messy backgrounds in the future.
Well thats all from me today, thanks so much for stopping by! Be sure to keep sharing your own creations using Cocoa Vanilla Studio products with us in the CVS Community Group on Facebook. We love to see what you make using these amazing products, and you just never know when we might pick your creations to be inspired by.
Hi y’all! Laura back again with a burst of color in this joyful layout of my darling girls playing together. I just adore their sweet friendship and have to celebrate it at every opportunity! Today’s theme is Throwback Thursday, so I reached into my stash for the very first Cocoa Vanilla collection I ever purchased, the stunning Bohemian Dream! This bold mix of pink, purple, and navy captured my heart from the very first time I saw it.
To start this layout, I backed a cut file from Redefined Kreative with the Abstract patterned paper, then layered it onto the Wild & Free Paper to make a big, bold patterned paper background. Building up from there, I used the remaining purple B-side of Abstract to mat my photos and then added lots of beautiful florals and word phrases around them.
To finish it off, I added some enamel shapes, gold Nuvo drops, gold ink splatter, and sequins from Spiegelmom Scraps that coordinated perfectly! These little details make such a huge difference on a layout and can take a simple page to superb in a flash! I had plenty to share about these two peas in a pod, so I wrote my journaling all around the outside of the mandala. This gave it a bit of an outline as well to distinguish the cut file from the background.
I hope this pattern paper filled layout inspires you to look at your papers a little differently! It’s fun to see how you can use up every little scrap. If you’d like to see the Play layout come together, I have the entire process in the video below!
Hello Cocoa Vanilla maniacs. I have a pleasure to open a RAINBOW LOVE week over the CVS blog. I bet you can imagine my excitement when I saw this theme. I am hudge rainbow fan and I love mixing and matching many collections in one project. I ended up with very energetic page documenting first day of a brand new school year of my older daughter. She is already a sixth grader so it means only two more years before she will finish elementary school and move to high school. I am totally not ready for that moment.
I started making this page with a white watercolor paper sheet. I picked six Distress Oxide ink colors and made a rainbow rays with them, starting in the middle of the page. It’s a really easy and simple process. You can easily replace Oxides with any other inks. They just need to blend easily. After I applied the colors, I sprinkled everything with clean water to create few splatters. Ink reacted with water fading away which added some great texture to the background.
Next step was picking six papers in corresponding colors to layer them over mixed media background. I went through my CVS stash and picked orange and yellow papers from “Legendary”, green and blue from “Boys rule”, pink from “Happiness” and purple from “Bohemian dream”. I run them through my Silhouette Cameo and cut simple arrows in different sizes in each color.
I glued them over the backgroun color on color. Last step was to place the photo with some embellishments around it. This time I gathered 6*12 sticker sheet from many older and newer collections and picked few labels and tabs to add them under the photo. I didn’t want to cover too much of my background.
I went through my collection of enamel dots, also from the previous collections, and placed few of them between the arrows, also color on color.
It was such an easy and fun page to make. I can never say “no” to all those juicy colors. If you want to learn how it was done, you can watch a process video I recorded for you.
I hope you will join in this colorful madness and create your own rainbow. Thank you so much for stopping by and see you in two weeks. I will finally be able to share with you a project made with brand new “Daydream” collection. It just arrived to my doorstep and I am over the moon excited.
Anna here today with you. I hope you all are doing well. Today’s focus is texture! I was thinking about something to give texture to my page instead of texture paste and I thought that thread would be a good idea. Then I found this cut file designed by Paige Evans in my Silhouette library and it inspired me the whole page with theBohemian Dream collection.
For the base of my layout, I used the colorful Abstract paper. Then, I cut the cut file from white cardstock and trimmed 1 cm. off each side and glued it on top of the patterned paper. The paper is so bold, but this cut file makes it a little lighter but you still see the print.
I had run out of the flowers from the Die cut ephemera pack, so I fussy cut some flowers from the Abundant paper to embellish the layout. I love this tropical look and I decided to die cut palm leaves with my Big Shot. I also added a flair button from the collection and enamel dots.
Let’s go to the title. I looked for a font that would help me to wrap it with thread and cut it with my Silhouette Cameo. I cut the word “summer” twice to glue it on top of each other to make it thicker. I used embroidery thread in gradient blue.
Then, I stacked all the letters on vellum paper and raised it with foam to make it stand out. I completed the title with a chipboard and the word “moments” from the Boho bits paper. Once it was all glued to the page, I raised the tips of the cut file in the spots with no decorations to add more texture. It’s so bumpy when you touch it!
I really love how it turned out! Love all the texture and the summery vibes! I hope it gives you some inspiration. Thank you so much for stopping by today. See you soon!
Hi everyone. Its Tarrah back with you today on the Cocoa Vanilla blog sharing a new layout featuring the gorgeous Bohemian Dream collection!
I am not normally a purple person when it comes to clothing or scrapping but when it comes to the Bohemian Dream collection, how can you go past that gorgeous purple?! The dress that my niece is wearing in this photo together with my Mum was the inspiration for my layout today. The colours in Amelia’s dress were the perfect match with the Bohemian Dream collection!
To start my page, I chose my background, which is the Dreamer paper and then started to build from the background up. I cut 2 strips of paper from the A and B sides of the Flower Child paper and placed them horizontally, I then trimmed the blue with white spots paper and cut it into a rectangle shape. Next I layered a paper doily underneath my photo, one of the journal cards from the Beautiful Mess paper and also layered one of the die-cut frames from the ephemera pack under the photo. The photo and frame have craft foam underneath them to add dimension to the page.
To embellish my layout, I took some of the florals, feathers and butterflies die-cuts from the ephemera pack and tucked them into various places around the page. On the left of my photo, I added one of the gorgeous flair buttons and the ‘Beautiful’ die-cut became my title for the page.
Thank you so much for stopping by the Cocoa Vanilla blog today! I hope you can take a little inspiration from my layout today.
Hello CVS friends, today I have a layout to share using a mix of the older collections, Wild at Heart, Midnight , Unforgettable and Make a Wish collections.Instead of my go to white cardstock I used the beautiful and subtle grey white washed wood grain paper Artisan. I wanted a real pop of colour so used the bright pink paper Hooray. I have used a large scallop hand punch to create a border each side of the Wild at Heart Vellum sheet which is 4 x12 inches. I added machine stitching to each side of the pink border strips.I added my photo off centre with foam tape and finished off with a bow from Unforgettable collection.I have not matted my photo knowing I was going to be adding layered flowers which would draw the eye to the photo.I have used two different cut files from the Silhouette Design store to create my layered flowers but for those who do not have a cutting machine use a hand punch, punching at least 3 and then layer with foam tape. If you want to recreate these centres, they are super easy! Cut a 12 inch strip at 1/2 an inch. fringe cut with a pair of scissors and then roll as you would any rolled flowers. Once the glue has dried then push outwards all the way around, then glue to the centre of your flowers. I have used Inky Depths paper from the Midnight collection to create my flowers.You will see that I then tucked in-between the flowers fussy cut butterflies, some die cut leaves and a sentiment from the accessory stickers.I then created my title using Happiness die cut titles. I added some more fussy cut butterflies around my title adding some Unforgettable enamel dots.I love using word and phrase sentiments from the Accessory Stickers sheets and you can see I added some more under my photo and under my large title.And there you have it, I love how this turned out! A great colour palette even though I have used several different collections. Don’t be put off because of the flowers on this layout, you can make. beautiful one’s too, time to blow the dust off those punches!
Thank you for stopping by today and feel free to leave any questions you may have on this layout in the comments. See you soon, stay safe and well!
Hello dear friends! It’s Kylie with you all again today, sharing a new layout I have just completed. Since it’s Mother’s Day here in Australia today, I thought it would be fitting to share a layout of that theme. I decided to use some of my Bohemian Dream stash and have combined it with a beautiful cut file which has been designed by lovely design team member Gwen, of Cut to You.
The cut file had two frames amongst leaves which were backed with the Wild and Free paper. For one frame I have fussy cut the gorgeous dream catcher 3 x 4 card from the Boho Bits paper and I have added my photo to the lower frame.Once it was all backed I adhered it to the Kaleidoscope paper with foam tape.I like the dimension and effect it gives to my layout, having it sit up from the background.For some extra colour I added two 1.5cm strips of Flower Child paper to each vertical side.
I really love to layer together different embellishments for texture and dimension. I have used the chipboard stickers, vellum accents and die cuts to support and balance my layout.Some have had foam tape added to raise them, giving a lovely natural flow.
Large titles can make such a beautiful impact to a layout. I selected the ‘Dream Big’ phrase chipboard stickers and added them to the lower side of my page. Once completed, I went back and added some of the chipboard hearts as well as a vellum butterfly to finish off my page.
Thanks so much for stopping by today. I hope you have enjoyed seeing my latest design and it gives you a little inspiration for your own scrapbooking.
Anita here with you today sharing a layout using the fabulous bohemian dream collection
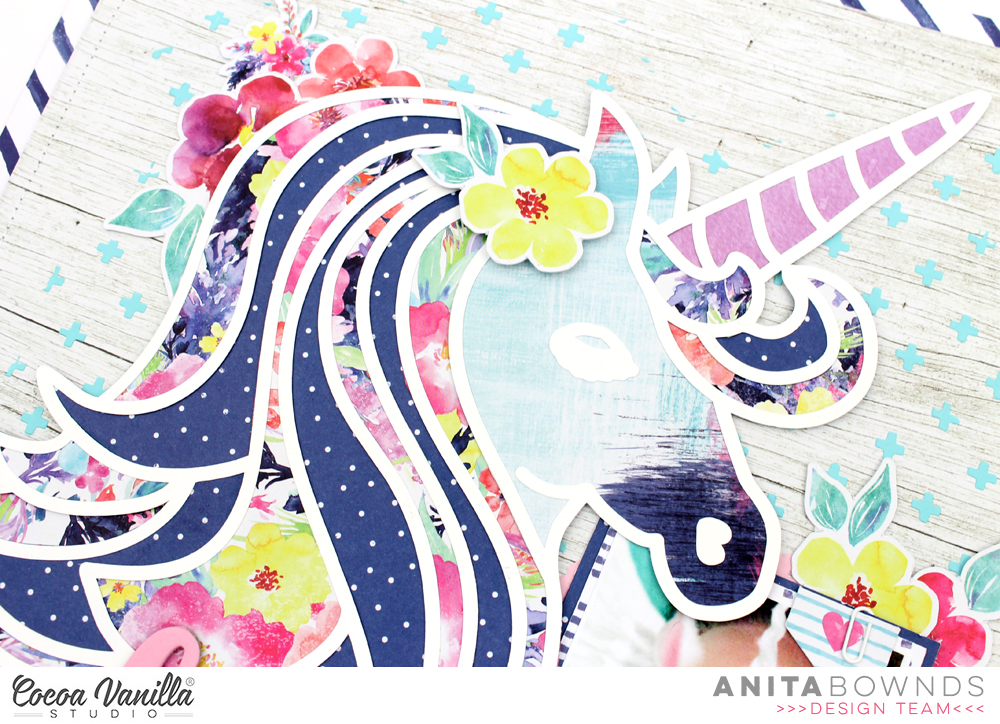
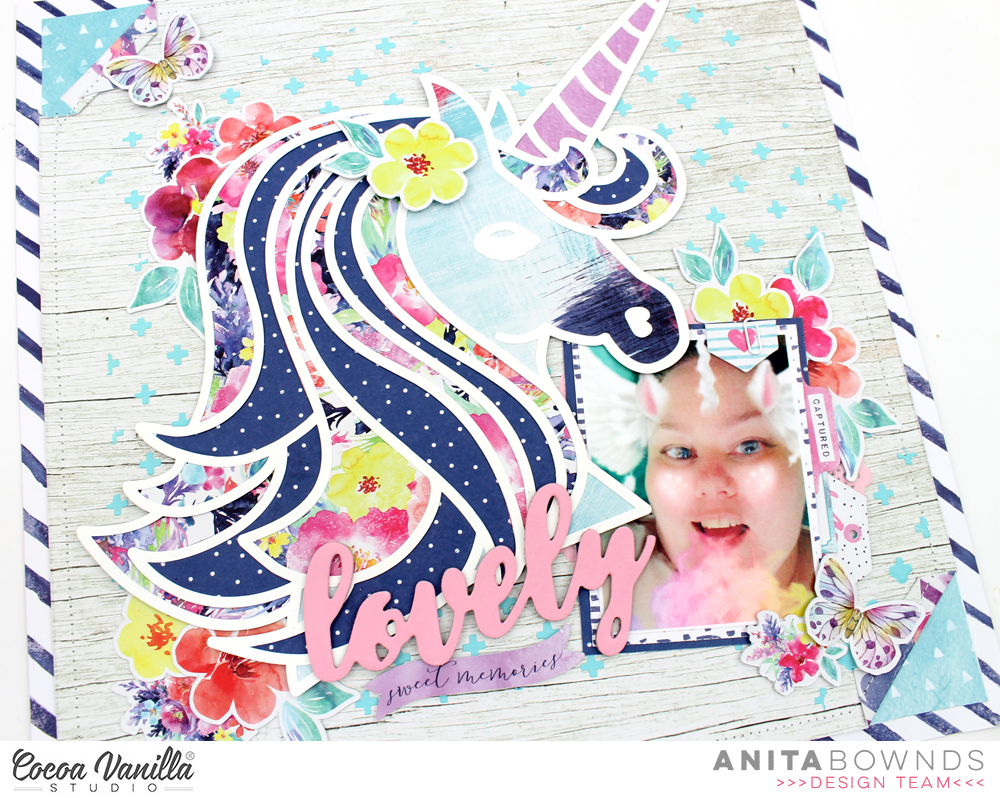
For my layout today I decided on this fabulous Unicorn cut file from Paige Evans as the main feature of my layout full of vibrant colour and layered clusters of flowers..
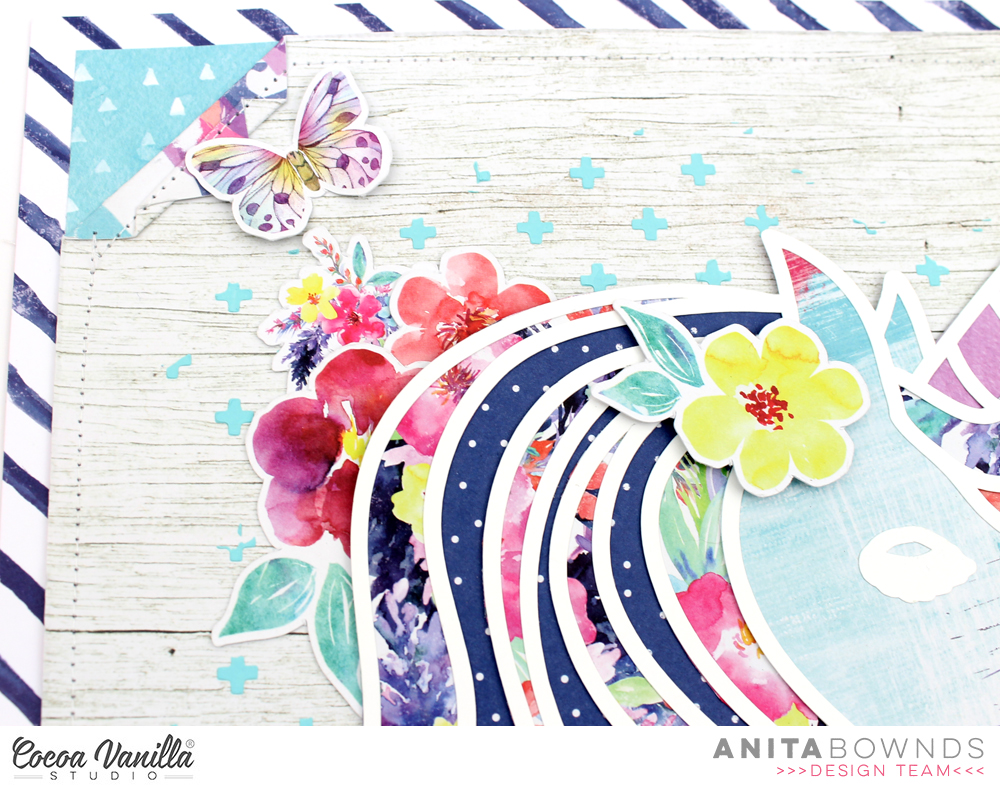
I started with backing the unicorn cut file first with abstract and abundant and then I used kaleidoscope b side paper and matted it on dreamer pattern paper as my base for my layout and before I machine stitched around the border I folded up 2 corners and cut a 2 inch square in half to tuck underneath the corners to change the colours. I matted my photo on abundant and beautiful mess
Then using modeling paste ,stencil and paint I added some mixed media to the background to add extra colour.
Then I adhered the backed unicorn and Photo down at the same time. Then I wanted add my title using the chipboard titles but I wanted a pink title so I used some acrylic paint to change the colour and next the die cut ephemera tucking in tags, Tabs and flowers around my photo
Then I added more clusters of flowers around the unicorn and a few butterflies to finish of the page.


 Instead of my go to white cardstock I used the beautiful and subtle grey white washed wood grain paper Artisan. I wanted a real pop of colour so used the bright pink paper
  I added my photo off centre with foam tape and finished off with a bow from
  I have used two different cut files from the Silhouette Design store to create my layered flowers but for those who do not have a cutting machine use a hand punch, punching at least 3 and then layer with foam tape. If you want to recreate these centres, they are super easy! Cut a 12 inch strip at 1/2 an inch. fringe cut with a pair of scissors and then roll as you would any rolled flowers. Once the glue has dried then push outwards all the way around, then glue to the centre of your flowers. I have used
  You will see that I then tucked in-between the flowers fussy cut butterflies, some die cut leaves and a sentiment from the accessory stickers.
 I then created my title using
  I love using word and phrase sentiments from the Accessory Stickers sheets and you can see I added some more under my photo and under my large title.
 And there you have it, I love how this turned out! A great colour palette even though I have used several different collections. Don’t be put off because of the flowers on this layout, you can make. beautiful one’s too, time to blow the dust off those punches!