Love This Layout | Unforgettable | Anita Bownds
Hi there crafty friends,
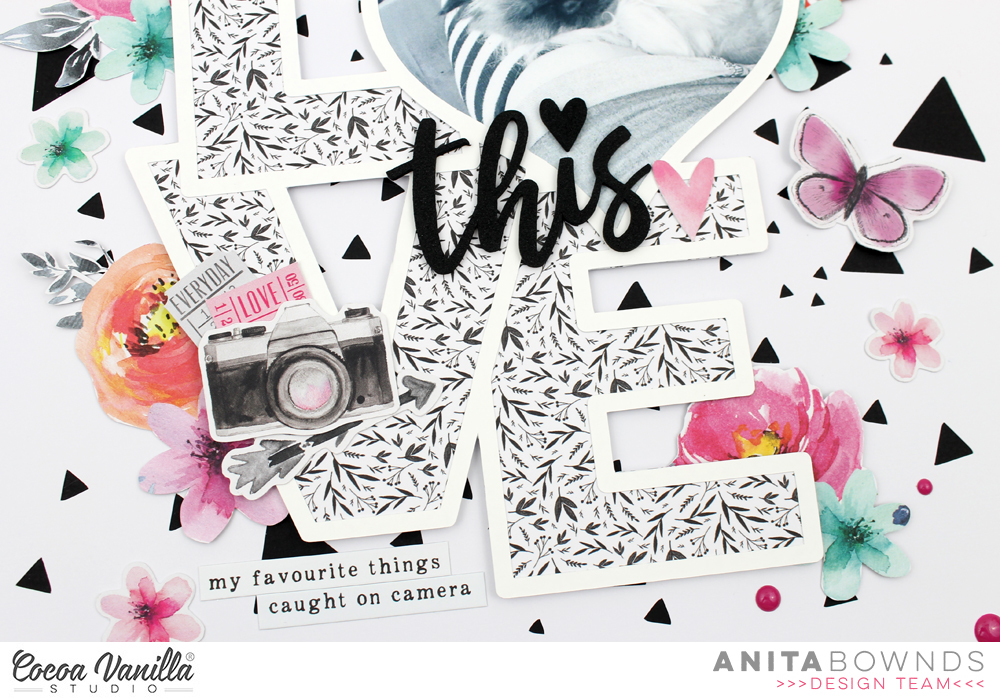
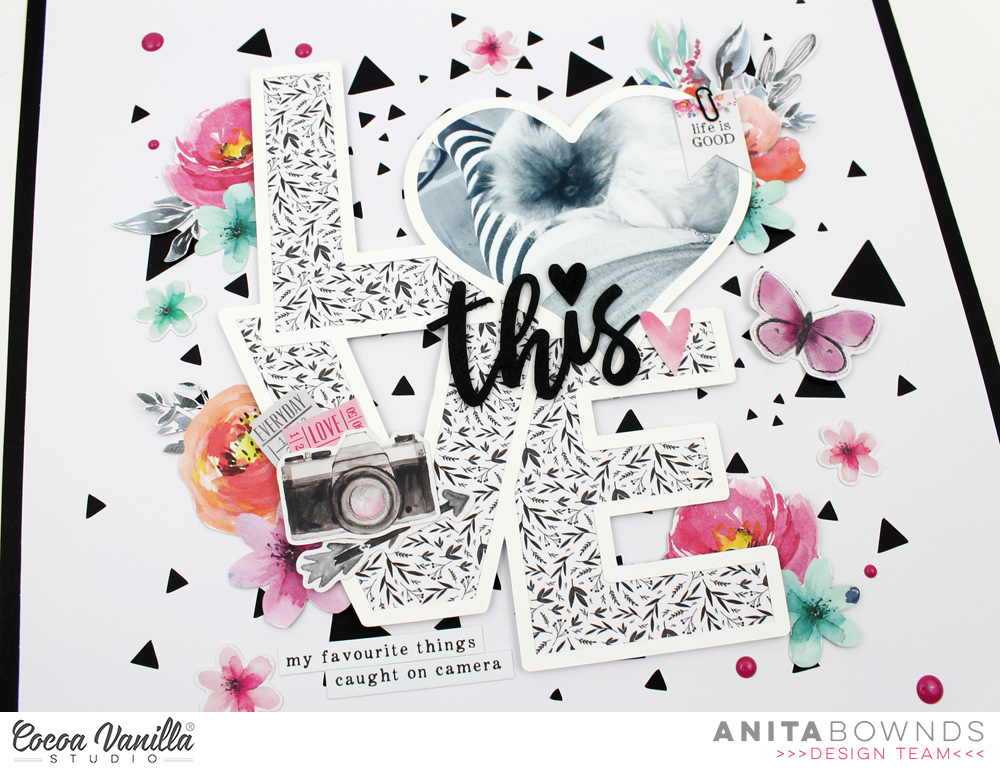
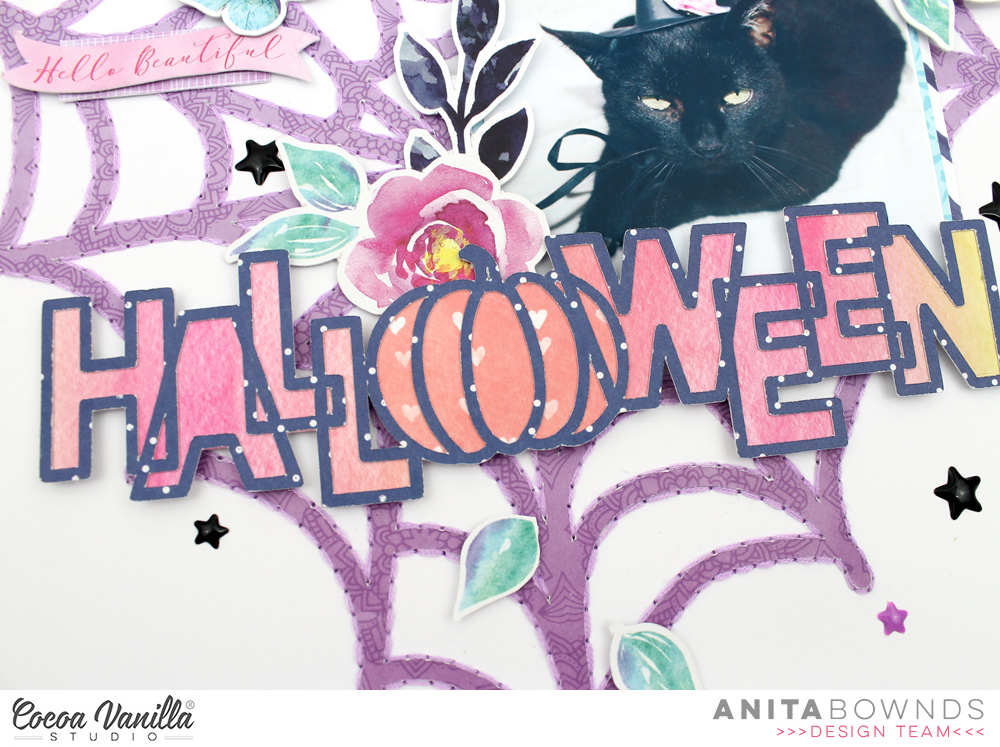
Anita here with you today sharing a love layout using the beautiful unforgettable collection.. I using a photo of my kitty Kushan, I guess most people wouldn’t know this but he is blind as he had a stroke 3 years ago and has become very clingy to the point he meows all the time and wants to be picked up and hugged or just be close so he like to lay on my legs while I play video games or watch tv…
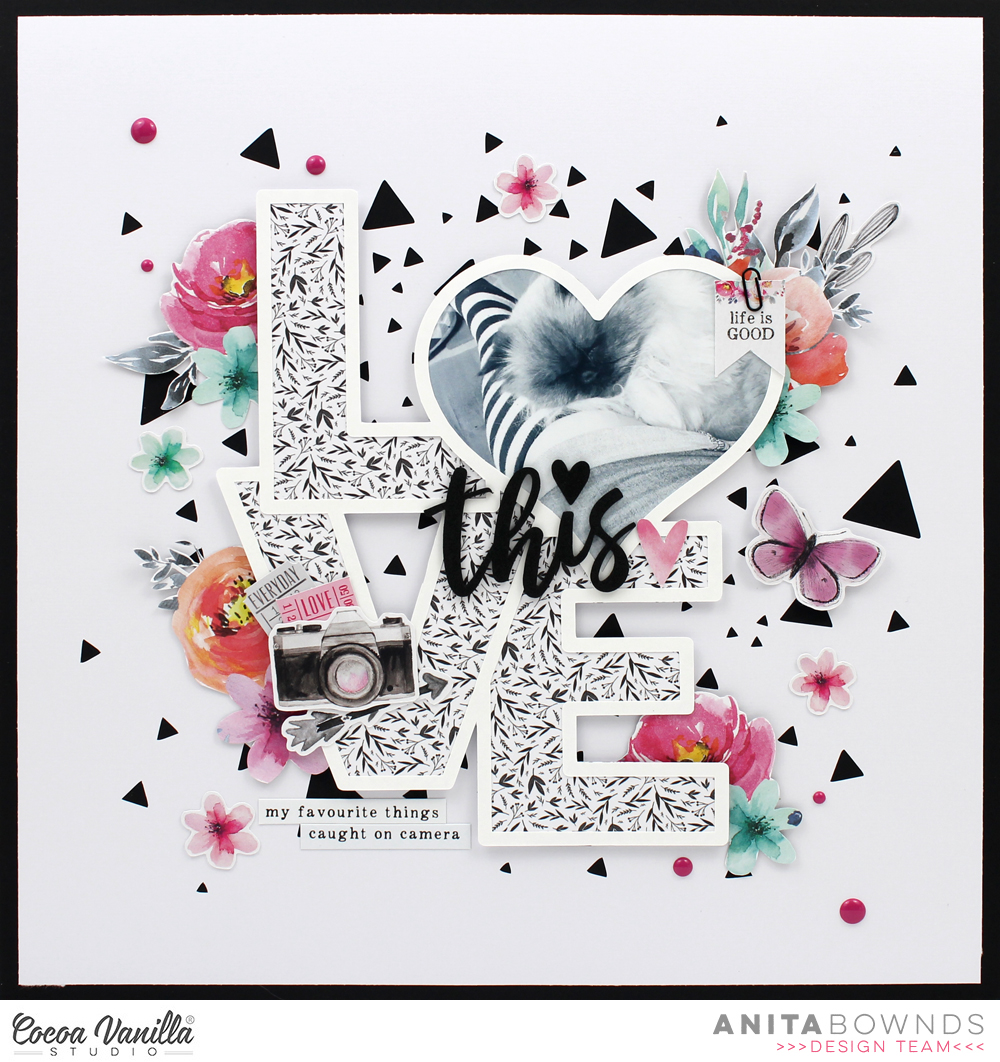
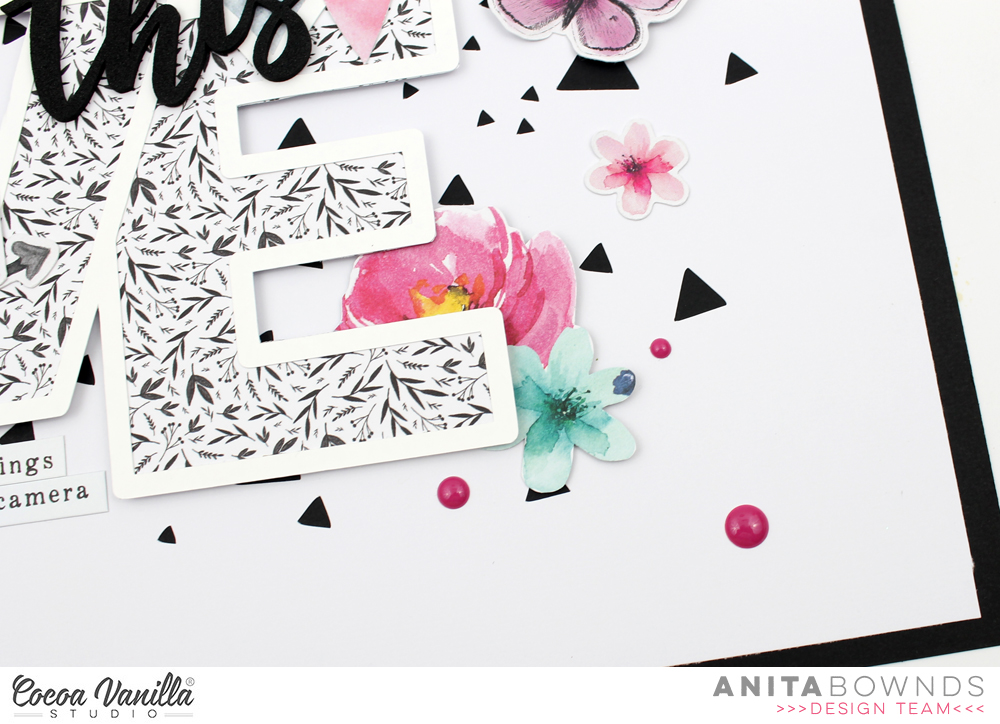
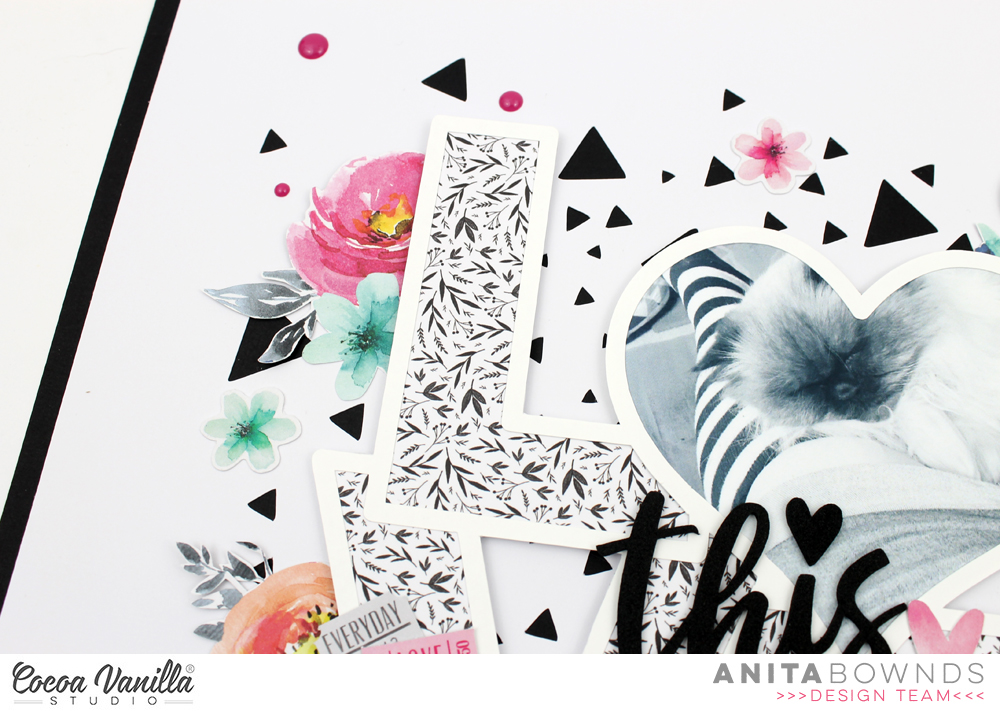
Ok so for my layout today I was inspired by a plate I have for my ephemera and bits on my desk that has triangles scattered on it so I thought this triangle confetti background cut file from Paige Evans was just perfect.
I used my cameo to cut out the background on white cardstock and back it with black cardstock
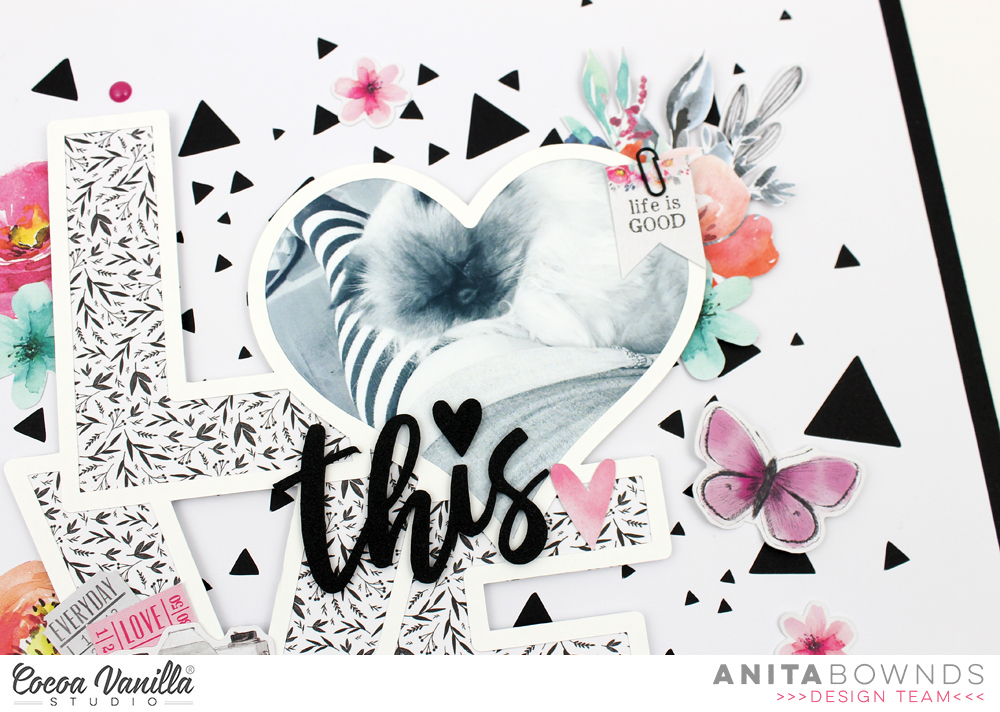
Then using another cut file from Paige Evans this time the word love I cut with my cameo in white cardstock
And backed the heart with my photo and the rest of the letters with natural beauty from the 6×8 paper pad
Then I added some double sided foam tape to the back a added it in the middle of the layout

Then I fussy cut out some flowers from patterned paper glorious to add floral’s around the cut file word
And for the other part of my title I use the word this from the foam title stickers and a few phrase stickers from the accessory stickers to the bottom of the love cut file.
Then I pulled out the ephemera and started adding it around the photo and cut files
Then to finish off the layout with a few enamel dots at the top and bottom of my layout.
check out my process video here
I hope I’ve given you some more inspiration today.
Happy crafting..


 Absolutely stunning!


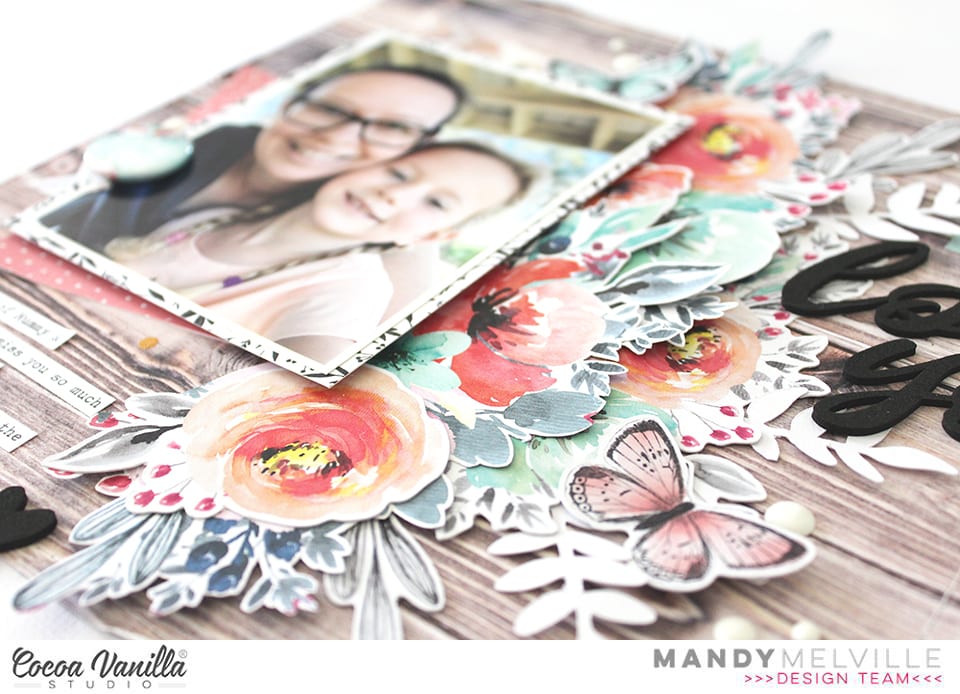
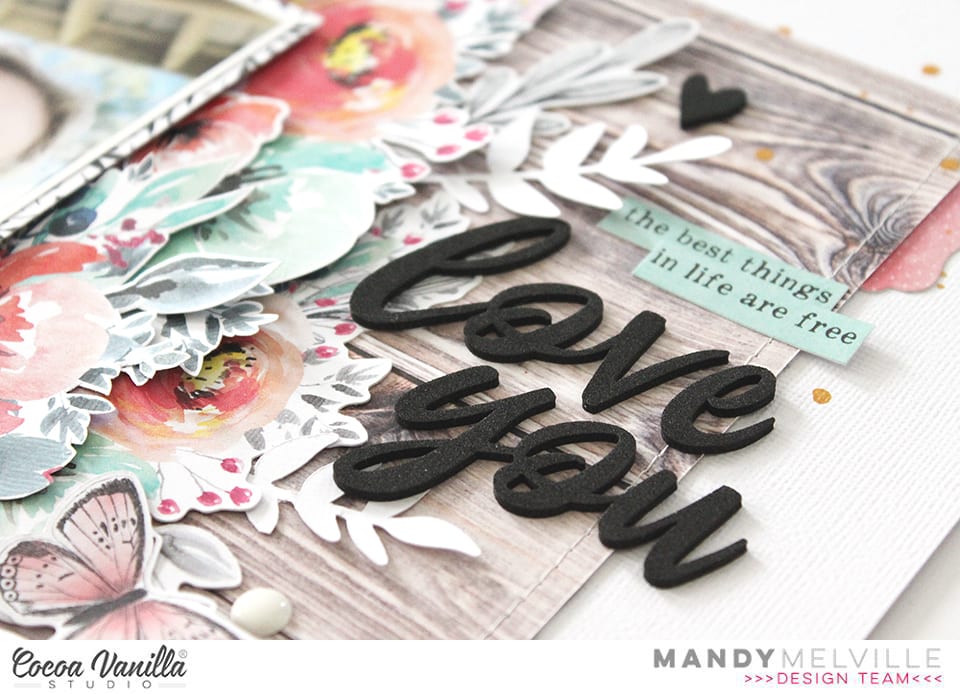
 And here. is version two! I decided to go bold and bright, ensuring my lettering really stood out which I felt it got a little lost in the first version of the layout. The only drawback was I had to convert my photo to black and white, which I think lessens the beauty of the shot.
 On both layouts I have used Story Teller paper as my base so there was a slight contrast with the black dots instead of a flat white. My second version I have used a turquoise cardstock, cutting the Story Teller paper down to 11×11 inches. I also used the same cardstock to cut Girl Squad cut file. on my Silhouette Cameo, in my first layout I used white to cut the Girl Squad cut file.
 I used the beautiful Forget Me Not paper to paper piece the Girl Squad cut file, wanting a smaller print so I could use some of the larger floral die cuts without them getting ‘lost’.
 From the 6×8 inch paper pad I used the Lacewing paper and fussy cut numerous butterflies. I wanted smaller butterflies hence why I used the sheet in the 6×8 inch pad and not the 12×12 paper. I added these with foam tape to create a 3d effect.
 I chose the largest floral bunch from the die cut ephemera pack and added in a way you could still see the lettering. Again I did this with foam tape to add dimension. I added some of the pink and turquoise enamel dots to flowers and under some of the butterfly wings.
 Before adding my photo I used some of the paint blotches from the Clear Sticker Sheet (I adore the clear stickers so much!) to ‘frame’ my photo and draw your eye to it. I used foam tape to attach my photo. I finished off adding some phrase stickers from the Accessory Sticker Sheet.


