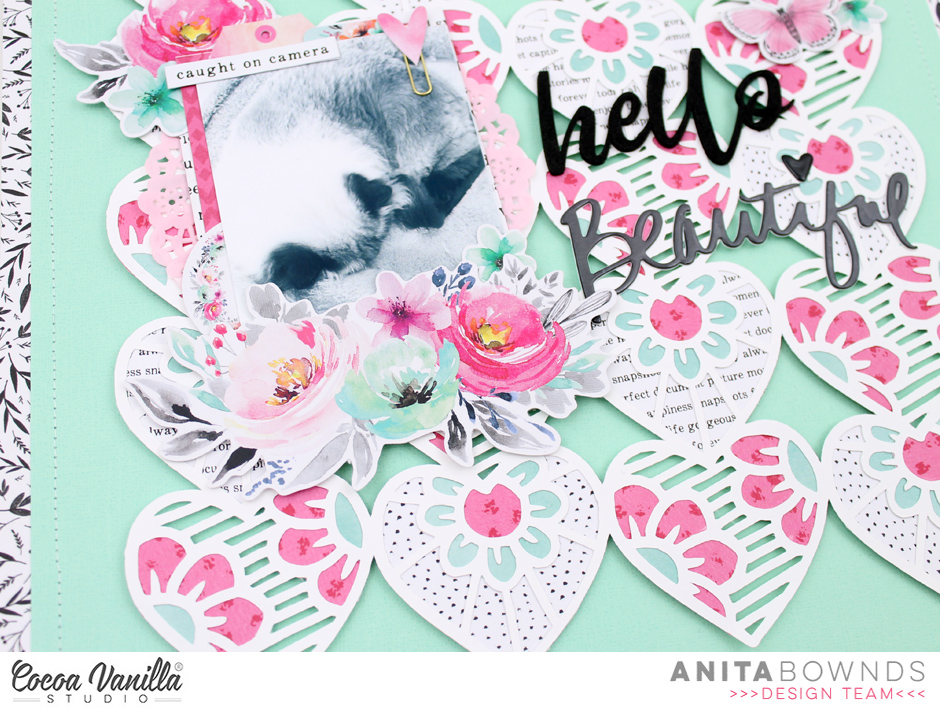
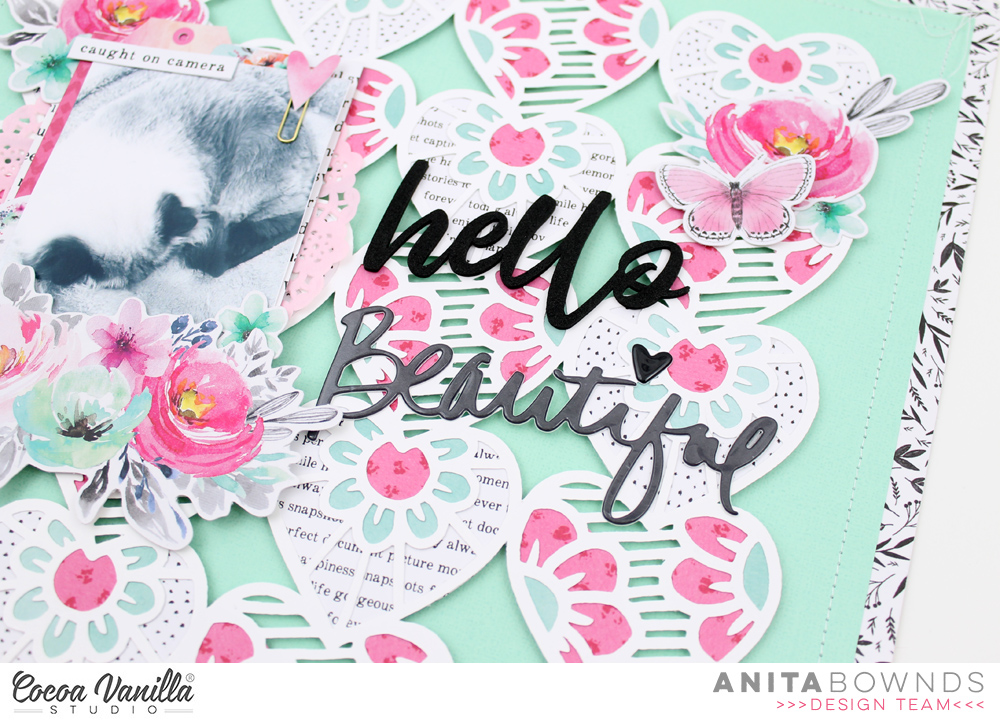
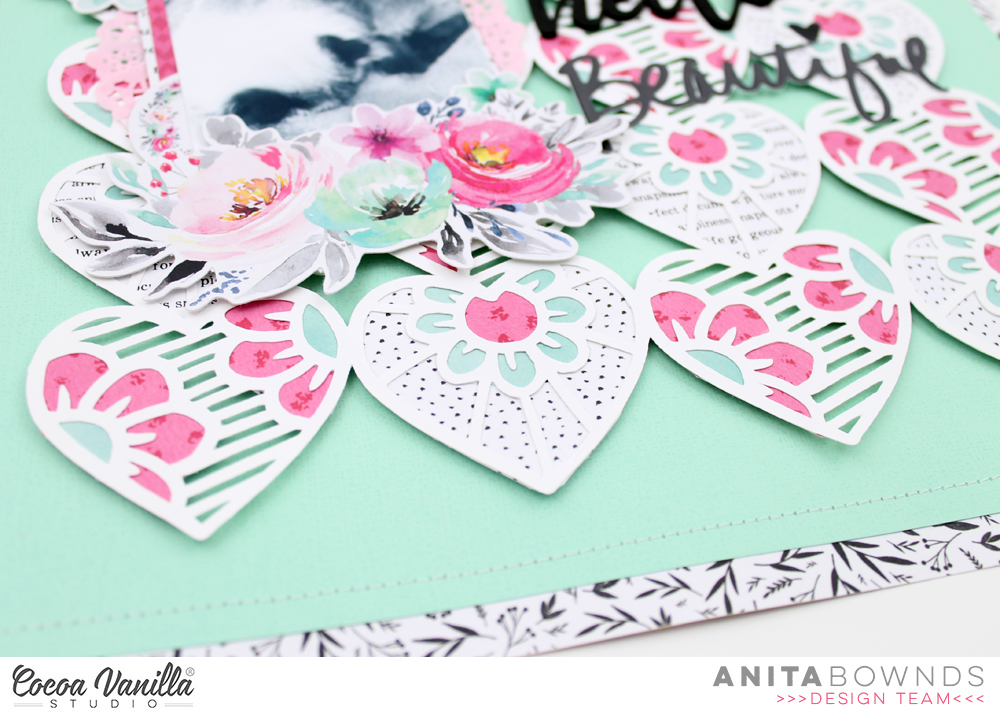
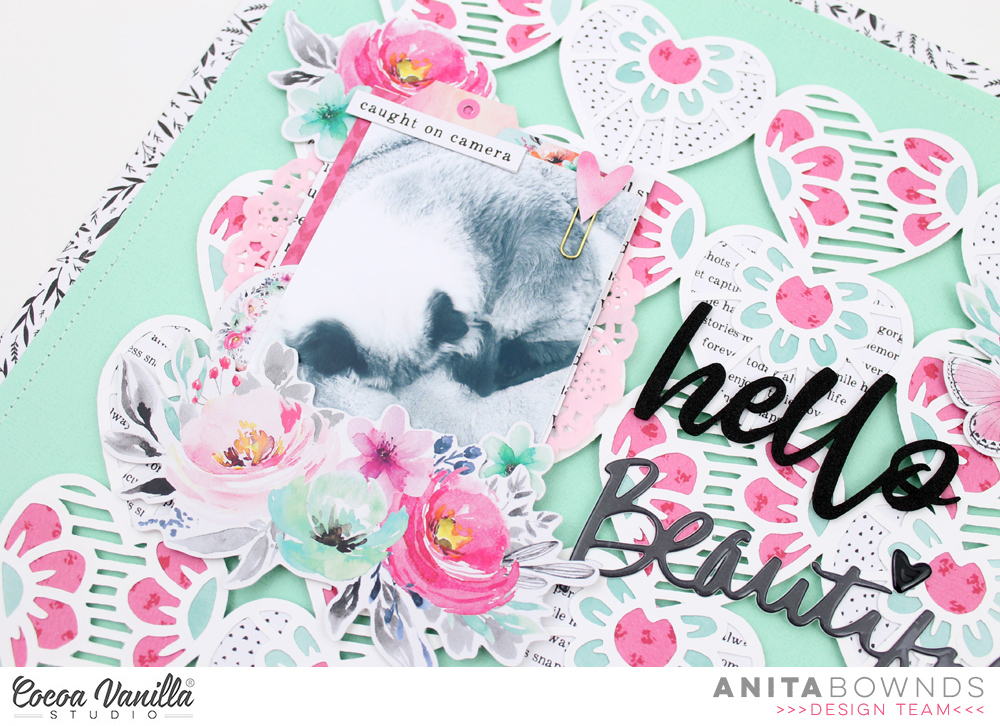
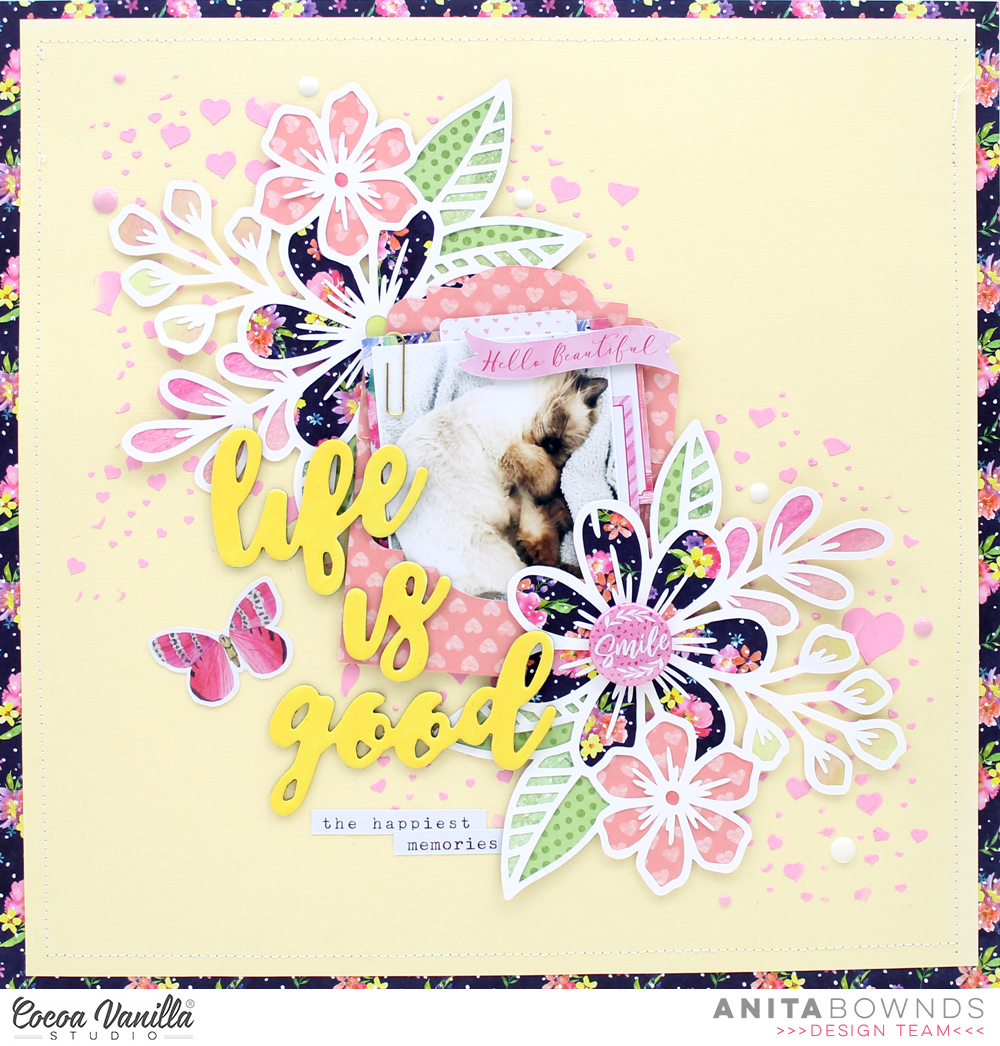
Anita here with you today sharing a fun floral heart layout full of colour using the unforgettable collection my layout is of my kitty sleeping in his bed in my craft studio, he just enjoys being near me…
I started off by using my cameo to cut out the floral hearts background
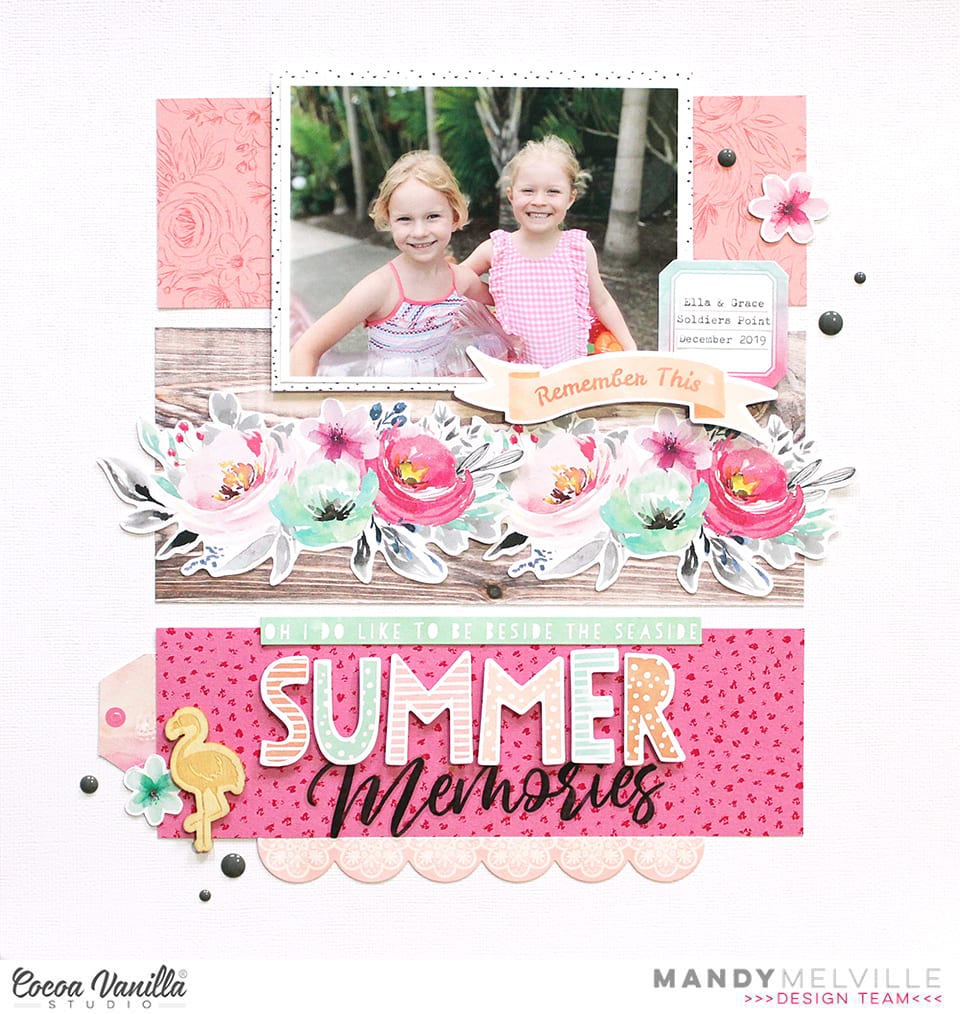
Mandy here with you today to share a layout for our ‘Holidays and Vacations’ theme, using a combination of the Unforgettable and Endless Summer collections. I documented a photo of my youngest daughter Eleanor with my niece Grace, taken when we took a family holiday together back in December. The kids had so much fun spending time with their cousins, and I just love this photo of the two girls ready to head off to the pool together.
I started with a sheet of white cardstock for my background, and then I adhered three different patterned papers, which I trimmed to 8 inches wide, down the middle of the page. I wanted papers that didn’t have very busy patterns on them, and I decided on using the pink and peach patterned papers from the Unforgettable 6×8 inch paper stack, as well as the 12×12 Natural Beauty woodgrain patterned paper.
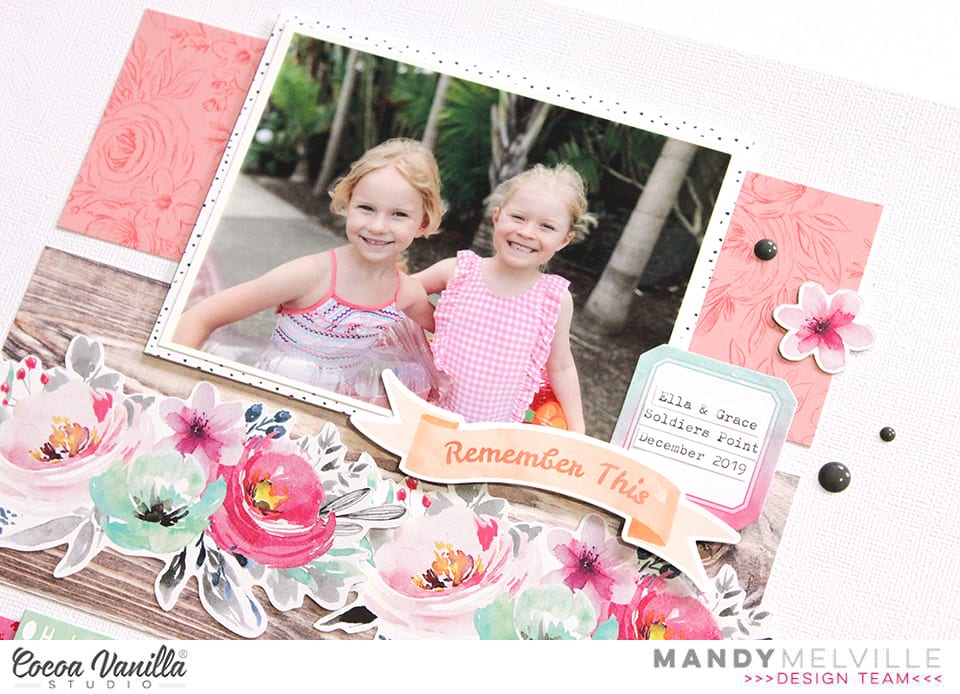
Next I matted my photo with another paper from the 6×8 inch paper stack, and then I adhered it at the top of the page, using craft foam for extra dimension. I added a couple of stickers on the bottom right hand corner of the photo, from both the Endless Summerand Unforgettableaccessory sticker sheets. The label sticker provided the perfect spot to add the photo details to the layout.
Next I layered together two of the Unforgettable floral die cuts underneath the photo, to make one longer floral cluster. The neutral woodgrain patterned paper underneath, helps these florals to really stand out.
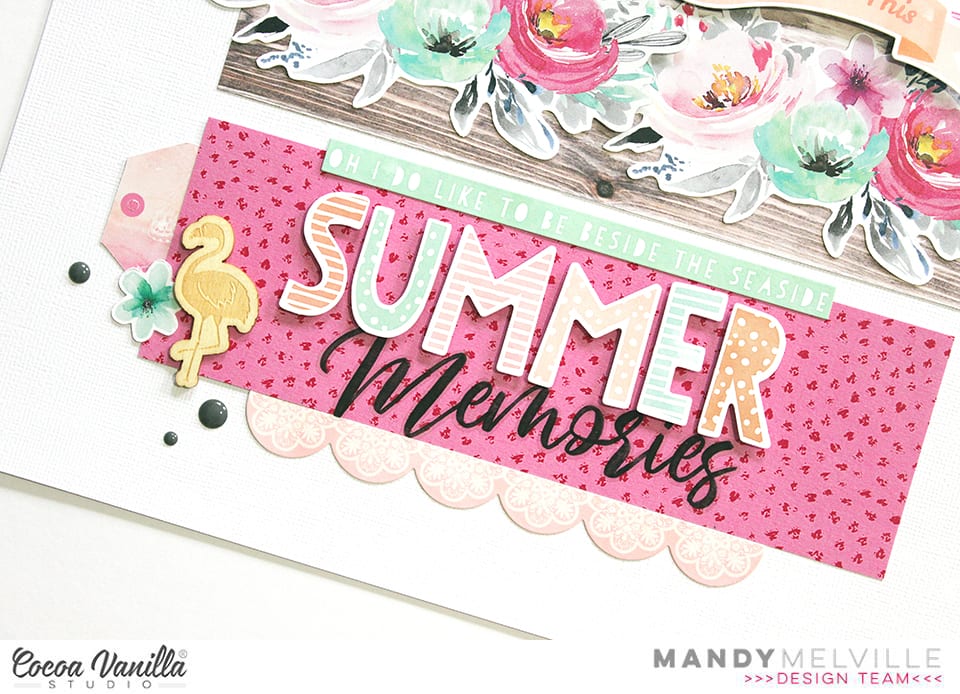
I added my title at the bottom of the page using a die cut word from the Endless Summercollection as well as a clear sticker from Unforgettable. I love the combination of the two fonts! I also created a little cluster to the left of the title using a tag and a wood veneer piece from Endless Summer, as well as a little die cutflower from Unforgettable. Above the title I added a stickerwith the perfect phrase for this layout… ‘oh I do like to be beside the seaside’, and I also added a scallop border sticker underneath the title.
To finish the layout off I added a few enamel dots in both the bottom left and top right corners.
Today is a bit of a sad post for me, as after three years on the Cocoa Vanilla Studio design team, I’ve had to make the difficult decision to step down this year due to increased work commitments. I’ve absolutely loved my time on this team, and being a part of this wonderful community, so I’m really sad to be leaving. But whilst I won’t be sharing my projects here on the blog anymore, when I get the time I’ll most definitely still be creating with the beautiful Cocoa Vanilla products, and I’ll continue to share my projects over on Instagram. So it’s kind of goodbye for now, but I’ll still be around! I want to say thank you to all of you for the support and encouragement that you’ve shown me over the year, to my fellow design team members for their friendship and for always inspiring me with their projects, and of course thank you to Zoe for giving me this amazing opportunity to be a part of her design team.
Hey Scrappy Friends! It’s Michelle here today sharing my first layout for 2020. I cant believe were already pretty much 2 weeks in to this new year and what better way to celebrate than to share a new layout for our ‘Holiday’ theme this month. For this layout I dipped into my Hello Sunshine collection, perfect for documenting summer memories like this one. Beach days are one of our favourite things to do during summer around the great region we live in, even more so towards the end of the season when its a little cooler and you can explore the coastline without frying/melting.
On this day we were out near a popular lighthouse along the coast where we live, but the beach was pretty quiet. Theres tonnes of rock pools in this area and it was so much fun exploring and seeing all the different creatures living amongst them. This was also during a time in Leilas life where Mario and Luigi had to come everywhere that she did. She had so much fun setting them up in little spots while she went off to explore.
There are a rare few Hello Sunshine product bundles available in the store, but once they are sold out they are gone for good. I’ve used the ‘Solar Flare’ paper as my pattern background, then layered the anchor paper and tiny triangles under the photos.
To the right of the photos I’ve added a couple of accessory stickers, ephemera, puffy sticker and woodie button to create a small cluster. (You can find the Puffy Stickers on clearance in the store for under half price here.)
And over to the left of the photos I’ve grouped together lots of different cut apart pieces from the main cut apart paper to create a title of sorts, but also to describe my thoughts of that day. ‘Fun in the sun’ , ‘The Best Summer Memories by the seaside’ , ‘So happy together’. I also added a few more ephemera pieces, puffy stickers and a woodie button to complete the group of bits.
All up this layout came together pretty quickly, some would call it a hot mess of bits and bobs, but one that I’m loving the look of. Definitely a different style of layout to my usual feminine floral designs.
Well thats all from me today, Thanks so much for stopping by. Be sure to check out the DIGITAL section of the shop where you can find this range, and many other of our past collections ready and waiting for you to print, cut and create with. Don’t forget to share with us in the Cocoa Vanilla Studio group on Facebook as we all LOVE to see what you create.
Hi everyone, and welcome 2020! I am so happy to be here with my first project of the new year for you. Today I am continuing on with our Holidays & Vacations theme, and sharing a layout I created using a combination of the ‘Boys Rule’ and ‘Midnight’ collections. I know what you are thinking – a bit of a strange mix of collections, right? Despite the very obvious differences between the two, they did work together surprisingly well and were a perfect compliment for the colours in my photo.
For my layout I decided to document a photo that was taken at the Cocoa Vanilla retreat that was held last May. Scrap retreats are definitely one of my favourite kinds of holidays – besides spending time with great friends, you get to enjoy a change of scenery, have a break from your everyday responsibilities, AND you get to create! What’s not to love about that?!
I started my layout with ‘Boys Rule’, with a sheet of Star Fall as my base,which I topped with piece of white cardstock, cut slightly smaller than the paper, to leave a narrow border around the edge. I then added four blocks of paper to my background using pieces of the Messed Up; Expressionist and Straight & Narrow papers. I distressed each of the blocks by scrunching and then flattening them back out; then ran them horizontally on my page to compliment the landscape orientation of my photo.
With my background complete, I then added some scrap cardboard to the back of my photo and decided on its placement on the page. I chose the beautiful floral print Bloom & Grow paper from the ‘Midnight’ collection to begin embellishing my layout, fussy cutting several pieces to tuck in around my photo to frame it.
With the flowers in place I then added the little banner that said the best from the ‘Boys Rule’ Chipboard Pieces pack, and a small black and white butterfly sticker from the ‘Midnight’ Accessory Stickers; placing both near my top floral cluster.
I created a small cluster below my photo by combining another fussy cut floral piece with a small leafy branch and heart, both from the ‘Midnight’ Die Cut Ephemera pack. In my cluster to the left of my photo, I also added the shine bright flair button from the ‘Midnight’ Flair Buttons set.
For my page title, I used the words happy and moments from the ‘Midnight’ Chipboard Pieces pack; and then I finished off my layout by typing up my journalling and applying it in strips (again tying into the horizontal theme) near the bottom of the page.
That’s all from me today. I hope you are enjoying our Holidays & Vacations focus and that you are perhaps feeling inspired to document some of your own holiday moments. Stay tuned for more inspiration from the team for this theme!
This week the design team were asked to create a project all about holidays and vacations. I have had some of my Paris holiday photos printed for some time so I choose 3 of my favourite to feature on my layout today.
I wanted to highlight the middle photo a little more so I raised it up off the page by adding a small chipboard frame underneath it and also added one of the black chipboard hearts to the photo. The other two photos I adhered flat to the paper, however I tucked in one of the tabs to the left and one of the small journal spots to the right.
My title is actually made up of the black letter stickers from the Made of Awesome collection and the ‘Love’ is one of the black chipboard titles from the More Than Words collection. I absolutely LOVE the vellum flowers in this collection and almost used a whole pack of them just on this layout! They were perfect tucked in either end of my photo cluster. I did add a few of the die-cut ones too for some pops of colour.
The XOXO flair was perfect to go with the ‘City of Love’ theme of my layout, I added it to the end of the ‘Love’ word. The ‘Remember This’ banner I popped up and placed above the ‘Love’ word. I added lots of words and phrases suited to our trip to Paris. I used accessory stickers, die-cuts and cut apart paper for this. To finish off, I added some of the super cute heart enamel shapes.
Thank you so much for stopping by today! I hope this gets you inspired to create a holiday themed layout using one of the Cocoa Vanilla Studio pretty girly collections!
Hi all Rachel here! Wishing you all a Happy 2020 and may it be a fun and creative year.
Today I am revisiting a beautiful holiday in Italy, with the photo in my layout taken in Capri. You certainly do not have to use a vacation themed collection to memory keep your holidays as my layout shows you. I have used Unforgettable collection to document my vacation snap.
I used the florals as the main feature on my layout, keeping a tropical, summery feel. I firstly added my photo which is 3×3 inches with a white border. I then started arranging the floral die cut ephemera at the top and side of my photo. I have layered and some I have added with foam tape which stops the floral bunches looking ‘flat’ finished off with some extra die cut leaves tucked under.
I had to add the die cut camera because holidays and cameras are a must! Again I used foam tape to add and added some of the clear sticker hearts. I used a sticker ‘the Story’ from the accessory sticker sheet to form my journalling. I typed my location and date onto white cardstock and added under the sticker.
I created my title using the foam title stickers and added more journalling using the accessory stickers. To break up the white I added a small clear sticker over it.
I added butterflies, some clear stickers, some die cuts and others fussy cut from the 6×8 inch paper. I have added in a way that they connect from the bottom of my page, going in a diagonal direction to the top of my page.
I added another floral piece which was fussy cut from the garland paper, I added a clear sticker paint brush stroke behind the bunch to add a stark contrast. I added enamel dots from the collection under the butterflies, floral bunches and on the camera lens. Lastly I added a light splatter of black color shine to break up the white of my page.
I love how this turned out, white space can really enhance your other elements. Thank you for popping in today and I hope this has inspired you to get scrapping those holiday snaps! See you again soon.
Hello friends, and welcome to my first project of 2020! I am so excited to get back to making and sharing pages with you all, and I’m starting off with a layout about our Disneymoon using the super lovely Unforgettable collection.
I started off off with a cutfile that is pure Disney magic and I backed it with some 6×8 papers from the paper pad. I cheated a bit and used my Silhouette to cut out the insides of the letters so I wouldn’t have had to cut them by hand and it worked out really well. Before attaching anything to the patterned paper I chose to use as the background, I used some acrylic paints to add some color and interest to my layout, and I added swipes of pink, light teal, coral, and a pale orange. After setting that off to dry, I went to work on the rest of my layout.
The photo I printed is of the two of us on the teacup ride at the Magic Kingdom wearing our bride and groom Mickey and MInnie Mouse ears, and I chose to print it out in black and white since it was faded and kind of grainy. First, I matted my photo on a bunch of matching patterned papers and added a torn edge because it’s not a Tazhiana layout without a ripped edge somewhere. Then I added some foam tape to the back of the photo so that I could slide a tag with some journaling behind it. I grabbed a bunch of ephemera from the die cut pack and created a sort of floral wreath behind where my photo was going to sit. I even added some foam dots and a piece of flair to add some more texture and dimension to the layout. It all worked out really well and was incredibly easy after all the hard work of picking what I want to use.
After attaching my photo and the LOVE die cut piece to the background, I went ahead and added my title using the foam title sticker pack and I added some enamel dots to add a bit more color and called this layout good. I love how it came out so, so much and it was a blast to play with color and paint.
There’s a process video for the page linked underneath this blog post if you want to watch it all come together! I hope you enjoyed my project and you give this technique a try. Seriously, pick it and stick it. That freedom to create is life changing. Till next time, keep it crafty friends.
Gwen back on the blog with you today with my first share of the year. I’ve enjoyed having some time off over Christmas and New Year and I’m super excited to be getting stuck into 2020. What better way to start than to kick off the Cocoa Vanilla Studio Holiday/Vacations theme week. I couldn’t resist scrapping this sweet photo I took in December of my husband and daughter on our recent family getaway to Hervey Bay in Queensland.
For my page, I was drawn to the ‘Happiness‘ collection with its stunning bright blue hues and immediately thought to team it with this fun cloud background cut file by CUT to YOU. I’ve cut the file on a plain white card from my stash and began the page by simply backing the clouds mixing and matching the ‘Good Vibes‘ and ‘Expressive‘ papers. For the rainbow, I used the B side of the Expressive paper.
Next, I’ve mat my photo using the ‘Botanical Bliss‘ pattern paper and then added some stitching around the edge. I’ve double mounted with more of the ‘Expressive‘ paper and raised everything up on foam for dimension.
I’ve mounted my white background using the same ‘Expressive‘ paper and stitched around the outer edge of my page. I find if I use the same paper in various parts of my layout, it really helps the page come together. From here, I’ve decided on the placement for my photo and the large cut file background so it was now time for embellishments.
This was the fun and easy part. With the largest elements of my page locked in, it’s really just about filling in the gaps and thinking about how your eye will travel across the page when you look at it. I decided to go from the top section in between the rainbow and the sunshine, down to the bottom centre of the page. To do this, I’ve started by creating a floral cluster in the bottom right-hand corner of my photo using elements from the ‘Die Cut Ephemera‘ pack.
I’ve then fussy cut out some dark navy butterflies from the ‘Bright and Beautiful‘ pattern paper. Next, it was time to add in my title, I’ve gone with the sentiment ‘Sweet Life’ from the ‘Die Cut Titles‘ pack. I love how it nestles down in under my photo against my flower cluster there.
Next, it was time to add in some journaling. One of my scrappy goals this year is to do more journaling on my pages. I often just write on the backs of them, but this year I would really like to include more details on the front where I can to help me tell my stories more. For this page, I’ve gone with the typewriter and some white card from my stash. I’ve also added in some more elements mostly from the ‘Die Cut Ephemera‘ pack but also from the ‘Accessory Stickers‘ sheet. I just love the typed sentiments at the bottom of these, and they match my typed journalling perfectly!
Thanks for popping by today to see my latest project, I hope it inspires you to get this collection out from your stash if you have it and make a fun summer vacay page. Also, be sure to keep checking the blog as there is a stack of inspiration coming your way from the rest of the design team over the coming week. As always, be sure to pop into the Cocoa Vanilla Studio facebook group to share your pages, I love seeing what you make.
I hope that you all had a lovely Christmas and are looking forward to a fabulous 2020! Today I have a new layout to share with you using the gorgeous Unforgettable collection. I chose to scrapbook a couple of photos of my beautiful Abi, taken when we were on holidays recently. I think that the colours in the photo work perfectly with the Unforgettable collection!
I started off with the Garland patterned paper as my background, however I turned it upside down as I wanted the cluster of flowers on the garland to be at the top of the page rather than the bottom. I love that this paper provides a gorgeous, ready-made background, which makes the design process so much quicker!
I printed my photos about 3×4 inches, and then matted them using two of the patterned papers from the 6×8 paper stack. I then positioned them overlapping the larger floral cluster at the top of the page. I also added a couple more floral die cuts into the garland to give it some more dimension and interest.
I added a few embellishments around the photos including a flair button to the left, and a tab sticker and butterfly die cut to the right.
To balance out the large floral cluster in the top left hand corner of the page, I added another smaller one in the bottom right hand corner. I fussy cut this one from the beautiful Glorious patterned paper. I also added a butterfly to the cluster, which I cut out of the Pretty Bits paper. I adhered it just in the middle section so that the wings would lift nicely off the page, once again adding some lovely dimension to the layout.
For my title, I chose the die cut piece that says ‘Living the Dream’, which I think was appropriate for these holiday snaps! I added this over on the right hand side of the page above the floral cluster. To finish the layout off I scattered a few little die cut flowers and some enamel dots around the page.
Thanks so much for joining me here on the blog today and taking a look at my layout! I’ll be back later in the month with another project to share with you.
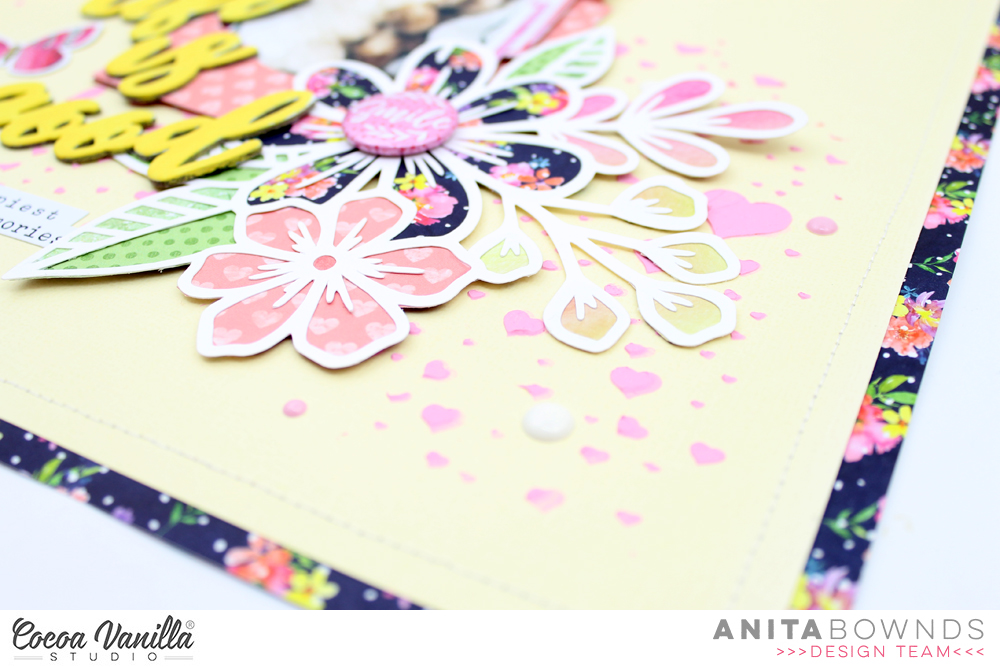
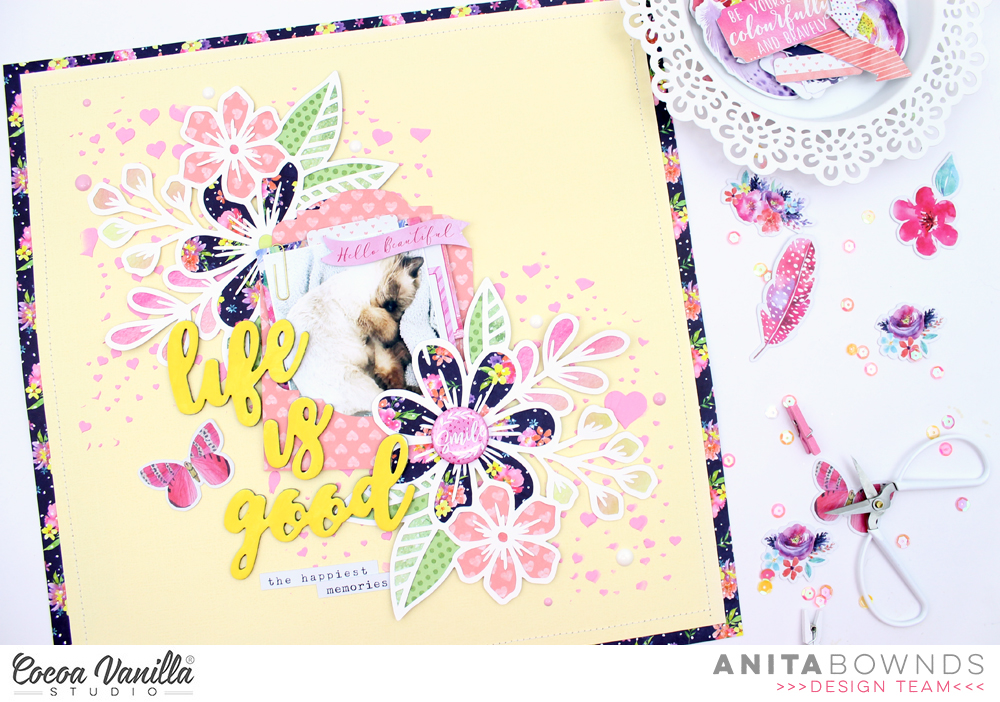
Anita here with you today sharing a colourful layout for our first throw back Thursday for 2020 using the Bohemian Dream collection … wow I can’t believe it’s been a year and I’m still having so much fun with Zoe’s collections they are so bright and beautiful… so my layout to day is all about my kitty Kushan..
It must be good to be a cat !! Not a care in the world, all curled up snoring his little head off …
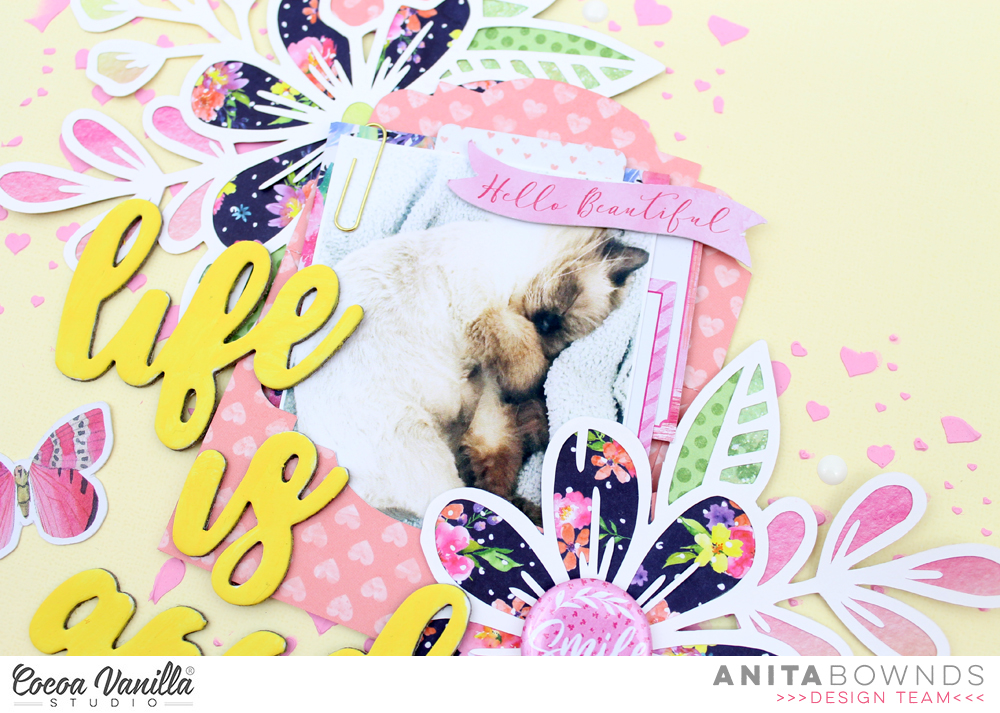
For my layout today my inspiration is the pattern paper flower child from this collection. I wanted to use those colours of the little flower clusters..
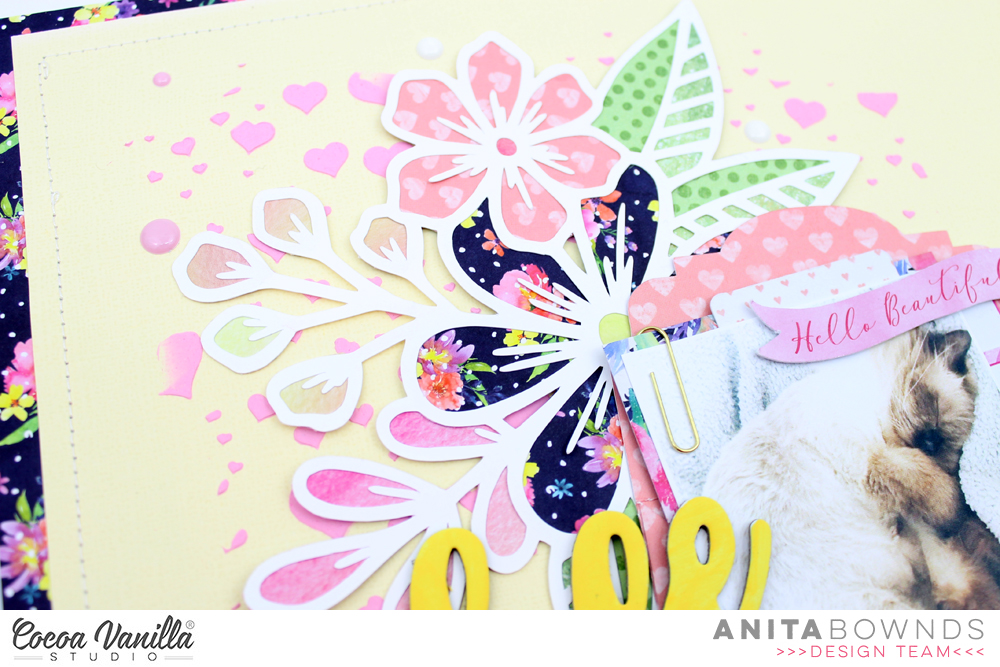
I started off by cutting out a few cut files the envelope by Paige Evans with paper boho bits and flower clusters from the silhouette design store, I back both flower clusters with the same pattern papers – boho bits , flower child , beautiful mess and the green pattern papers from boys rulestraight and narrow and fun and games
Then next I matted my light yellow cardstock on pattern paper flower child then I wanted to add more of that bright pink colour so using another cut file heat confetti from Paige Evans I cut on thick cardstock to use as a stencil , I mixed the strawberry pigment powder with modeling paste till I had the desired colour and added it in 2 place’s on my background.
Then I started to add the flowers and the envelope to the layout popping them up with double sided foam tape to add a bit of dimension , I added some ephemera and accessory stickers to my photo and a flair to the centre of one flower. I popped out some of the chipboard titles and added some yellow paint to make my title pop and adhered them down
To finish of my layout I added a butterfly from the ephemera pack and enamel dots scattered around the flower clusters… and a stitched border around my Light yellow cardstock