It’s Sophie on the blog today with a new layout to share! I used the lovely new collection Happy Days again!
I cut three rectangles from the A5 Paper pack and stitched them down on white cardstock. I added a little scalloped border on their upper edge, and a zigzag stitch between them.
I printed a colorful photo of Sabrina and mounted it on tissue paper and foam adhesive. My title comes from a JustNickStudio alphabet cut file. I placed a smaller velum rectangle on the yellow one to soften it up so that my title stands out a bit more.
I added a beautiful bicycle die cut from the Ephemera pack and created a ground with watercolors from my stash. I fussy cut tiny little flowers that I scattered on the ground around the bicycle and wrote down my journaling on a sticker from the sticker sheet.
Here are more close-ups:
It’s a very Springy page and I LOVE the bright color scheme!
Mandy here today to share a new layout using the beautiful new Happy Days collection! I absolutely love all of the gorgeous bright colours in this collection and for this layout I wanted to create a fun and happy layout featuring all of the colours! What better paper to use for this than the Rainbow Bright paper! I knew that this would be perfect for documenting a photo of my youngest daughter with her besties on her 5th birthday.
The Rainbow Bright paper made such a gorgeous background for this photo and really brought the layout to life! Once I had decided on this paper, I then matted my photo with one of the papers from the A5 Paper Stack. I adhered it to the page using craft foam in order to give it some nice dimension and to help it stand out against all of the bright colours in the background.
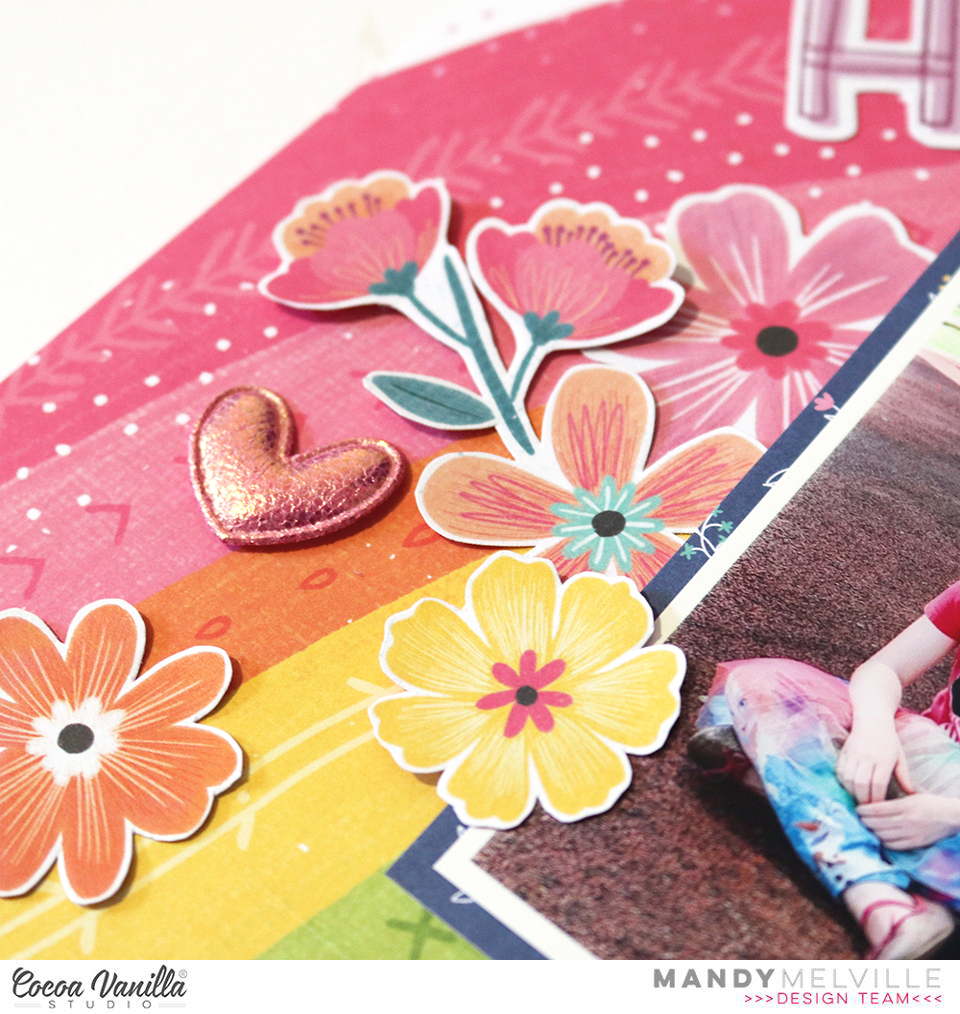
For my embellishing I decided to keep it mostly tone-on-tone. So on the pink section of the rainbow I added pink embellishments, on the yellow I added yellow embellishments, and so on. I started with a fun little cluster on the bottom right hand corner of the photo. As this was on the blue and purple section, those were the colours that I chose for this cluster. I included some florals from the Floral Ephemera pack, as well as some that I fussy cut out of the Lush Blooms paper. I also added a couple of DieCuts to the cluster.
Moving over to the left hand side of photo, I added another embellishment cluster using similar items that I used in the first. I tucked some of the flowers under the edge of the photo and some on top to give the cluster some dimension. How gorgeous are the Puffy Hearts?! I couldn’t resist adding one to each of my floral clusters!
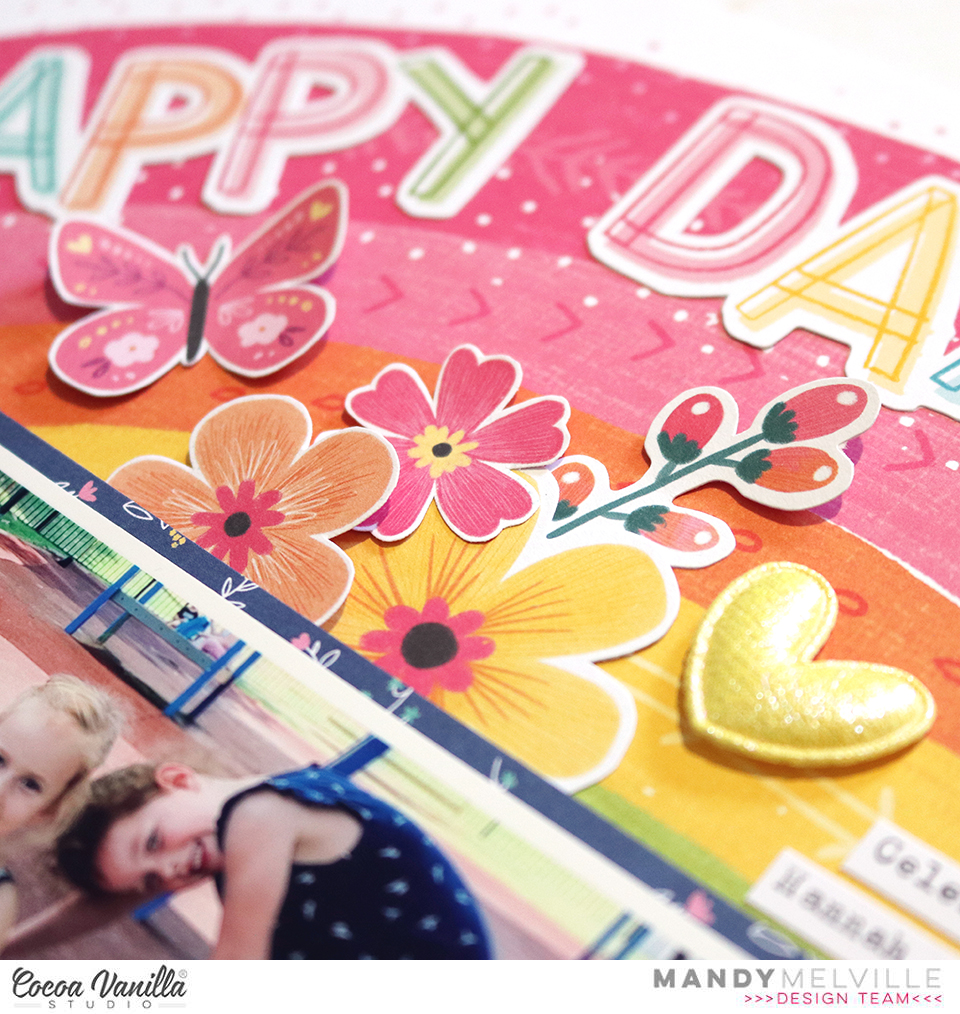
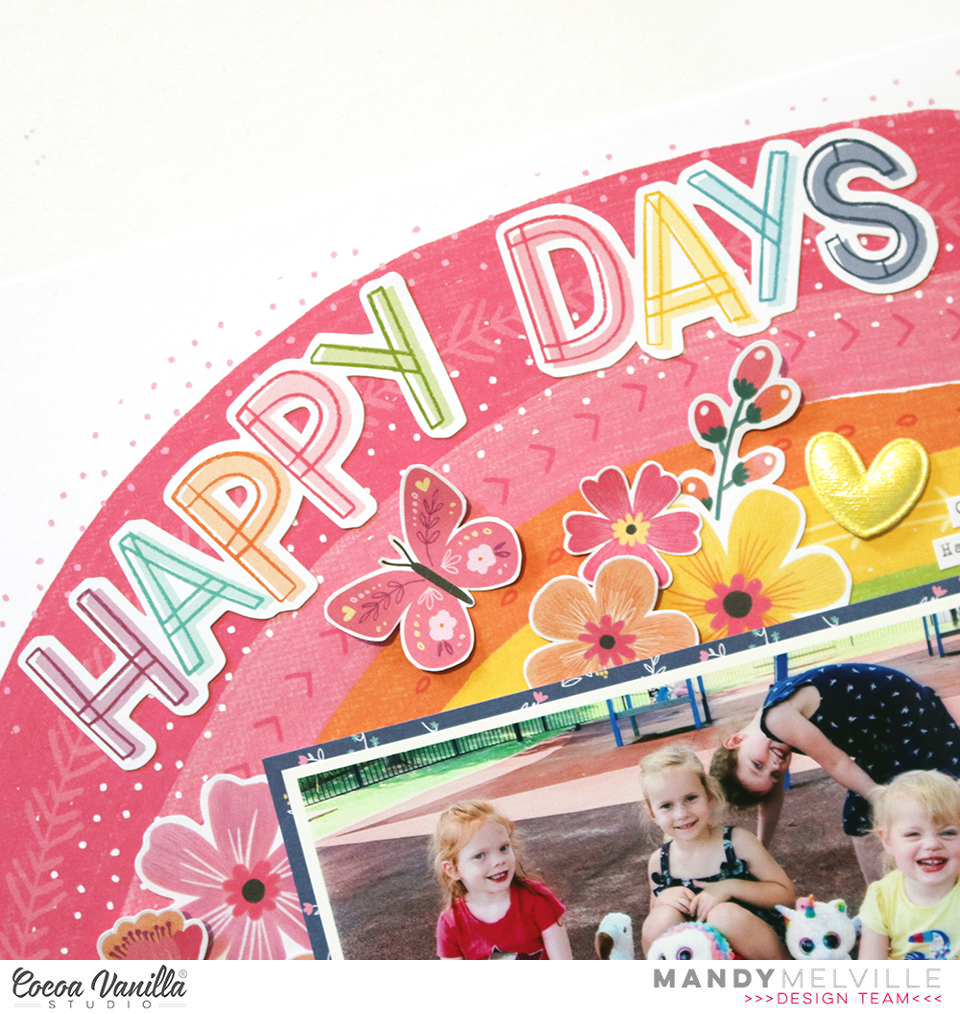
I added a third cluster above the photo, creating a visual triangle to draw the viewer’s eye around the page. To keep the clusters looking balanced I again included similar items to the first two. You can also see that I fussy cut a few butterflies out of the Flutterby paper and I scattered these around the page, again keeping them tone-on-tone.
For my title I decided on using the ‘Happy Days’ words from the Die Cut Ephemera pack. I positioned the words so that they curved around the arc of the rainbow. It was the perfect title for this happy photo!
I finished the page off with some typed journalling strips and a few little hearts from the Chipboard Titles pack.
Thanks so much for joining me here on the blog today! I hope that you’re able to create some bright and fun layouts with this collection too!
Hey y’all! Laura Alberts back again with a lovely shelf design featuring the new Happy Days collection. I absolutely adore the bold rainbow patterned paper in this collection and decided to use it with some white cardstock to create these lovely, detailed shelves for my photos to rest on.
Next to each of my photos, I’ve paired it with a cut-apart piece from the A5 paper stack. Love these smaller cut-aparts! This gave me an opportunity to add a journaling spot to the layout. Layering embellishments into large horizontal clusters was a great way to keep the attention on the photos by limiting the attention drawn to each of the individual ephemera pieces.
I used a chipboard title “Love” on one of the smaller shelves. I purposely left plenty of white space and limited my embellishing to my shelves to give my eye a place to rest on the layout. Each set of these shelves is balanced by using similar sized clusters.
I hope this layout inspires you to use your punches in a slightly different way! If you’d like to see how “Love” came together, check out the process video below.
Hello everyone! It’s Anna here with my second page in May. As you can suspect, I am ears deep into brand new “Happy days” collection. It’s so colorful and fun and ideas keep flooding my head. This time I want to share with you layout inspired by all the fruits from “Juicy fruit” paper. I love this pattern so much. We do not have exotic fruits in Poland growing on trees but I remembered about few older photos of Maja eating fruits straigh from the bushes in my mom’s garden. I decided to scrapbooking this memory with all the fruits I could find within “Happy days” collection making a TUTTI FRUTTI page!
To make page even more “fruity” I started my creative process by adding some pineapples into the white background using the only fruity stencil I own. I went crazy with all the fruits on this layout. I used yellow and green Distress Oxide inks and green and yellow mist to add some splatters.
Each of my four photos is backed with a different pattern paper from A5 Paper Stack. It’s a very colorful page so I went with yellow, pink, blue and navy. I also took some time to fussy cut some fruits from “Juicy fruit” paper.
With the photos glued down I could add my lemons, oranges and peaches around them. Some of them went under the photos and some of them on top creating multiply layers. I also found two strawberries in Ephemera Pack and added them too!
This page didn’t need much of embellishing, so I only added few flags, tickets and camera from the Ephemera Pack. It may seem a little bit different as I cut off the white outline to make them blend better into the composition. My title TUTTI FRUTTI is made with pattern papers and some alpha dies. This way I could be sure I will not run out of T letters as they appear in a large quantity in those two words. I tried to add some white inline into each letter but my white pen wasn’t cooperating well.
I finish the composition by adding few tiny, puffy hearts here and there. They are so, so cute!
And that’s all folks! For today :) I will be back in two weeks with a brand new project made with wonderful “Happy days” collection. Sending you all lots of hugs.
It’s Sophie on the blog today with a new layout to share! I used the lovely new collection Happy Days again!
I created a mixed media background with inks and white acrylic paint. Then I fussy cut beautiful golden frames from the Specialty Gold Foil Paper and filled in the frames with several patterned papers from the A5 paper pack. I placed the frames around my black and white photo, and mounted them on foam adhesive.
I used the Alpha chipboards for my title and added watercolor paint to each letter.
Finally, I decorated the page with beautiful florals and die cuts from the Floral and Ephemera packs.
Here are more close-ups:
I love the color scheme of this page. Hope you like it too !
Welcome back to the CVS blog everyone..I hope you are all well.
It’s Kellie here today sharing another page with the brand new ‘Happy Days’collection.
For today’s page I decided to stick to the cooler tones of the collection… this is a favourite colour combo for me…blues and yellows make my creative heart happy. Here is a look at the completed page..
I had two photos I wanted to scrap so I decided I would place one on the top right and the other on the bottom left and make two large embellished areas on my page. These pics are photos of my youngest boy when we were in Fiji…they are super sweet!
To start, I decided to create some frames using a frame die and picked out some of the papers from the 6×8 paper pad.. using frames really help to make your photos pop on the page..you could get the same effect by making large matts around your photos.
Next I wanted to ground the photos so they weren’t floating on the page… so I cut some large strips to pop under my photos. On the top photo I used the paper ‘Feel Good’and the strip under my bottom photos is called ‘Sunshine Lollipops’.
Next I moved on to embellishing around my photos. Firstly I picked out some of the black and white frames from the Die CutEphemera pack. I cut these in half and had them sticking out around my photos…this is a great way to stretch your supplies…two pieces for the price of one!!
On my top photo, I cut two word phrases from the 12 x12 cut apart paper called ‘ Feel Good’ and cut some of the hearts from the same paper to add to the bottom of my photo.. then above my photo I used a tab sticker and word phrase from the ‘Accessory Sticker Sheet.’
On my bottom photo, I picked out the ‘Hello’ banner and the ‘Best of Times’ from the Die Cut Ephemera pack. Next to my left photo I used another tab sticker and word phrase from the Accessory Sticker sheet. I finished off my photo clusters with some florals I cut from the ‘Lush Blooms’ paper.
Next I worked on my title. I wanted to fill in the white space on the bottom right so this was the perfect spot. I used a mix of the Chipboard Title Stickers and the Mini Puffy Alphabets. Under the title I used a sun from the Die CutEphemera.
I wanted to balance my title so to the top right of my page I stencilled some clouds and used two clouds and a sun from the Die Cut Ephemera. To finish my page I added some of the heart Puffy Stickers.
Thanks for stopping by today, hopefully you found some inspiration from my page and you have been having fun with this gorgeous collection!
Hey y’all! Laura Alberts here with a rainbow grid layout using the new Happy Days collection! I used four 3×4 photos of my child getting their hair bleached and dyed, which is a summer tradition of ours. I love the bold, vivid colors in this collection that were perfect for these photos!
Behind two of the photos I tucked frames from the specialty paper and I love the gold shimmer this gives to the layout! I added a banner on top of one and a cluster of hearts and flowers on the other. My title is from the chipboard and is added into the center of another frame.
For my journaling, I used a cut apart piece and incorporated it into the grid. For the embellishing, I stuck to small clusters around the page using fussy cut icons and ephemera. My favorite parts were the little butterfly trails and the puffy hearts!
I hope this layout inspires you to try the grid style! If you’d like to see “So Fun” come together, check out the process video below!
Hello everyone! Welcome in another month! My assignment for today was to create project with “Motherhood” theme in mind as a part of celebrating Mother’s Day. I am both a child and a mom so I could approach this topic in two ways. However, I barely have any photos with my own mom (she is live and kicking, just hates taking photos) so I decided to scrapbook my own story. When our kids are born, we usually focus on taking photos of them, all the cute feet and smiles and everything but we often forget to include us into the picture. Who can blame us? We usually look tired and exhausted when a new baby is born, with no time for any makeup or doing hair. I am one of those mothers too and with my first daughter born I honestly do not have any photo of me and her that I would scrapbook and share in the public. I remembered this lesson with kid no 2! When we came back from the hospital, I washed my hair, put some maskara and asked my hubby to take us few photos on our own couch. They are not perfect, they are not posed properly, but they are filled with all the love and tenderness a new mom feels toward her baby.
One of those imprefect photos made it to this page. Maja was only one week old here and I was still recovering but I remember this moment so vividly – the pure happiness flooding me with tears in the corners of my eyes. The prefect human I just made was finally there to be touched, held and kissed. So tiny yet so perfect.
I reached for brand new CVS collection called HAPPY DAYS. The perfect name of line to scrapbook such a precious memory. My photo has a lot of contrast and unusual color combination but I managed to find just a perfect papers in this collection. I started with white, textured cardstock quickly drawing few wonky hearts on it using very soft watercolor crayons in four colors. Some are bigger and some are smaller. My custom made background was done withing few minutes.
Next step was to cut two tags and a rectangle from A5 PAPER STACK papers to create a composition. After glueing them down to the background, I took my fussy cutting scissors and LUSH BLOOMS and FLUTTERBY papers and I cut out bunch of flowers and butterflies in matching colors.
I glued them down and went through EPHEMERA PACK to find other elements that would fit my composition. I also created a title using CHIPBOARD TITLES. Some of the words are used as they were supposed to and some of them are a random letters pulled out from other words. This way “sweet” turned into “meet”. I just skipped S and rotated W into M. Just another way to spread your possibilities of using up scrappy stuff.
I finished the design by adding few puffy hearts for more texture. I really like the color combo on this page – I would probably not think of it if not the colors in the picture. It proves how versatile HAPPY DAYS collection it! With all the colors of the rainbow, you can easily pick only few to play with.
That is all for today! thank you so much for stopping by and see you again in two weeks.
It’s Tarrah back with you and today I am sharing a new layout featuring the gorgeous new Happy Days collection!
Have you seen the gorgeous new gold foiled specialty paper in this collection? It is soooo beautiful! I knew I had to use it for a layout! I decided to document some dress up photos of my niece, adding a total of 3 photos on this layout!
Make sure you get the specialty paper in your Happy Days collection order, you won’t be disappointed!
I took the gold foiled specialty paper and carefully cut out the centres of the ‘frames’ with my craft knife, leaving just the outline of each ‘frame’. I put the centres aside in case I want to use these on a project in the future. I then took the A5 paper stack and chose 1 of each of the papers from the pack and backed all the spaces in the papers where there were no photos. My title is made up of the gorgeous chipboard alphabet stickers. I placed the title split up so that it helps draw your eye around the layout.
Once all of the spaces were backed, I trimmed down the specialty paper and adhered this piece to the ‘B’ side of the ‘Definitive’ paper to frame the entire layout. I chose a variety of the beautiful embellishments in the collection to embellish each of the ‘frames’ including die-cuts from the ephemera pack, enamel hearts and dots, fabric puffy hearts and accessory stickers. Many of the embellishments have been adhered using craft foam underneath to add dimension to the page, I love how the craft foam creates shadows and dimension.
On some of the spaces, I chose to leave the embellishments off as I felt that the paper was enough for that space. You can in the below image, I left them off the rainbow paper and the round butterfly space. I also left the orange and lemon space free of embellishments and the horizontal rectangle at the bottom as well. Some of the spaces only have subtle embellishments such as the round space with the rainbow paper, I have only added 2 enamel hearts to this space.
I love how colourful and bright this collection is and how easy it is to create pretty projects! The collection made this page come together so easily and I love how it turned out! I can’t wait to see what you all create using this beautiful collection! Make sure you get your hands on it soon!
Thank you so much for stopping by the Cocoa Vanilla blog today! I hope you enjoyed reading about how I created my layout as much as I enjoyed creating it!
Hey y’all! Laura back again with a new layout featuring the stunning new collection Happy Days! These sweet photos from our trip to Michigan over Thanksgiving were perfect for this color scheme and I just had to give them a big bold purple mat to let them pop off the page!
One of my favorite pieces in this collection are these puffy fabric hearts! They are so soft and add a sweet, whimsical feel to the page. I used them to embellish the cut-apart labels that I wrote out my journaling on.
To give my design a little extra flair, I layered some floral and icon ephemera with this “Awesome” cut-apart piece to create a dramatic title that helps focus the attention on my photos as well as accent the shape of this simple, linear design.
I hope this layout inspires you to pull out your puffy embellishments from Happy Days or any of the past collections and give them some love! To see how “Awesome” came together, check out the process video below.


 The Rainbow Bright paper made such a gorgeous background for this photo and really brought the layout to life! Once I had decided on this paper, I then matted my photo with one of the papers from the A5 Paper Stack. I adhered it to the page using craft foam in order to give it some nice dimension and to help it stand out against all of the bright colours in the background.
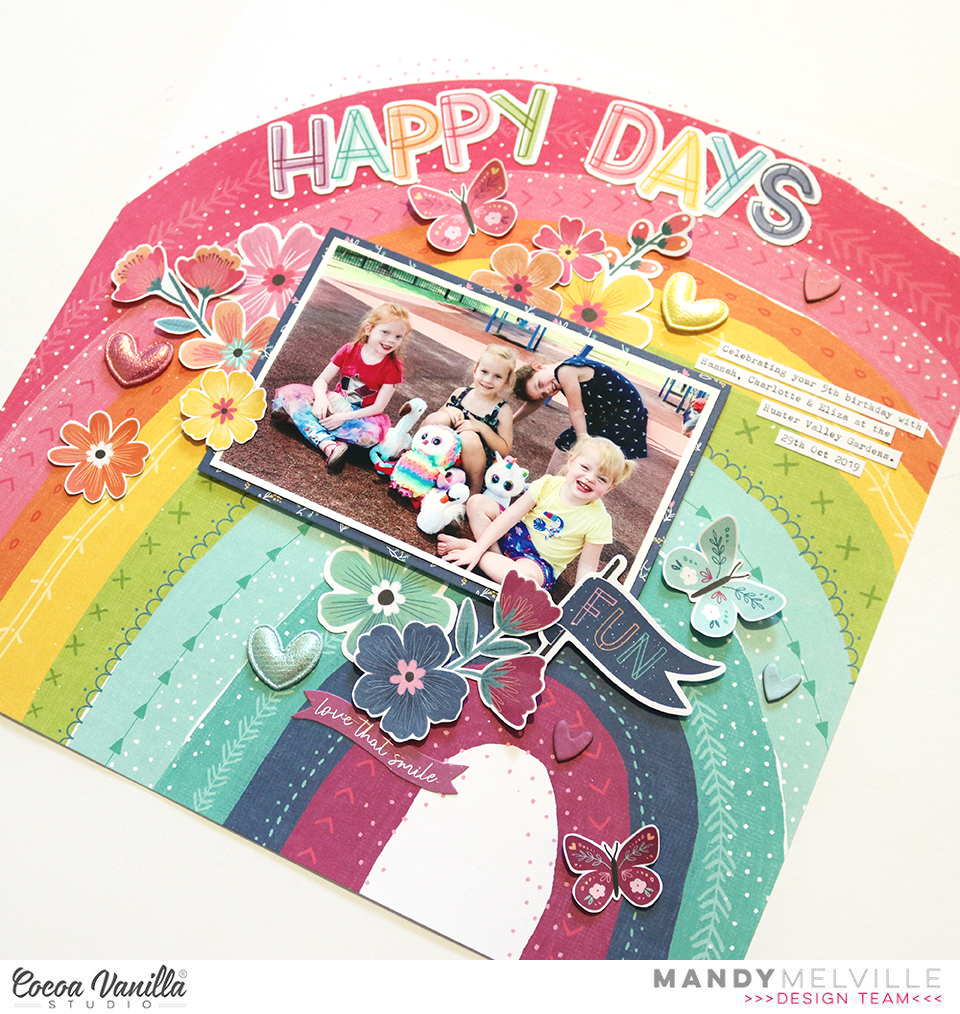 For my embellishing I decided to keep it mostly tone-on-tone. So on the pink section of the rainbow I added pink embellishments, on the yellow I added yellow embellishments, and so on. I started with a fun little cluster on the bottom right hand corner of the photo. As this was on the blue and purple section, those were the colours that I chose for this cluster. I included some florals from the Floral Ephemera pack, as well as some that I fussy cut out of the Lush Blooms paper. I also added a couple of Die Cuts to the cluster.
 Moving over to the left hand side of photo, I added another embellishment cluster using similar items that I used in the first. I tucked some of the flowers under the edge of the photo and some on top to give the cluster some dimension. How gorgeous are the Puffy Hearts?! I couldn’t resist adding one to each of my floral clusters!