I used the beautiful Heart & Home collection again!
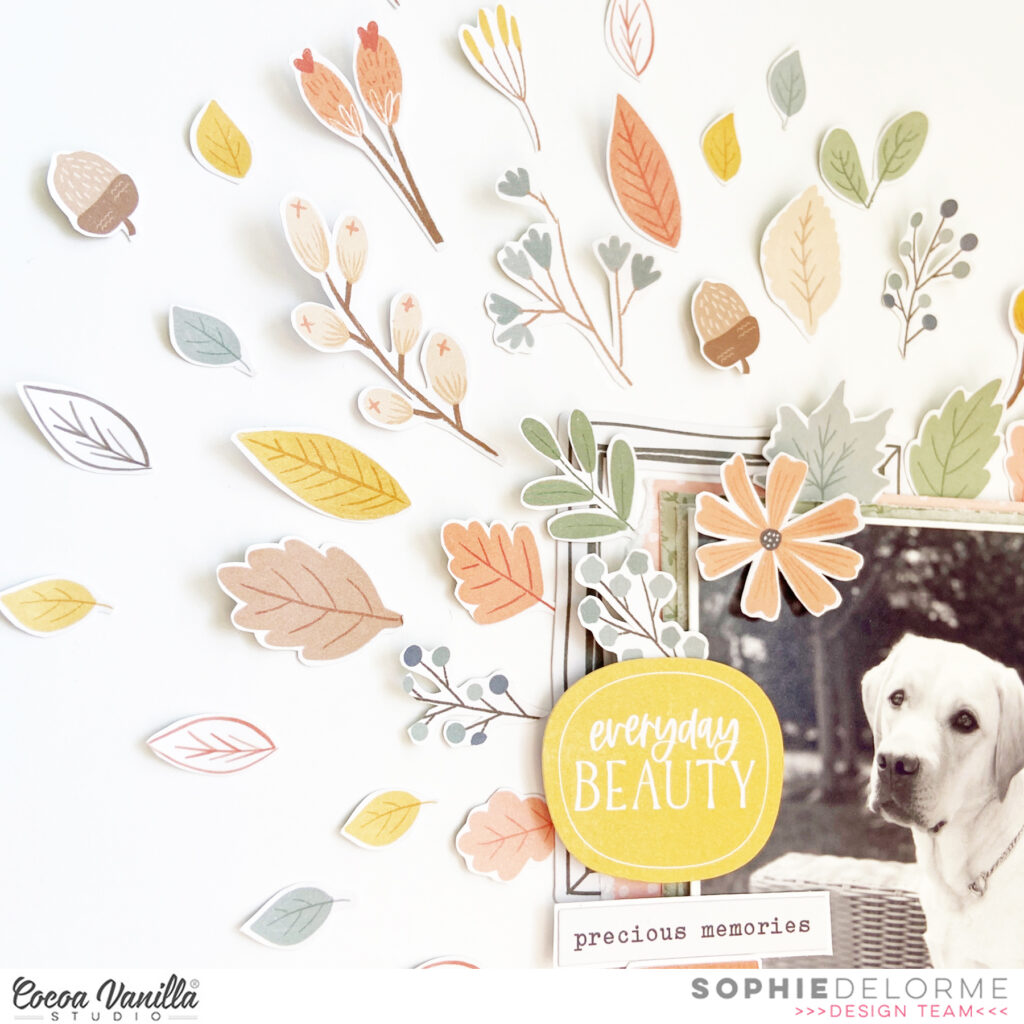
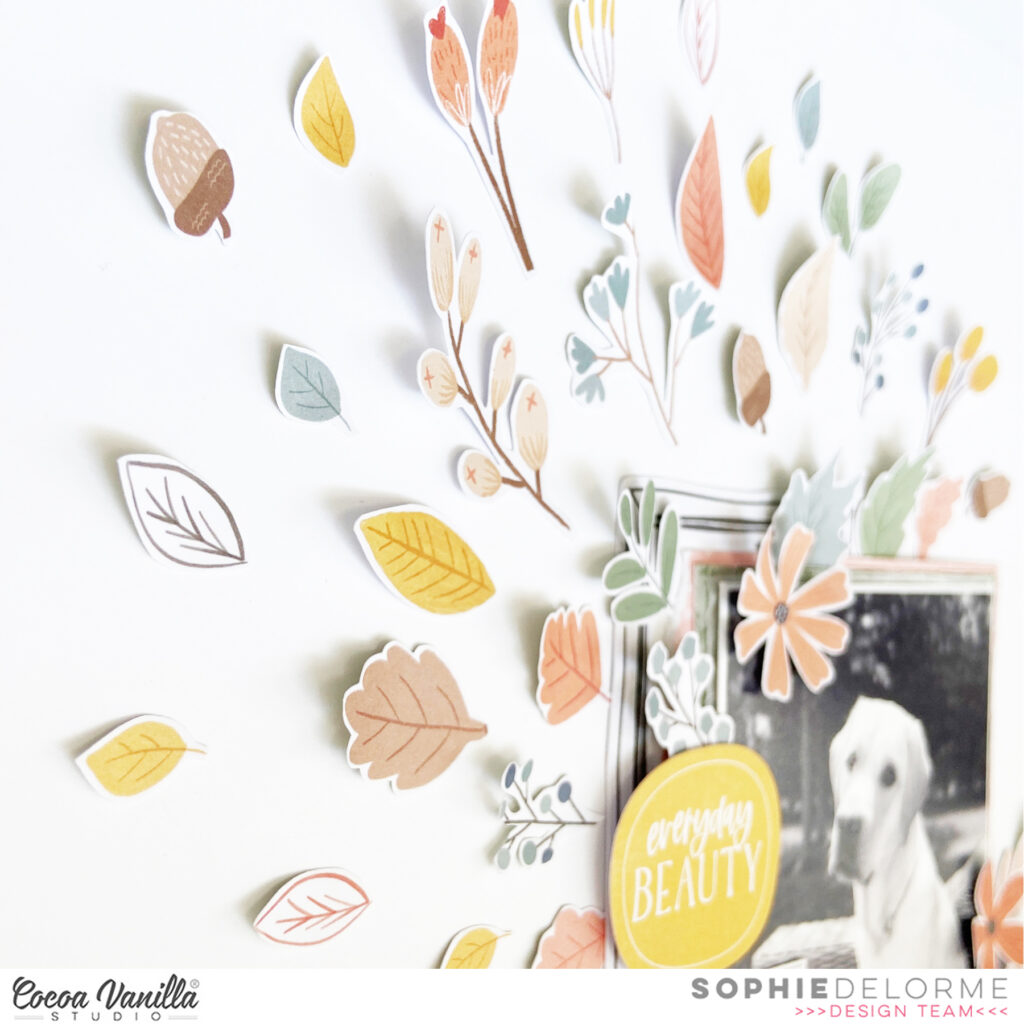
I focused on the Leaf Litter patterned paper and fussy cut numerous tiny leaves.
I centered my black and white photo on a thick white cardstock, added a few layers of patterned papers from the A5 paper Stack, tissue paper and foam adhesive.
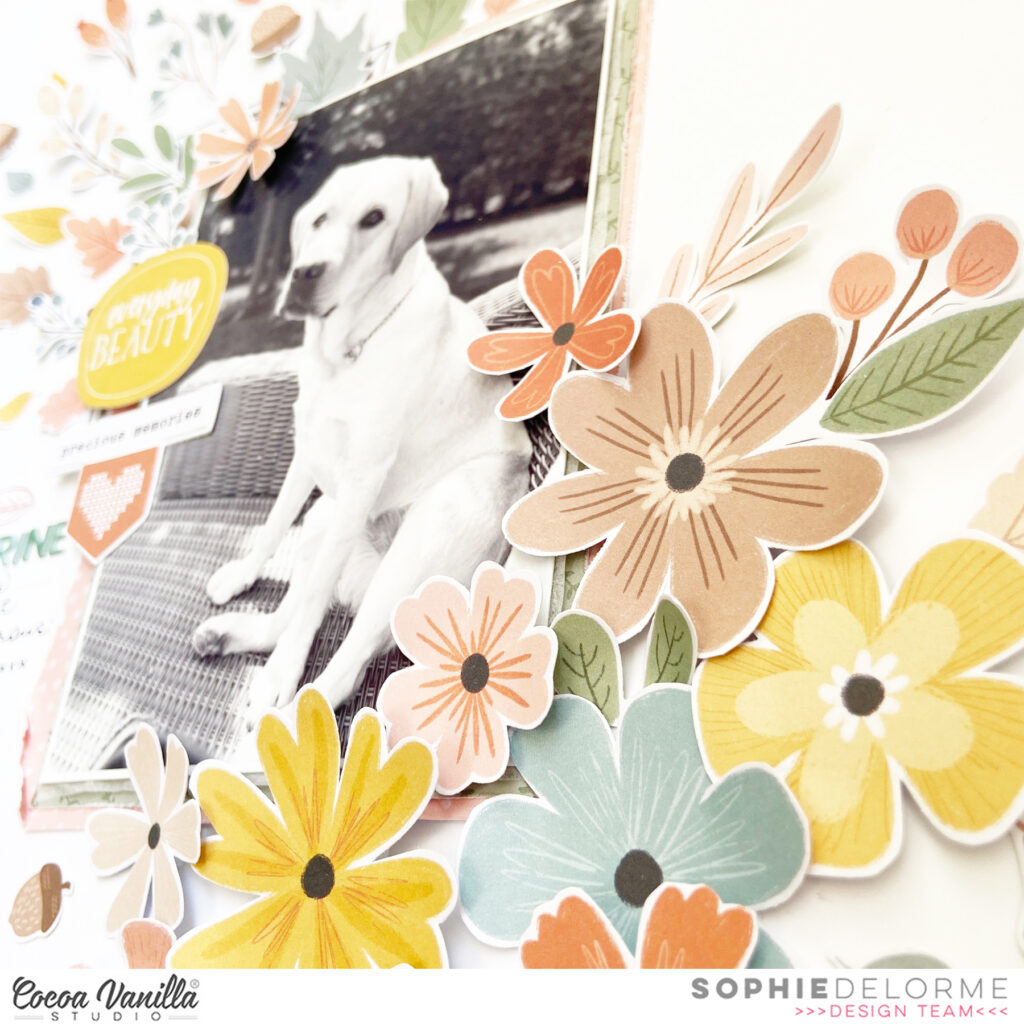
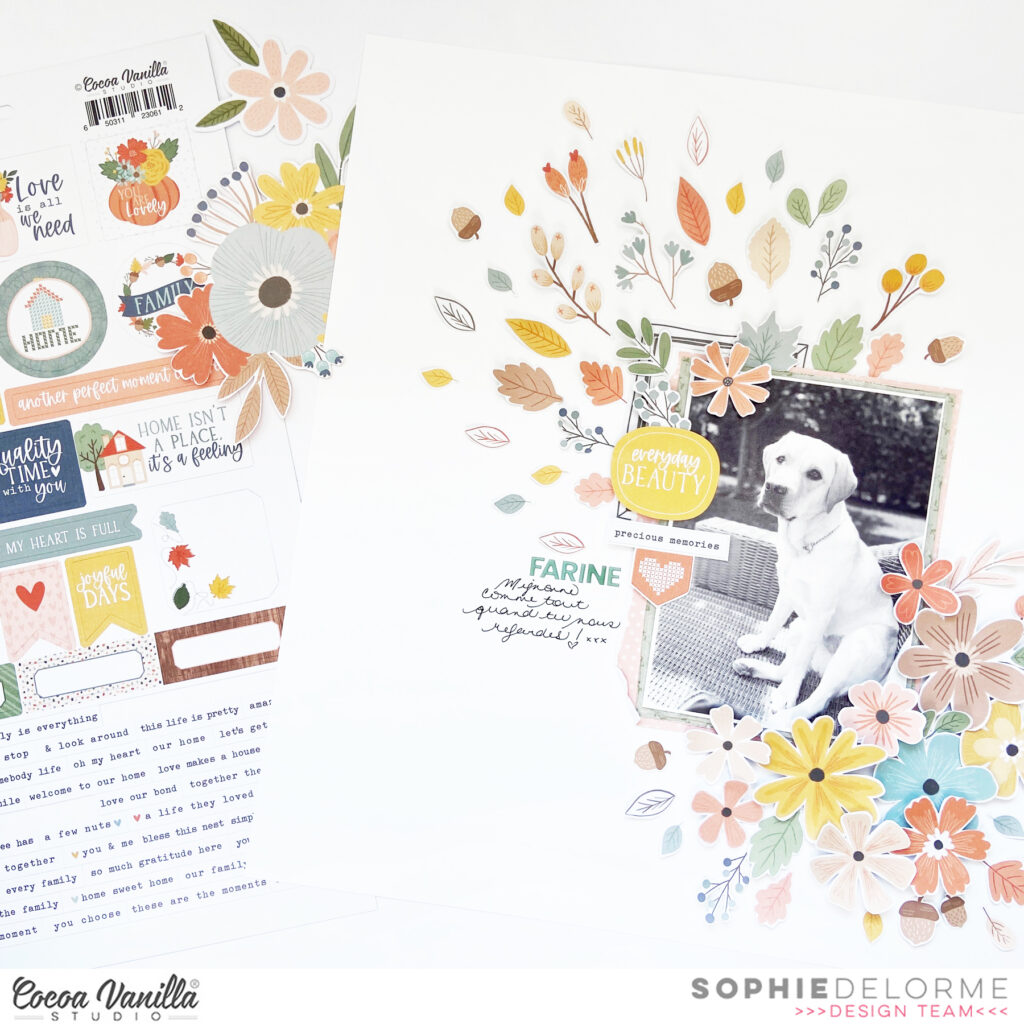
I created a big floral cluster on the lower right corner of the photo (Floral Ephemera pack), and scattered the beautiful fussy cut leaves on the upper left corner of the photo to create a diagonal design.
I placed a die cut on the photo as my title, with the name of my dog (Mini Puffy Alphabet) and a few handwritten words about how cute she looks!
Here are more close-ups:
I love the result and hope you like it too!
The layout is very easy to scraplift so don’t hesitate to give it a try!!
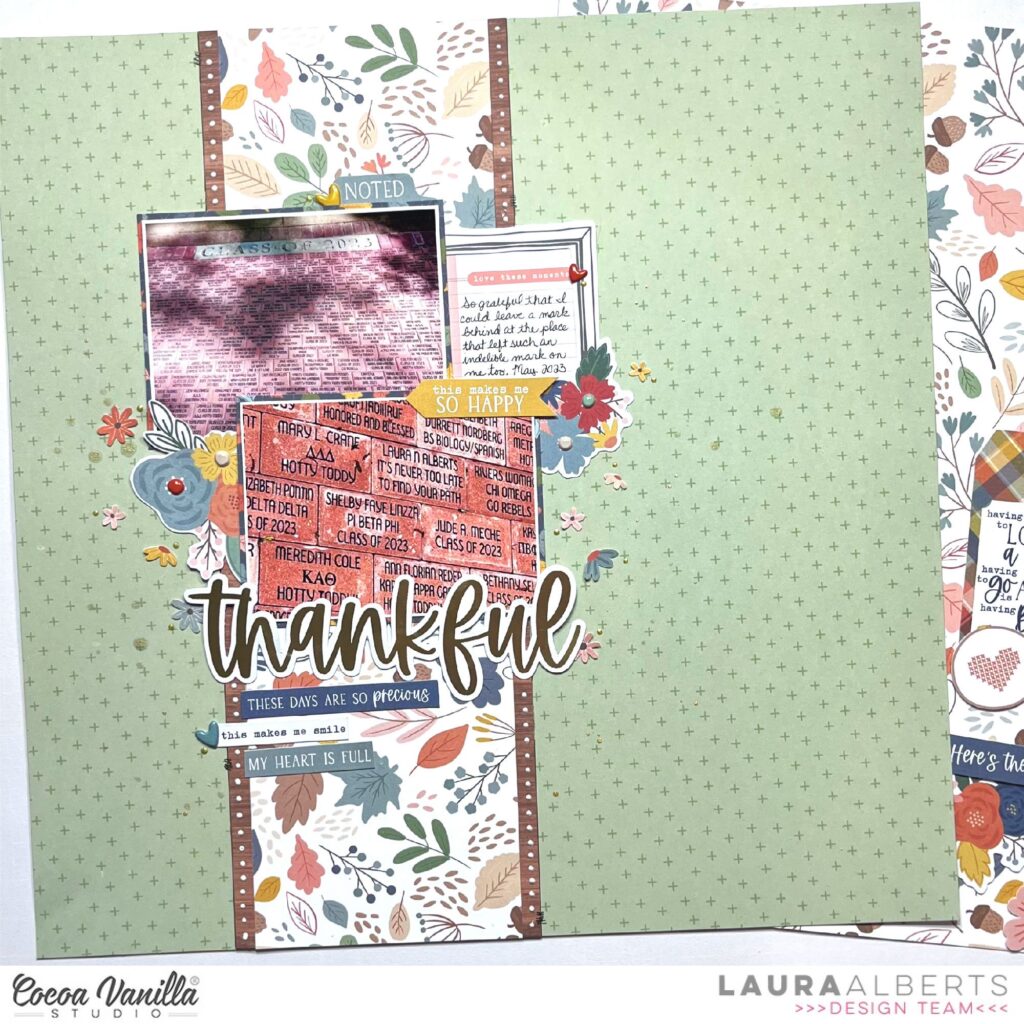
Hey y’all! I’m back again with the stunning Heart & Home collection to scrap these two photos of my brick. This is my mark on the university I attended and I am so grateful that I had this opportunity to return to school and finish my degree. To celebrate, I’m scrapping this moment with these rich colors from Heart & Home!
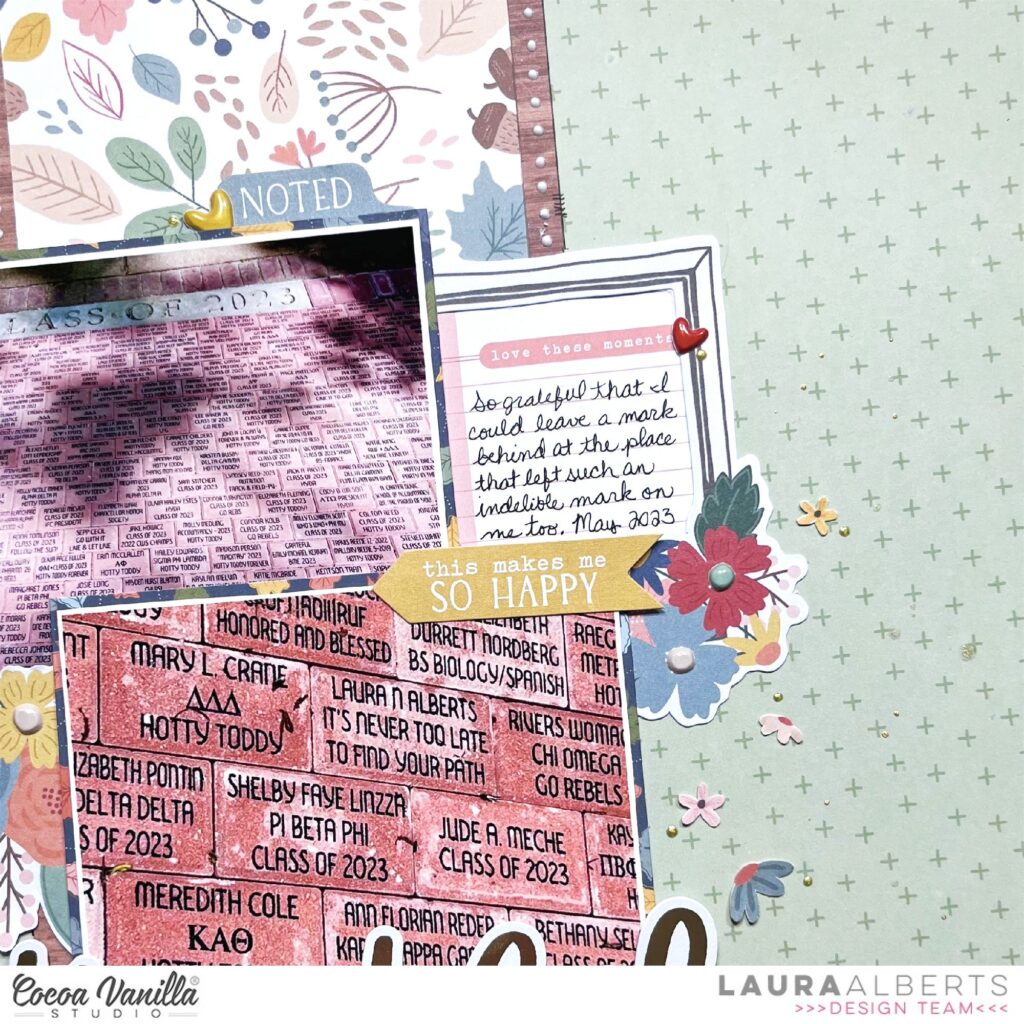
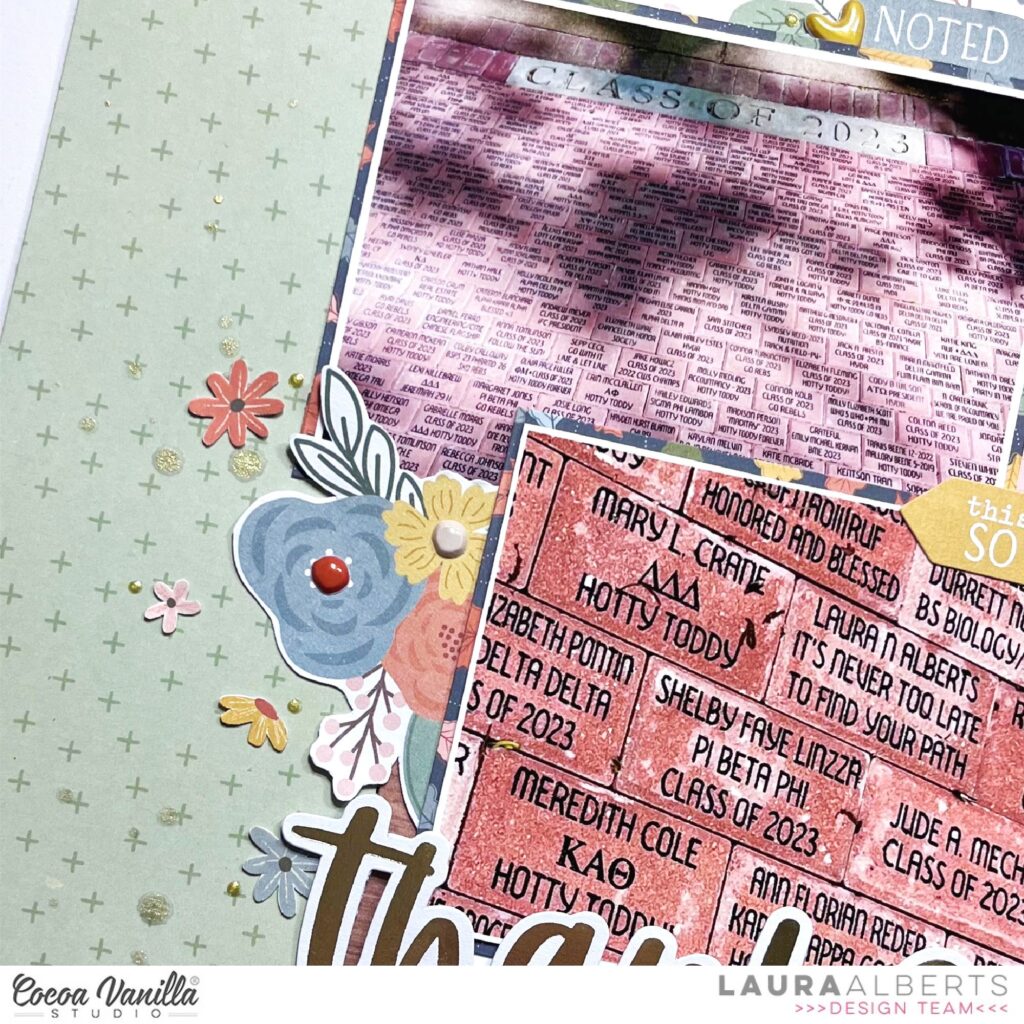
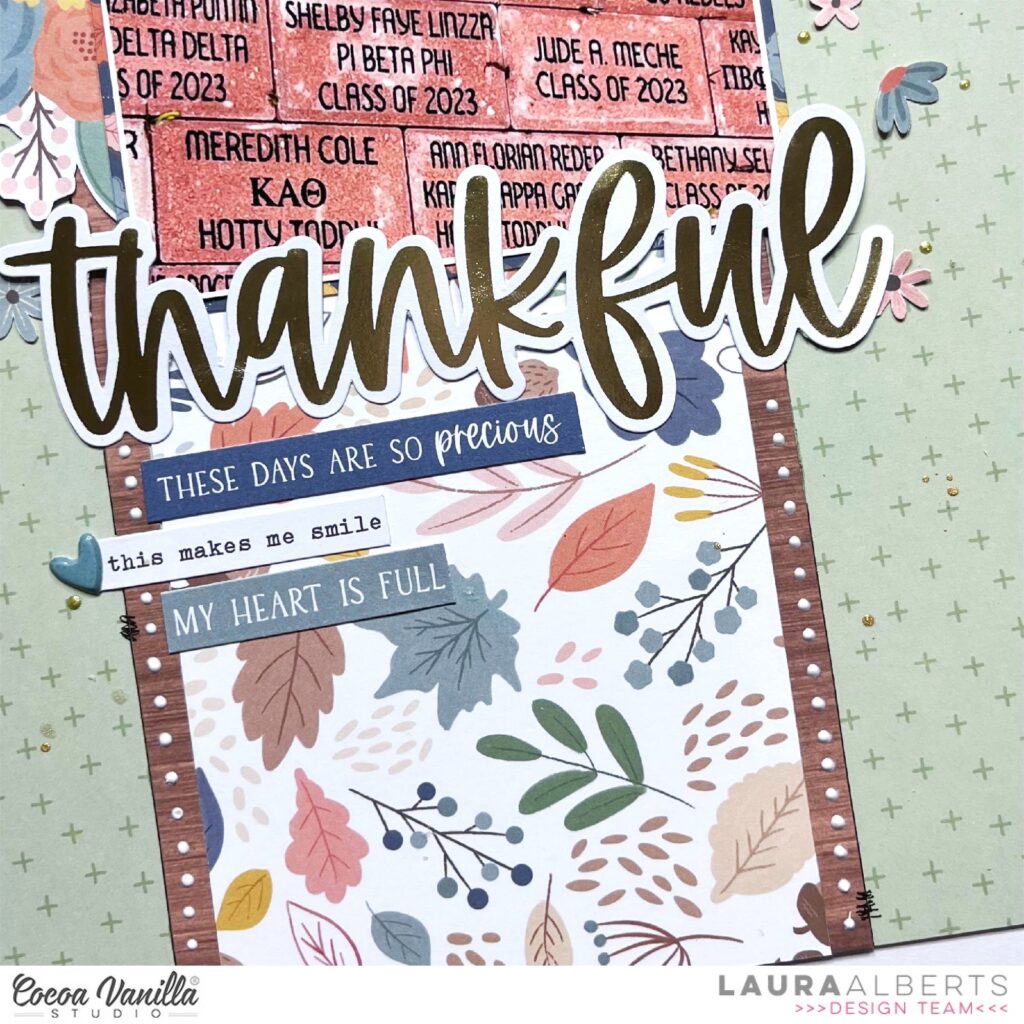
For this layout, I created a fairly simple vertical background and layered my two 3×4″ landscape photos on top of each other with clusters of florals from the icon ephemera packs tucked into the corners. With a lovely gold die cut title and these tiny fussy cut florals, I gave the page a beautifully detailed finish!
Adding in Nuvo drops was how I gave this simple vertical time to shine. Using white Nuvo on top of the woodgrain paper that edges the background gives it a purpose. The outlining of those strips makes them pop even more!
I hope this layout inspires you to find new ways to add details that give your layout a polished finish. To see how the ‘Thankful’ layout came together, check out the process video below:
Mandy here today to share a new layout featuring the stunningly beautiful Heart & Homecollection. On this layout I documented a couple of photos of my hubby and I that were taken when we visited a winery recently in Mudgee. We had such a lovely time wine tasting and then having a picnic on the grounds of the winery. The colours in the Heart & Home collection complemented my photos beautifully, so it was the perfect choice for scrapbooking these photos.
I started with the Golden Fields and the Fall Beauty patterned papers. I cut them both in half diagonally and then adhered them together to create my background. When creating a background like this, it’s best to make sure that one of the patterned papers has a less busy patterned so that your background doesn’t become too busy and overwhelm your photos. Next I matted my photos with the woodgrain paper from the A5 Paper Stack and adhered them at an angle along the join between the two background papers.
Because the background already added so much interest to the page, I wanted to keep the embellishing fairly simple. I decided on adding two floral clusters which were positioned again along that diagonal to draw the viewer’s eye down the page and through the photos. I used a combination of florals that I fussy cut out of the Bountiful paper, along with Die Cut and Floral Ephemera. I used foam tape to give the clusters some dimension and I avoided adding adhesive to the leaves so that they would lift nicely off the page.
I kept to a warm colour palette on this page, choosing the reds, pinks and oranges, and making sure to repeat these colours in both clusters to keep them looking balanced. By tucking some flowers under the edge of the photo, and adding others on top, it helps to give the cluster some extra dimension and interest. I also finished off both clusters with some Puffy Stickers.
For my title I couldn’t go past using the gorgeous Gold Foil Titles! I chose the phrase ‘Good Times’ and tucked the words in to the right of the photos. There are so many words in the pack, it makes it so easy to add beautiful titles to your pages! And who doesn’t love a touch of gold?!
Thanks so much for joining me here on the blog today! I’ll be back next month with some more inspiration.
Hello Hello! It’s Michelle back here again with a new layout share using the newestCollection – Heart& Home. The colours within this collection reminded me of a photo I took recently of Leila for her last Book Week of Primary School so I thought what better moment to document than this one.
I started with a cut file design from CUTtoYOU that I’ve cut out using white cardstock and backed with pattern papers from the A5paperstack. I used a different pattern in each of the stars, then mixed them up for the strips that shoot out between. I backed the main square with the woodgrain pattern and adhered the cut file piece to the cardstock using double sided foam tape to lift it off the background. I added a splattering of gold ink all over before finishing the page as I wanted to build the remaining embellishments around the splotches
Leila dressed up as the Mad Hatter for her final Book Week parade, and after all the effort we put into her costume, I’m happy to say she won for her class. Yay! We op shopped for most of her outfit items and spent more than we needed to on all the finishing pieces. I created a tea party cake stack with some hat boxes, a tea set and my hot glue gun, sewed a wig onto a top hat and created a sashing of threads. She had a great day, and had lots of compliments for her crazy costume.
I added the photo directly to the cut file piece without adding paper layers below as I felt there was already so much going on in the background. I wanted it to stand out amongst all the colour behind it so I raised it up a little with a piece of foam sheet and layered the ephemerapieces to the top corner.
I added another floral ephemera piece to the bottom , and another to the right of the layout to create a visual triangle of sorts.
I used the negative star pieces from the main cut file to add a little detail to the blank white space around the cut file, mixed in amongst the gold splatters with a couple of accessorystickers, ephemerapieces and puffyshapes
On the larger star of the cut file I added a mini title using the MiniPuffyAlphas. These are the perfect size for creating secondary titles on layouts as they’re not too big to distract from the main title
Which then makes way for the large title using my beloved white Alphabet stickers from quite a few years back. I added machine stitching over the top to ensure they stay adhered for many years to come, but also adds a little extra detail to the layout.
Here’s a final look at the entire layout..
Well friends thats all from me today, I hope you’ve enjoyed seeing my newest creation using the Heart&HomeCollection.
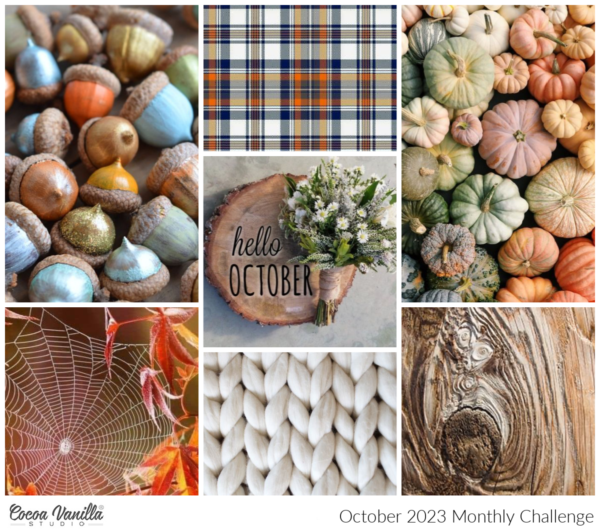
It’s Tarrah back with you and today I am sharing a new scrapbook layout created using the gorgeous Heart & Home collection. For this project, I have taken inspiration from the beautiful October mood board. I have documented an Autumn photo of myself amongst some fallen leaves, I love how my photo goes perfectly with this collection.
October Mood Board
The inspiration I took from the mood board was mostly from the centre image, I decided to replicate the woodgrain circle but added a few other layers of papers underneath to add some interest and to include some more colours. Naturally the colours from the mood board match perfectly with the Heart & Home collection. I placed most of the elements to the right of the circle also like in the centre image of the mood board.
I created the circles from 3 different papers including the Harvest paper, the Gather paper and the Framed paper. I used the ‘B’ sides of each of each of these papers. I traced 3 different sized dinner plates and free hand cut them out. Once they were cut out, I adhered them layered on top of each other onto some white cardstock and then bent up the edges to add some texture. I trimmed the white cardstock down to measure approximately 11′ x 11′. I then adhered it to the ‘B’ side of the Bountiful patterned paper. Once adhered, I machine-stitched a border around the edges to add some texture.
I layered a paper from the A5 paper stack underneath my photo and adhered it to the right side of the layout using craft foam to add dimension. I layered a frame from the ephemera pack on the left side of the photo and also some small flowers from the floral ephemera pack. On the right of the photo, I added lots of the gorgeous florals also from the floral ephemera pack. If you look closely at the florals, I have added some of the puffy stickers to the centres of the florals also. My title is made up of the gorgeous gold foil cardstock words, I chose the words ‘So Thankful’ and adhered it to the bottom of the photo using craft foam.
To balance out the heaviness of the right side of the layout, I created a cluster of embellishments that mostly included some more of the gorgeous florals. I adhered some flat and adhered some with craft foam to create different heights and dimension. I did add a die-cut that said ‘Everyday Beauty’ here also. Some more phrases were added too including the Happiness Is Homemade banner that I added under the title and the Moment Captured banner die-cut that I adhered on top of the photo. I also added the Joyful Days sticker from the Accessory sticker sheet just above the title. Lastly I added some of the puffy hearts around the page, stamped the date stamp and sprinkled some white mist around.
Thank you so much for stopping by the Cocoa Vanilla blog today. I hope I have inspired you to pull out your Heart & Home collection and create with it. Make sure to join in our October mood board challenge and submit your project on our Facebook Page!
It’s Sophie on the blog with a new layout to share!
I used the beautiful Heart & Home collection again!
I started with a white background and placed two patterned papers; a wood grain and a soft pink polka dot (both come from the A5 Paper stack) in the center of the page, stitching them down on the cardstock. I centered a photo on the polka dot paper, added tissue paper and adhesive foam to make it stand out a little bit more.
I fussy cut numerous florals from the 12×12 “Bountiful” paper and placed them around the photo.
I wrote down my journaling on a beautiful frame, used the Heart & Home Gold Foil Words for my title and scattered plenty of cute fussy cut butterflies flying around the page.
Finally, I tied everything together with a huge bow created from ribbon in my stash.
Here are more close-ups:
I love the result! Just can’t get enough of this wonderful collection!
Mandy here today to share another layout featuring the gorgeous new Heart & Home collection. I absolutely love the beautiful colours in this collection and how versatile it is! For my layout today I chose to document some photos of my son from a day that we spent getting out in nature together.
I started my layout with the striped Harvest paper as my background. On top of that I layered a piece of the woodgrain Framed paper which gave a neutral area for me to add my photos and title. Down the left hand side of the page I created a border by layering the Fall Beauty and the Leaf Litter papers and finishing it off with a punched honeycomb border.
To give some extra interest to the photos, and to help them stand out from the background, I added some patterned paper layers behind them. I also adhered the photos at a slight angle which gives the layout a more whimsical feel rather than being too structured.
When it was time for embellishing, I couldn’t resist fussy cutting some of the beautiful floral clusters out of the Bountiful patterned paper. I added the first cluster in the top left hand corner of the page, layering some smaller florals from the Die Cut Ephemera pack with it, as well as a small banner sticker to finish it off.
Next I added another floral cluster in the bottom right hand corner of the page. This balances out the first cluster and gives the layout a diagonal flow, drawing the viewer’s eye down through the photos. In this cluster I again used more fussy cut florals, as well as a journaling piece from the die cut ephemera pack.
For my title, I took inspiration from the ‘Family’ die cut pieces in the ephemera pack. I love that each letter is a different colour, and decided to create a similar style title using some metal alphabet dies from my stash. I cut each letter out of a patterned papers from the A5 Paper Stack and combined it with Mini Puffy Alpha Stickers. The title ‘Love this Kid’ seemed like the perfect sentiment for these photos!
I finished the layout off with a couple more stickers and the ‘Together is Better’ piece that I fussy cut out of the Gather patterned paper.
Thanks so much for joining me here on the blog today. I hope that you enjoyed taking a look at my layout and found some inspiration!
Hey y’all, Laura Alberts back again with a fun spin on a grid layout. For these four 3×4 inch photos from a camping trip, I puzzled the pictures together with ephemera and cut apart pieces to create a collage in the center of my page. The border around the outside gives the collage a little bit of structure and helps it feel cohesive.
In blank spots that were a little too narrow for additional embellishments, I added a row of chain-stitching with ombre embroidery floss that coordinated with the Heart & Home collection. These sweet puffy heart stickers were the perfect accent for this banner piece!
The floral ephemera pack is always one of my favorite parts of a new collection and these darling flowers had to make an appearance on my layout too! The hand-stitched elements work beautifully with the cross-stitch designs on the cut aparts that I used for titles.
I hope this layout inspires you to try a new design with multiple photos! If you’d like to see how “Family” came together, check out the process video below.
Hello everyone. It’s Anna here with my newest layout, made with brand new “Heart & Home” collection. I am a big fan of fall projects and this line is just perfect for making one (or two :) ). Autumn is just starting to appear this year and leaves are still green but I had a perfect picture from my last year walk in the forest. Sun was low and it was shining through the leaves and tree trunks creating beautiful halo and rays. It looked so magical, like straight from the fairy tale. I snapped few photos enjoying this little wonder of nature.
I knew I wanted to use many pattern papers in this project making die cut leaves. I chose nine different patterns in brown, red-ish, orange, yello and green colors. Some of them are 12*12 papers like “Bountiful”, “Leaf litter”, “Fall beauty” and “Gather” and some are from A5 Paper Stack.
After cutting leaves I added some Distress Oxide inks on the white backgroud creating strips of color, that blend together. It’s a sort of fall halfrainbow. With the background done, I could add leaves using color on color technique. I only applied glue in the middle, and run through the rows with sewing machine and white thread. This way I was sure my leaves will stay in place.
My title is a mix of Mini Puffy Alpha Stickers and letters from word “family”, you can find in Ephemera Pack. I used original F, A and L letters and created second L using first one as a stencil.
At this point my layout was already colorful and full of texture so I only added few embellishments. I searched through Ephemera Pack to fing all the fall related elements and placed them color on color, highlighting the stripes. I found mugs, some leaves and few inscriptions. I also reached for 6*12 Accesory Stickers to embellish area around the photo.
Final step was adding tiny, cute Puffy Stickers, also using color on color technique. Creating this page was so much fun and a perfect combination of mixed media products and paper embellishments. My favourite kind of layout.
That is all for today! Thank you so much for spending your precious time with me. See you in October!
I have a new layout to share today created with the lovely Heart & Home collection !
I based my design on a black and white photo of my daughter Sabrina walking on a bridge this summer. I “continued” the road with white Cardstock and added a yellow border with the “Gather” patterned paper. I hand stitched on the papers with matching thread, and placed everything on the beautiful “Leaf Litter” green paper.
I cut the page into a 11 inches square and mounted it with adhesive foam on a 12×12 white cardstock on which I scored a few lines, as shown in a close-up here:
I decorated around the photo along the road with Die Cuts from the Die Cut Ephemera pack and fussy cut flowers and leaves out of patterned papers.
My title is a little banner from the Die Cut Ephemera pack. I drew, cut and stitched little clouds around the photo as the finishing touch, and handwrote my journaling with a brown pen.
Here are more close-ups:
This is a very different design for me but I am so happy of how it turned out !
I hope you like what you see and are being inspired by this gorgeous collection !


 I kept to a warm colour palette on this page, choosing the reds, pinks and oranges, and making sure to repeat these colours in both clusters to keep them looking balanced. By tucking some flowers under the edge of the photo, and adding others on top, it helps to give the cluster some extra dimension and interest. I also finished off both clusters with some Puffy Stickers.
 Thanks so much for joining me here on the blog today! I’ll be back next month with some more inspiration.


 To balance out the heaviness of the right side of the layout, I created a cluster of embellishments that mostly included some more of the gorgeous florals. I adhered some flat and adhered some with craft foam to create different heights and dimension. I did add a die-cut that said ‘Everyday Beauty’ here also. Some more phrases were added too including the Happiness Is Homemade banner that I added under the title and the Moment Captured banner die-cut that I adhered on top of the photo. I also added the Joyful Days sticker from the Accessory sticker sheet just above the title. Lastly I added some of the puffy hearts around the page, stamped the date stamp and sprinkled some white mist around.


 I started my layout with the striped Harvest paper as my background. On top of that I layered a piece of the woodgrain Framed paper which gave a neutral area for me to add my photos and title. Down the left hand side of the page I created a border by layering the Fall Beauty and the Leaf Litter papers and finishing it off with a punched honeycomb border.
 To give some extra interest to the photos, and to help them stand out from the background, I added some patterned paper layers behind them. I also adhered the photos at a slight angle which gives the layout a more whimsical feel rather than being too structured.
 Next I added another floral cluster in the bottom right hand corner of the page. This balances out the first cluster and gives the layout a diagonal flow, drawing the viewer’s eye down through the photos. In this cluster I again used more fussy cut florals, as well as a journaling piece from the die cut ephemera pack.
 For my title, I took inspiration from the ‘Family’ die cut pieces in the ephemera pack. I love that each letter is a different colour, and decided to create a similar style title using some metal alphabet dies from my stash. I cut each letter out of a patterned papers from the A5 Paper Stack and combined it with Mini Puffy Alpha Stickers. The title ‘Love this Kid’ seemed like the perfect sentiment for these photos!


