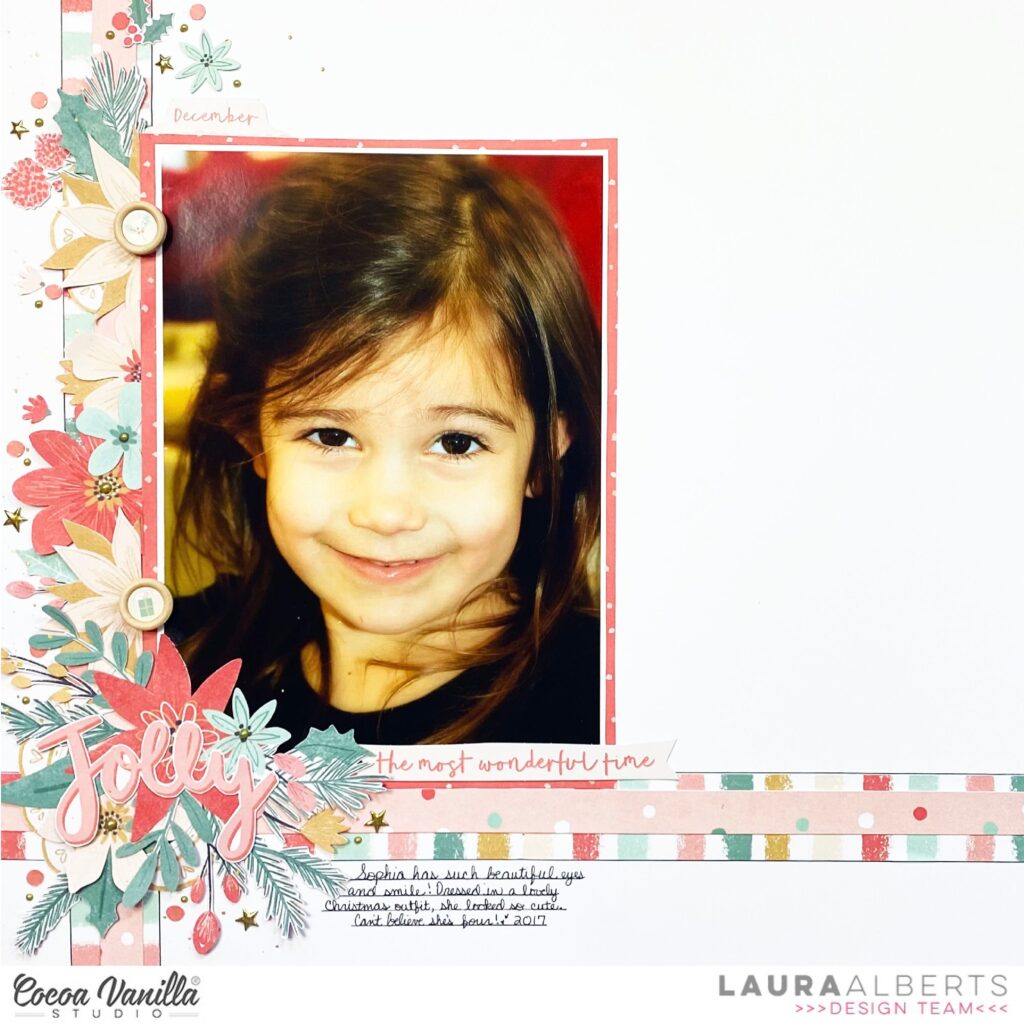
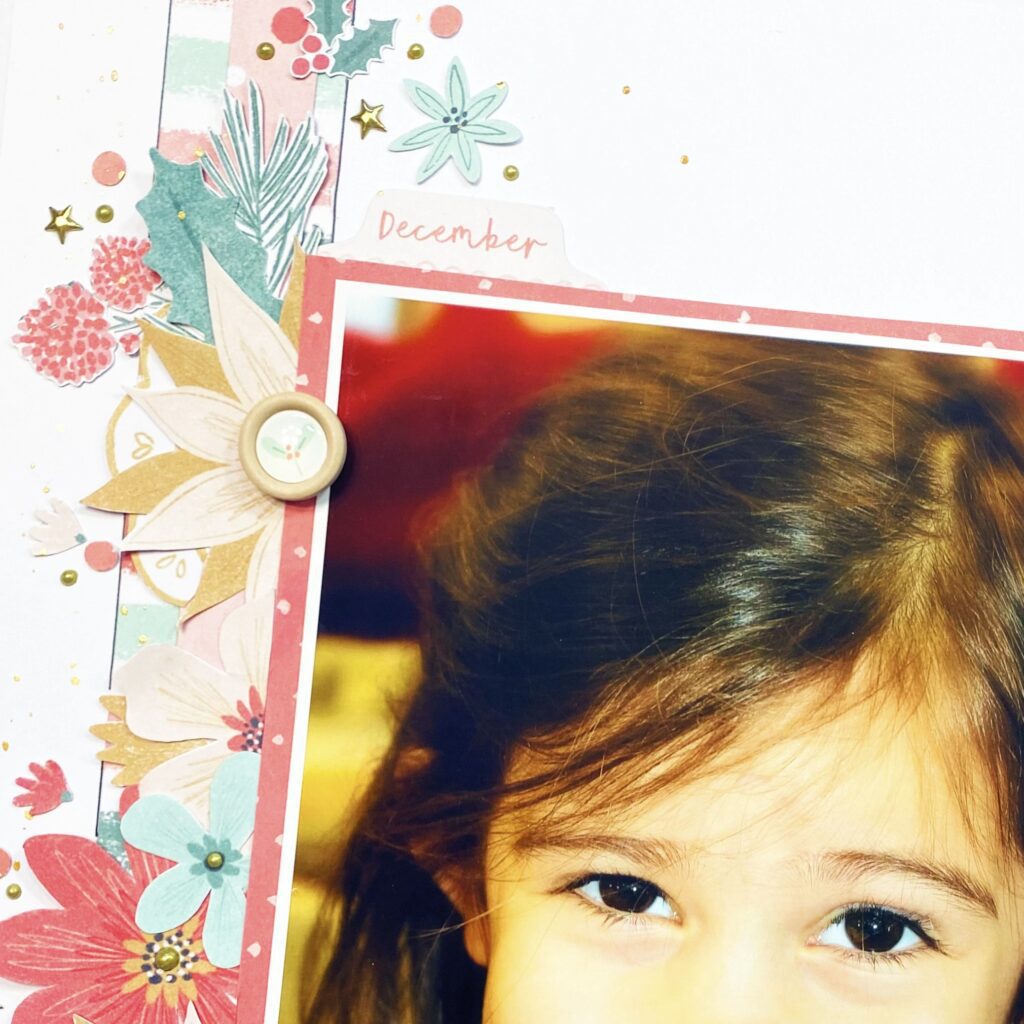
Hi y’all! Laura Alberts back again with a Christmas layout with the gorgeous new Joyful collection. This layout features a large 5×7 inch photo of my youngest daughter, so I opted for a simple L-shaped design to keep the focus on that lovely smile of hers! I cut two large strips of the Holly Days patterned paper and then two smaller strips of the Feeling Festive paper. Running these strips both vertically and horizontally creates a perfect place to tuck my photo where they meet.
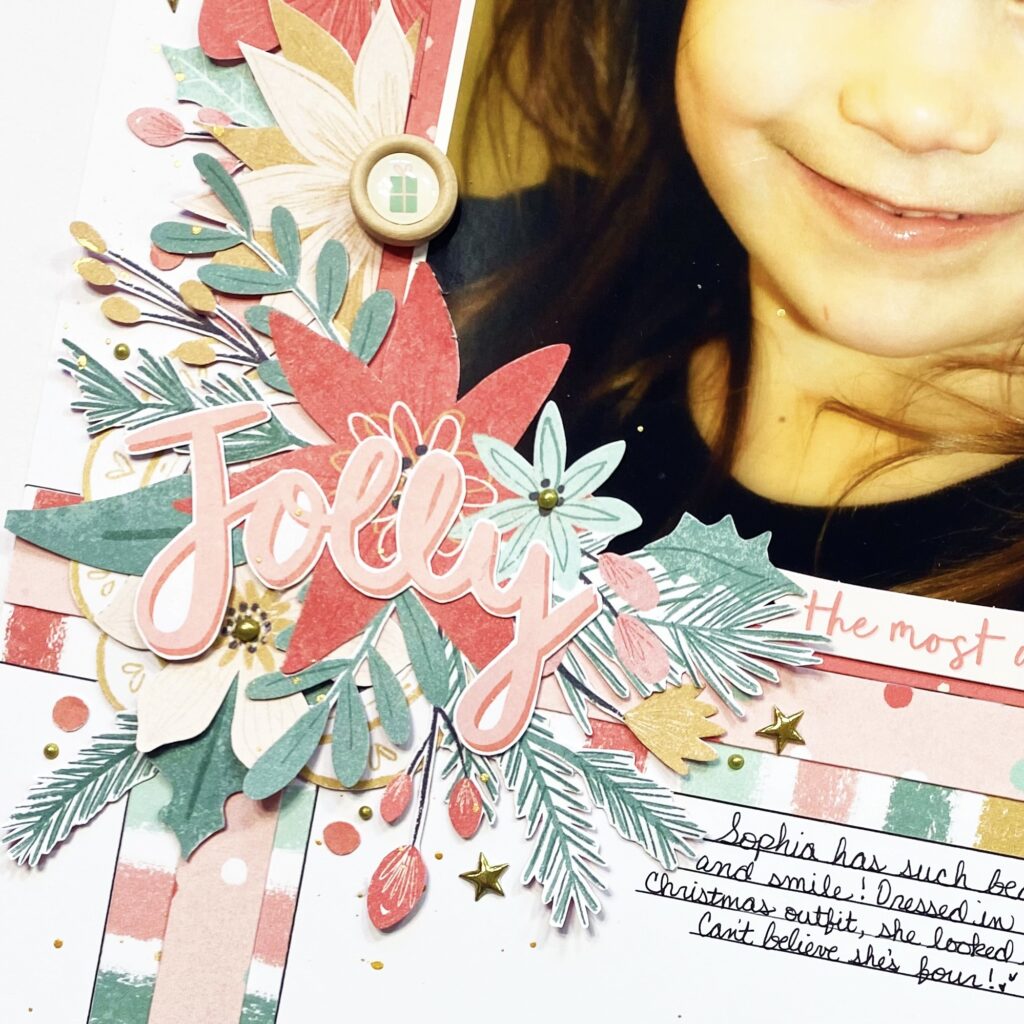
I fussy cut an entire 12×12 of Tis the Season patterned paper for these stunning florals, even the florals that run off the edge. I use these half pieces for layouts just like this one to tuck behind the photo! This helps me get the most from my fussy cut florals without having to hide half of a floral behind the photo. On two of the florals, I added wood buttons for added texture and dimension on the page. I filled in most of the large florals’ centers with gold Nuvo Drops for a little extra shine!
For my title, I layered the ephemera ‘Jolly’ over my largest floral cluster. Underneath of the floral, I tucked a ephemera frame for added detailing. My favorite part was adding these tiny little stars from the gold puffy word phrases. They gave the perfect scattering detail to the clusters!
If you want to see how ‘Jolly’ came together, be sure to check out the process video below! I hope this layout inspires you to try scrapping a large photo too!
Welcome crafty friends! It’s Anna here with my newest page. I decided to let the christmas go (even though I stil have plenty of “Joyful” collection on hand) and created a generic type of page, where I could play with colors. I was missing it so much! It’s not a vivid, summer rainbow as I used a bit muted and dreamy “These days” collection, but it still warms my heart. I am total sucker for colors. Inspiration for this page was very simple – pie chart! It’s not the first one I created in this style and for sure not last. This composition is great if you like mixing pattern papers. You can even use up some paper scraps!
This page is based on “These days” collection mostly but I also mixed in few other pattern papers, as I needed some green and navy to finish the rainbow order. I reached for some “Merry and bright” paper scraps with red and white stripes and green chequered pattern. I also added “Up in the clouds“, “Sun shower” and “Happy place” patterns from “Daydream” collection. Orange “Wall of fame” and mint “Family ties” along with some patterns from Paper Stack come from “These days” line.
The easiest way to make a pie chart type of layout is to take some unused 12*12 paper or a failed background, mark the point you want your triangles to meet and think of a number of triangles you want to include. Then, simply start drawing lines starting at the chosen point to the edges of the page using ruler. After you are happy with how it looks, cut out triangles (don’t forget to number them first so you won’t be lost later) and use them as a stencils on pattern paper. This is exactly what I did here. You can save those triangles for any future pie chart layout!
After parts of my pie chart were ready, I glued them down over the white sheet of paper. I also added stitching along each side for more texture. Best spot for the photo is in the middle of the pie chart as the eye is naturally drawned to this point by all the lines. My paper pieces are arranged in rainbow order but you can create anything you want! Use only shades of one color or mix two colors. There are many possibilities. Next step was to decorate everything with lovely flowers from Floral Ephemera Pack. They come in many colors, shapes and sizes, along with some leaves and twigs, that you will be able to make many amazing projects with just one pack of them. I placed my flowers color on color enchancing the rainbow order. I also fussy cut few butterflies from “Take flight” paper and added thm to composition.
Few more transparent stickers and puffy stickers here and there and a title made with super cute puffy alpha stickers and the page was done. I don’t think I will ever get tired of making projects like this one – full of colors and flowers, with a girly vibe.
That is all for today friends. Thank you so much for stopping by and see you in two weeks!
I am sharing a layout created with the colorful Happiness collection !
I played with some Lindy’s Stamp Gang magical powders and shakers and a lot of water on a thick white cardstock for a colorful mixed media background. I let it dry completely.
I went for a vertical design today, and my starting point was the little pink frame that comes in the Die Cut Ephemera pack.
I created several frames and squares that I placed together under and around my photo. I machine stitched on a few of them.
I printed my photo in color as it is quite neutral. I added tissue paper and adhesive foam behind it.
I printed my journaling directly on a rectangle cut out of a paper from the 6×8 Paper Pad.
I used the Happiness Die Cut Titles for my title and subtitles.
Finally, I embellished the page with a few beautiful Die Cuts. I fussy cut the blue butterfly out of the “Little Things” patterned paper. I added a Flair Button, a few Clear Sticker hearts and some sequins from my stash.
Here are more close-ups:
I love the end-result and hope you do too !
Thank you for stopping by, and I will see you again soon !
Hey y’all! Laura Alberts back again with a hand-stitched layout featuring the stunning These Days collection! For this beautiful title, I used a stitching cut file from Paige Evans. Instead of using an electronic cutting machine, however, I printed out the image and used a paper piercer to poke the holes by hand. Then, using a variety of coordinating colored floss, I chain-stitched the title. While three days of stitching was certainly a time commitment, I think the end results were worth it!
I backed the entire layout with a stunning wood grain paper called Pretty Posies and then reached into the A5 paper stack for these beautiful banners and mat behind my photo. The florals I’ve clustered on either side of the photo are fussy cut from the Home Grown patterned paper as well as the floral ephemera pack. Even those tiny little scattered florals are fussy cut! I do enjoy prepping new collections by fussy cutting all the florals first!
On opposite sides of my stitched title I added florals from the ephemera pack that I fussy cut the white border off of, with little fabric hearts for a bit of added texture. That is the name of the game with this layout! Stitching is a brilliant way to add texture and dimension to a layout without adding a lot of bulk to your albums! I finished off the layout with gold Nuvo drops around the clusters for extra detail and a bit of gold ink splatter. My favourite part was adding my journaling to the ‘O’, such a fun and unexpected place for journaling!
If you’d like to see how ‘Memories’ was created, be sure to check out the process video below! I hope you will give hand-stitching a try and see how you can elevate your scrapping with added texture!
Hello scrappy Friends. It’s Anna here with my newest page. I still haven’t finished scrapbooking christmas photos so the bag with “Joyful” collection is still on my desk. I had this one, fun photo of my puppy spending time under the christmas tree that I wanted to use on the project. It was such a funny moment, when he found a perfect spot for the nap there, when all the presents were handled and christmas was done and dusted. All I could think of while looking at him was a Mariah Carey’s song “All I want for christmas is you”. He was like a self wrapped gift :) It have me an idea of a layout title.
I gathered all solid patterns from “Joyful” line, going through both 12*12 sheets and A5 paper stack. I decided to use “Deck the halls“, “Feeling festive“, “Making spirits bright” and “Tis the season” plus few small papers fromt the stack. Next step was to hand cut the letters for the title. I haven’t sketched anything so each letter if different. I tried to keep them around 5 cm tall. If you want to recreate my idea and you don’t feel confident enough to cut them by your own, you can reach for bigger alpha dies or digital die cutting machine. My desk is a total mess right now, swamped with few projects in progress so I didn’t have room for the Cameo to put up.
I tried few pattern papers for my background but they were mixing with the patterns I used for letters so I decided to use sheet of kraft cardstock instead. I arranged the letters and the photo and glued everything down. I only applied glue in the middle of each letter to be able to tuck something behind them if needed.
Next step was to decorate everything with ephemera pieces and stickers. I went through ephemera pack, chipboard stickers and puffy stickers to choose matching elements. I found a tall gift and I replaced one of the I letters with it! Am I brilliant or what? :D I also fussy cut some starts from “Making spirits bright” and added them to composition. You all know how I love papers with elements that can be easily cut out!
Here you can see my precious gift from up close. Isn’t he the cutest? My final step was to add few wooden buttons and golden splatters. To my surprise, this page came together really fast. Cutting the letters took me less than half an hour and placing all the elements another half making it an one hour page. I had a lot of fun with the big title and I will for sure revisit this idea for some other topic. It’s also a perfect opportunity to use up smaller paper scraps or make a page when you run our of full 12*12 papers and have only leftovers.
That’s all for today. Are you still creating christmas themed projects like me, or after the December is done, you no longer find it enjoyable? Let me know in the comments. Thank you so much for stopping by and see you in two weeks.
Hello everyone. It’s Anna here with my last page in 2021! Staying in christmas mood I scrapbooked fresh from the oven photo of my girls under the christmas tree. I took it on Christmas Eve, that is the most celebrated day of christmas in Poland. We eat special supper that day and Star is bringing gifts to everyone, who was nice. If you thought it’s time to hide your christmas papers and collections until next year, hold your horses!!! Use them to make few pages with new photos and all the memories, that are still fresh in your head. Write everything down to read it next year. I don’t like adding journaling to my pages, where it’s visible so I usually write few words on the back of the layout. “Joyful” collection is just perfect for all the christmas photos – so cute, fresh and modern.
This layout was inspired by all the gifts under the chtistmas tree. I looked at them and thought it would be fun to mimic boxes on page and add photo as a gift tag. I went through the “Joyful” pattern papers and choose two that look like a wrapping paper: “Advent” and “Feeling festive“. I also added strips of red “Tis the season” as a ribbon with a dimensional bow. Smaller gift is decorated with strips of mint paper from A5 paper stack. My background paper is a little more busy. I decided to use “Making spirits bright” with super fun stars.
I printed my photo vertically and trimmed it to the size of rectangle, cutting of two corners with my tag corner punch. You can also use dies to cut this shape or just scissors. Next step was to make a hole and add circle of pattern paper as a decorative element. My photo tag was ready. Just make sure, that you picked the right photo that can be trimmed down to this quite narrow shape. You don’t want to cut off piece of head or whole arm of the person on the picture.
I decorated the photo and area around it using golden phrase stickers, chipboard stickers and few elements from ephemera pack. I didn’t want to overdo it so it still looks like a gift wrapping. Tag seems like hanging loose but I glued it down to the background so it won’t be destroyed while storing in the pile later.
I also added smaller tag to the other gift, this time without any photo on it. They are both decorated with bows that I made with strips of paper. You can use proper die if you have one but I was just too lazy to reach for it. I trimmed my bows with the scissors without measuring anything, trying to keepmthem simple. You can replace the paper with actual ribbon and make real bows with it. They will be harder to destroy while storing the layout.
I finished my page adding few stars fussy cut from “Making spirits bright” paper mixing them with gold glitter puffy stars. Thay are so cute and can be used whole year round, not only for christmas projects. This page came together pretty quickly thanks to my inspiration, found under the christmas tree. I had a vision in my head and just went with it.
You can easily recreate this page as a birthday one too! Just change patters and embellishments. You can add more gifts and more photos as a tags if you shrink them.
That is all for today and for this year. Thank you for stopping by and see you in 2022!
Hey y’all! Laura back again with a super sweet baby layout featuring the new holiday themed Joyful collection. I love to challenge myself to scrap outside the theme as much as possible to stretch my creativity and get the most of my favourite collections. One of the inspirations for this layout was the adorable animal icons on the Magical Moments patterned paper. I just had to fussy cut them out and create a mobile with them above these sweet photos of my daughter cuddled up with me. To create the hanging lines, I simply free-handed some loops and then hand-stitched them with floss.
I added several fabric stars and wood buttons amid the hanging animals to fill in the gaps and give the impression of a sky. Both the mobile and the night sky are imagery that fits these sleeping baby photos perfectly and really help to set the mood for the overall page. On the top left of the photo, I pulled in a few stickers from 6×12 sticker sheet as well as a scattering of these puffy stars from the puffy titles. Love the pop of gold in this collection, it’s just the perfect addition to the soft color tones.
Along the right and left side of my photos, I added a cluster of florals that I fussy cut from the A5 paper stack, including these teeny tiny ones that I use to add details around the outside edge. To add a bit of definition to this page, I outlined the main photo mat with a pen. The finishing touches to this lovely layout was a puffy gold title, journaling, and splatters. Overall, I think I captured the soft, sleepy mood perfectly with the Joyful collection and I can’t wait to see what other photos I can scrap with it!
I hope this layout inspires you to scrap outside the theme too! If you’d like to see how Our Memories came together, check out the process video below.
Hello crafty Friends. It’s Anna here and today I want to share with you super cute baby page made with not so baby themed “Joyful” collection. This brand new line was designed for christmas and it’s filled with with patterns and elements that correspond with winter and December celebrations. Howver, when I say all those cute critters like deer, fox and bunny, I knew I have to make a baby page. Let’s be honest – I am a bit of Grinch when it comes to christmas projects. I love the season but I prefer scrapbooking summer and travels. Most of christmas collections has very traditional color palette and the same motiffs. It kind of gets boring after a while. That’s why I was so exctited to see “Joyful” collection. This line has such a beautiful colors and many versatile patterns so I knew I will be able to use it whole year round.
As a mom of two lovely girls I always find a photo to scrapbook with any cute collection. I picked pictures of Maja, when she was less than a year old and paired them with all the pink and beige I could find in “Joyful” collection. I not only went through 12*12 papers, but also checked the 6*8 paper stack and pocket cards. I finally settled with very neutral background called “Very merry” and “Advent for one of the clouds. Did you noticed that 6*8 paper stack contains of a little bit different patterns or the same patterns but in different colors? It makes it a must have product! I managed to find two red – pink papers there and I cute a biggest cloud and backed my photos with them. Pink stars pattern is the back of one of the pocket cards!
This page is quite simple so I wanted to add some extra texture to the clouds by stitching the clouds with pale pink thread. Photos are surrounded with cute critters and generic words and other elements. I just love the drop of metallic gold added to this line. I also love new chipboard stickers!!!! They are so fun to use and look just beautiful. Deer and fox doesn’t look christmassy and can be used for any kind of project. That’s why I decided to use them here.
I embellished my composition with a lot of stars. They are often combined with baby themed collections so I thought they will match to my page as well. I fussy cut some bigger ones from “Making spirits bright” paper, added few smaller ones from ephemera pack and few with gold foiling from cardboard stickers sheet. Few wooden buttons and puffy stickers and my page was almost ready.
My title is a combination of word “joy” from cardboard stickers sheet and some pink foam alpha from my stash. Making this page gave so much fun and I just loved looking for elements that I might use. I also can’t wait to make some christmas themed project with it!
That is all for today. Thank you so much for stopping by and see you in December! I can’t believe it’s almost here. It feels like I just cleaned up the last year christmas tree and decorations. What a crazy year it has been.
Hey y’all! Laura back again with three holiday card from the stunning new Cocoa Vanilla Studio Joyful collection! I really adore the sweet icons and beautiful patterns in this one. It was so much fun to experiment with a variety of papers, fussy cutting everything, and adding the sparkly finishing touches! For the first card, I layered fussy cut florals in the background with a tree from the ephemera pack and a chipboard piece that says “Falalalala” for my central focal point. The title is simply “Jolly” wrapped over the top from the ephemera pack. Those tiny details really are what makes this one pop! With one of the gold fabric stars for the top of the tree and gold Nuvo Drops dotted in the center of the florals and around the backyard, this card really shines!
On the second card, I layered two patterned papers from the A5 paper stack as a base for my large title. The “Christmas Joy” is from the chipboard stickers and is a stunning gold foil! I layered a large fussy cut swag behind the “Joy” and then added dimension with a second layer of fussy cut florals on top of it. My favorite part of this particular card are the little floral bits that look like they are flitting around the outside of both the swag and the title. With more Nuvo Drops for a sparkly detail, this card came together rather quickly after all of that fussy cutting!
For the third card, I decided to create a scene with these adorable animal icons! A little white card stock for snow along the bottom was a quick and easy base for this sweet deer and squirrel. I created the appearance of depth to this one by layering the tree and sign behind the deer, which gives the allusion they are further back. I added chipboard stars across the top of the card with Nuvo Drop trails leading down to them, so that they appear to be hanging from the sky! The “Jingle All the Way” sentiment is from the chipboard stickers and just like before, gold Nuvo Drops were the final details this one needed!
I hope you enjoyed my take on holiday cards using the gorgeous new Joyful collection! They were so much fun to make and I can’t wait to share them with family and friends! Don’t be afraid to use some of the dimensional embellishments on your cards! Once I removed several layers of chipboard behind the titles, they laid quite flat!
Hey y’all! Laura back again with a layout inspired by the gorgeous October Mood Board. The color scheme was perfect for the These Days collection and these sweet florals and greenery reminded me of this cut file from Liz Longest Designs. It’s a very simple wreath that looks divine when dressed up with these floral ephemera pieces! I backed each of the leaves with a green floral paper from the A5 paper stack.
I separated out the colors of the flowers in the floral ephemera pack and stuck to the smaller ones for the wreath, balancing out the mix of colors around the page. Each of the flowers has a drop of Nuvo in the center to give it a little extra texture and sparkle! I used the small puffy alphas for my title, spelling out ‘My Sister My Friend’ right next to my top photo. These photos are of my twins and catching a rare moment of them being sweet to each other was definitely a scrapworthy moment!
I created four clusters on this layout around my photos. The top cluster has a fussy cut frame as a base, with a bit of fussy cut florals and floral ephemera laid on top. The sparkly gold cloth hearts are squeezed in too along with a puffy word phrase and heart. These details really make a tremendous difference to my clusters, giving them the finishing touches they needed.
Similarly, this cluster to the left of the bottom photo contains the same elements. This helps all of the clusters feel cohesive on the page. In addition to the Nuvo drops, I also splattered with gold ink spray around the floral clusters and the perimeter of the wreath for a whimsical look.
I hope this inspires you to look at your cut files a little differently and incorporate them in a big way on your projects too! To see how “My Sister My Friend” came together, check out the process video below!