Hey y’all! Laura here again with a sleepy puppy layout using the aptly named Daydream collection! I went for a modified grid this time and used as many of the bits and pieces as I could on this one. I love the way it feels both full and balanced at the same time. I did a little bit of layering at the top and bottom of the grid to give it the appearance of depth, but those flair did the job for me! I love adding chunky pieces like flair and foam on my layouts, so when I decide to do a chunky layout, I go all out!
There’s also a bit of hidden journaling in this pocket on the right side of the layout to document our old dog’s decline at the time. I didn’t want to add that part of the story to the front of the layout, so by adding this little pocket, I can document his journey without making it the focus of the layout. I really wanted this layout to showcase his incredible talent of falling asleep anywhere, anytime.
These rainbows were one of my favorite parts of this collection, so I fussy cut a whole page of them to use as embellishments and they are slowly showing up on every one of my pages! I even found ways to tuck in sequins around my clusters to add a little bit of bling and really make this layout shine!
I hope the modified grid on this layout inspires you to look at your embellishments a little differently! It’s fun to see how you can change things up. If you’d like to see the Good Times layout come together, I have the entire process in the video below!
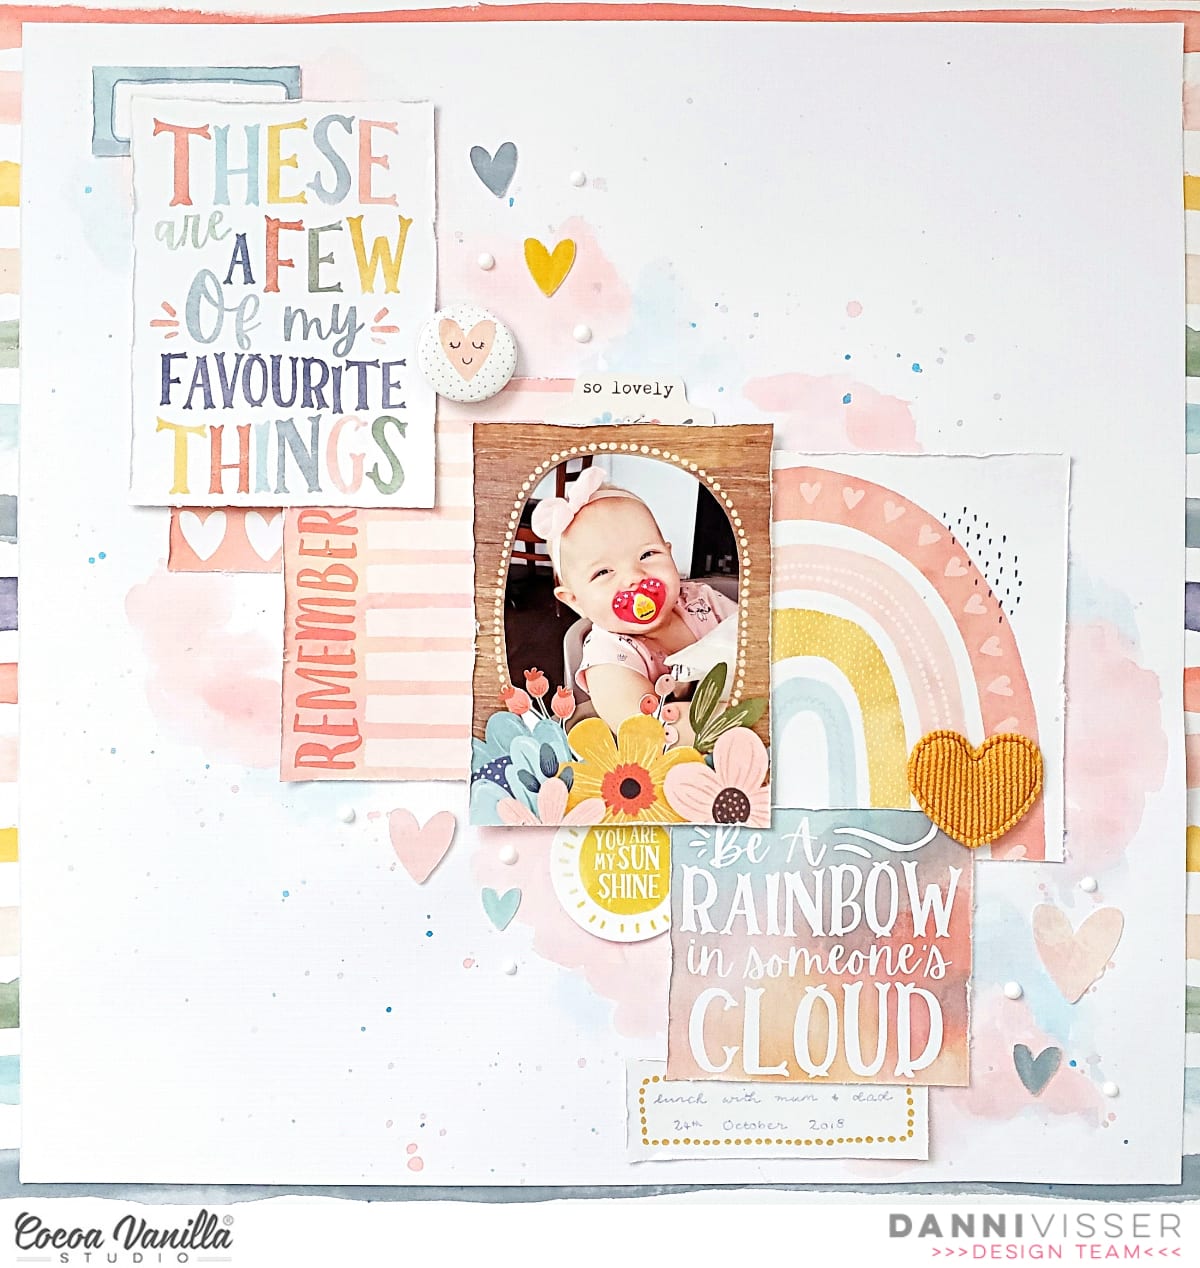
Hi there Cocoa Vanilla fans! Danni here, and today I am having some fun with the cut-apart elements in the Happy Place 12×12 patterned paper, which is part of the amazing new Daydream collection xx
Cut-apart sheets are one of my favourite products to work with, and as soon as this collection arrived on my doorstep I set to work with my scissors and cut this whole page up into it’s individual elements, ready for making a layout. I find it is much easier to get inspired when you already have all the pieces cut out and ready to use.
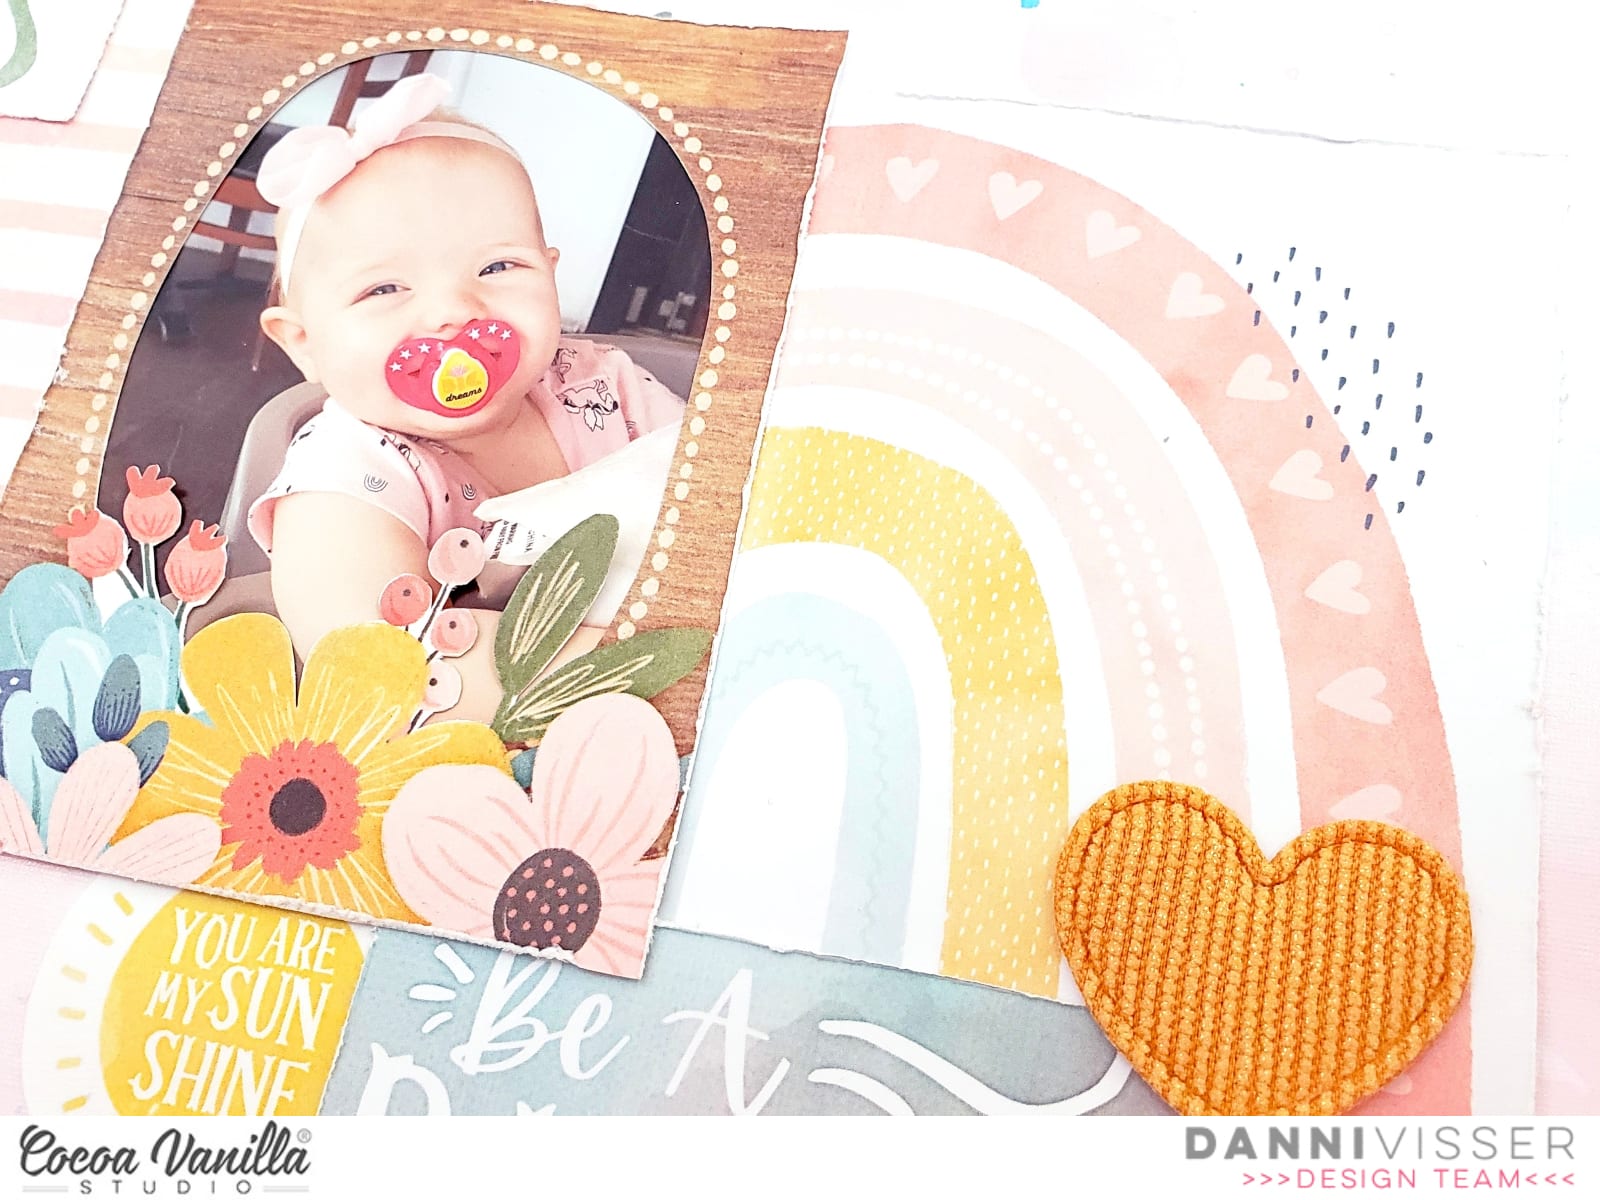
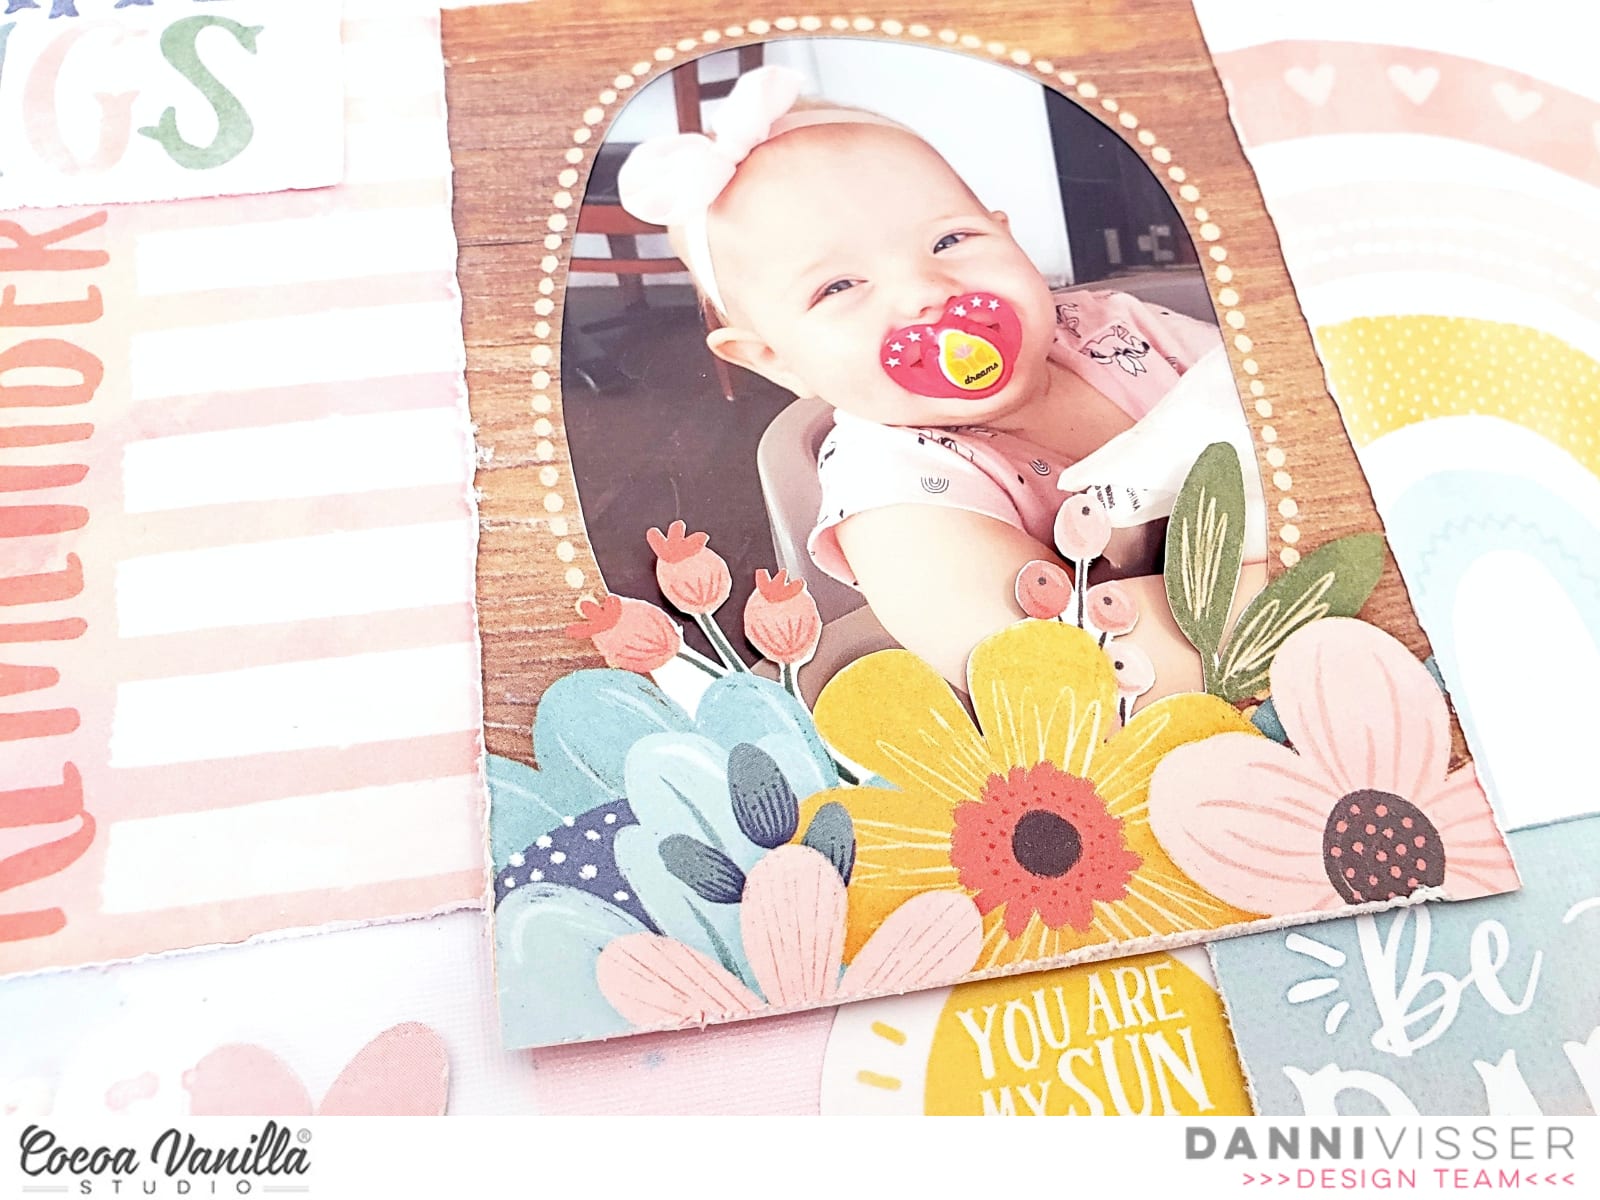
The sweet little woodgrain piece with the oval centre and flowers at the bottom was crying out to become a frame, so I carefully cut the oval from the centre, taking care to keep all the little flowers intact. A craft knife and cutting mat works best for this.
I chose this beautiful photo of my sweet baby girl to put behind the frame I created. The 3×4 inch size of these cut-apart elements makes them perfect to use with 3×4 photos, and this one fit perfectly. I arranged several of the other elements from Happy Place 12×12 patterned paper in a diagonal across my page – this is my favourite layout as it really helps to draw the eye across the page.
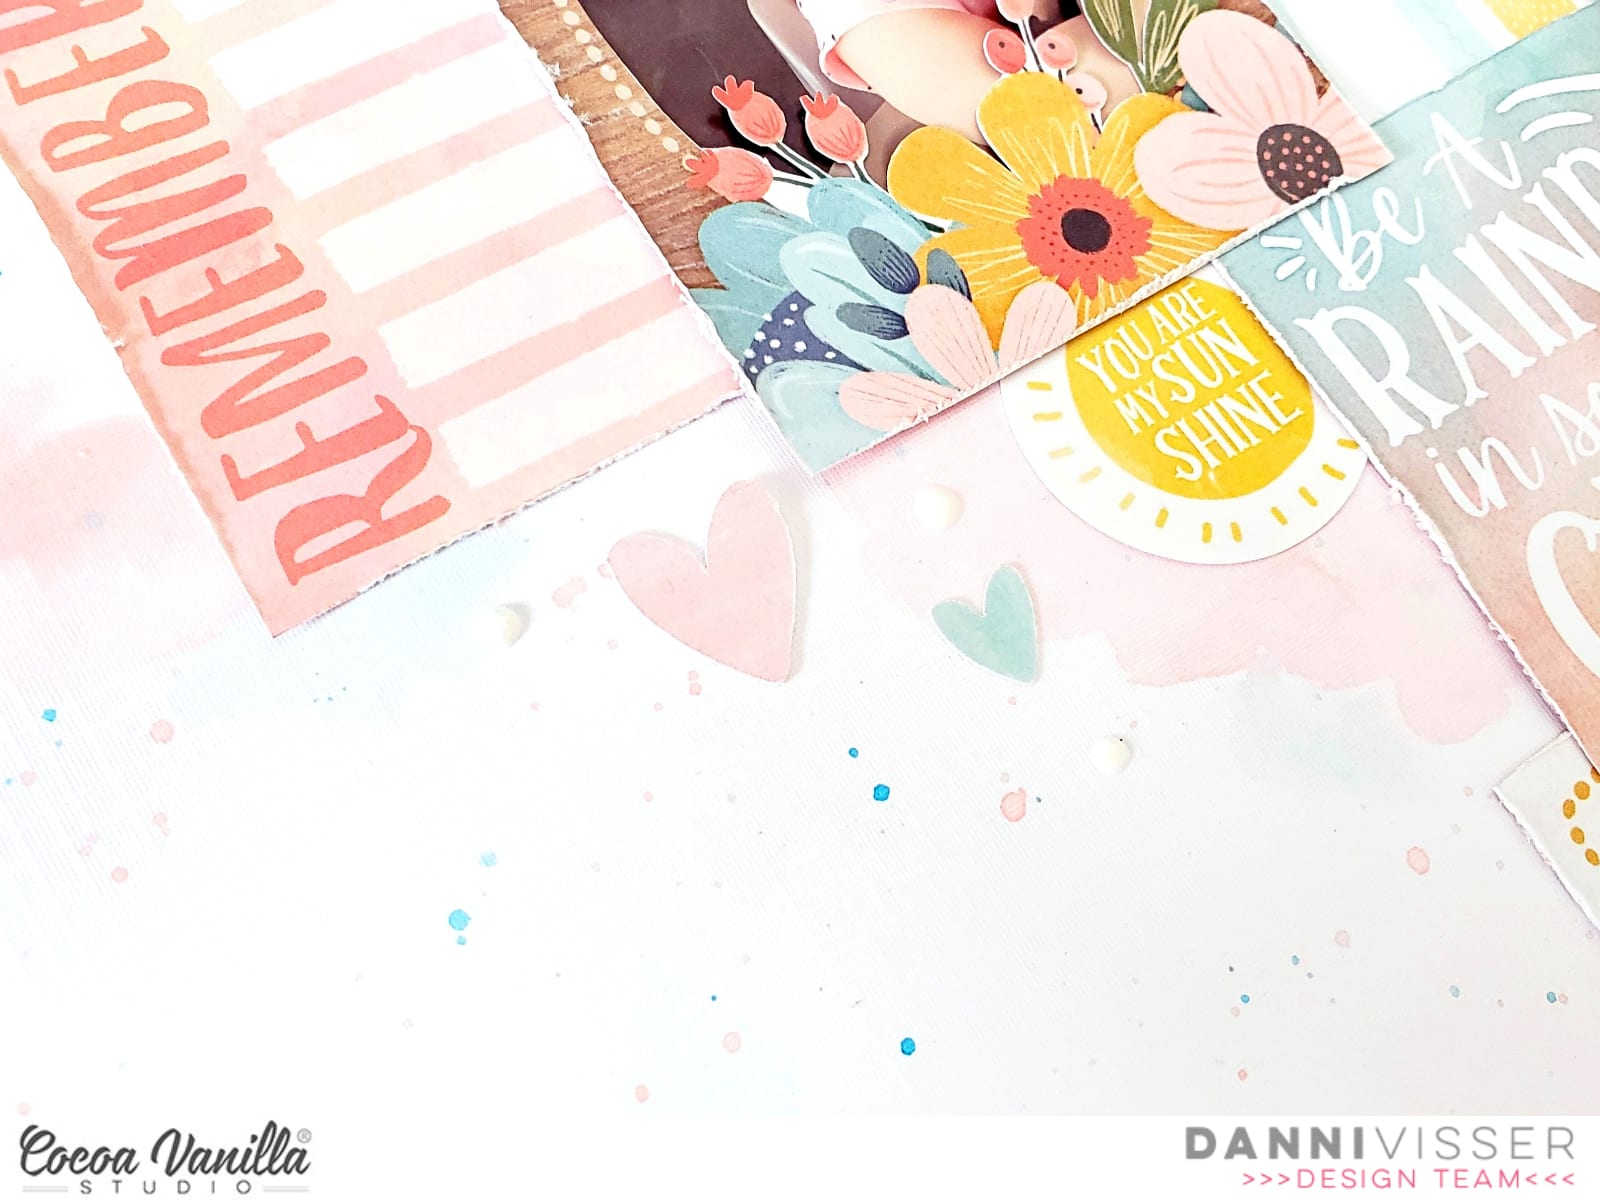
For my background I chose white mixed media weight cardstock and added a border using Stepping Stones 12×12 patterned paper for a pop of that beautiful rainbow stripe. I went ahead and added some soft mixed media to the background using some solid watercolour paints, making sure to place the colour where it could be seen peeking out from behind my cut-apart elements. Once this dried I placed all those elements back onto the page and adhered them down.
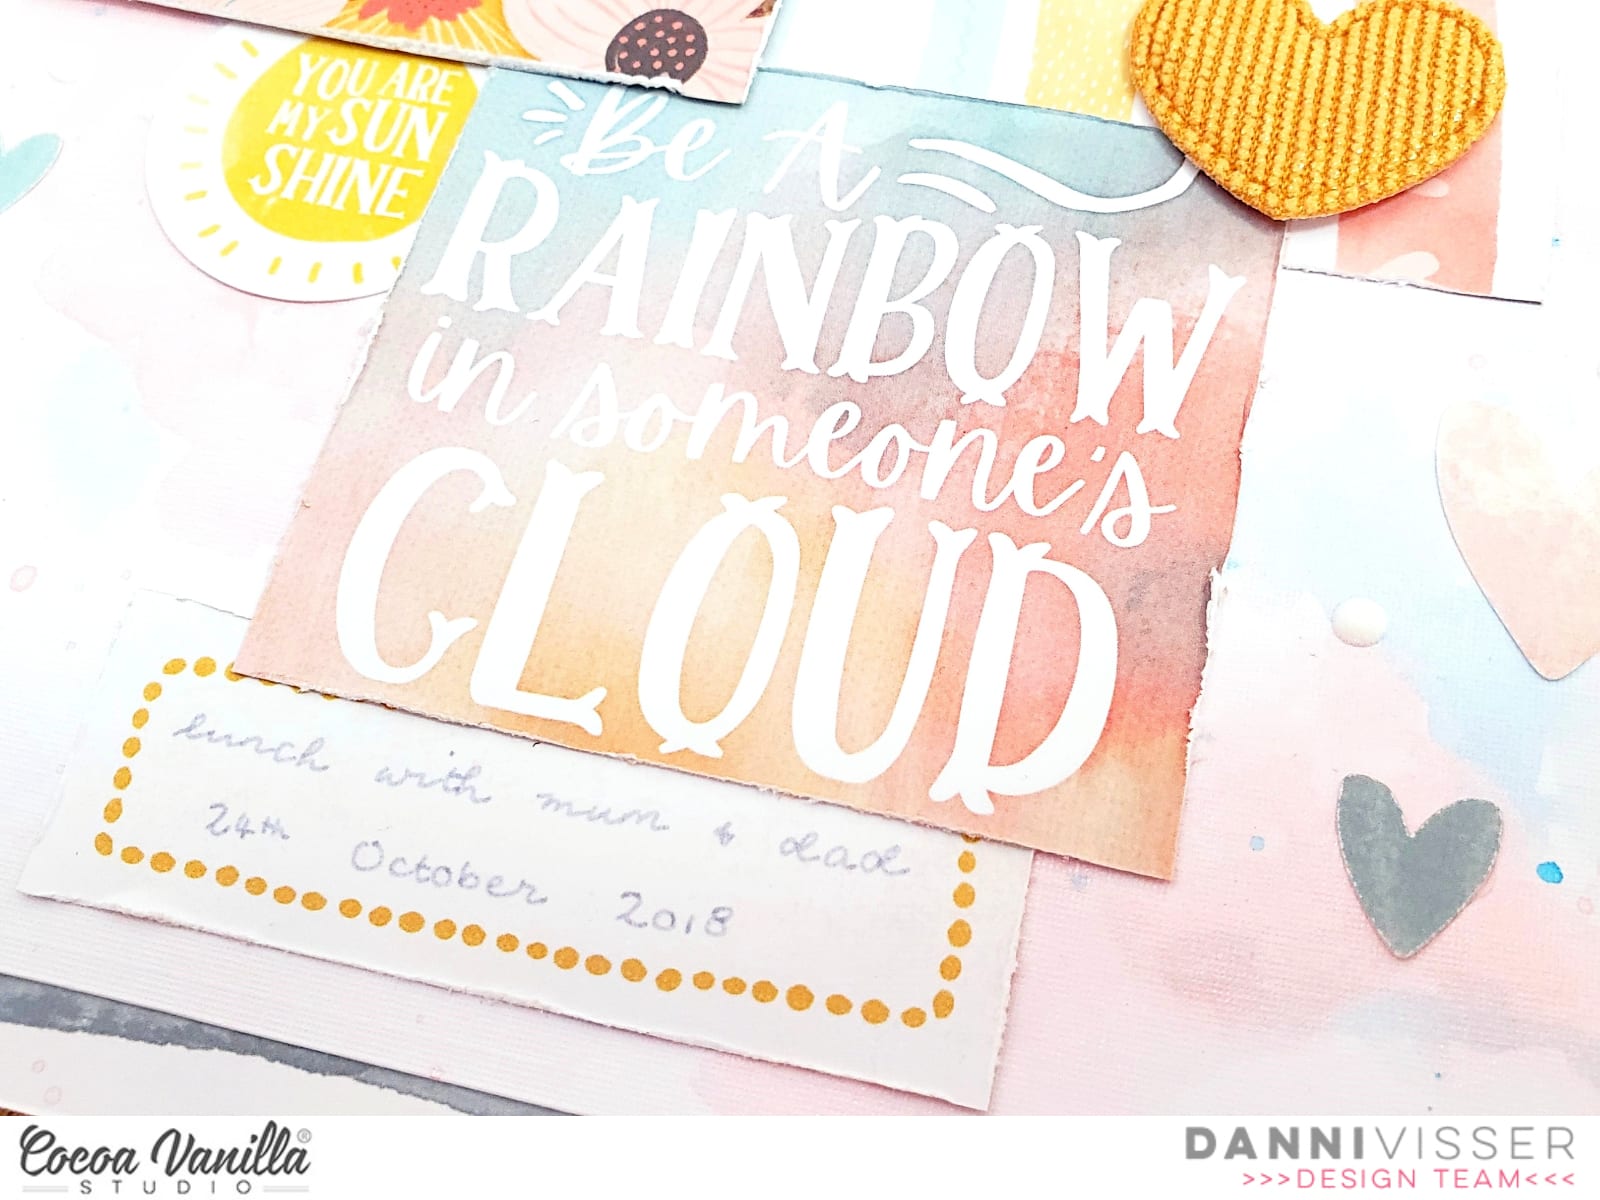
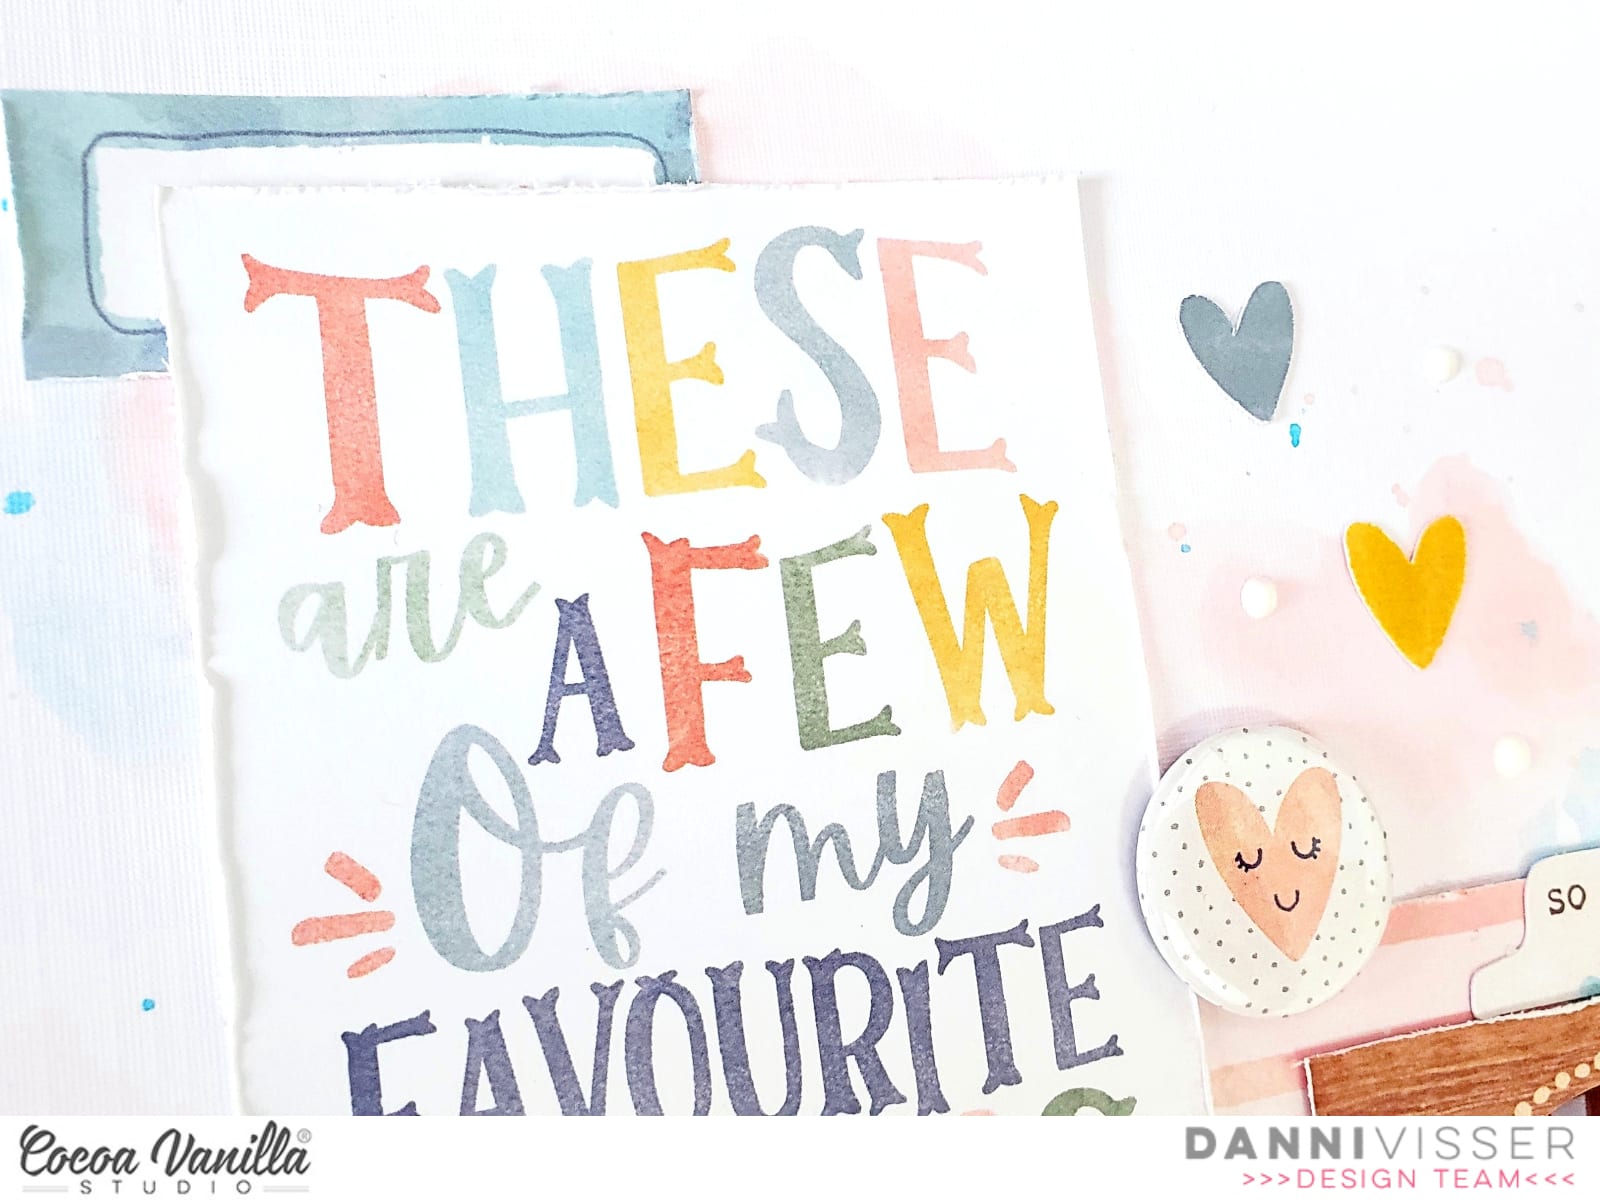
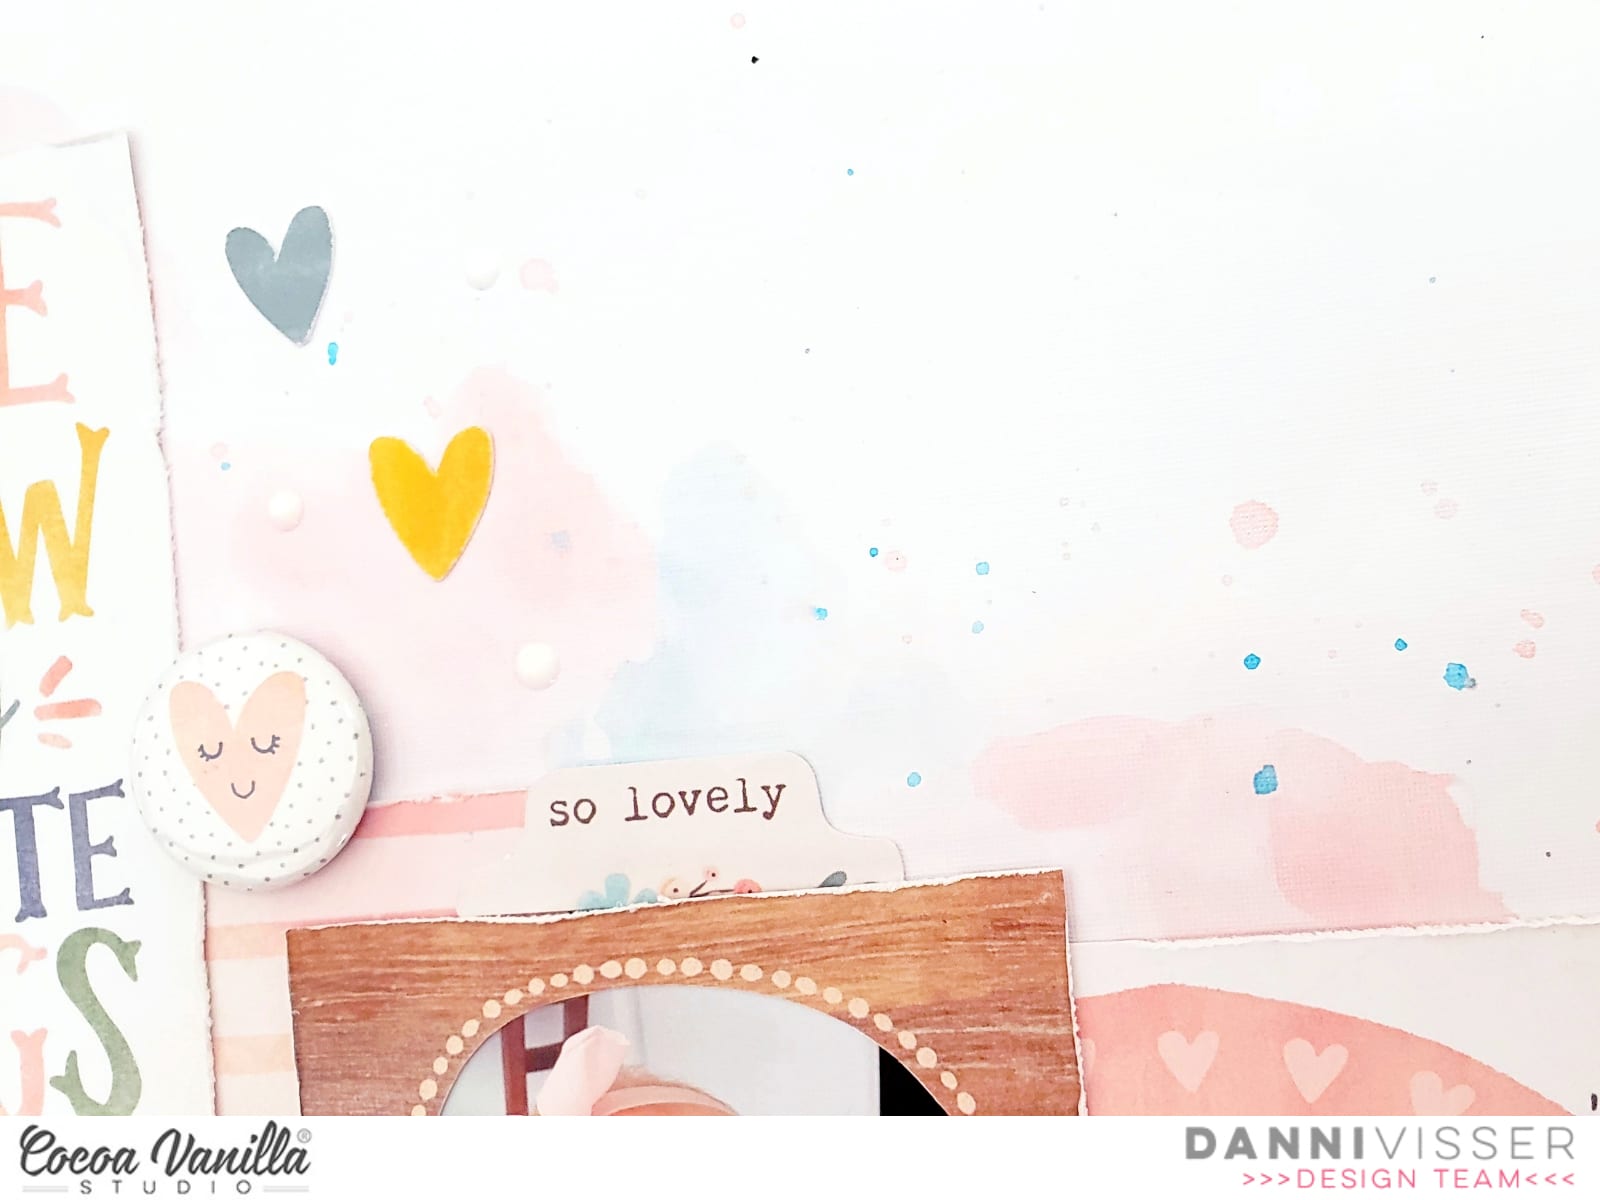
For embellishments I chose to keep things simple, adding a flair button, a puffy heart, a sunshine sticker from the accessory stickers and a sweet little die cut ephemera tab at the top of my photo. I pulled out a bunch of the teeny tiny heart die cut ephemera and accessory stickers, creating several clusters of these in varying colours around my diagonal design.
For finishing touches I added a few lines of journaling on a label at the bottom of the page, followed by three little clusters of white dimensional drops. This layout is quite simple and minimal, quick to make and looks so soft and pretty. I am so happy with how it turned out. I hope you were inspired to use your cut-apart patterned papers today! They are such a fun and easy way to make a layout that looks amazing.
There is a process video linked below if you would like to watch this layout come together. Thanks for joining me today, happy scrapping!
Hi everyone, it’s Sue Plumb here to share my latest design team project using the amazing ‘Daydream’ collection. If you haven’t had a chance to create with this range yet, then do yourself a favour and make sure you check with your favourite retailer to see if they have it in stock – it is so gorgeous!
For this page, I decided to document a photo that I took a few months ago when some of my family got together to celebrate my boys 8th birthday. I began with a sheet of white cardstock and used inks to add some subtle layered watercolour detail to the background.
Next, I layered some pieces of the Sun Shower; All Aflutter; Stepping Stones; and Up in the Clouds papers to form the mat for my photo. I then added some frayed gauze for texture and some scrap cardboard under my photo to pop it up from the page.
Once I had the photo in place it was time for some embellishments. I had the gorgeous floral print Garden Variety paper and my scissors at the ready to get cutting. I fussy cut several larger floral pieces and a few loose flowers, then tucked them in amongst the different paper layers around my photo. To give the flowers extra dimension, I bent up some of the petals and leaves, and used foam tape under some of the pieces.
To the left of my photo I added the flair button which read the good life from the Flair Button pack and a small blue heart from the Die Cut Ephemera pack directly onto the edge of my photo.
I couldn’t resist adding one of the adorable Puffy Hearts to my page, so I tucked a green one in amongst the flowers above my photo, which coordinated perfectly with where the green ink was on the background.
I created a small cluster in the top right corner of my photo using a few small stickers from the Accessory Sticker sheet, then added a butterfly from the Die Cut Ephemera pack nearby.
I chose the words family time from the Die Cut Titles pack for my page title and completed my title cluster with a die cut rainbow and heart.
As a finishing touch I scattered a few sequins around the page from the Sequins and Flowers pack and a little handwritten journalling.
I will be back again with another share in two weeks time. Until then, happy scrapping!
It’s Sophie with you today and I am sharing a beautiful and simple layout created with the Daydream collection !
I cut a 9×10 rectangle out of the gorgeous “Sweet Serenity” patterned paper and backed it with a light brown cardstock.
I felt like doing some hand stitching on my page, so did a little chain stitch with white embroidery floss on the edges of my rectangle. Then, I added adhesive foam on the back of the whole rectangle before adhering it to a 12×12 white cardstock.
I chose a photo of my sweet Sabrina, smiling while she was watching our dog play outside.
I added tissue paper, adhesive foam and a piece of the “All Flutter” patterned paper behind the photo, and placed it on the left lower side of the layout. I added 3 frames; 2 square ones and one circle that are from the Daydream Die Cut Ephemera pack, that I arranged around the photo in a diagonal line.
Of course I had to add a bunch of flowers, as I think this collection has just the most stunning floral embellishments I have ever seen !!! So I created a beautiful floral cluster on the left lower corner of the page, that are from the Daydream Die Cut Ephemera pack, as well fussy cut out of the “Garden Variety” patterned paper.
I also created a little cluster on the upper side of the page with a sun, rainbow, and a few other flowers.
My title is from the Daydream Die Cut Titles that are so versatile and easy to use !
Finally, I handwrote my journaling, following the circle pattern of the floral frame, and added the date.
This is a very simple design but I truly love the end-result ! This little hand stitched border gives extra dimension to the layout and ties everything together !
Here are more close-ups:
I hope you felt inspired by this beautiful collection today, thank you so much for stopping by, and happy scrapping !!!
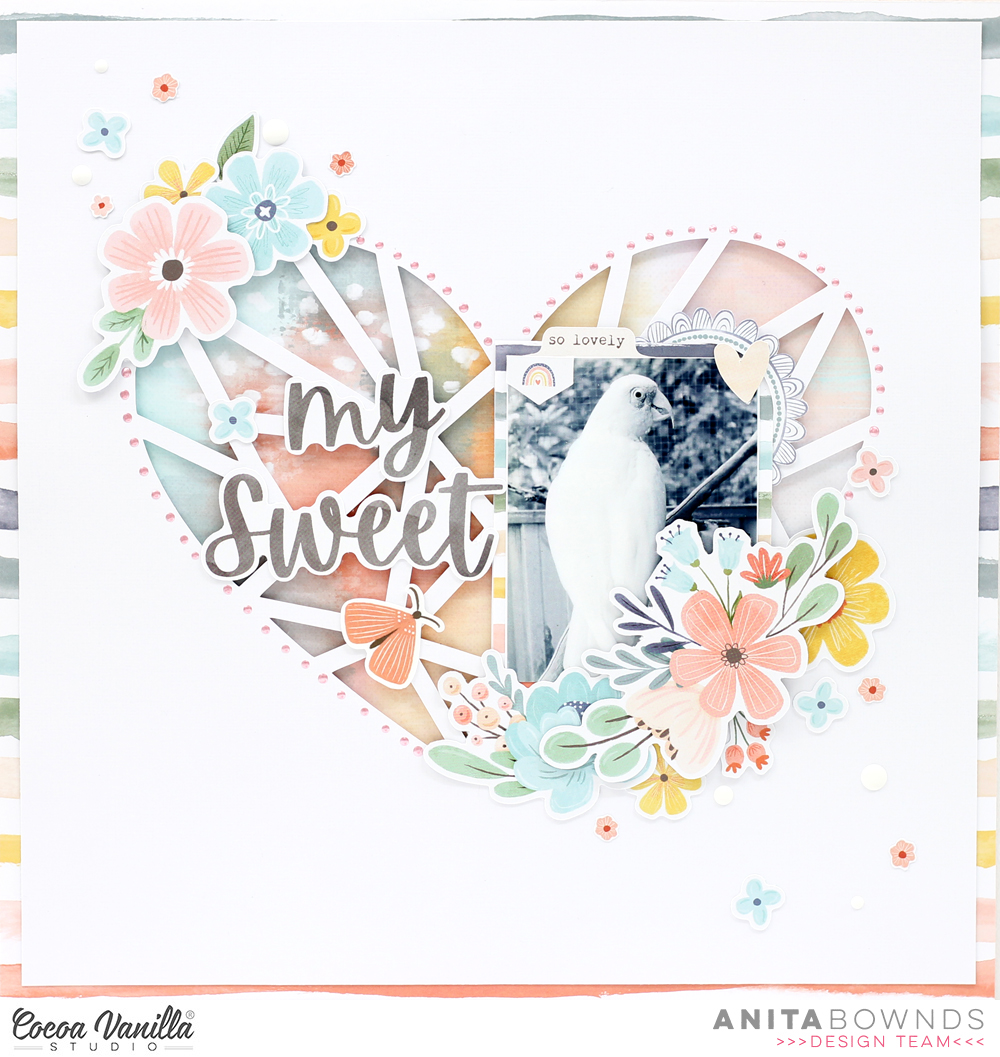
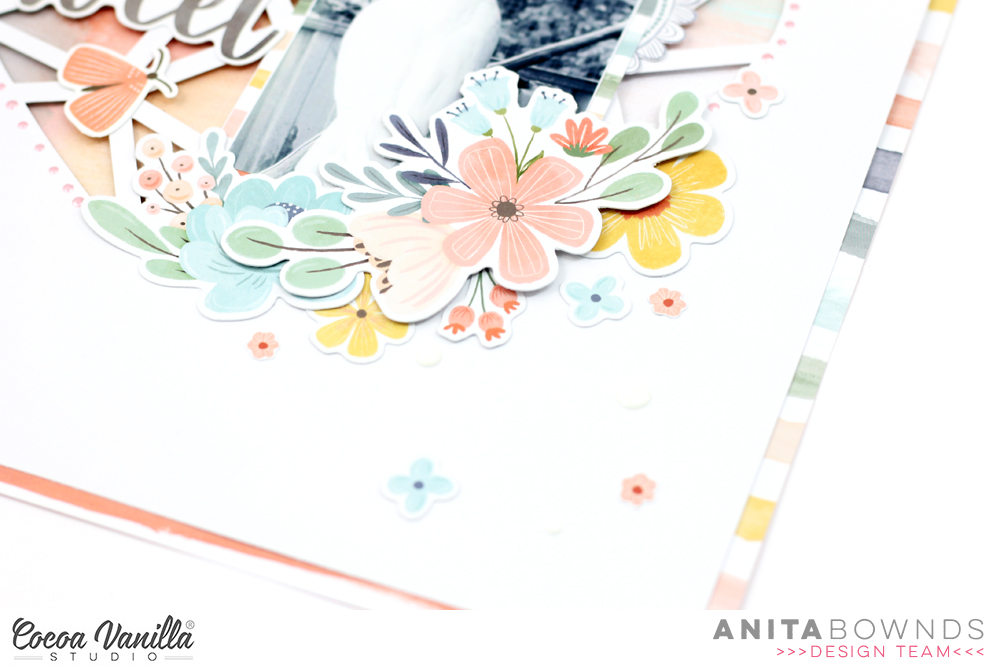
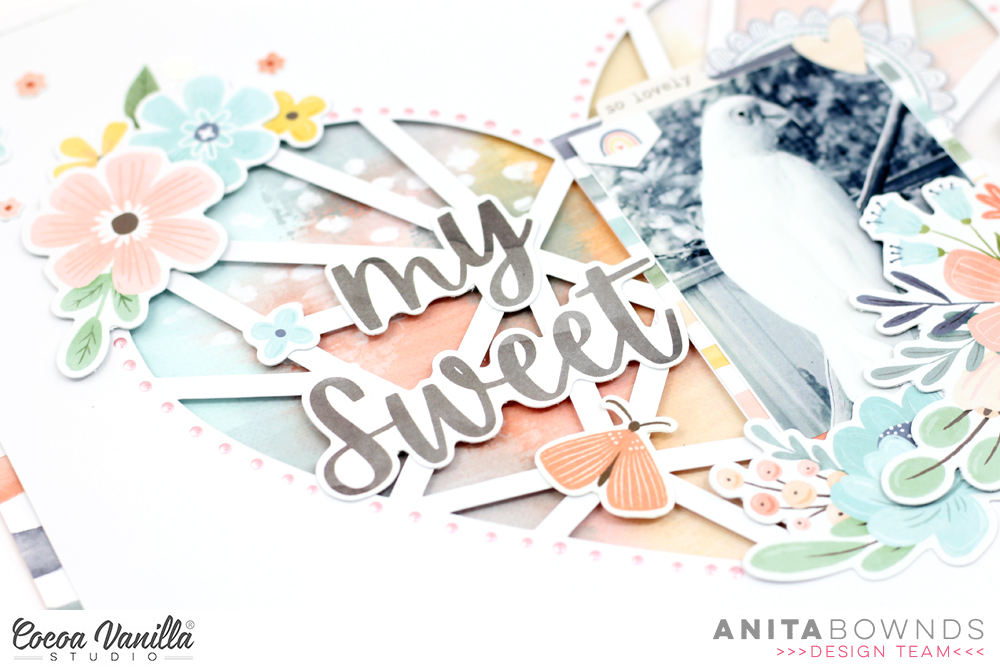
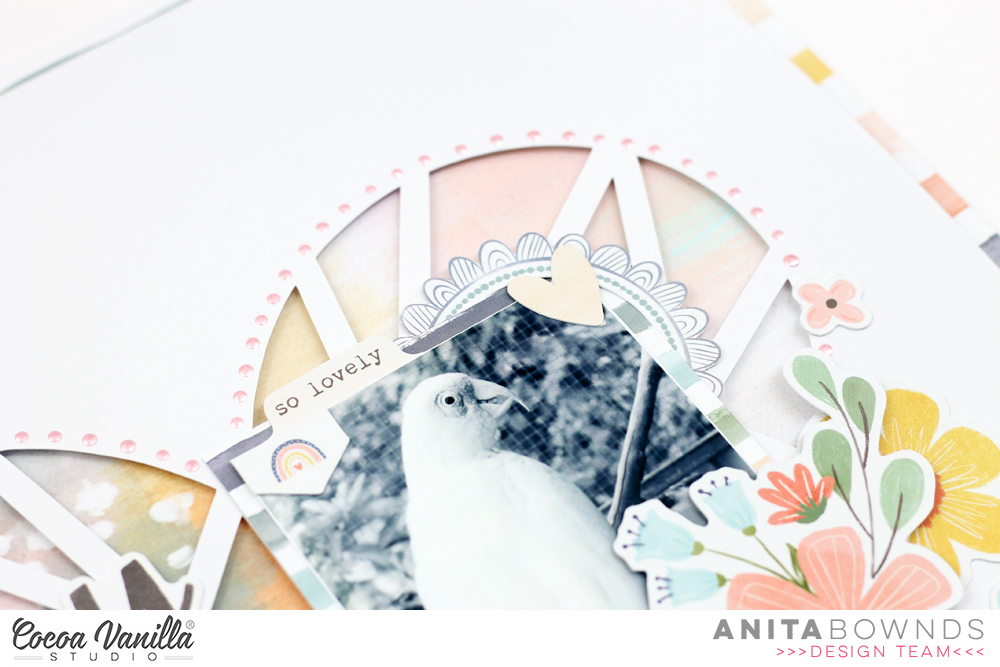
Hi there crafty friends, Anita here with you today sharing a cute heart layout created with the beautiful Day Dream Collection . My layout today is all about our cheeky bird nubby who loves digging holes and playing plastic lids.
Using white card stock and my cameo I cut out a heart using a cut file from @neatncraftycutz I then back it with sweet serenity pattern paper popping it up on double sided foam tape then I trimmed he white card stock down and back it with stepping stones pattern paper.
Now it’s time to decorate, I matted my photo with stepping stones pattern paper and added it to the right hand side ,I then pulled out all the flowers from the ephemera and started adding clusters of flowers around the edges of the heart A few bits of ephemera around my photo.
Then I add my title using the cardstock titles and I finished off the layout with the a few mini fussy cut flowers , enamel dots and pearls.
Hi there! Danni here with today’s Throwback Thursday inspiration featuring the gorgeous Midnight collection. I adored this collection so much that I have been hoarding a lot of it, so it felt great to put it to good use.
The Sunset Strip 12×12 patterned paper has always reminded me of a sunset, so it was perfect for a background of this landscape sunset photo I took in the Sunshine Coast hinterland. I had cut the floral circle cutfile for another layout, and the negative interior pieces looked so pretty on the cutting mat that I could not bear to bin them, so I carefully glued them to the background paper. It looked so lovely with the patterned paper peeking through!
Next, I used some inks and mists to add some purple, pink and gold splatters to the background. This helps tone down the stark white of the cutfile and adds some interest to the background. I used the Shine Bright 12×12 pink gradient patterned paper to back my photo and built some horizontal layers behind it with plain vellum and the woodgrain side of Shine Bright 12×12 paper to give my photo a natural ‘resting place’.
I made sure to line up the horizon in my photo with the colour change gradient in the background paper – this makes the page look cohesive and really enhances that sunset illusion.The Beautiful Moments title from the chipboard pieces fit perfectly around my photo and was the perfect sentiment for this layout. I used a tab from the die cut ephemera and some tiny words from the accessory stickers to supplement my main title.
Even though I want to hoard them forever, I placed some of the gorgeous die cut ephemera floral peonies and leaves in clusters either side of my photo, then added a pretty butterfly from the accessory stickers on the centre of one of the cutfile flowers, making sure to pop the wings up on dimensional foam – one of my absolute favourite techniques.
Finally, I added a few enamel dots from my stash in matching colours to finish off the layout. This whole layout was very quick to come together, even though it looks very full with plenty of detail – making an interesting background meant I could keep my embellishments minimal while still having a very impactful layout.
I hope you enjoyed joining me today! Please check out the video below on the Cocoa Vanilla Studio YouTube channel if you would like to see the entire process. Happy scrapping!
Hi everyone! It’s Sue Plumb here today to share my latest design team page with you. This layout is actually the very first page I created with the brand new ‘Daydream’ collection, even though I am only sharing it now. When I cracked open this collection to create, I couldn’t help myself but reach for the adorable Over the Rainbow paper first. (I think there are lots of people who did the same – including our design team!) You may recall seeing lots of rainbow themed layouts over the past week from our team as part of our rainbow theme, so I thought what better time to share this page and join in the fun!
Now the funny thing about this layout, is I already knew I was going to make it before I even received the collection. (Very unlike me to plan a page ahead of time!) As soon as I saw Zoe’s reveal of this paper, I knew I wanted to use a silhouetted photo of my daughter standing under the rainbow (so I had her pose for the photo in advance).
I started my layout by adding a little bit of extra detail to the paper. I used a fine tip white paint pen to add faux stitched detail along the edges of some of the rainbow arches, and then faux hand stitched details onto the blue hearts.
I then cut around my photo to get rid of all the background and placed some messy white cotton thread for soft texture where my photo was going to go. I used some scrap cardboard behind the photo to pop it up from the page.
Once I had the photo in place I added a floral piece from the Die Cut Ephemera pack along the bottom edge of the page so it looked as though she was springing from a bunch of flowers. I also added a small floral sprig and the fantabulous banner piece to cover her hand.
Now it was time to add some extra detail around my page. In keeping with the whimsical scene I was creating, I added the die cut sun from the ephemera pack in the top right corner of the page using some foam tape to pop it up. I also used the happy days words from the ephemera pack as my page title.
With my daughter’s pose of her hand being held joyfully in the air, I wanted to create a look as though she was scattering some fun / happiness / rainbow vibes, so I used a selection of sequins from the Sequins & Flowers pack and stuck them as though they were being thrown from her hand.
I also added three fussy cut butterflies from the All Aflutterpaper, placing them so they were on the coordinating coloured arch on the rainbow.
I finished off with a few happy phrase stickers from the Accessory Sticker sheet placed onto the rainbow and my page was done. This whimsical scene was unlike my usual style of page, but I really had fun creating it and I am happy I could bring my vision to life. (And my daughter absolutely loves it, which is the most important thing, right?!)
Thanks so much for stopping by so I could share this with you. If you haven’t managed to find the ‘Daydream’ collection yet because your favorite store sold out, rest assured that plenty of re-stocks have been shipped, so check with them to see if they have it coming.
Hi there friends! Danni here with my take on the Rainbow Love theme for this week. I was incredibly inspired by all the fussy cut-able elements in the 12×12 patterned papers in the new Daydream collection, so I decided to have some fun with the little rainbows in Up in the Clouds patterned paper.
I used my craft knife to carefully cut all the little rainbows out of the Up in the Clouds paper, being careful to keep the rest of paper intact as I was planning on using it later. Once I had done all my cutting (very therapeutic by the way!) I adhered a piece of plain navy cardstock to the back of the 12×12 sheet, so it peeked through all the little rainbow-shaped windows.
I went ahead and took some time to pop all the rainbows up on dimensional foam, which I then adhered over the top of the patterned paper/cardstock background. I made sure to offset each rainbow slightly to allow the cardstock to peek through, which gives depth and shadow.
I chose a sweet photo of my little girl and added some simple paper mats of navy and pink from the 6×8 paper stack, distressing the edges lightly for some texture. I build “This Sweet Love” title from die cut titles pack to right of the photo, creating a left-right downward diagonal to follow my daughter’s eyeline in the photo; this helps create a natural flow to the page.
I built a floral cluster at opposite corners of photo following the same diagonal line, using die cut ephemera flowers and some moths from accessory stickers. I also included a tiny word sticker above my photo and cluster of them as a subtitle below my main title. I love using the tiny word stickers for this, and the sentiments are always perfect.
For a little shimmer I added some gold ink splatters delicately around the page, then tucked in three of the tiny paper flowers from the sequins & flowers pack within my embellishment clusters. I added some further detail to my floral clusters by tucking in some of the gold leaf sequins from the sequins & flowers.
To add the finishing touch, I chose an assortment of sequins to add sparkle around my page, adding them in three clusters like I would enamel dots. The background of this page looked so impactful that I did not need to add much embellishment to have an incredible layout, which made this page come together so easily!
I really hope you enjoyed this page and maybe got a little inspiration! I have a process video linked below if you would like to watch it all come together. Happy scrapping!
Hello Cocoa Vanilla maniacs. I have a pleasure to open a RAINBOW LOVE week over the CVS blog. I bet you can imagine my excitement when I saw this theme. I am hudge rainbow fan and I love mixing and matching many collections in one project. I ended up with very energetic page documenting first day of a brand new school year of my older daughter. She is already a sixth grader so it means only two more years before she will finish elementary school and move to high school. I am totally not ready for that moment.
I started making this page with a white watercolor paper sheet. I picked six Distress Oxide ink colors and made a rainbow rays with them, starting in the middle of the page. It’s a really easy and simple process. You can easily replace Oxides with any other inks. They just need to blend easily. After I applied the colors, I sprinkled everything with clean water to create few splatters. Ink reacted with water fading away which added some great texture to the background.
Next step was picking six papers in corresponding colors to layer them over mixed media background. I went through my CVS stash and picked orange and yellow papers from “Legendary”, green and blue from “Boys rule”, pink from “Happiness” and purple from “Bohemian dream”. I run them through my Silhouette Cameo and cut simple arrows in different sizes in each color.
I glued them over the backgroun color on color. Last step was to place the photo with some embellishments around it. This time I gathered 6*12 sticker sheet from many older and newer collections and picked few labels and tabs to add them under the photo. I didn’t want to cover too much of my background.
I went through my collection of enamel dots, also from the previous collections, and placed few of them between the arrows, also color on color.
It was such an easy and fun page to make. I can never say “no” to all those juicy colors. If you want to learn how it was done, you can watch a process video I recorded for you.
I hope you will join in this colorful madness and create your own rainbow. Thank you so much for stopping by and see you in two weeks. I will finally be able to share with you a project made with brand new “Daydream” collection. It just arrived to my doorstep and I am over the moon excited.
Hello CVS friends Rachel here! Haven’t the DT layouts using the stunning new collection Daydream been just gorgeous! I had to use all my restraint not to use the rainbow paper this time around, but I promise I will end up over using it as it is my absolute fav!
So here is my first layout using Daydream titled The Good Life, which is documenting our sea change to a coastal regional town (which was the best decision ever!)
I chose a camper cut file as my new home is all about the sea and visitors in camper vans all summer long. I used GardenVariety and Daisy Days papers to create the body of the camper van. I used Sun Showers paper and the wood grain paper from the 6×8 inch paper pad to create chassis and wheel. I then machine stitched each segment. I added the curtain and door with foam tape to create height. I had to use the gold puffy heart which went perfectly in the centre of the wheel.
I created a floral cluster using the die cut flowers from the Ephemera pack, this was to add a feature that softened the layout. I layered them and used foam tape to adhere some of them. I added some glossy accents to the flowers, cut file leaves in white and finished off with a moth/butterfly.
My photo is of our jetty at sunset which is stunning. I framed it with a die cut frame and added to my layout with foam tape. I tucked the sun die cut under the frame and finished off adding one of the gorgeous flairs. I used a scallop paper strip to form my ‘sky’ and a strip from the Garden Variety paper to create my ‘grass’. This links everything together.
I added journalling under the camper in the form of a phrase sentiment from the die cut pack and some that I typed.
This would make a great travel layout and of course you could add more photos!
Thank you for stopping by today and I hope you have a wonderful week.


 I finished off with a few happy phrase stickers from the Accessory Sticker sheet placed onto the rainbow and my page was done. This whimsical scene was unlike my usual style of page, but I really had fun creating it and I am happy I could bring my vision to life. (And my daughter absolutely loves it, which is the most important thing, right?!)


