It’s Tarrah back with you and today I am sharing a new layout for our Mother’s Day theme we have going on this week on the blog! I decided to document a special photo of my beautiful Mum and myself on Sydney Harbour when we went to the ballet a year ago. I pulled out the gorgeous Midnight collection to help me document this special memory.
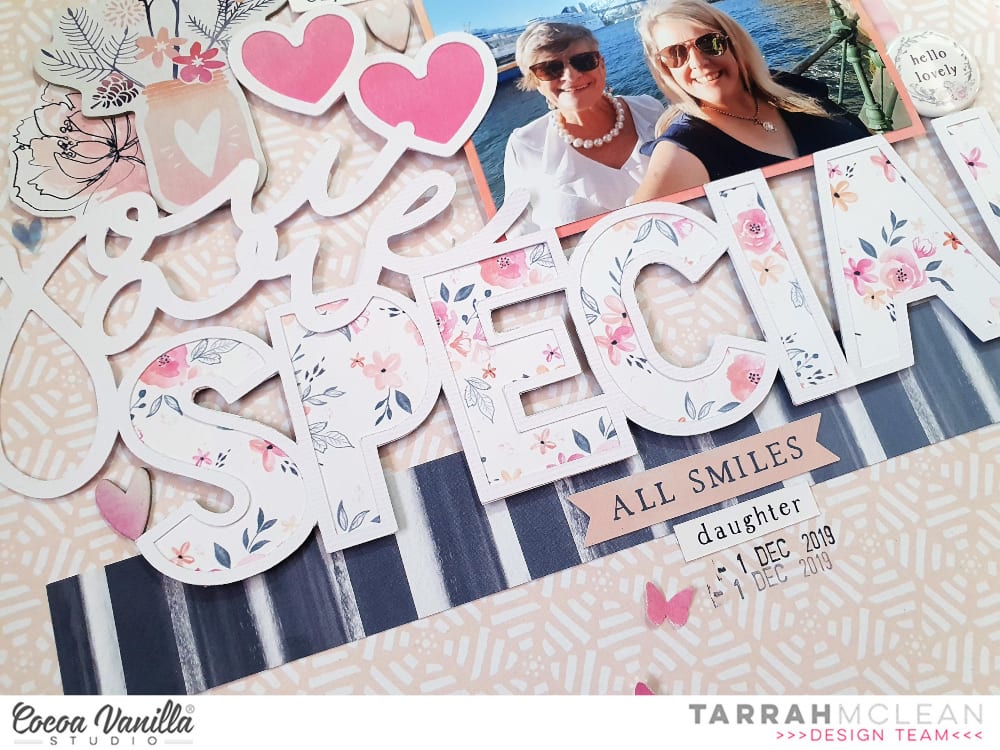
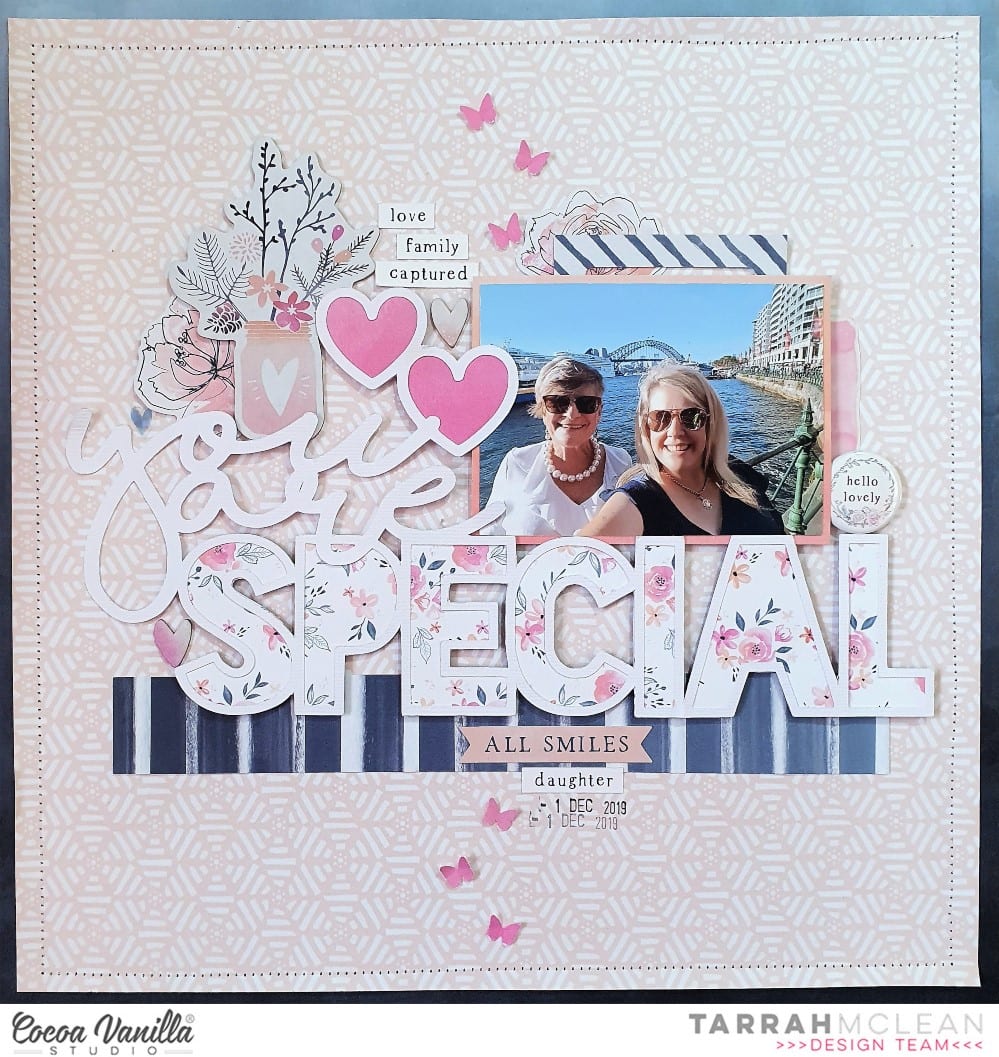
I found a really lovely cut file designed by fellow team member Gwen from Cut To You, I cut it out from white cardstock and then backed the hearts at the top of the cut file with the pink side of the Shine Bright paper the Special word in the cut file, I backed with the ‘B’ side of the Inky Depths paper, I love that small soft floral side. Once it was all backed, I placed craft foam underneath both the hearts and the ‘Special’ word.
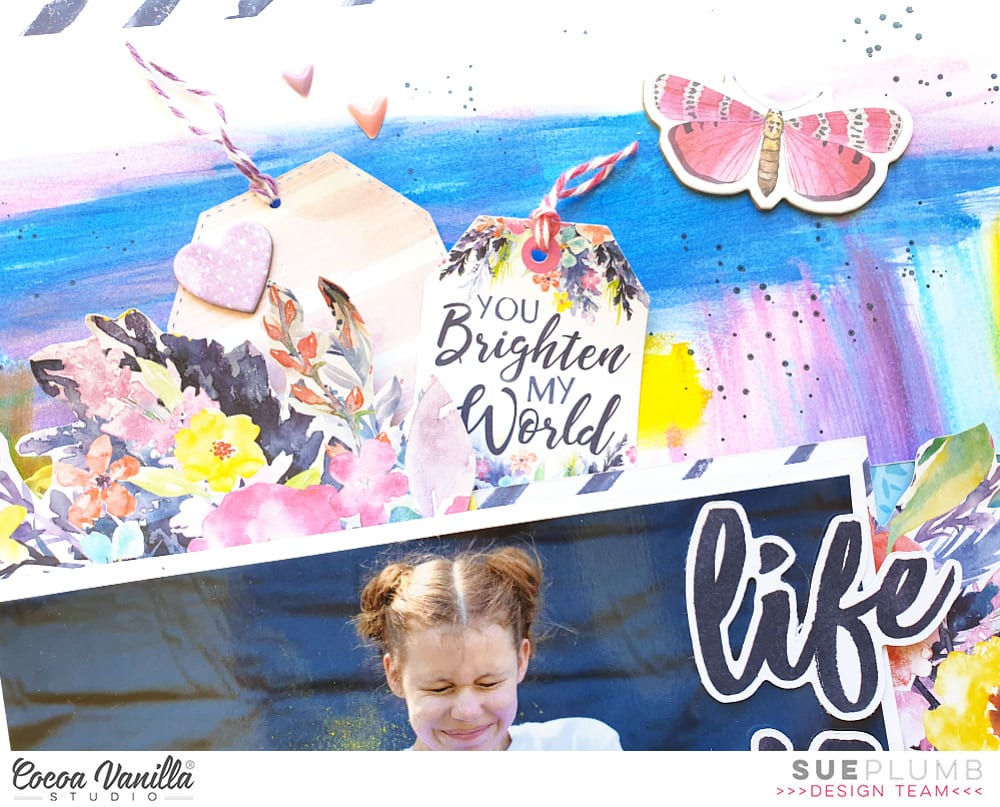
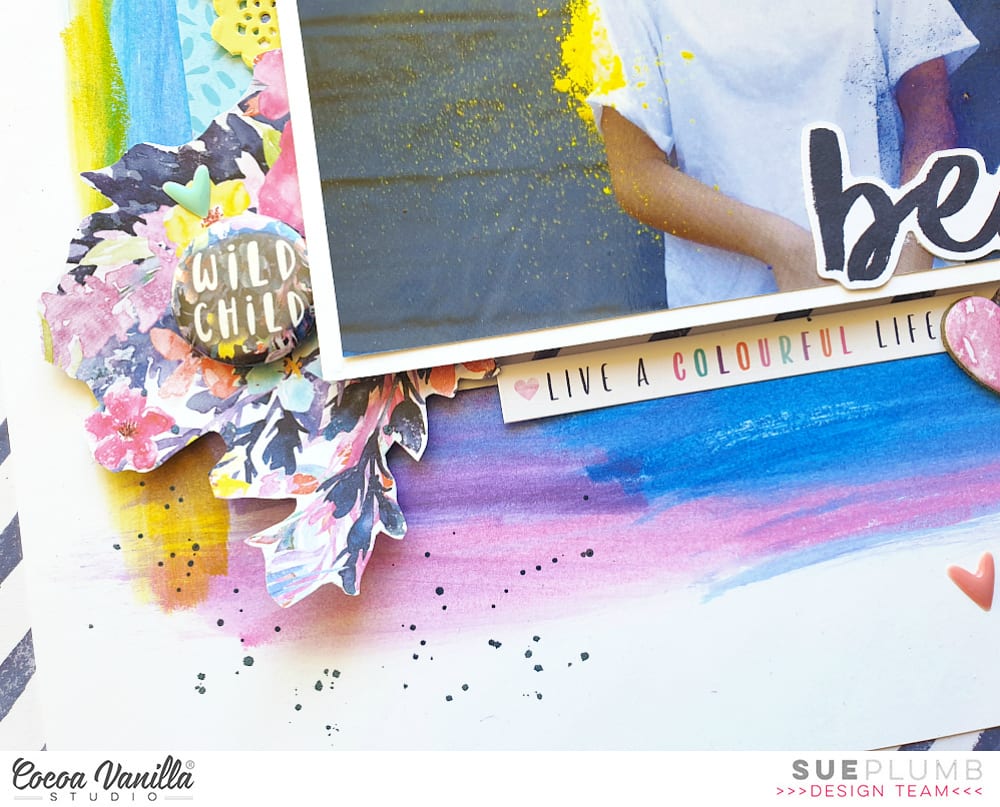
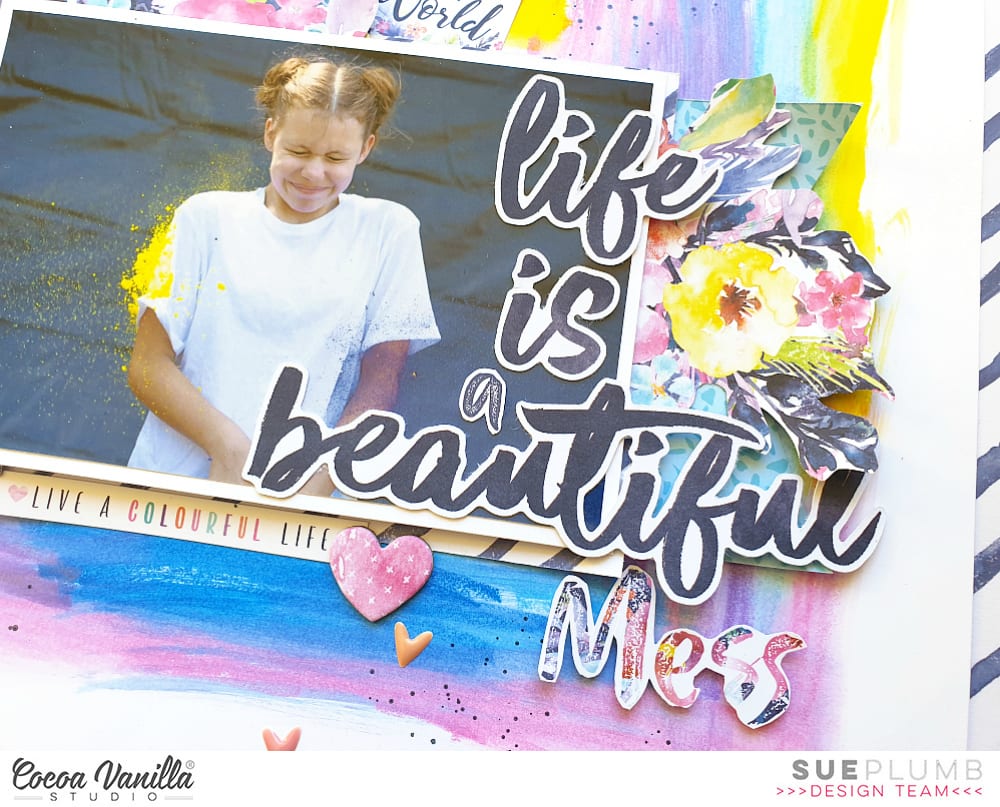
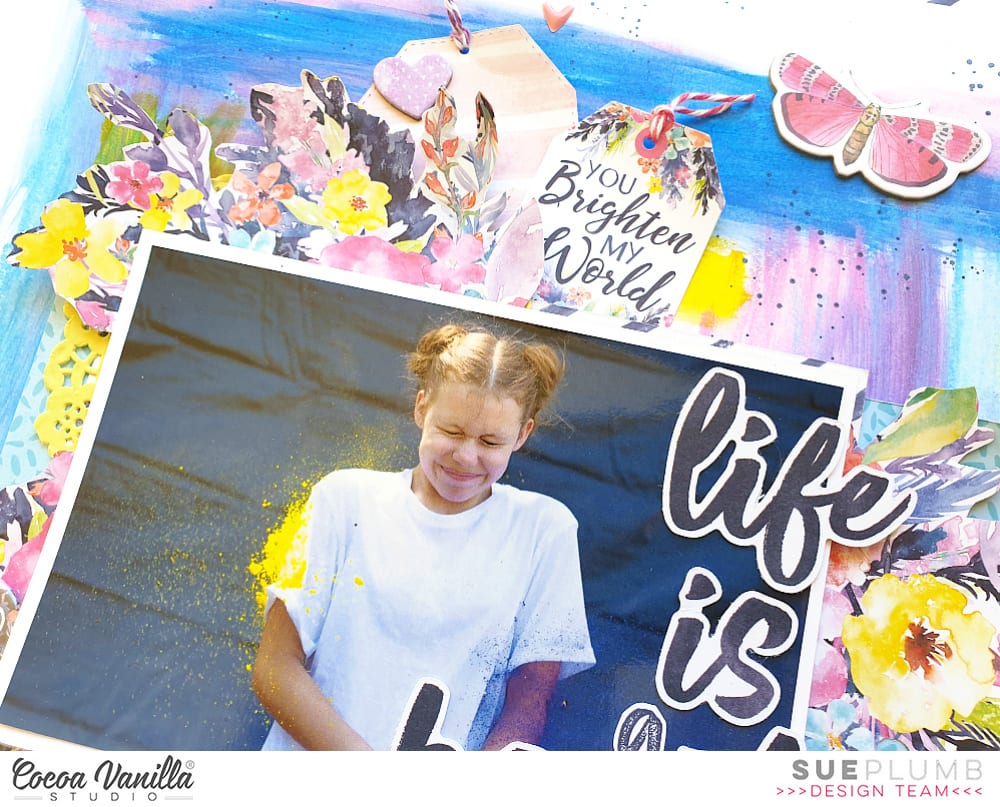
I chose the ‘B’ side of the Mixed Blessing paper for my background and also matted that piece with another sheet of the Inky Depths paper. I machine stitched around the entire edge to add some texture and interest. I placed the cut file title in the centre of the page and I cut a strip of the Bloom and Grow paper and placed it underneath the bottom of the cut file before I adhered it all down. I matted my photo in the orange part of the Shine Bright paper and added craft foam underneath the photo and mat, it fit perfectly just above the word ‘Special’ with one of the hearts from the cut file overlapping onto the photo also.
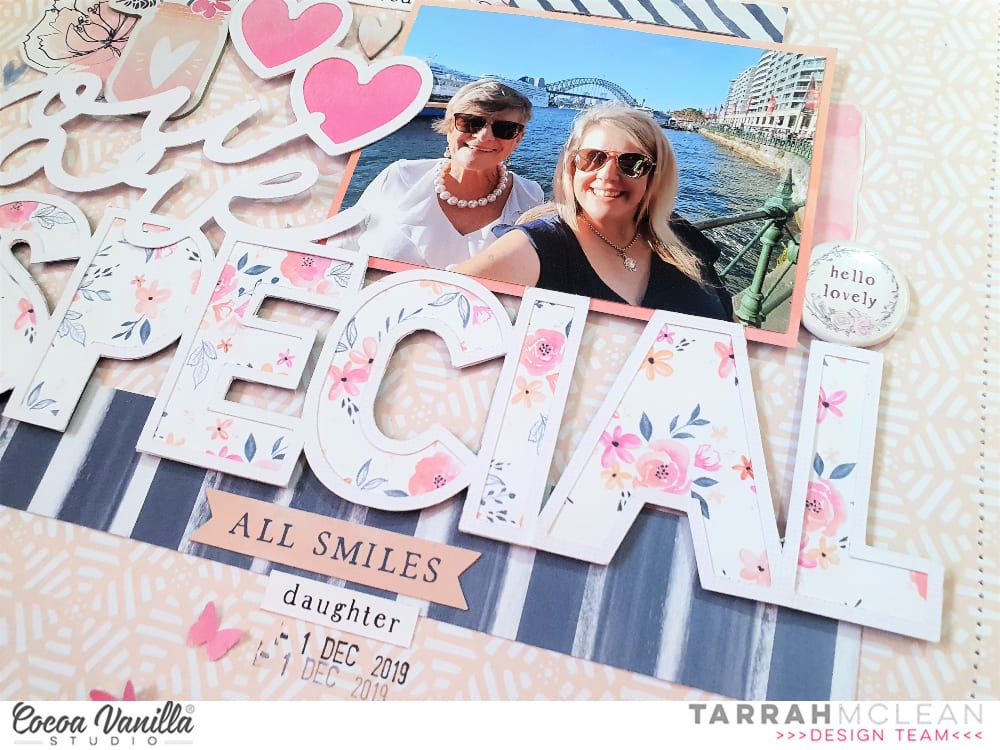
I tucked in one of the cute die-cut frames from the die-cut ephemera pack into the top of my photo, I then took one of the paint strip clear stickers and added it to white cardstock, I then fussy cut it out and tucked it into the right side of my photo. I also added one of the cute flair buttons here. The jar and flower chipboard piece fit perfectly there just above the ‘You’ in the cut file, I love how this looks here. I also tucked in one of the floral die-cuts to the left of the jar to bring in some more of the florals to the page. I also added a few chipboard hearts and also a clear sticker heart too. Lastly I added some of the accessory word and phrase stickers and the date stamp to finish off!
Thank you so much for stopping by the Cocoa Vanilla blog today! I hope you have plenty of Mother’s Day memories you can document!
Hi everyone! It’s Sue Plumb here to share my latest project with you. Today I am sharing a layout I created last weekend as part of the Cocoa Vanilla International Scrapbook Day celebration event. It was such an amazing weekend – full of fun, friendship, and of course, inspiration! I am so proud of our team and all the work they put into the event, and to hear how much everyone who took part enjoyed it, really made it all worthwhile.
So the layout I am sharing here was designed for Gwen’s “Grab 5” challenge where we had to include – a chipboard element; a die cut title; a flair button; enamel dots; and something fussy cut. I decided to document this fabulous photo of my daughter being hit with holi powder that was taken by a friend of mine who is a photographer. And what better to pair a splash of colour with, than the beautiful ‘Bohemian Dream’ collection?
Given the “arty” theme of this photograph, I decided the best approach would be to have some arty fun whilst I created it. I started with a sheet of white cardstock that I cut down to measure 11×11″ with the intention of mounting it on patterned paper later on. I pulled out my gelatos (if you don’t have gelatos you can substitute any sort of water soluble pastel or art crayon). I chose some colours that would match with the palette of the collection, and used them to create a very simple “scribbled” background in a rough square shape. I then used my fingertip and a baby wipe to blend the colours out.
With my background work complete, I then turned my attention to creating some layers for behind my photo. I gathered some scraps of the Gypsy Heart and Dreamer papers and added them behind my photo, tucking in a yellow paper doily from my stash as well. I also added a tag that I cut and the you brighten my world tag sticker from the Accessory Sticker sheet, both tied with twine.
For the fussy cut element of my page, I couldn’t go past using the stunning floral print from the collection – Abundant. I cut three pieces from the paper, tucking each of them under the edges of my photo to form a triangle around it. I also added the live a colourful life sticker along the bottom edge of the photo.
By now I needed to tick off a few other items from my criteria list, as I only had one in place so far. I grabbed a flair button from the Flair Button pack, adding it on top of the floral cluster to the left of photo. The next element I wanted to add was the chipboard element, so I chose a few pieces from the coordinating Chipboard Accent Sticker sheet – a couple of small hearts and the beautiful pink moth.
For my title, I knew exactly what I wanted it to say, so I grabbed the ‘Happiness’ Die Cut Titles pack and chose the words life is beautiful. To complete my title I fussy cut a mess from one of the cards on the cut apart Boho Bits paper, then mounted all the words down along the right side of my photo.
I finished off my page with a scattering of sweet enamel shapes (hearts) and a splattering of some navy mist. I was so happy with how this pretty page turned out!
If you haven’t joined the INSD group yet, you can find it on Facebook HERE. There are still a few days left to enter the challenges, plus there is also a free online class from Zoe you can access (including a printable digital kit); process, live scrap and instructional videos from different members of the team; and plenty of inspiration as well, of course.
Thanks so much for stopping by today so I cold share this with you. Until next time, happy scrapping!
Hey y’all! Laura Alberts back with a Wild & Free layout featuring my youngest son and his stockpile of sister-annoying weapons. He is ready to take on all three of his sisters with this setup! I couldn’t stop giggling while scrapping this one, he’s so serious in his games and he was ready to rock and roll. This cut file from Paper Issues was absolutely perfect for this “target practice” style layout! I used the front and back of the Wild One patterned paper from the Legendary collection to build my background and then fussy cut tons of stars from the All Stars patterned paper to create a cascade that follows the color pattern of the background!
By tucking this larger ephemera star behind my photo, it helps to draw your attention to the photo as well as give the impression of the smaller stars shooting off from the larger one, a cool effect and perfect for this layout! I added a scattering of enamel dots and gold ink splatter to add detail to this cascade of stars.
I used a cut apart piece for my title and an arrow to draw your eye back to the photo again! On a one photo layout, it’s important to reinforce that this is the focal point in more than one way. And finally, I added these word phrase strips below the photo to create a pre-made journaling spot! I love how this layout came out and I think it really captures the feeling of that moment for my son.
I hope you’ve found some inspiration in this design and I would love to see how you capture your photo’s moment in time with your design! And don’t be afraid to fussy cut these brilliant stars that inspired this layout for me! They make for fantastic embellishments that already perfectly match the collection! A little bit of extra time can make a huge difference in your creations, those details can take your creativity even higher!
Thank you so much for joining me on the sister-blasting adventure and enjoy the process video for this fun layout below! Until next time, my friends!
It’s Tarrah back with you and today I am sharing a layout for Throwback Thursday. I decided to go back and pull out the gorgeous More Than Words collection for my Throwback Thursday project. I decided to cut a scallop design cut file that is from Cut To You first and backed some of the open spaces with some of the gorgeous papers from the collection.
I chose the Noteworthy paper as my background paper and arranged all the scallop pieces on the background how I liked them. I chose to document a lovely photo of my Mum and my son together at my Nan’s 90th birthday at the end of last year. I added one of the cardstock frames behind my photo and popped it up with foam tape to raise it up off the page. I placed some embellishments around the photo, including the flair button, a few die-cut phrases, a chipboard heart and some enamel dots and shapes.
My title is made up of the chipboard ‘Moments’ word from the chipboard elements pack and also the word ‘Sweet’ from the black chipboard titles pack. I placed both of these on the left of my photo, I like how they look overlapping the scalloped papers underneath. I added some of the floral cluster die-cuts around the page also, I like how they add some more colour and another element to the page.
The most time consuming part of the layout was backing all the scallop pieces and getting them arranged. Once that was all done and I had them glued down, the rest of the layout came together quite quickly. I find backing cut files very therapeutic, a bit like fussy cutting….however I know its not everyone’s cup of tea lol! A few of the last bits I added were the small phrase stickers from the Accessory Sticker sheet.
Thank you so much for stopping by today, I hope you enjoyed my Throwback Thursday project and that you are inspired in some way to create with your More Than Words goodies.
Hello CVS Friends. It’s Anna here with another project made with brand new “Legendary” collection. This line is so easy to work with and you have to believe me as I am not used to using masculine lines. I made this page in about 30 minutes which is almost a record for me. “Legendary” is a very colorful collection with almost all colors from the rainbow in it. However this time I decided to focus on yellow, orange and blue. I took those colors from the picture of my cute nephew.
I started with white background and some colorful splatters made with mists. It’s such an easy and fast way to add some unique touch to your pages. Second step was to pick three patterned papers and cut them into pieces. I also added decorative edge made with border puncher. If don’t have any, you can just tear off the edge of paper to add a little bit of mess.
Next step was to add photos over the layered papers and some title made with amazing product – Die cut titles. You have so many words to choose from and they are designed the way, you can also make longer phrases.
I love adding simple shapes to my projects and “Legendary” collection has great set of stars in various sizes and colors. I choose three bigger ones from Ephemera pack to create a visual triangle. I also added small stars from Clear stickers set and added them here and there.
I finished my page with few ephemera pieces, mostly tags and tickets, and few enamel dots. I am so happy how it all turned out. Tt will be a perfect addition to the gift for upcoming birthday of this little super hero.
I hope I inspired you to reach for this super cool collection. Zoe is a master of masculine collections! Thank you for stopping by and stay safe and healthy my Friends.
It’s Tarrah back with you today to share a new layout using the awesome Legendary collection!
I love how versatile this collection is, it can be used for boy projects, travel projects and even girl projects! Make sure to check your local or favourite online scrapbook store and get your hands on it!
I started out by trimming some of the papers into a few different sizes and arranged them on a white cardstock background. I chose the white arrow paper to feature my photo and some of the main embellishments. My photo is one of my eldest son looking handsome and going to his Year 6 farewell night a few years back.
Â
Â
I love the star die-cuts in the ephemera pack, I added the grey ones in 3 places to create a visual triangle on my page. I like how this takes your eye around the page. In between 2 of the stars I added some of the clear sticker stars, I like how this adds a bit more impact to the die-cut ones.
Inside the large grey star, I added one of the large circle Authentic die-cuts, I used craft foam underneath it to raise it up, I like how it gives it shadow and dimension. I also added the ‘Epic’ die-cut title below my photo, this became my title for my page. The flairs are awesome in this collection so I added the ‘Let’s Go’ one on this page since the photo is my son getting into the car! I also added the ‘Admit One Adventure Pass’ ticket just above the flair also.
Thank you so much for stopping by today. I hope my layout inspires you in some way! Make sure to keep an eye on the Cocoa Vanilla online store as the Legendary collection will be in the online store in the next few weeks!
Hello Cocoa Vanilla fans. It’s Anna here with fresh from the oven page. I got my stash of brand new “Legendary” collection and I knew I had to use it right away. You know I am a mom of two girls, big fan of flowers and pink, but Cocoa Vanilla masculine lines are always so colorful that I would want them anyway. “Legendary” line is also perfect for all your outdoor adventures and this it the way I decided to use it first. I am planning some mini album with my oldest, furry child, who is a good boy but I needed a warm up first.
I was very inspired by the paper with a map pattern “Outdoors type”. Because let’s be honest – what can be better as a background for travel page? The problem is that I love the B side too… Such a pretty wooden pattern. So I combined them both :) They look amazing with my photos taken in Tatry mountains during our first (me and hubby) trip as a couple. It was time before fancy cameras and I do not have many decent photos from that time. I managed to pick few when we were reaching a high peak using a cable car. Landscape from above looked amazing that day.
I picked some ephemera pieces that may fit the travel theme and gathered then under the photos. I also added a title using a word from “Die cut titles”. This is such an amazing product and it makes adding titles so easy. You can use words separately or build longer sentences.
I also have an idea for a very simple embellishment – add little wooden sticks to the flags included into ephemera pack and you will have some dimensional element to add to your projects. I placed my flags over the mountains silhouettes.
I finished my page adding date stamp, few stars and enamel dots. Did you noticed that they are back to the CVS products range? “Unforgettable” collection had them and this line also has matching ones. I love this product and I am so happy to see it back.
That is all for today. I hope you love “Legendary” line as much as I do. It’s appearing in the shops around the world already if you feel you need to have it right away (BTW – I know you do :D). Thank you for stopping by and see you in March.
Hello friends. It’s Anna here with my newest page made with CVS goodies. You all have seen the brand new line that will be appearing in the stores any time called “Legendary”. It’s another amazing, boy themed line, that came out from Zoe’s wonderful mind. I am still waiting for it, so I decided to dive into older collections. This time my creative process started with a picture, that I printed long ago but didn’t have mojo on how to scrapbook it. The important thing for this page is mentioning that my printer was dead for few days so I had to use photos that I already had on hand, so I was kind of “forced” to use this one. Don’t get me wrong – the picture is so cute and darling to me but the colors were hard to scrapbook as I always prefer more pastel shades and this one was edited with weird filter. it was a perfect opportunity to challenge myslef. I knew I am going to use some CVS collections, so I went through my stash and picked papers that may work for those colors and “baby bedtime” theme.
“Endless summer” line turned out to be just perfect when it comes to colors, especially the paper with cute clouds. It’s no longer available in the shop but you can purchase the digtal version of it and print your own paper. Stary paper “Star fall” from “Boys rule” collection was just perfect for a bedtime themed page. Thta it how thw whole idea came out.
After I fussy cut some clouds, I placed them around the background and added photo. I knew, I didn’t want to add too much to make a picture a main star of the project. I have a little box filled with elements from older CVS collections, all mixed up so I searched through it looking for matching elements. I didn’t care the line, I just wanted them to fit the theme. I picked many wooden stars from various collections including the very first boy themed line “Flying high”. I also added a cardboard frame and rubber tag that were a part of “Wild at heart” collection. My title was made with leftover alpha stickers.
It’s a very simple page and because the photo carries so many good memories, i wanted to add journaling too. however, I hate seeing my hadwriting on the pages, so I hid it. I cut out two tags in the same size from paper scraps and tided them with a string. The bottom tag has a little journaling on it, but it’s cover by the second one. This way I still get my memories recorded and a clean page :)
That is all for today. CVS collections are perfect used separatelly and together and working with them is a pure joy. I am a member of this team for 5!!! years and I still can’t get enough of them. thank you for stopping by and see you in two weeks.
Hello Friends. It’s Anna here. I am the last one, closing this amazing year of isnpiration over Cocoa Vanilla Blog. All of my super talented DT mates already shared their favorite 2019 Cocoa Vanilla projects and now it’s my turn. To be honest, I had a hard time choosing them because I love CVS products and I love all of my layouts and albums made with them.
You all know I love colors so I decided to pick a rainbow page as a first fav page of 2019. I created it as a sample for my classes, that I was lucky to teach in Australia this year. I used papers and embellishments from amazing “Happiness” collection. This name truly reflects the line itself. If you want to make this page, along with a second colorful layout, you can purchase the Double Page Kit in CVS store.
My second favorite page it much less colorful but I had so much fun making it. It’s a scraplift of my fellow DT member gal – Amanda and I used pretty “Midnight” collection. Simple heart made of fussy cut flowers is a perfect example that less is more.
One of my resolutions for 2019 was to reach for older collections much often to use up a little bit more of a growing pile of scrappy supplies. This birthday page was made with “Make a wish” line, which was one of my favorite collections in CVS history. I honestly used almost all of it.
I am a big fan of summer themed line so this “Hello sunshine” line is also on the top of my favorite CVS collections (who am I kidding – they all are on the top of my list…). This one was created during amazing event – CVS Creative Escape retreat. Zoe is making another one in 2020 and you really don’t want to miss that. Check the details here.
Last page is the most recent one. Once again I revisited an old line – the very first CVS collection called “Sugar and spice“. I do not have much of it left but I had a great help from Zoe, who released digital versions of older lines!!! How great is that. Now you can print your own papers and embellishments. We can call this layout a hybrid page, because I combined both older stuff and the newly printed elements.
That is all for today and for this year. We will meet again in 2020! I can’t believe how fast this year went by. I am sure 2020 will bring many more amazing products from CVS.
It’s Tarrah back with you and today its my turn to share some of my favourite layouts from 2019.
First up is this one I created recently using some of my last pieces of the gorgeous Tis the Season collection that I had been holding on to! This layout is one of my favourites because it has lots of my favourite things included on it, a photo of my boys, Christmas, a cut file, machine stitching and I also love the super cute shaker pocket that I filled with lots of the sequins from this collection.
Thankfully I can now have an endless supply of this stunning collection with the release of this collection in digital format! Never have to run out of it again! You can get your hands on the Tis the season digital collection in the Cocoa Vanilla store here.
My next favourite is this one I created using the amazing Unforgettable collection. I just Love all the florals in this collection and the colour palette is so beautiful too. I chose this one as a favourite because I love the design and how the soft colours of the collection make the darker black and white photo really pop. I also love all the layers of florals, papers and embellishments. The gorgeous foam titles in this collection are awesome to use too and the re-introduction of the bitty bows and tassels makes my bow heart happy!
Of course there has to be a boy themed layout in the mix having 2 sons and a husband! I used the awesome You Rock collection and used a sketch as inspiration to create my layout about my eldest son and hubby.
This layout is a favourite because I love the simple design and that I was able to use up some of my stash of the You Rock collection. The You Rock collection is probably my favourite Cocoa Vanilla boy collection. Unfortunately there are not too many pieces left from this collection and as yet its not a digital collection so if you have some left, lucky you!
Last but not least is this pretty layout using the stunning Happiness collection. This layout is one of my favourites because I absolutely LOVE the Happiness collection! This collection gets my colour loving heart skipping a beat! I mean just look at those stunning colours!!
I love that I was able to include lots of the different papers and I also fussy cut the colourful butterflies and scattered them around the layout.
Its also one of my favourite layouts because of the photo I added to the page, this photo features some of my people and they include boss lady Zoe, fellow team member and good friend, Sue and her gorgeous sister Mandy as well as former team member, Raquel and another friend Amy. I love spending time with ‘my people’ who get my passion for creating with pretty things!
Thank you so much for all your support this past year! I hope I inspired you in some way?!
Wishing you and your families all a very safe and Merry Christmas, I hope you get to spend time with the people you love the most and cherish those times with them.