It’s Sophie with you on the blog sharing this new page created with the Great Escape collection!
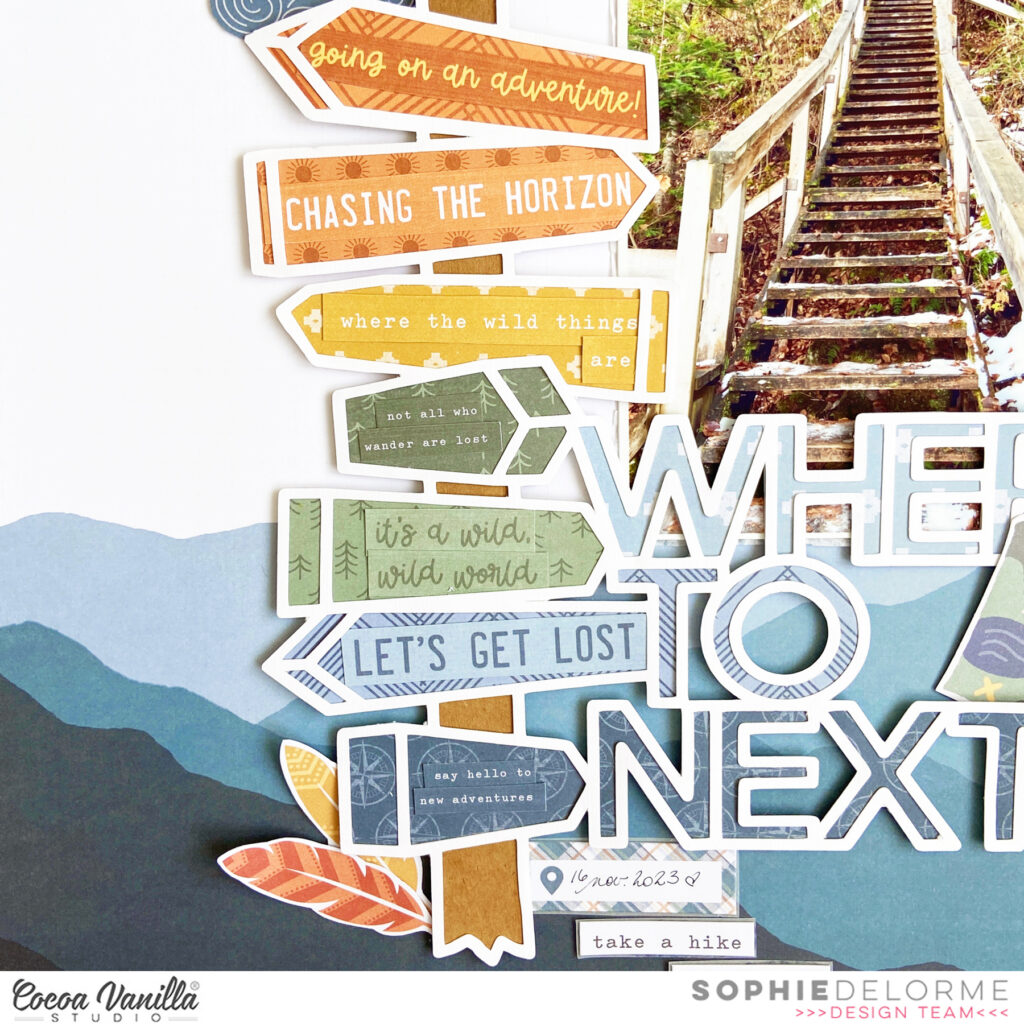
I had this photo from a recent hike and thought it was perfect to match a Paige Evans cut file that I love and wanted to use.
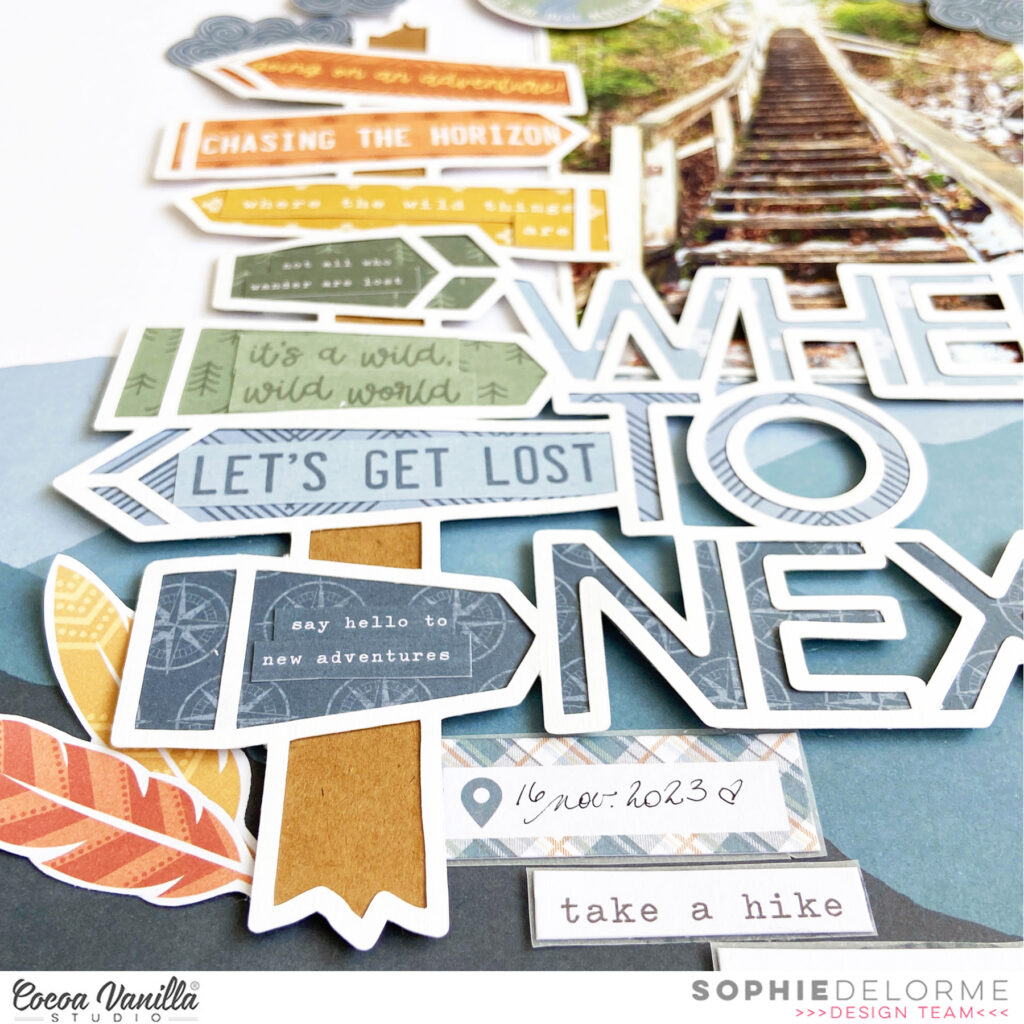
I backed the cut file with several different patterned papers from the A5 Paper Stack, and added a few phrases in matching color to each of the signs.
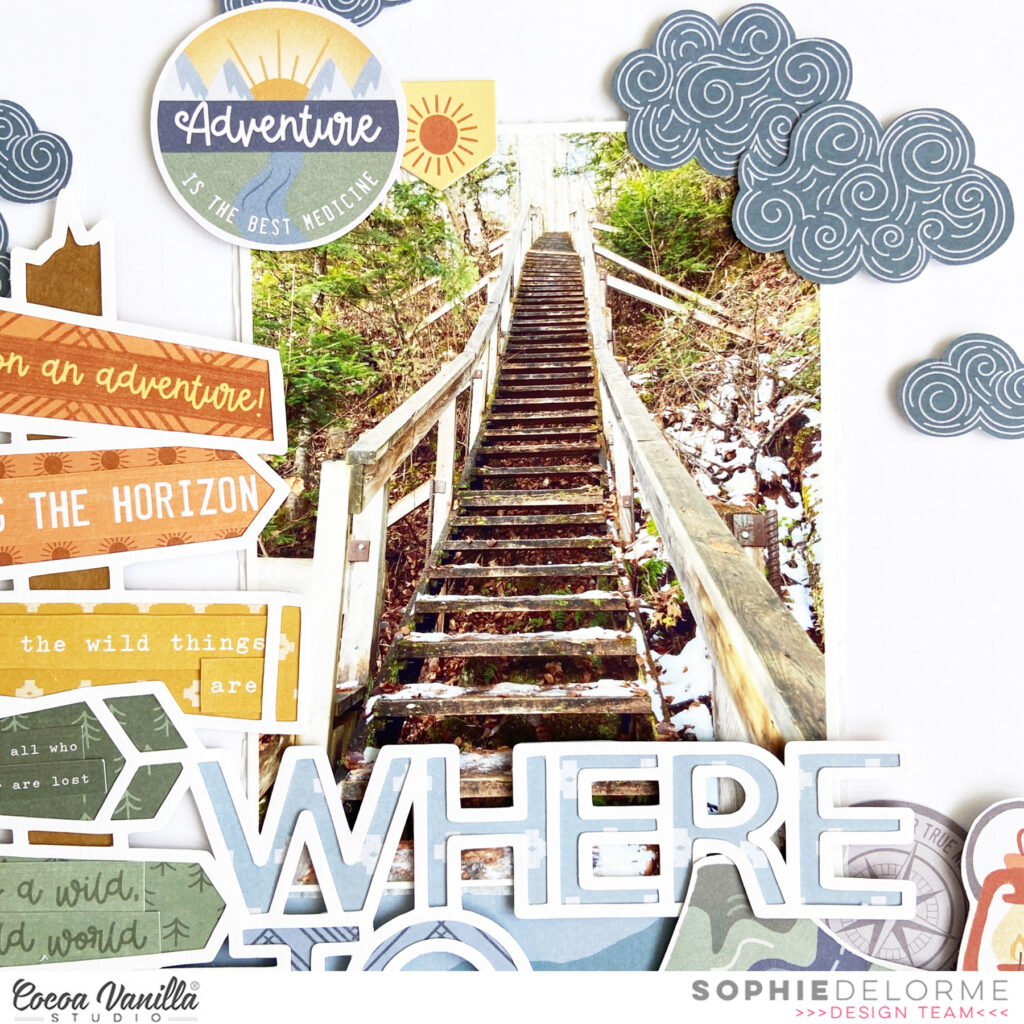
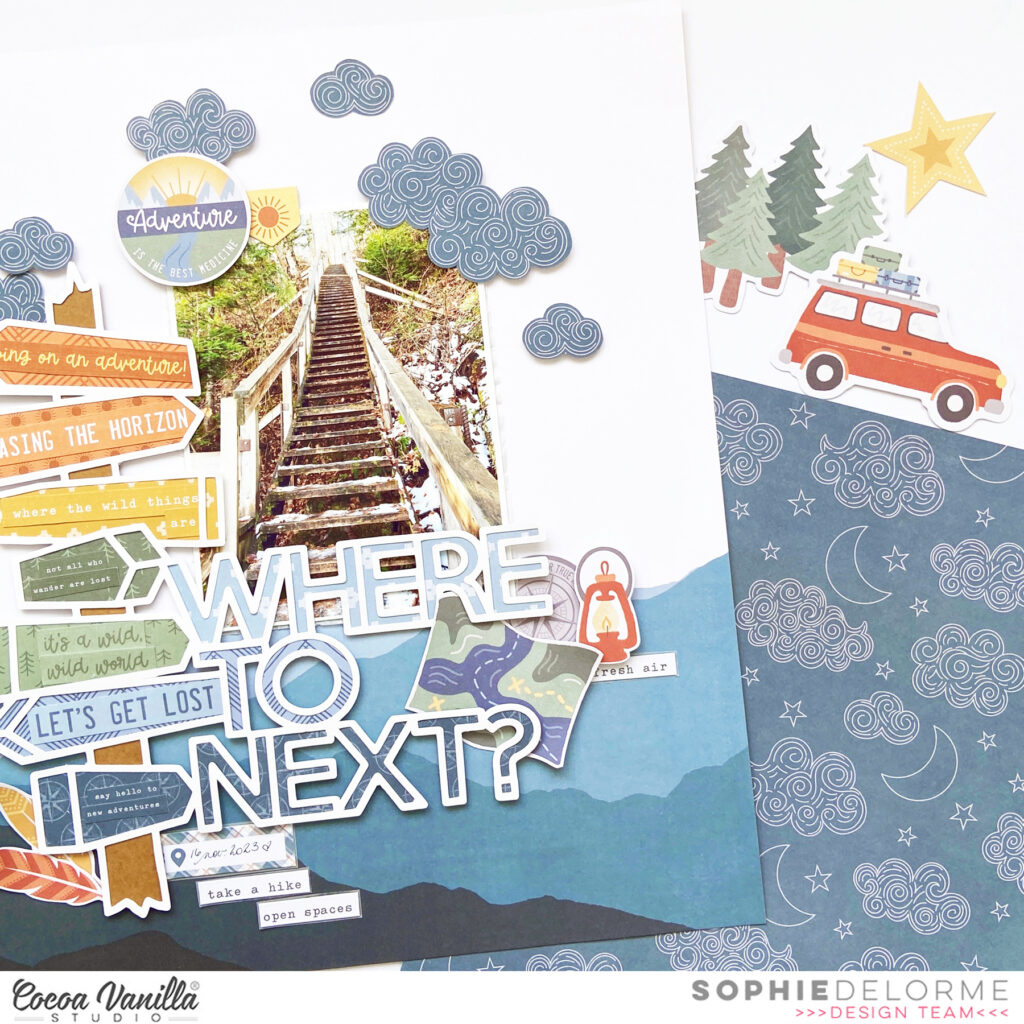
I put the cut file and photo on the Horizon paper. I added a few die cuts from the Die Cut Ephemera pack and phrase stickers from the die cut sticker sheet. I also fussy cut cute clouds from the Starry Night paper and added the date.
Here are more close-ups:
I am very happy with the result and hope you like it too!! Did you get your hands on this collection??
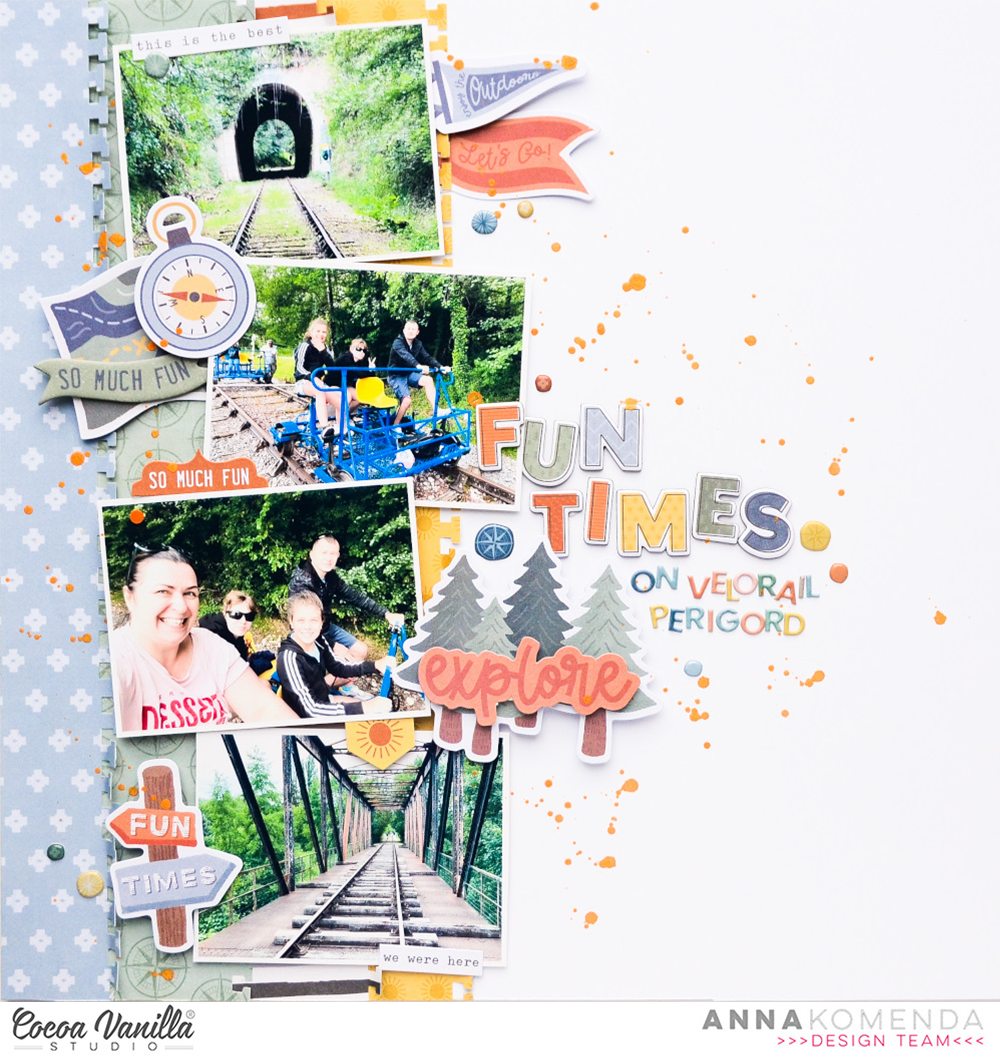
Hello Friends! It’s Anna Komenda here with my first ever project made with brand new “Great escape” collection! I was going to start bold with travel album but I run out of time so layout it is :) But do not worry – I will make this album too and will share it later with you. I decided to scrapbook our adventure on rail bike from last summer. They are becoming more popular in Europe, where restoration of old tracks turns them into fun biking adventure for the whole family. This particular one we took in France and it took us two hours of pedaling, going through little tunnels, old bridges and country landscape. It was really a fun, family time.
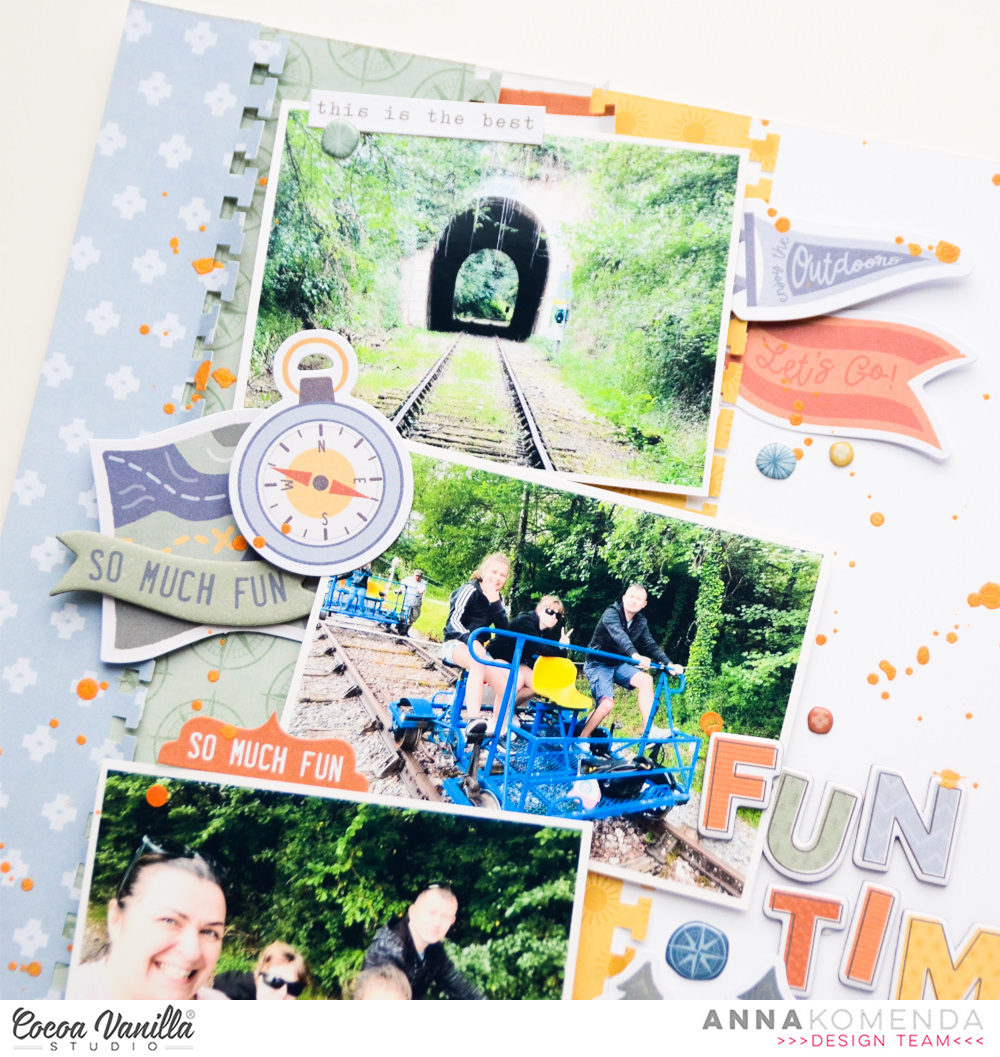
I started with white cardstock as a base and four strips of pattern papers: “Journey”, “Adventurer”, “Direction” and “Horizon”. I arranged them on the left side, adding some decorative edge with edge puncher.
Next step was to add pictures in a vertical row and decorate area around them. I started with a bag of Ephemera Die Cuts and picked the ones that match my theme, like compas, map, trees and fun banners.
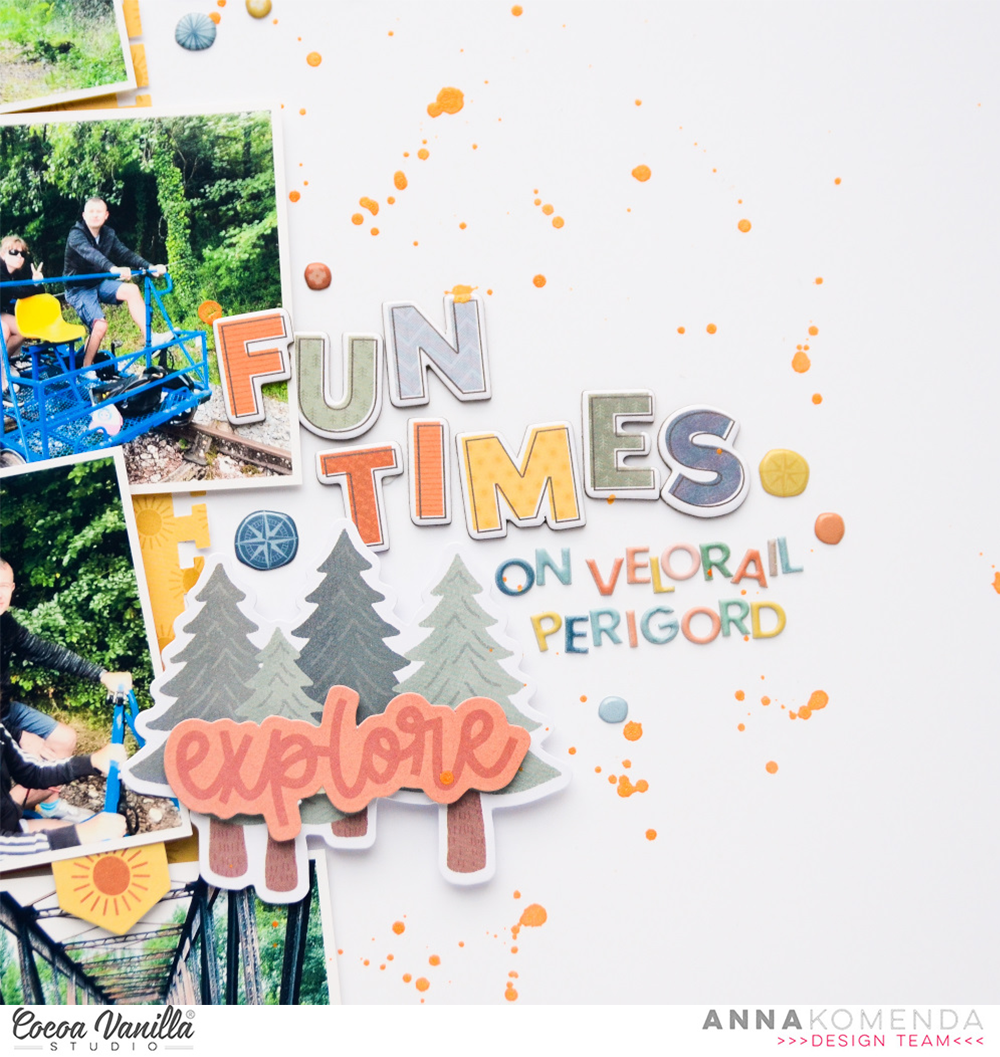
With all of them in place, I could add the title. I decided to combine words “good times” taken from Chipboard Stickers sheet with smaller words created with Mini Puffy Alphabet from older “Heart & Home” collection. Their colors matches this new line perfectly!
With all of those in place, I added some finishing touches with super cute tiny Puffy Stickers and some orange splatters. Making this page took me less that half an hour which is sort of time record for me. It usually takes me much, much longer but this time elements just clicked into the right spots. Magic of well designed collection!
That is all for today. Thank you so much for spending your time with me and I will be back with more projects made with this line!
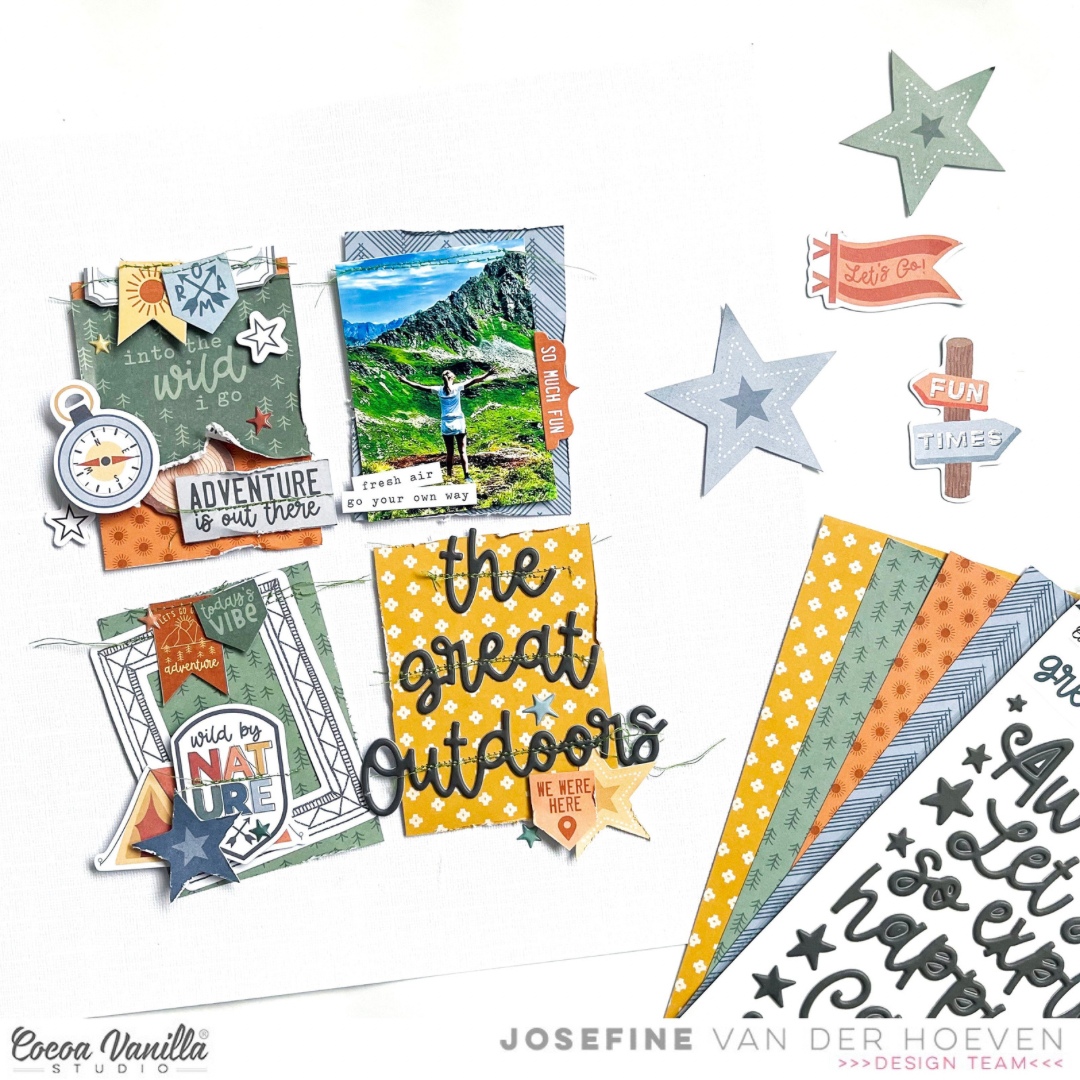
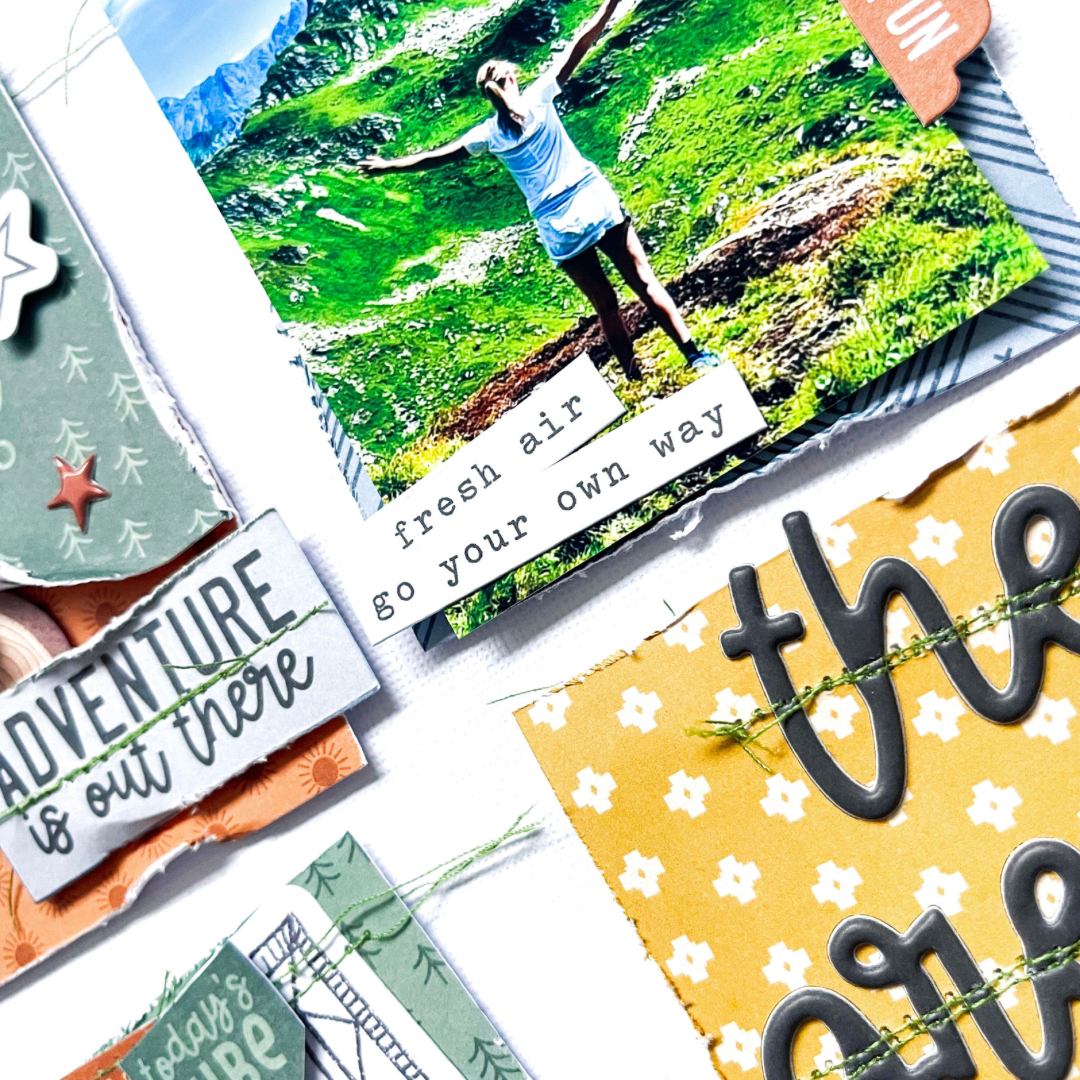
welcome to today’s scrapbook blog by Cocoa Vanilla Studio! It’s great to see you here seeking for new scrapbook inspiration. Today, I’m excited to share with you a fresh scrapbook layout featuring the fantastic new collection “Great Escape.” For this project, I’ve choose for a grid design as my inspiration. I cut various strips of paper to size and arranged them in a grid pattern on my white cardstock background.
To start, I selected some shape die-cuts and added them to the strips of paper, stitching them with green thread. I love the texture and effect that stitching adds to my scrapbook projects. On the right side, I created clusters with some beautiful and fun shape die-cuts. I also stitched green thread onto word strips and banners, giving them a nice placement on my layout.
The photo of my daughter high in the mountains of Austria complements the theme perfectly. The lovely swirl puffy titles from the collection fit wonderfully, so I placed them at the bottom left to create the title “The Great Outdoors,” stitching it with green thread as well. Placing the photo above the title, I added a few word strips as extra accents.
I’m really pleased with how the layout turned out, and I hope I’ve inspired you with this grid design. Wishing you all a wonderful day, and until next time on the blog. XoXo, Jo
Hey y’all! Laura Alberts back again with another Great Escape layout, but this time it’s a birthday page. Four photos and a shower of stars is the recipe for creating a layout bursting with celebratory vibes! The colors were too perfect not to step outside the theme of this collection for a fun spin a column design.
I started with a strip of the stunning plaid on the Star Gazing patterned paper, layered it with thin strips of the navy, then attached it to the beautiful gray woodgrain of the Starry Night to build my background. I lined up my three smaller photos and a few cut aparts from the Wild Life paper to fill in my column.
On the right side, I scattered fussy cut stars from the Star Gazing patterned paper to create a second column, then added my 3×4 focal image and a journaling spot on top! The chipboard stickers were perfect to embellish both columns and add a title with a 3D pop!
I hope this layout inspires you to try stepping outside the theme! If you’d like to see how this layout came together, check out the process video below:
Today is throwback Thursday! I have used the bright and beautiful Happy Days collection.
I wanted to scrap this photo of my youngest boy and I and therefore aimed for a colour palette more boy than girl!
I used Definitive paper as my background page and then cut the Rainbow Bright paper rainbow taking out the pinks. I added machine stitching to add texture to it.
I used two frames from the die cut ephemera pack for my photo, one which I cropped to a close up. I added these with foam tape so I could add elements under the frames. I added flowers from the floral ephemera pack focusing again on blues and yellows to match my rainbow. I then added glossy accents to the centres of the flowers.
I added journalling using the phrase sentiments from the accessory sticker sheet under my photo.
I next created a sky by cutting some clouds and layering them using the paper from the A5 paper stack. I added hearts from the puffy sticker sheet.
I used the curve of the rainbow and added my title using the chipboard title stickers
I added a butterfly and some heart puffy stickers to add more contrast and dimension.
The colours of this layout against a black and white background are so striking, this layout is giving me all the happy vibes!
Thank you for stopping by today! Throwback Thursday is always a good excuse to get out those older collections and create something beautiful.
It’s Sophie with you today and I am excited to share my very first layout with the new Great Escape collection!
As soon as I saw it, I knew exactly which photo to document with it!!
I started with a white background and the Starry Night paper to place my photo and embellishments.
I mounted the photo on tissue paper, adhesive foam and a few layers of patterned papers from the A5 Paper Stack.
I placed the photo on the right side of the page, and added white gesso on the left side where I was about to build a little scenery.
I selected a few embellishments from the Die Cut Ephemera pack like the trees, signage and tent to support the theme of the layout, and scattered numerous stars around the photo and title (Foam Title Stickers).
I completed the page with a few stickers from the Accessory Stickers sheet, and handwrote my journaling directly on the white background.
Here are more close-ups:
Oh how I LOVE this collection!! It’s just perfect for outdoors memories!!!
Hi Cocoa Vanilla friends and welcome back to the blog.
It’s Kel here today and I am sharing my take on the Scrap Lift challenge that is running this month. Have you had a chance to enter the comp? There are 3 different pages to choose from…or you could lift all 3! I decided to scrap lift this layout from design team member Michelle Stokes….
For my page, I am using the brand new The Great Escape collection..here is my page..
I changed the design by not using squares, instead using elongated hexagons. I mounted a smaller hexagon on top and added hand stitching to give them texture.
I have used 2 photos like Michelle, applying them slightly offset, and mounted them onto black cardstock to help them pop off the page, then embellished on a diagonal through the photos.
To the top left of the page I have used a piece from the die cut ephemerawith a hand cut star and a black star that I cut from cardstock, to add a pop of black to the top of the page..
Next I used a sticker above my photo from the Accessory Sticker Sheet and a chipboard banner from the Chipboard Stickerswhich I added onto my photo. Under the photo I used a label from the A5 paper stack to add my place and date.
To the bottom right of my photos is where I added my title. I used the Chipboard Stickers for “Fun Times Ahead’.. I love how they pop off the page… and of course I had to add some of the signature Cocoa Vanilla stars that Zoe adds to her more masculine collections..
Under the title I used some of the phrases from the Accessory Sticker Sheet. I always find these easy to use..
I hope you have enjoyed seeing how I scrap lifted Michelles gorgeous page today and I look forward to seeing your pages in the Cocoa Vanilla Facebook group.
and welcome to the Cocoa Vanilla Studio blog! We’re happy to have you here looking for fresh scrapbook inspiration and curious to explore the fantastic new collection called “Great Escape.” My family and I are mountain lovers, always on the lookout for new adventures through long climbing hikes. This collection fits perfectly with our cherished memories from Austria and Switzerland. The photo featuring my daughter and me was taken in the picturesque town of Hallstatt, Austria.
To kick off this creative journey, I started by cutting a large circle out from white cardstock. Opting for a light blue patterned paper, I filled the circle and added a touch of detail by stitching the edges with green thread by using my Cricut cutting machine. I cut three different trees from green and gray cardstock. The cut files are from the Cricut store. The choice of green and gray provided a beautiful contrast that complements the colors of the new collection. To add depth and dimension, I attached the trees with 3D foam, for a lovely stand out.
Next, I sized the photo and added a dark blue border by cutting the pattern paper to fit and placing it behind the photo. I placed the photo with patterned paper halfway onto the trees. Creating a focal point on the right side of the photo, I selected die-cuts to make a large cluster. Adding a green stitching detail to some of the die-cuts.
Underneath the cluster, I finished with two word strips that complement the theme. For a playful touch, I scattered puffy stars across my layout as confetti, bringing joy to the overall design. Lastly, I created my title using the beautiful word titles. The font of these word titles is truly amazing, and I chose “Let’s go explore” as the title. To finish, I added splatters of white gesso and green and blue Distress Oxide using a brush.
I hope this outdoor layout has inspired you to embark on your own creative journey. I’m thoroughly enjoying working with this beautiful collection and can’t wait to create another layout. Until next time, happy crafting!
Hey y’all! Laura Alberts here again with another Great Escape layout featuring a ton of camping photos from our trip to Cumberland Falls! The waterfalls at this campground were stunning, so I wanted to squeeze as many photos on this layout as possible. In the end, there are two 3×4 inch photos and four 2×3 inch photos documenting the sights and my kids exploring the area.
I started with a few paper strips, two from the cut-apart Wild Life patterned paper and the others are off-cuts from Starry Night and Journey. In addition, I fussy cut a ton of stars from Star Gazing and the feathers from Direction. I love the patterned papers that have designs perfect for fussy cutting!
In addition to the vertical and horizontal strips that I used as a base for my design, I added an little shelf in the center to hold my main focal images. The fussy cut stars added a nice detail to the rainbows along the vertical strip, while the rainbow stripe reflected the same color scheme along the bottom and on the shelf, creating continuity between the three clusters of photos.
I hope this layout inspires you to expand your use of paper strips to think outside of the box! If you’d like to see “Explore” come together, check out this process video below:
It’s Tarrah here with you today to share my first layout using the awesome Great Escape collection!
I decided to create a layout featuring a large A4 photo taken from the bridge over the amazing Cataract Gorge in Tasmania from our recent trip visiting Tassie. The Great Escape collection was the perfect collection to focus mainly on the photo for this layout and layering lots of the elements straight on top of my photo.
I started out with a plain sheet of white cardstock and placed my large photo in the very centre of the cardstock. I left the edges free of adhesive so that I could place the papers down the sides. I then cut some paper strips from the ‘B’ side of the ‘Happy Camper’ patterned paperand the ‘B’ side of the ‘Direction’ patterned paper, placing these vertically, the ‘Direction’ paper was placed at the outer edge and the ‘Happy Camper’ paper closer to the photo. I then fussy cut the scallops from the ‘Wild Life’ patterned paper and tucked this piece in on the left-hand side and bent the edges up to add some dimension.
My title is the ‘Adventure’ title from the chipboard pack, I placed it down the bottom of the page, in the centre of photo and also placed one of the circle die-cuts from the ephemera pack just above the chipboard title. I took 2 of the stickers from the Accessory Sticker sheet and placed these below the chipboard title. I journaled the location and the date on the smaller sticker.
On the right-hand side I placed 2 more of the chipboard pieces to help balance the scallops from the left-hand hand side. I placed one of the phrase stickers from the Accessory Sticker sheet layered over the top of these pieces. I also placed one of the enamel dots from the enamel shapes pack here.
At the top of the photo, I placed the ‘Wild by Nature’ die-cut using foam tape to add dimension to the page. I also placed another of the enamel dots over the top of the arrows on this die-cut. This collection is perfect for your travel and outdoor adventures such as camping, road trips, hiking, fishing, walking, running or even documenting the boys in your life! I hope you get a chance to purchase this awesome collection to create some projects of your own!
Thanks so much for stopping by the Cocoa Vanilla blog today! I hope you are inspired by my layout and enjoyed reading about how I created it. Make sure you visit the blog to see all the other gorgeous inspiration from the Cocoa Vanilla design team!