You’re Awesome | No Limits | Lina Monaco
Hello Friends,
Lina here today on the blog with a Throwback Thursday layout for you. I used the latest boy themed collection, No Limits, for my layout and I have no doubts that I made the correct decision with this one. It’s full of bright colours with fun accents and decor pieces such as lightning bolts, arrows and stars. I mean, it was an obvious choice for me!

For my layout, I decided I wanted to incorporate a grid of some sort. I wasn’t sure how I’d accomplish this right off the hop but after looking at my photos and noticing that I had printed off duplicates of this photo of my darling nephew, one in black and white and one in colour, I thought using the photos and pocket cards was the way to go. The background paper I used is called Stardust and it’s the most perfect aqua tone with splatters and distressing.
I matted my photos and two Pockets Cards with papers from the collection including Latitude, Nebula, and Big Bang. The pops of colours make my rainbow heart happy ☺️

For a pop of darker blue, I used two additional Pocket Cards to matte the original cards. I just adore how the inky blues subtly pop out from behind the cards, it just makes them leap off the page. I arranged both my photos and my Pocket Cards in a grid style and went to work on embellishing my layout.

I used the Die Cut Ephemera, Accessory Stickers, along with the Chipboard Stickers to add pops of embellishments around the page. I also used the Chipboard Stickers for my title, pulling “You’re Awesome” from the sheet. I adhered it down using hot glue on the edges and securing it down. I enjoy the loose and playful placement of the title as it adds a bit of whimsy in my opinion.

I continued to embellish the page with Puffy Stickers, tucking them in and around the layout. I felt the layout needed a bit more expression and sentiment and so I used some of the small phrases from the Accessory Sheet to add some much needed micro titles. This is how I personally convey sentiment on layouts as I almost never journal on them. If I want to document something specific, I do so on the back of the layout.

Lastly, as per my style, I finished off my layout with a good splattering of gold paint spray. I feel like it just pulls everything together and rounds out the layout nicely.
I hope you enjoyed my layout and wish you the best day!
xoLina


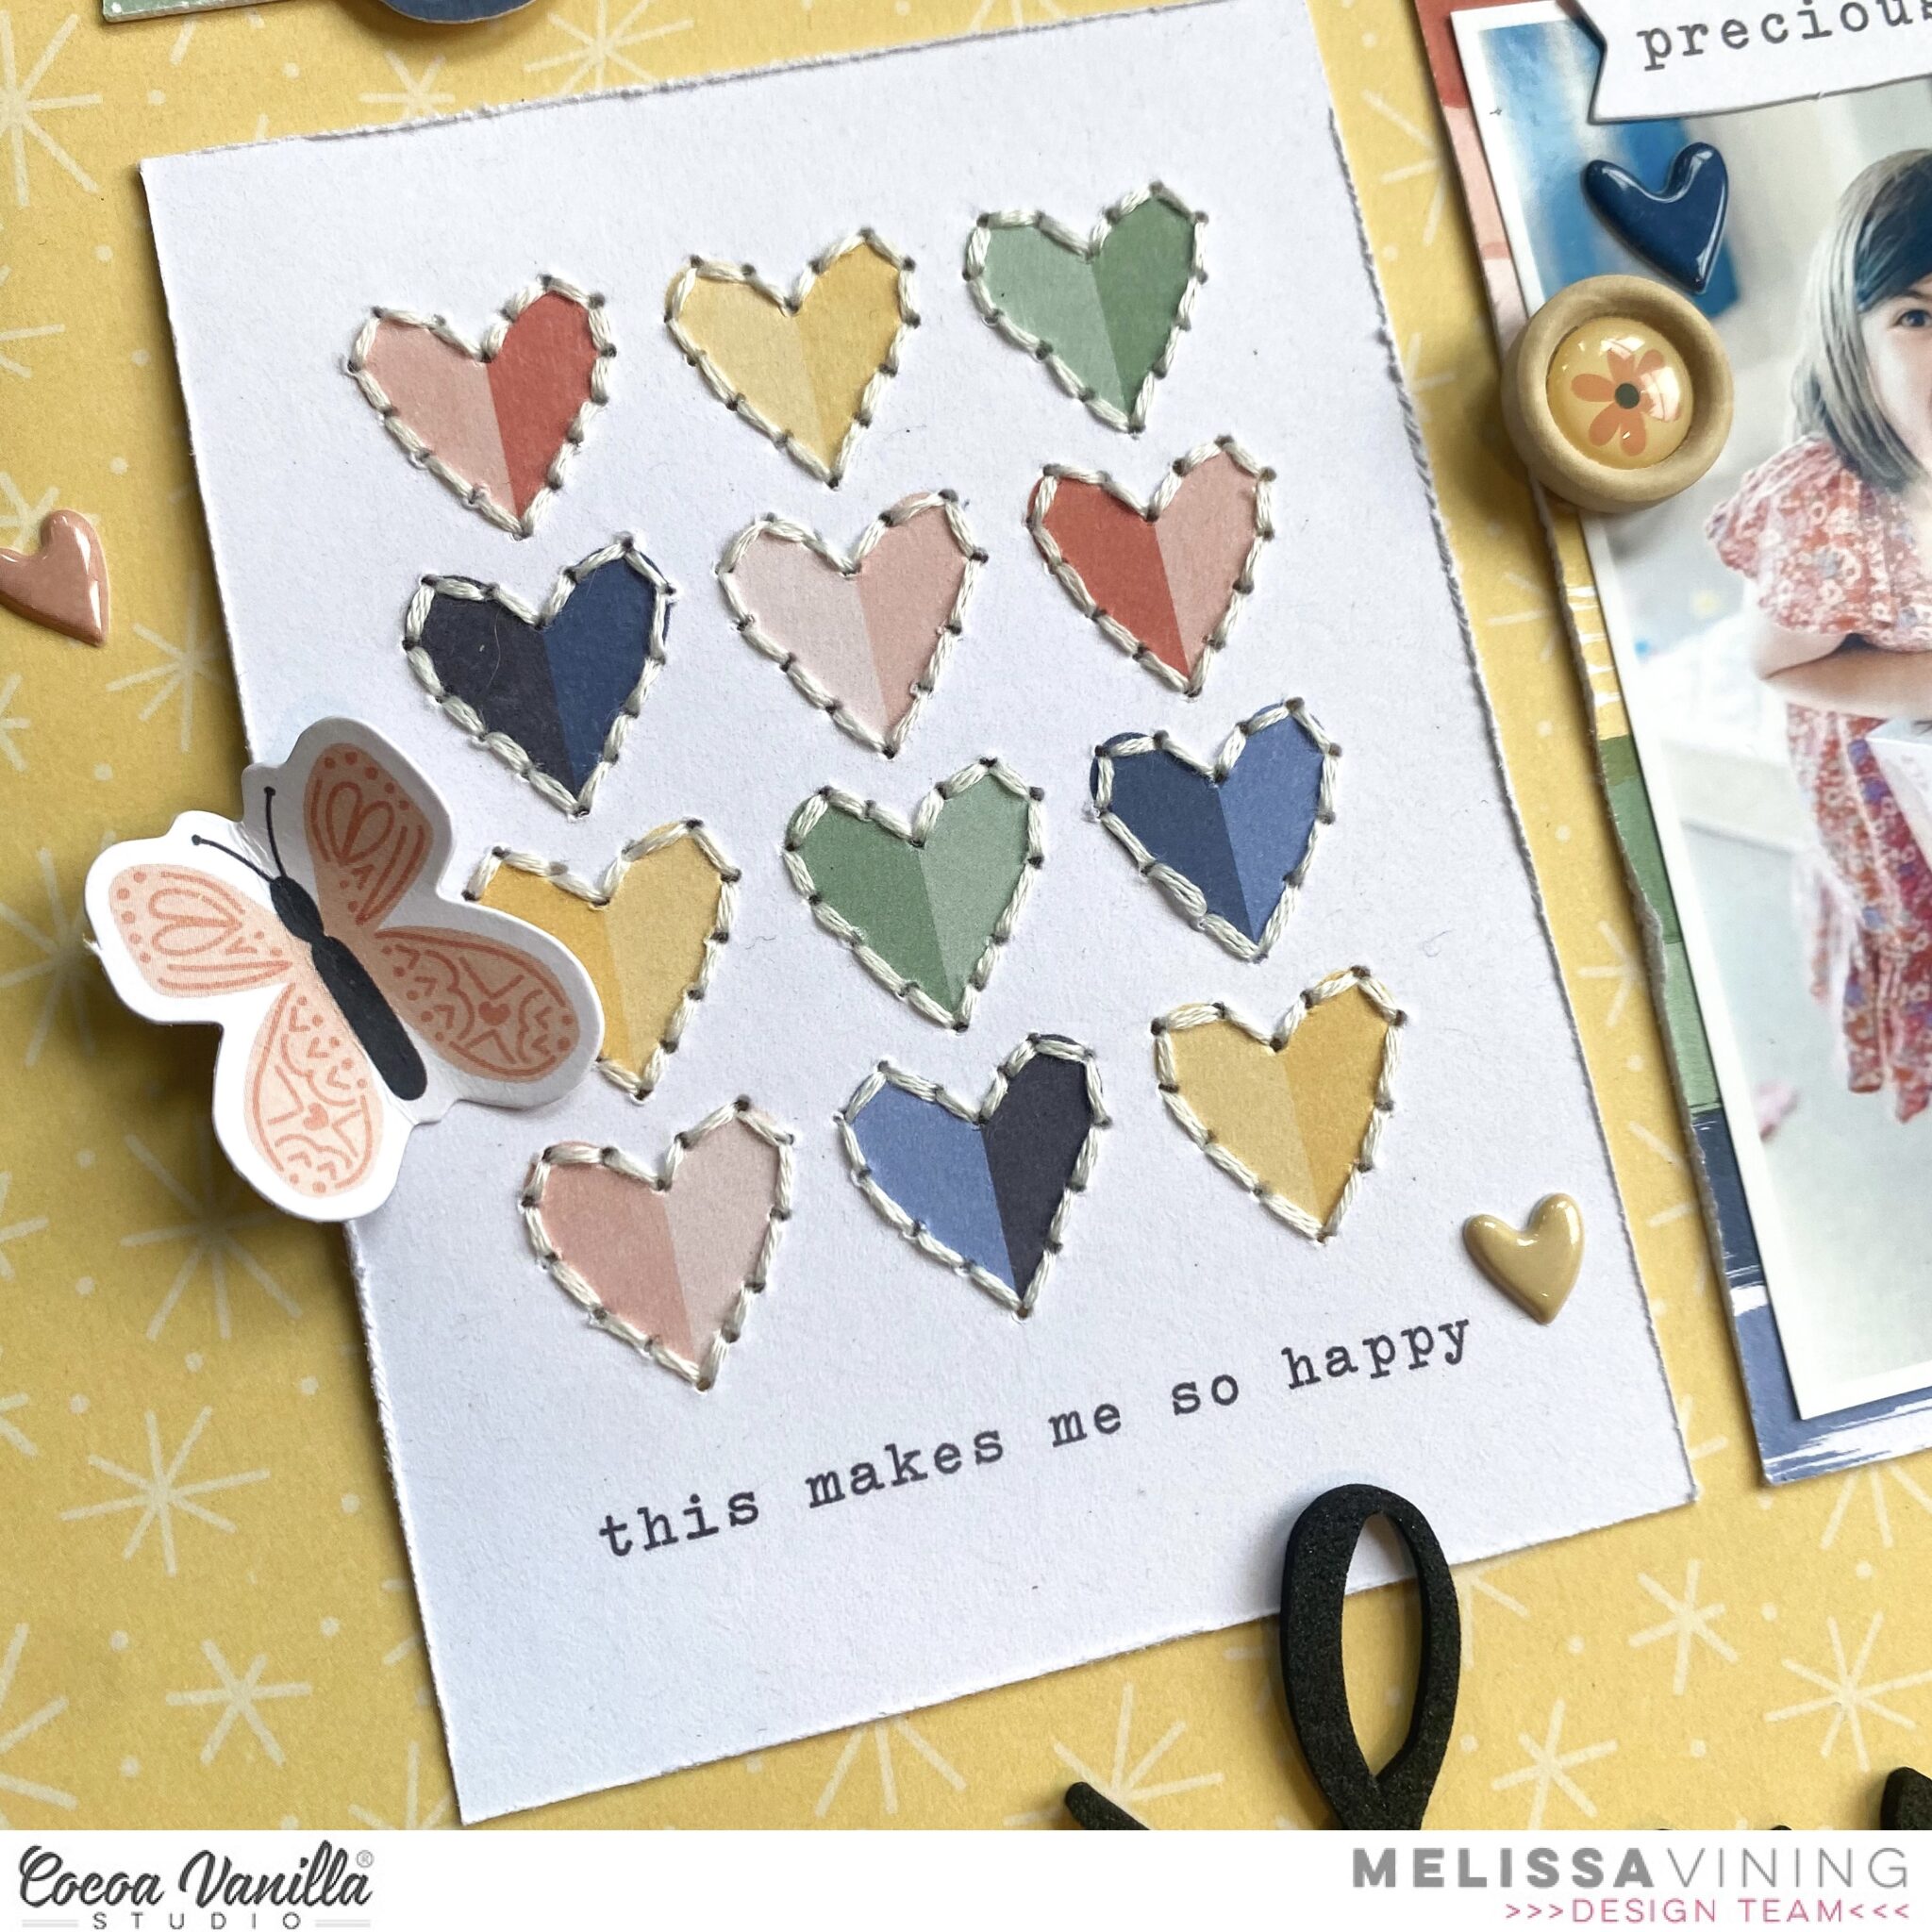
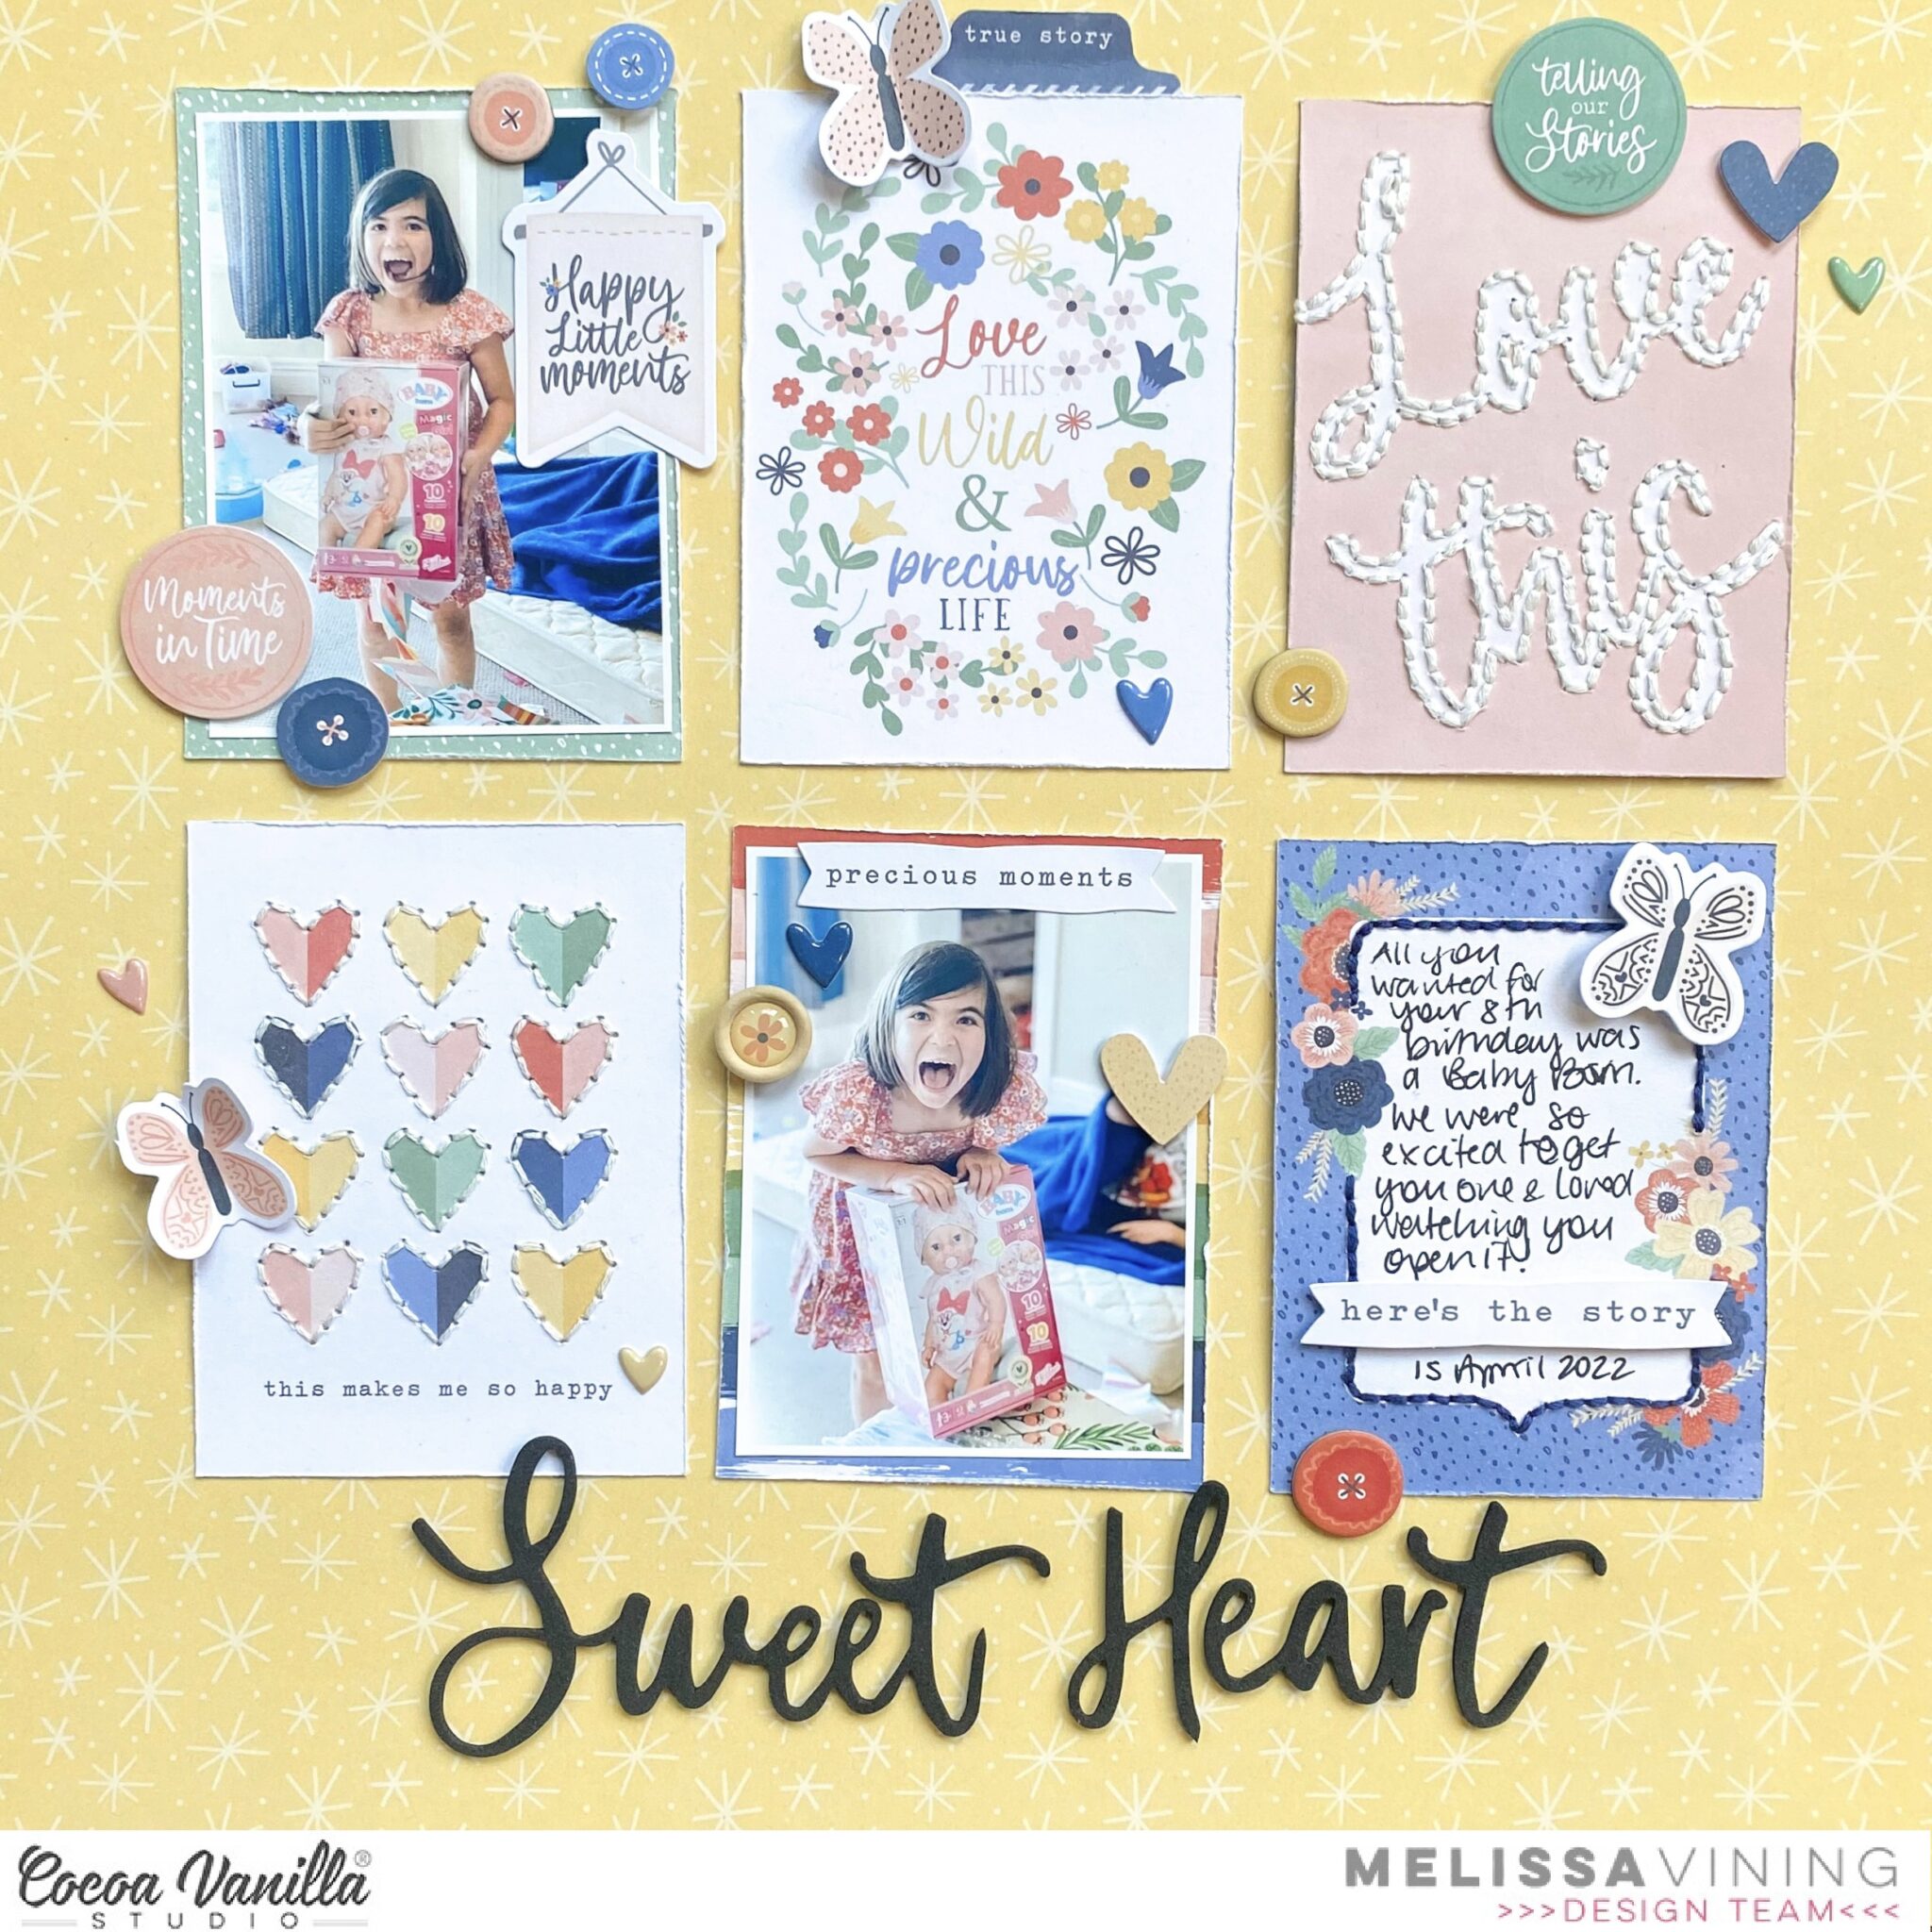 Whenever I use several of the pocket cards I go with a grid design to feature as many cards as possible. For this layout I chose two cards that were patterned paper to house the photos, and the other four cards feature beautiful design elements that could be further embellished. I used Little Love for my background because I love the beautiful yellow and subtle pattern – perfect for featuring all of the cards. The “Love This” card was calling out for me to hand stitch around it. I pierced holes around the edge of the words, and then stitched with the full 6 threads of the skein. Simple yet effective.
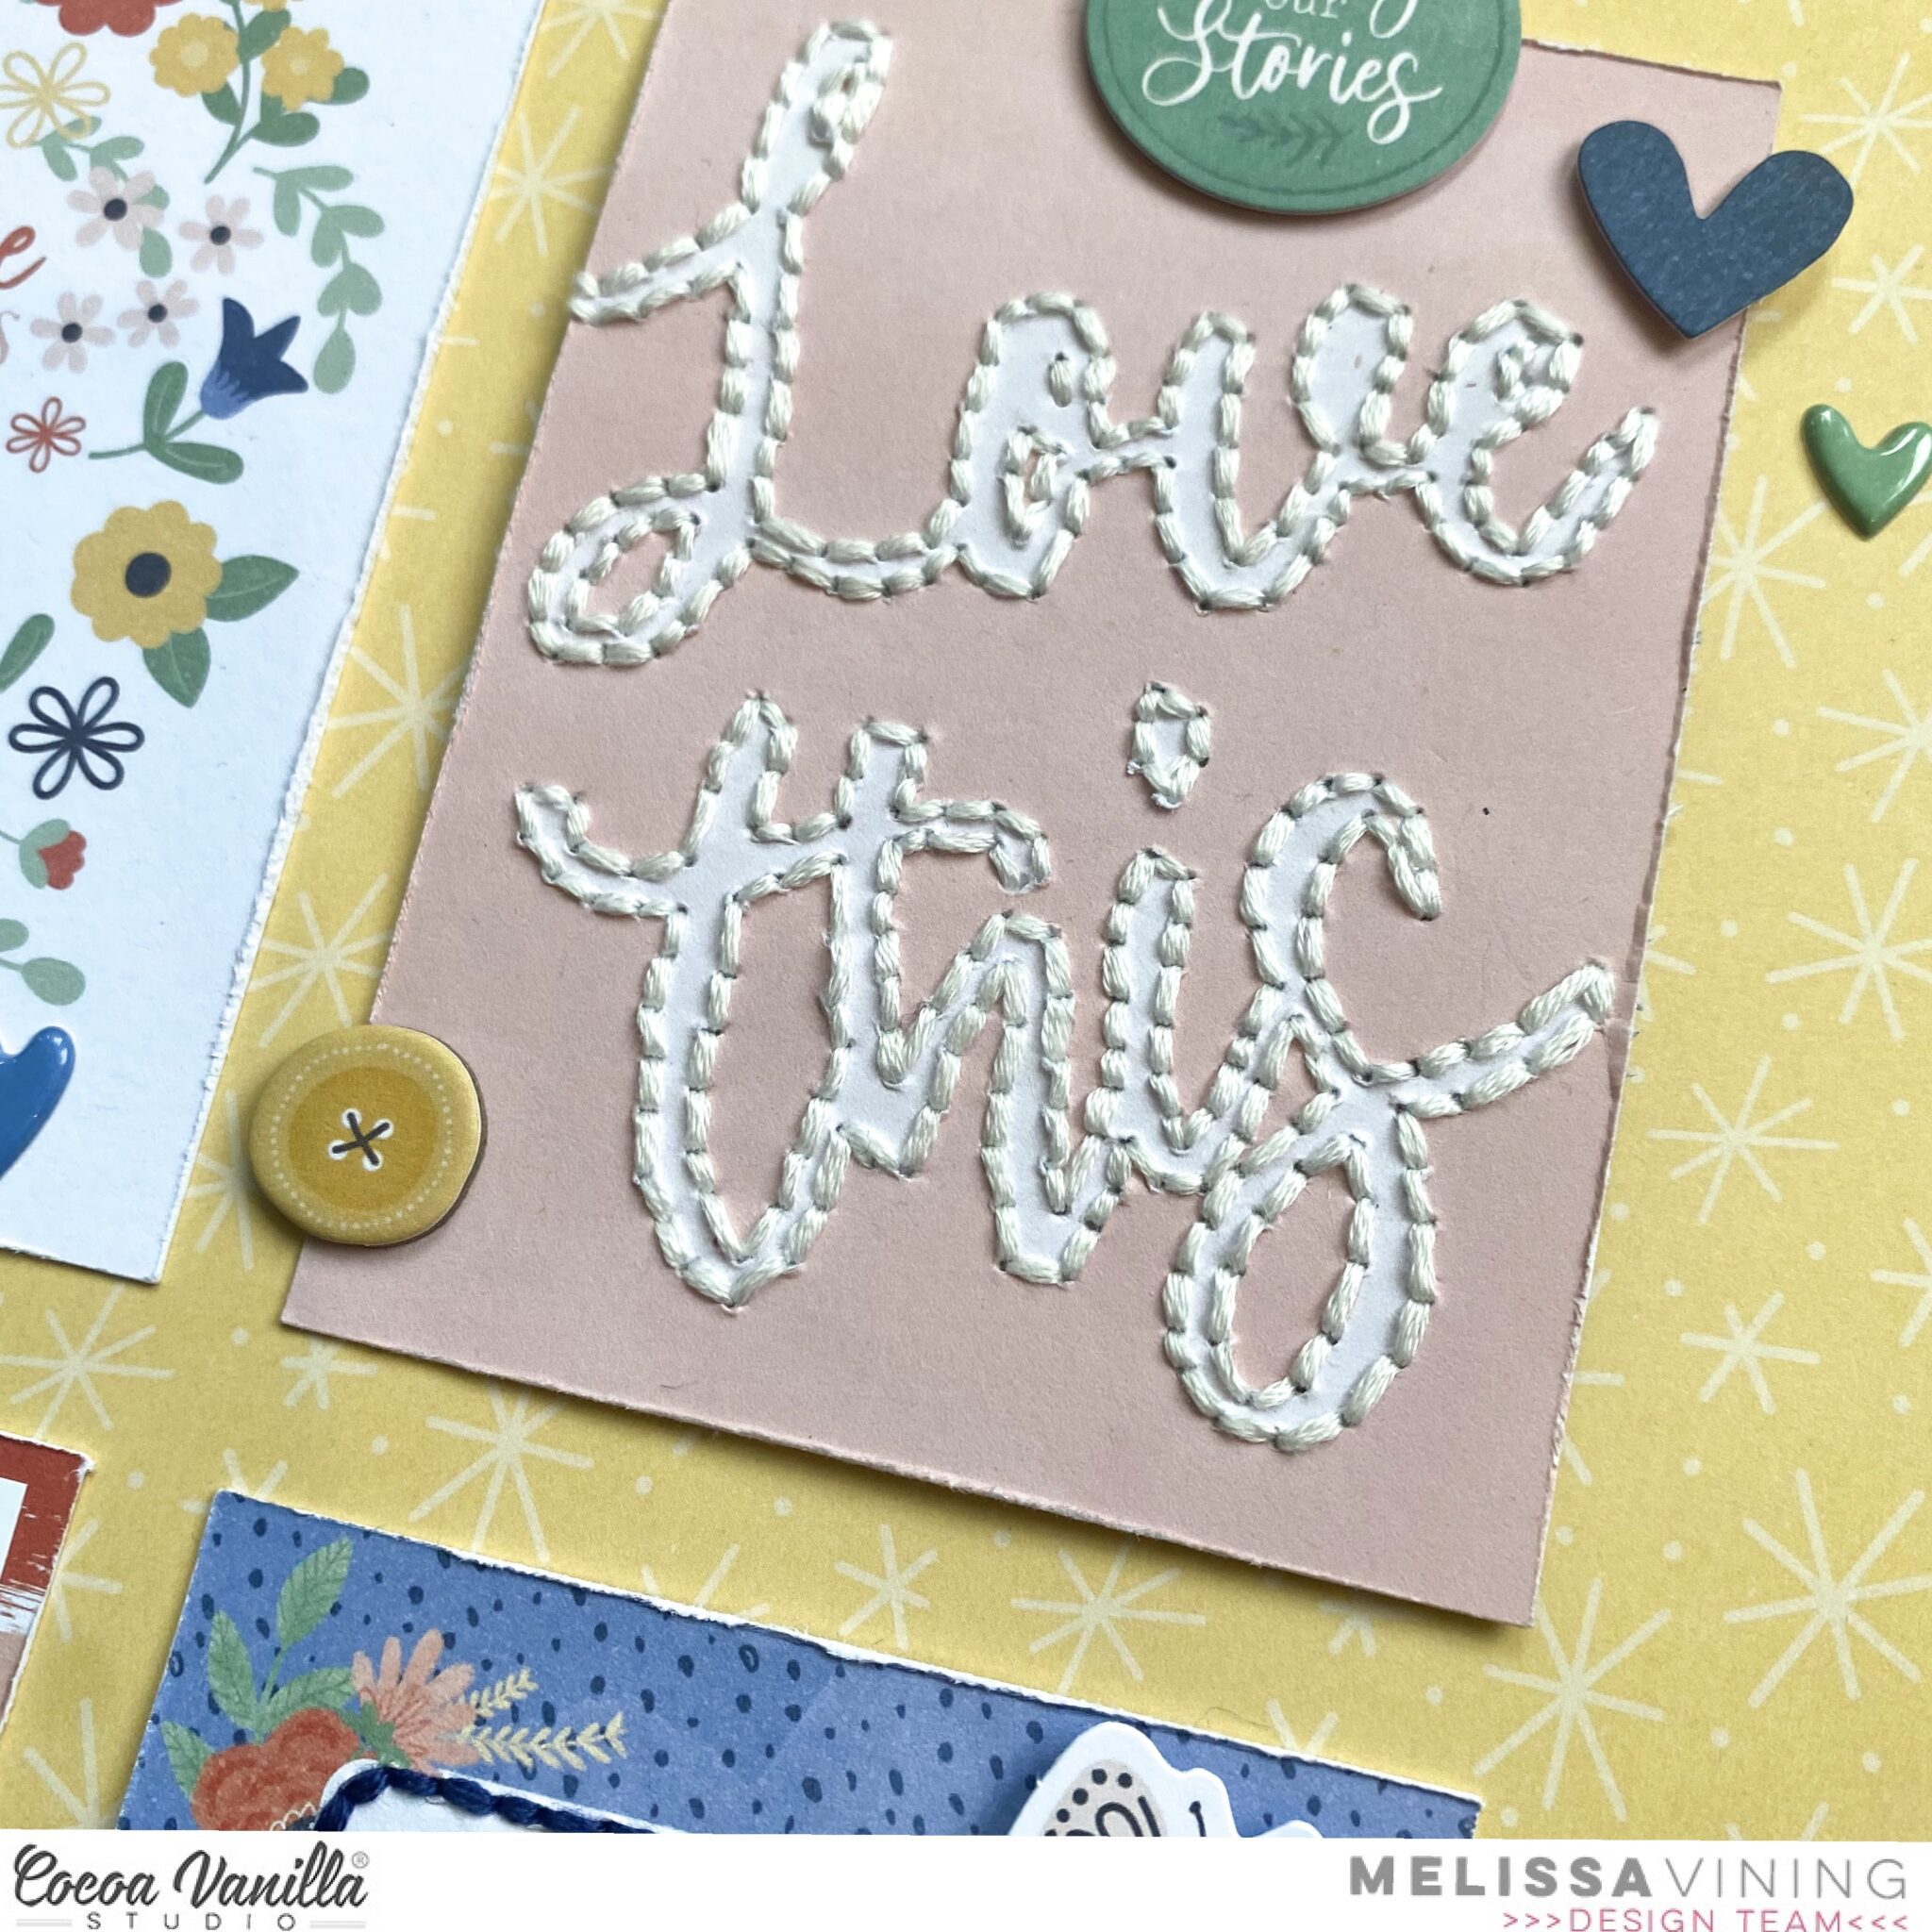
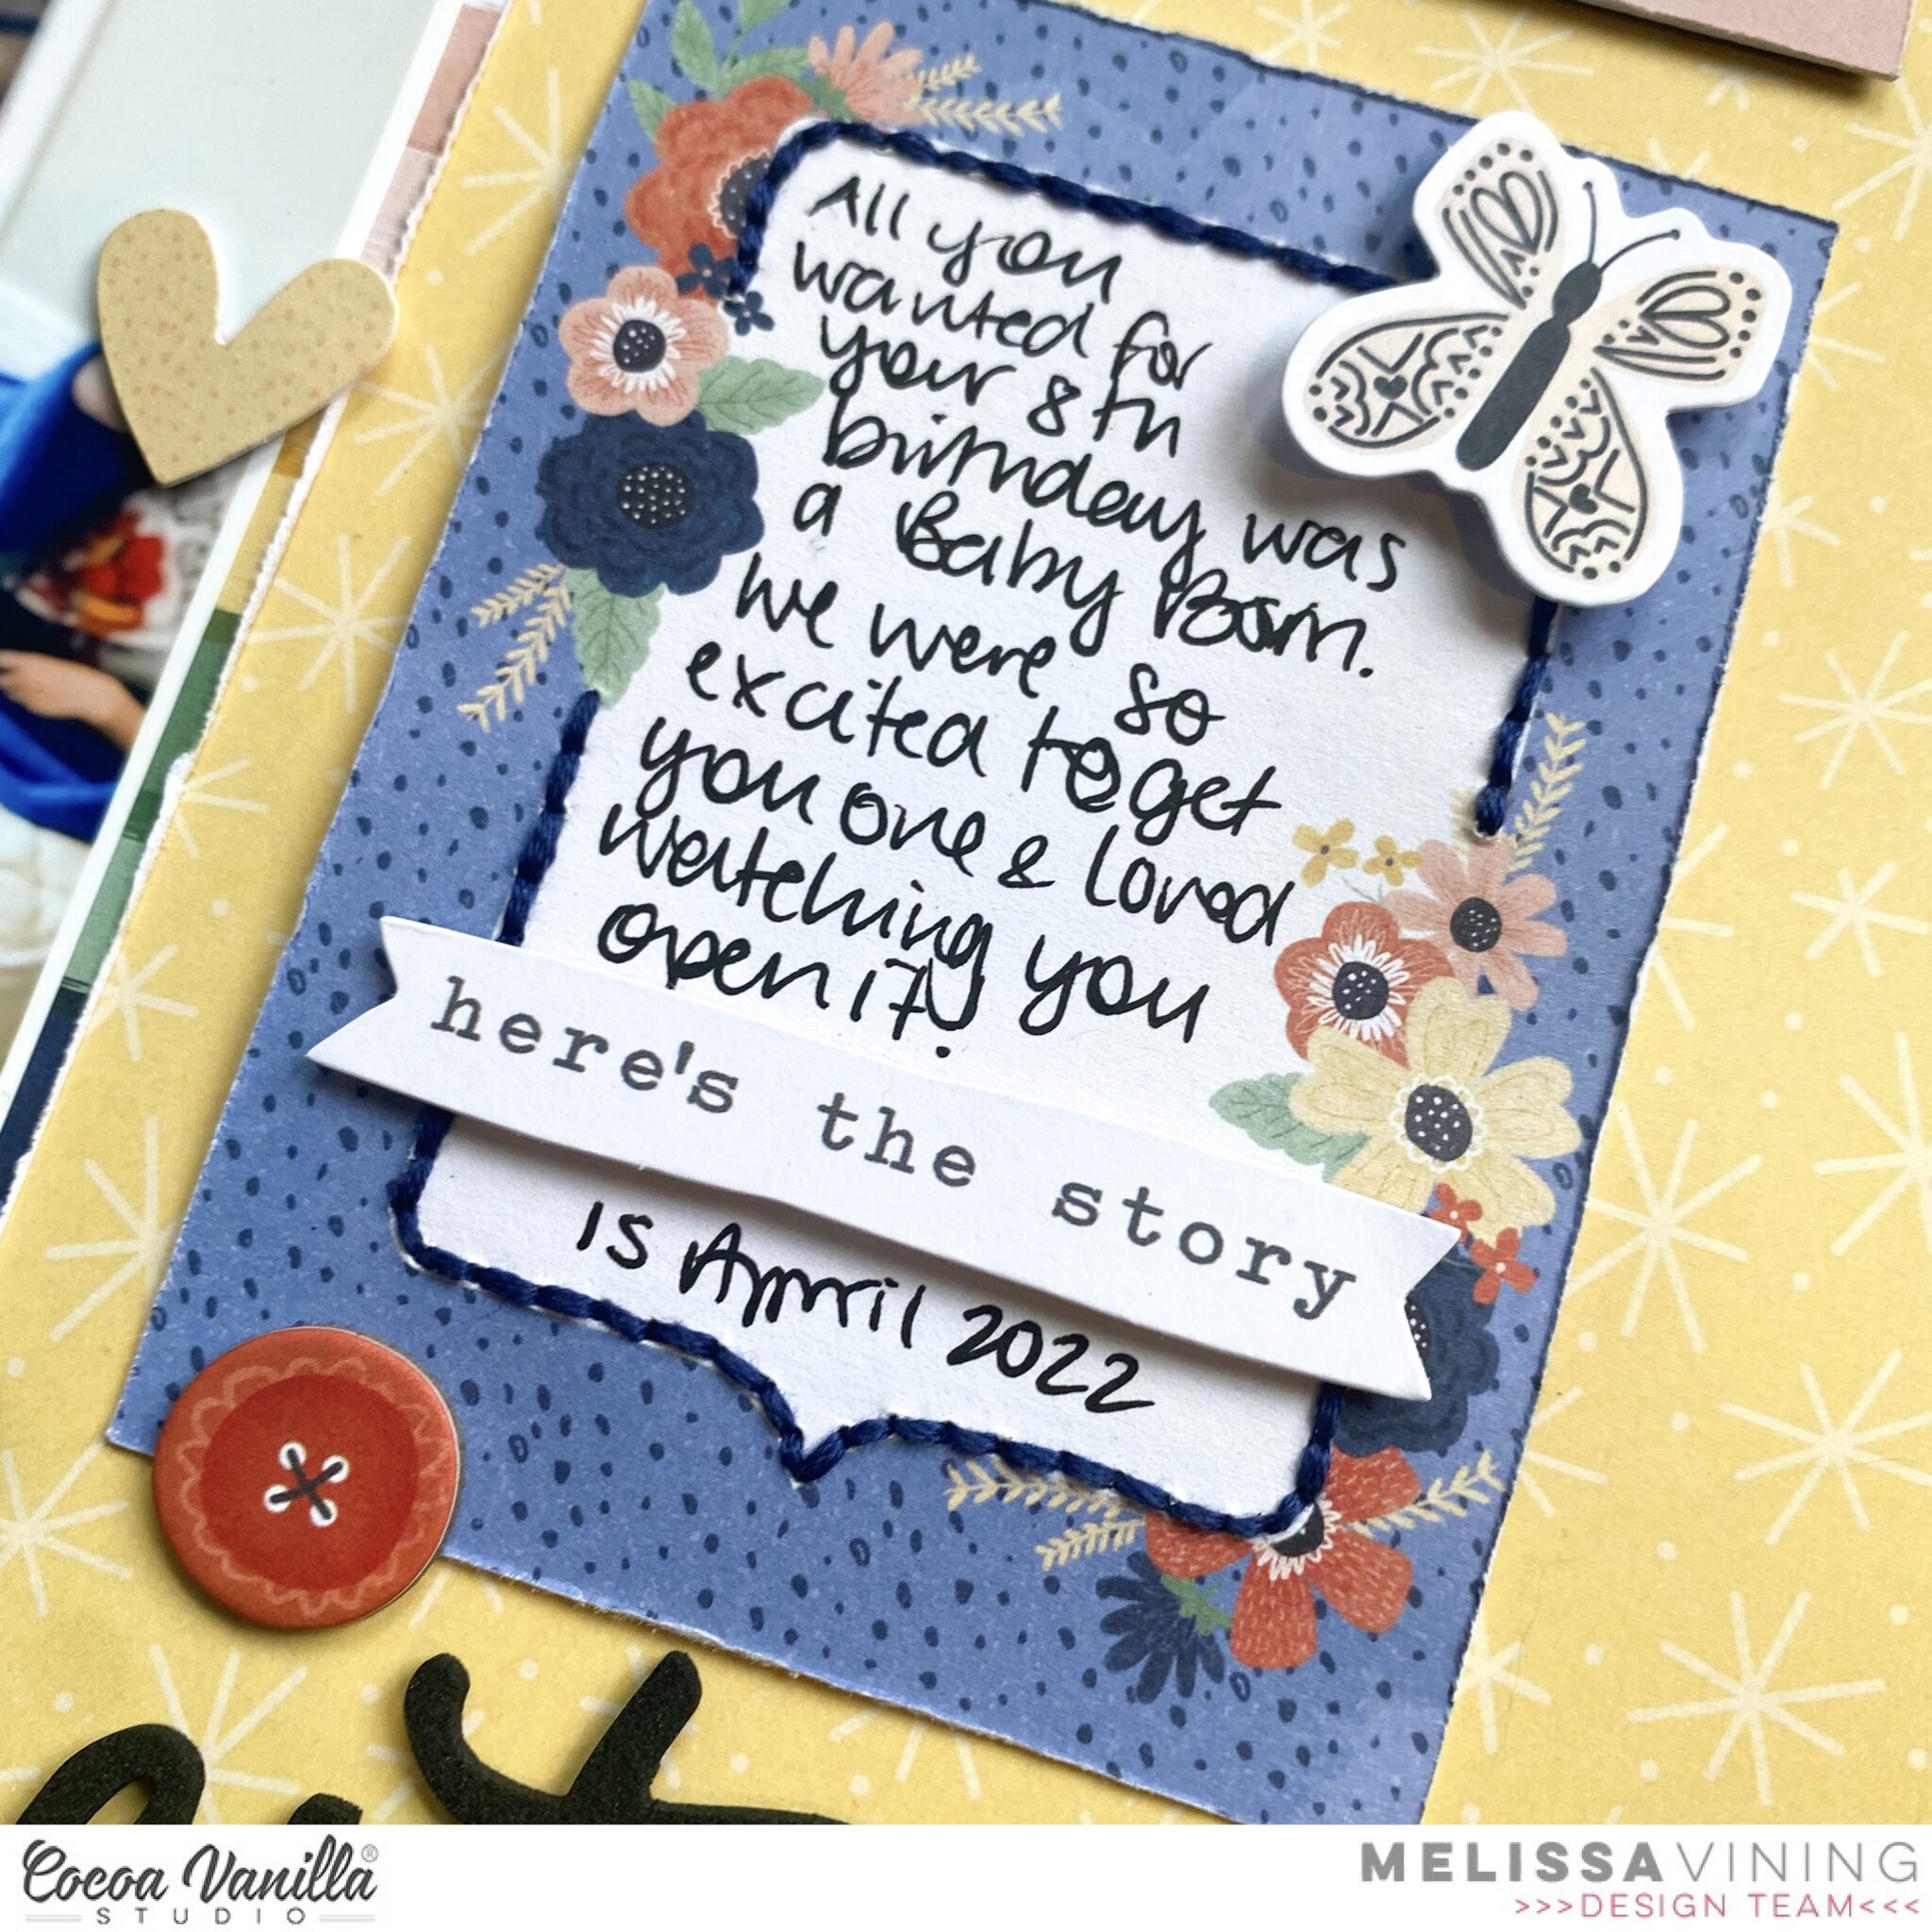
 For the card housing my journaling I stitched around the speech bubble in navy blue thread to match the colour on the card. I love how the stitching looks, and I embellished with a Die Cut Ephemera phrase and a butterfly.