It’s Sophie on the blog today with a cute layout to share!
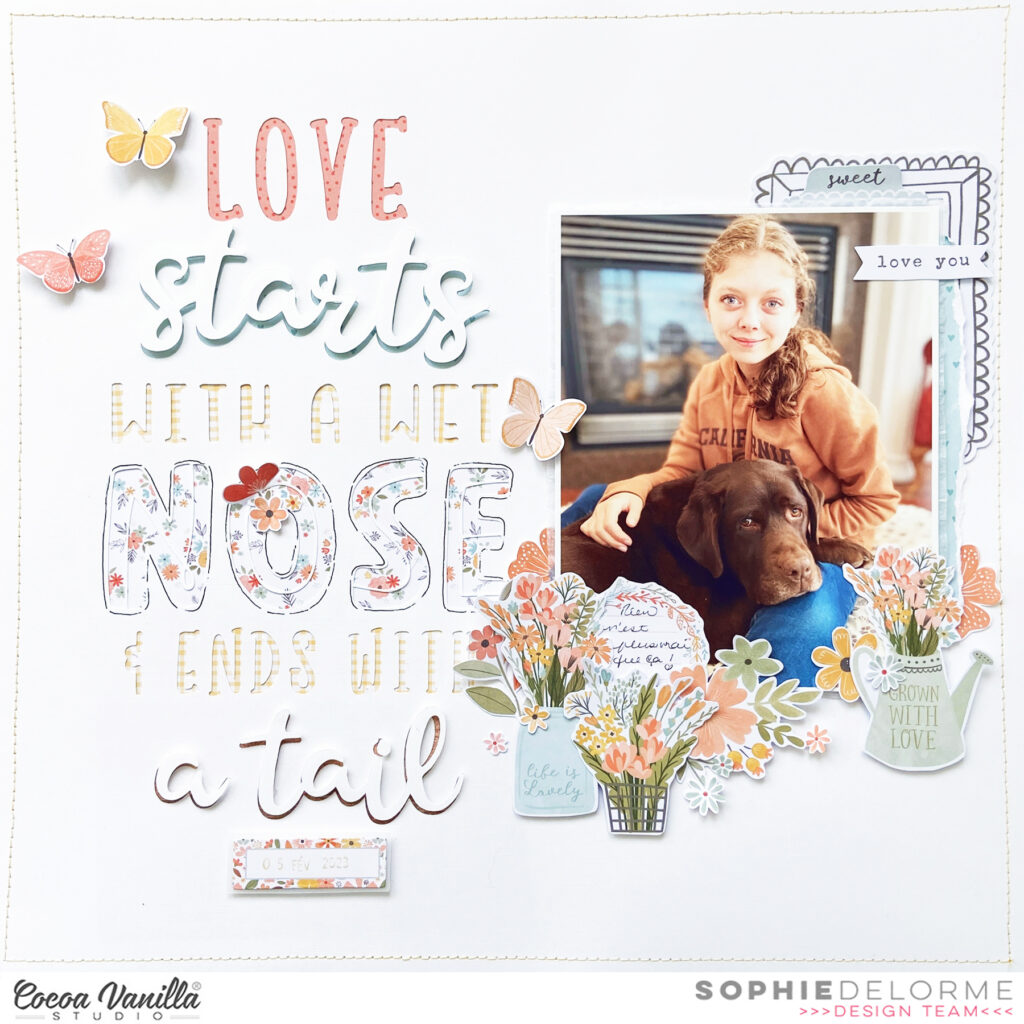
I used a collection that I LOVE: These Days! I paired it with a beautiful cut file from Echo Park Paper for the title of my page.
I cut the cut file on white textured cardstock on the left side of the page, and used it for my title. I placed a sweet photo of Sabrina and our dog Fiona right next to the title, mounted the photo on tissue paper, patterned paper and foam adhesive.
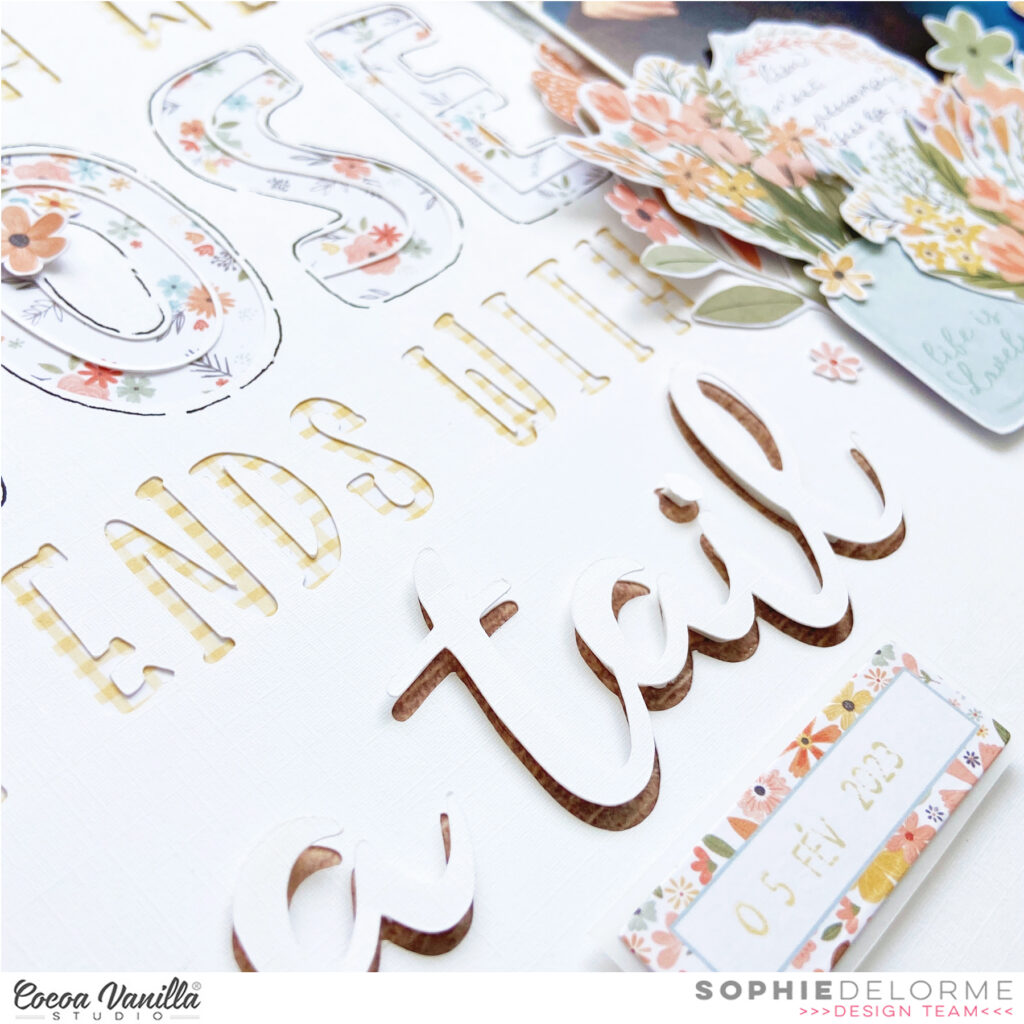
I backed the cut file with different patterned papers from the These Days A5 Paper Stack. I popped a few words slightly off from the cut words to add interest and dimension to the title.
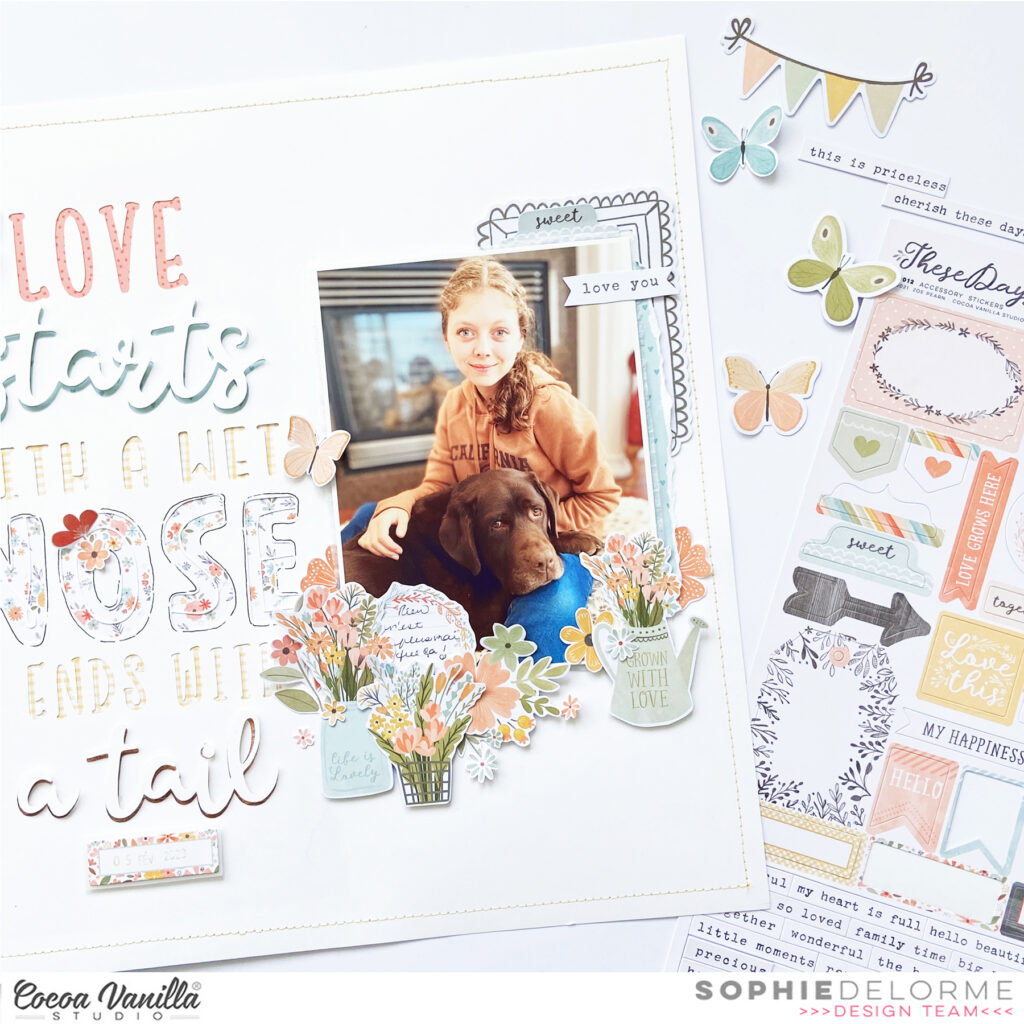
I decorated with Die Cuts around the photo, scattered a few butterflies and handwrote my journaling on a wreath cut out from a pocket card.
Here are some close-ups:
This layout came together in no time at all! A big title cut file, a beautiful photo and a few embellishments from an amazing collection is all it takes to create precious memories!
I hope you found some inspiration in my page today,
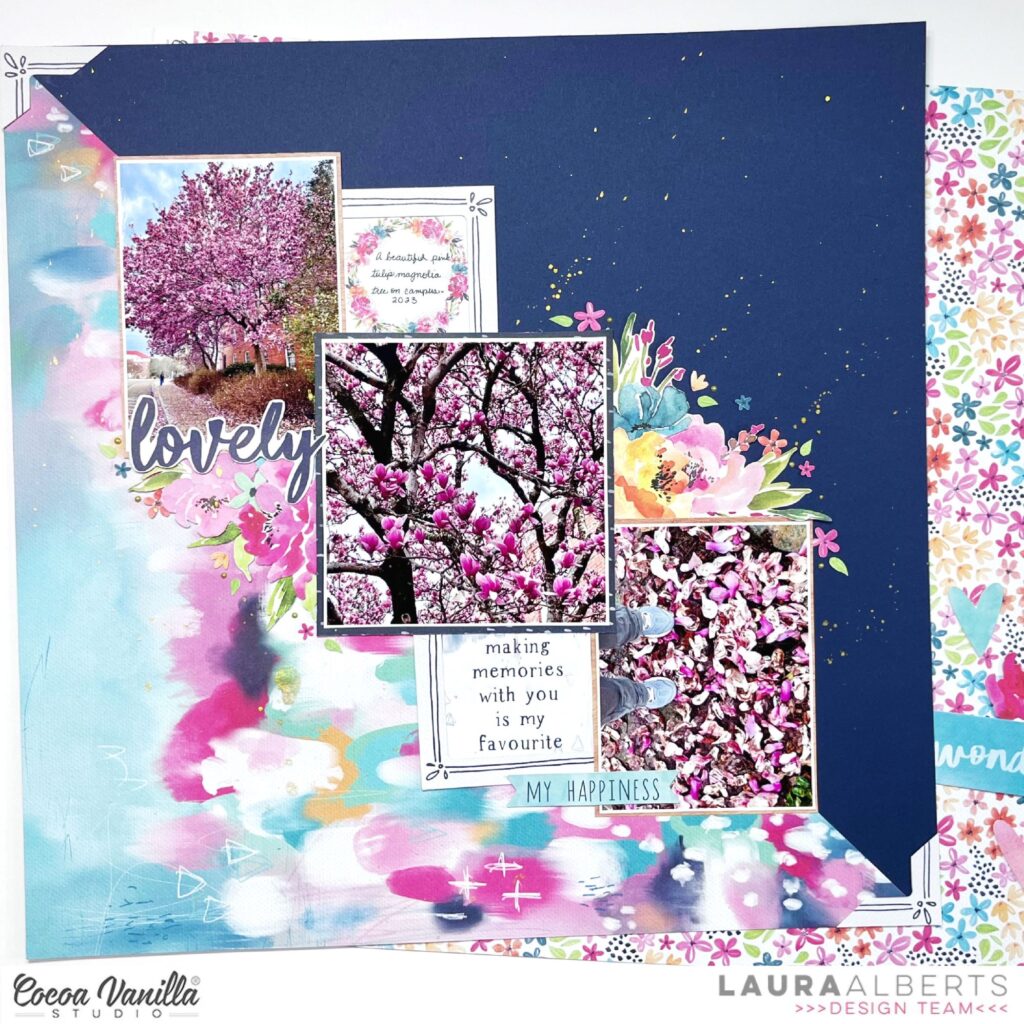
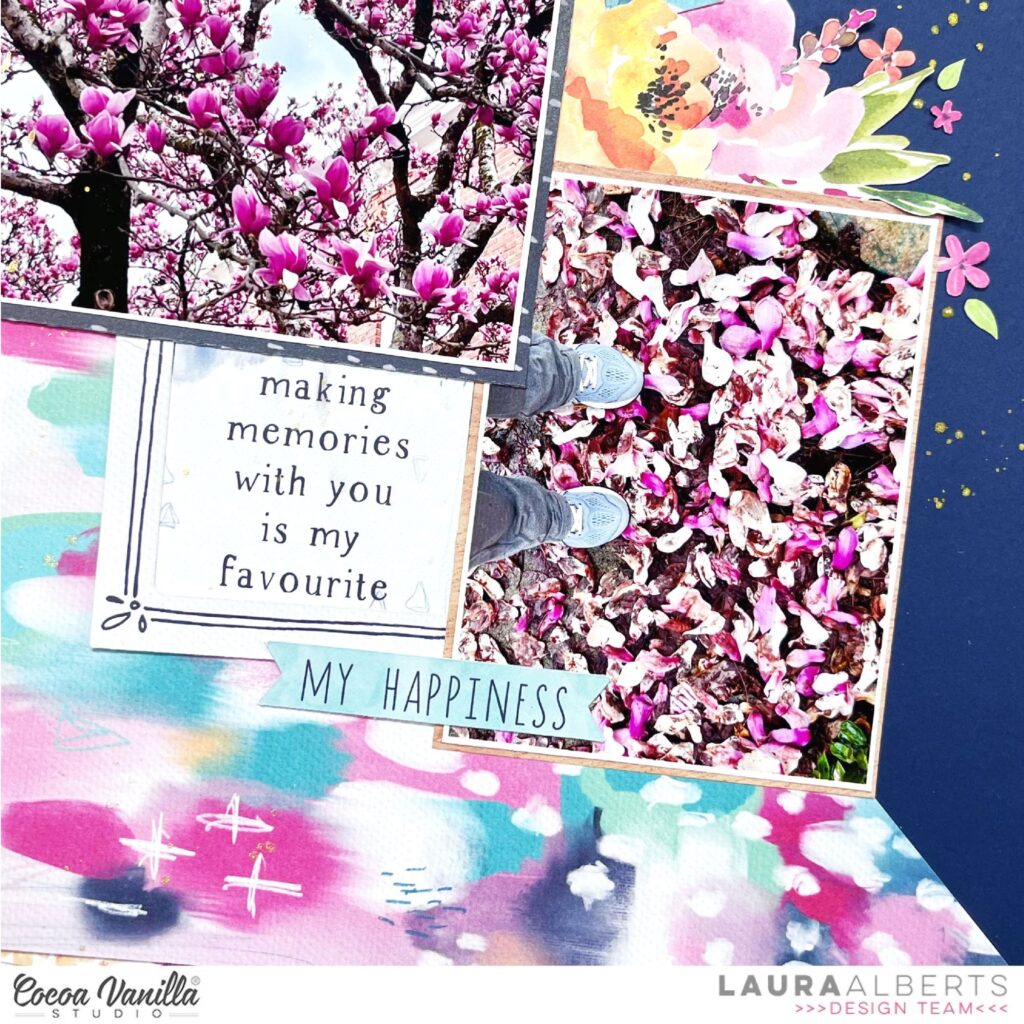
Hey y’all! Laura back again with a stash dive! This stunning Happiness collection is one of my all time favorites. To build this background, I cut a piece of the Expressive patterned paper in half diagonally and layered it onto navy cardstock. For the corners, I cut up a frame from the ephemera pack.
These lovely photos of a Tulip magnolia tree were a perfect color match to the bold pinks in this collection, so I knew it would compliment them. I added floral ephemera clusters on the inside corners of the stair-stepped photos and framed cut-aparts on the outside corners.
The tiny little florals are fussy cut from the A5 paper stack and I love the detailing these add to the page. With a little bit of gold Nuvo and ink spray for splattering, this one was done!
I hope this layout inspires you to dive into your stash for some crafty fun soon! To see how “Lovely” came together, check out the process video below:
Hi everyone, its Melissa here and I’m back today with another layout that I created with the beautiful These Days collection. This collection is still on sale over in the shop, so make sure you head on over and purchase it before its gone! I was in the mood for creating with circles and I created all of these circles using my Cricut Design Space. If you don’t have an electronic die cutting machine you could use a manual die cutting machine, a circle cutter or you could trace around circular items.
This photo is of my eldest daughter in my husband’s relatives pool in January during our summer. The back ground paper is Daybreak and is so beautiful with all of the mixed media-look background. The majority of patterned paper circles were cut from the A5 Paper Stack, and I distressed all of the edges. I stuck some flat to the paper, and placed others on dimensional foam for interest.
It’s time for new inspiration from the beautiful and sunny ” Sunkissed” collection. I’m so happy to see you back on the Cocoa Vanilla Studio blog today. We are heading into spring and with the sunny weather coming up I couldn’t resist making a sunny layout with a beautiful summer memory.
For this layout, I challenged myself to use only pocket page cards, die-cuts (flower), stickers, word strips, puffy stickers and the gold glitter foam titles. I created six clusters on my layout. I started with the two flower clusters. I placed these diagonally across from each other. I folded the flowers a bit so that they have a little bit more dimension on the layout.
I stitched the two rainbow die-cuts on top of each other with light blue sewing thread. I placed these next to the flower cluster on the top right. I choose three colorful hearts and fold them in the middle then I placed the hearts playfully around the rainbow. I love the beautiful, fun and playful text on the pocket page cards. I choose a pocketpage card tear it a little at the top and stitch a tab on the side with blue sewing thread. I decorate the pocketpage card with a die-cut and a puffy sunglasses.
I absolutely love the cute little “Sunkissed” puffy stickers. I even used them on the flower clusters. I tried to create a little bit of the tropical vibe. I cut a pocket page card to size and placed it behind the black and white photo of me and my hubby. I decorated the photo with a tiny heart and a colorful word die-cut. On the right side of the photo, I playfully stitched a view labels and word strips together with light bleu sewing thread. I playfully glued the labels on my layout and decorated them with three gold hearts.
In the center of the layout, I left extra space for the title. The awesome gold glitter title words fit perfectly on my sunny and tropical layout. I choose for the title “Happy Days” This title and of course the white gesso splatters make my layout complete.
I hope I was able to inspire you with this summer layout and I can’t wait for the new amazing “Happy Days” collection. I want to thank you for visiting the blog today and hope to see you again next time.
I wish you a very lovely and creative day friends.
It’s Tarrah back with you and today I am sharing a sweet layout created with the gorgeous These Days collection!
I am documenting a lovely photo of my sister and our Mum together from a few years ago.
I started my layout by choosing a cut file from CUT to YOU and cut it out from the Good Life patterned paper, I was careful to have the heart placed in the centre of the paper so that it would leave the 12′ x 12′ paper in tact but just with a big heart cut out of it! I trimmed down a sheet of plain white cardstock and adhered this to the heart paper, being sure not to place adhesive here the heart was cut out.
I chose a variety of the patterned papers from the A5 paper stack and backed all the spaces in the heart with all of the different papers. I used up lots of this paper pack for this layout! I love how the heart looks with all of the papers backed in the spaces. Once the heart was all backed, I added craft foam underneath the cut file and then adhered it to the white cardstock background. Next I added one of the super cute gold puffy hearts to the centre of the heart cut out in the cut file.
I placed my photo over to the right and on top of the cut file, layering one of the 3′ x 4′ pocket cards under the photo to help enhance the photo and make it stand out from all the gorgeous colours in the various papers. My title is the small card to the left of my photo, I cut this out from the A5 paper stack. I also added the Hello banner sticker above the title as well. I just had to add some of the gorgeous florals from the floral ephemera pack, I tucked these in both on the left and on the right of the photo. I added more die-cuts here too and some phrase stickers from the Accessory Sticker sheet too.
Above the photo, I adhered the Happy die-cut title and at the bottom I tucked in one of the tab stickers from the Accessory Sticker sheet. I stamped the date stamp on this tab. Around the outside edge of the heart, I added some of the gorgeous puffy hearts from the Puffy Stickers, I love how these look scattered around the large heart. A few more die-cuts like the butterflies and the tea cup finished off the embellishing of my layout and one of the last things added was one of the Wood Epoxy buttons.
Thanks so much for stopping by the Cocoa Vanilla Studio blog today! I hope you enjoyed reading how I created my layout and that you inspired to create using your These Days collection!
Hello crafty friends! I feels like ages since I created a CVS boy layout, so here is one for all those who need some boy layout inspiration! I have used the still awesome No Limits
I found a fab pie chart cut file from the Silhouette design store. I cut it twice, one slightly smaller than the other and then layered over each other. I used the Spark paper as my base/background paper and added the pie graph cut file. I used Orbit paper for the larger pie graph and Universal paper for the smaller one.
I next added my 6×4 inch landscape photo but before adhering to the centre of the pie graph I added two paper pieces/strips to the top and bottom of my photo. I used the star paper from the A5 paper pad as the patterns are printed smaller.
I used some elements from the Ephemera die cut pack, placing them is a way that your eye is drawn to the centre of the pie graph. You can see here I added some enamel dots behind die cuts that I had used foam tape to attatch.
I added phrase sentiment stickers over my die cut titles, which when your title is large (or words) you can add your journalling in this way.
Lastly I created a journal space by making another embellishment cluster, the epoxy wooden buttons are still available on the shop (https://cocoavanilla.com.au/shop/no-limits-wood-epoxy-buttons/) I have added extra stars around the edge of my base paper, using die cuts and enamel ones to add texture.
Blue, black and grey really are the most fab colours for a boy layout! With this colour combo you can add almost any coloured photo and it will work.
Thanks as always for stopping by and see you soon!
Before I share my page today, have you seen the sale on the ‘These Days’ collection in the shop?! There are still some gorgeous pieces left from this collection at a hugely reduced price… you can check it out HERE.
SO for today’s layout, I thought I would create something with this collection to inspire you to grab the last pieces available for this collection or grab out what you have in your craft room.
This is a picture from Christmas, with a bunch of our family…These Days is perfect for documenting family, home…anything close to your heart really.
I used the black and white dot paper for the base of my page…a great neutral to get started. Next, I adhered 3 strips of patterned paper to add colour and layers to my page…these are 3×8 inch in size. These were adhered with foam to create dimension.
I created multiple layers behind my photo with different papers. I cut the mason jar and the blue scalloped frame from cards found in the Pocket Cards.
On the right of my photo I added some tabs from the Die Cut Ephemera. Also one of the Wood Epoxy Buttons to the bottom right and top of my photo. The heart tab is from the cut apart paper.
The strip of houses under my photo is also cut from the cut apart paper… then to fill out my page I used a bunch of florals from the floral ephemera pack and also fussy cut some out from the floral paper. To add more black to the page I added some of the black foam stems found on the title sticker sheet. You may also spot a few of the Puffy Stickers on my page..they are so cute!
I hope you enjoyed my page and are inspired to check out the ‘These Days’ SALE.
Hey y’all! Laura back again with a bright and cheerful layout using the stunning Happiness collection! I am completely enamored with the pairing of bright, bold colors with deep, dark neutrals like navy. This is one of those collections that makes me smile every single time I pull it out! Perfect for some fun in the sun, backyard playground photos.
For this background, I used a set of metal heart dies to create these fantastic heart shaped frames. I backed them with this stunning watercolor stripe patterned paper and layered them behind my photos in a vertical column. My photos are interspersed with stunning floral ephemera pieces, cut apart labels and words, as well as fussy cut shapes.
One of the highlights to this layout were these stunning tassels from the ephemera pack! Such a fun detail to hang from the heart-shaped frames. With a bit of Nuvo for a touch of gold detailing and gold ink spray to finish it off, this layout was done!
I hope this layout inspires you to dig out your older stash to have a play! Those collections from the past deserve some love too! To see how “Sweet” came together, check out my process video below:
Hello everyone. It’s Anna here with my newest layout. As I am waiting impatiently to dive into brand new and recently released new line called “Happy days”, I pulled out some older but still pretty collection from my stash called “These days”. If you do not have it yet, there are still plenty of elements available in CVS store and they have some crazy awesome prizes! So go quickly and grab it while you still can.
I scrapbooked picture I took the same day (totally fresh from the oven!) of my two girls getting ready for a birthday party. They are recently in the phase they both like dark (preferably black) colors so this mama is missing all the pink and pastel photos so much. That’s why using “These days” with it’s muted colors was a great choice.
I started with cutting out big letters from a word PARTY with my digital die cutting machine using “Family ties” paper. This colorful pattern has all the colors present in this collection. I arranged my letters on the white cardstock and used my pencil to gently sketch an outlines of them.
Next step was chosing five different colors of Distress Inks and blending them under each letter stepping out ot the lines a little bit, to create sort of colorful shadow. The final result is very subtle, exaclty how I intended it to be. I still have plenty of flowers in my Floral Ephemera pack, so I picked a few adding them color on color (matching the inky shadow witht the flowers). Before I started glueing them down, I added a layer of foam tape under each letter for more dimension.
I love all the papers with elements that can be fussy cut from them, like flowers or butterflies. I always buy more than one paper and I can make myself plenty of extra ephemera pieces. It can strech your collection so much more. This was the case with beautiful “Take flight” paper filled with butterflies. I cut out few of them and added them on top of the letters. I also reached for Ephemera Pack and found more matching elements to tuck under the letters.
With my title almost done, it was time to finally add my photo. I had a perfect spot in the bottom left corner. Before glueing it down, I backed the picture with cute pattern paper with hearts called “Good life”. All I had to do was to add some smalled puffy stickers,clear stickers and 6*12 stickers here and there. I also finished my title adding word “time” using super cute puffy alpha stickers.
And voila! The page is done. Another memory scrapbooked! That is all for today. Don’t forget about the great discount on “These days” collection, that is waiting for you in CVS Shop! I am sure it’s not the last time I am reaching for this amazing line.
Hello Paperlovers, So happy to see you on the Cocoa Vanilla blog today! I chose the amazing collection “These Days” designed by of course Coco Vanilla Studio. I absolutely love the beautiful colors in this collection that fit perfectly to create a beach themed layout. With this blog I want to take you through my creative process…..
I started with a blank white cardstock sheet and took inspiration from cardmakers. Instead of one decorated circle, I place four in a grid pattern on my white cardstock sheet.I choose several pattern papers and cut out three circles. Then I cut out three circle edges. I add a light blue sewing stitch to these circle edges. I also provide the beach picture with a light blue sewing stitch.
I placed the circle edges with 3D tape on top of the pattern circles. This way I created more dimension and can slide the flower die-cuts between the layers much easier.
I love creating different layers with so many beautiful and different embellishments from this amazing collection. I choose different floral die-cuts, butterflies cut from patterned paper, wooden buttons, little cute gold colored heart and different word stickers. I absolutely love how the differents clusters turned out.
For the title “Happy Days” I used a shape die-cut along with the mini puffy alphabet. See the little title cluster on the photo. For a real beach vibe, I made a view white splatters with gesso. I mixed gesso with a little bit of water and I used a water color brush to splatter. I also made some light pink splatters using the Distress Oxide color “Saltwater taffy” I hope I was able to inspire you with this scrapbook layout and hope to see you on the blog next time. I wish you a happy and creative day. XoXo, Jo


 For this layout, I challenged myself to use only pocket page cards, die-cuts (flower), stickers, word strips, puffy stickers and the gold glitter foam titles. I created six clusters on my layout. I started with the two flower clusters. I placed these diagonally across from each other. I folded the flowers a bit so that they have a little bit more dimension on the layout.
 I stitched the two rainbow die-cuts on top of each other with light blue sewing thread. I placed these next to the flower cluster on the top right. I choose three colorful hearts and fold them in the middle then I placed the hearts playfully around the rainbow. I love the beautiful, fun and playful text on the pocket page cards. I choose a pocketpage card tear it a little at the top and stitch a tab on the side with blue sewing thread. I decorate the pocketpage card with a die-cut and a puffy sunglasses.
 I absolutely love the cute little “Sunkissed” puffy stickers. I even used them on the flower clusters. I tried to create a little bit of the tropical vibe. I cut a pocket page card to size and placed it behind the black and white photo of me and my hubby. I decorated the photo with a tiny heart and a colorful word die-cut. On the right side of the photo, I playfully stitched a view labels and word strips together with light bleu sewing thread. I playfully glued the labels on my layout and decorated them with three gold hearts.


