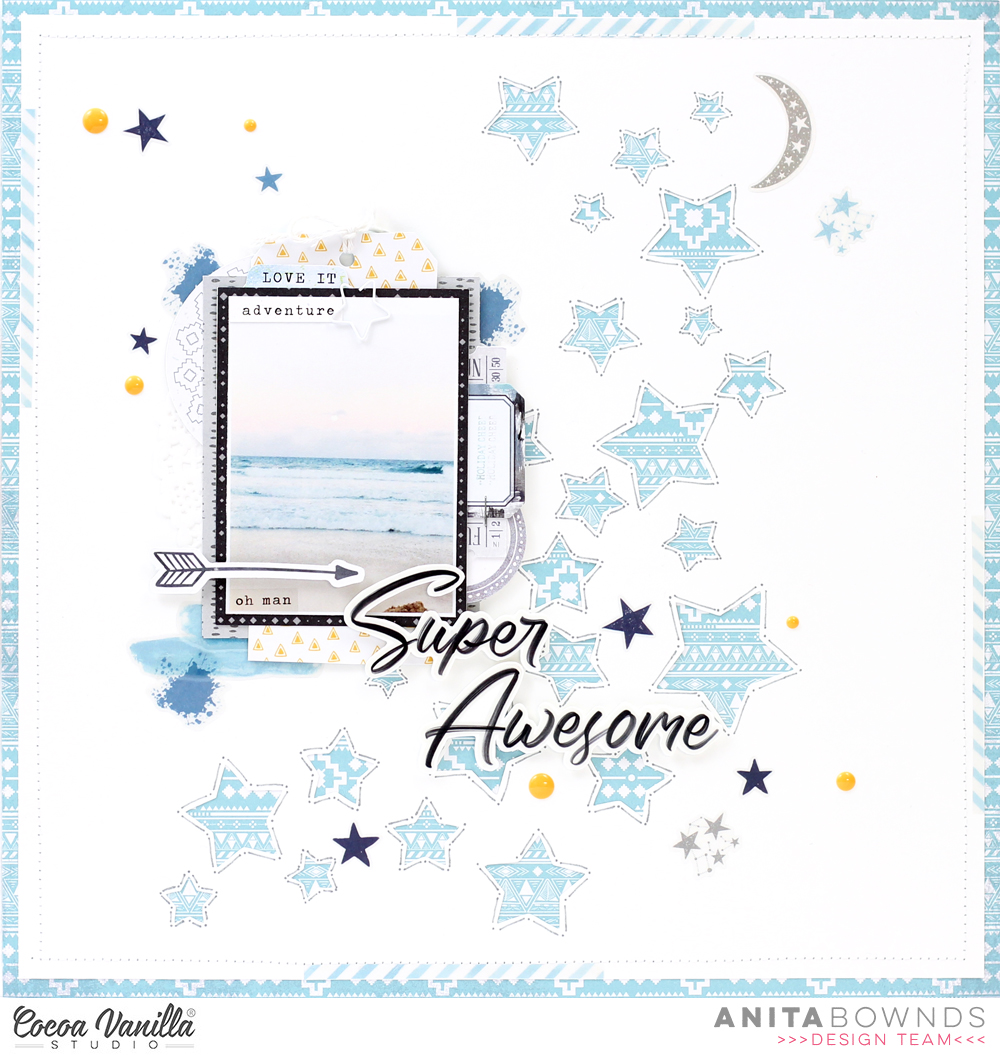
For my layout I decided to do one with stars , I know it doesn’t really go with a beach theme but this photo was taken late in the afternoon and the moon was out already totally weird I know but it was a beautiful afternoon just sitting on the beach enjoying the view…
I started off by cutting out a star background cut file from @neatndcraftycutz
And adhering it down on total legend patterned paper then I machine stitched around the border and using a fine tip grey pen I added dots and lines around the stars to add more texture
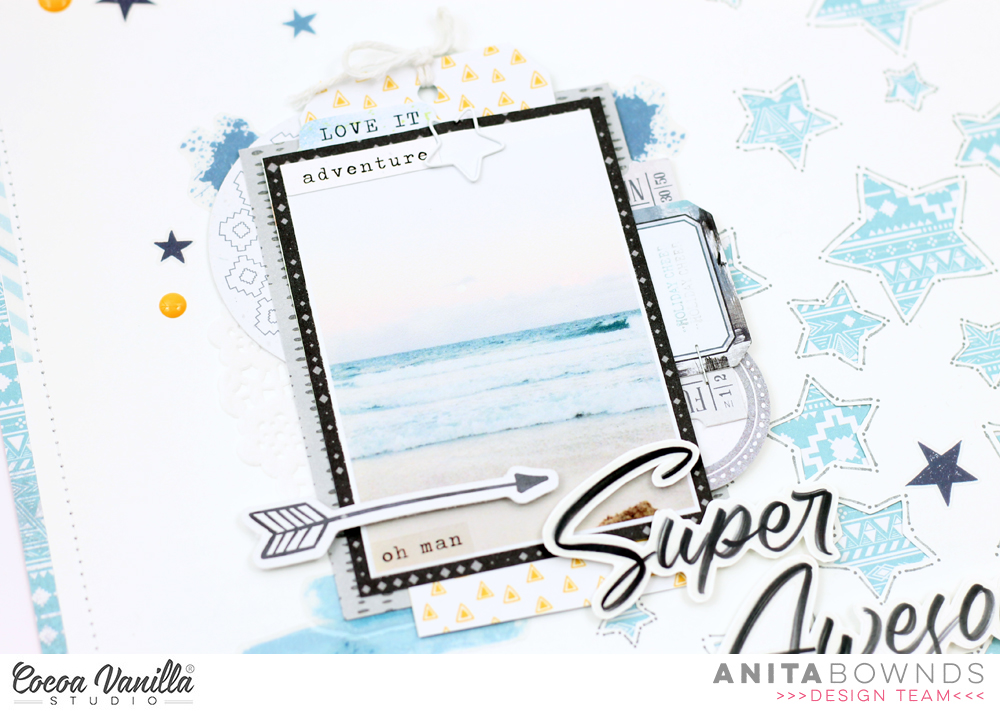
I then layered a doily and patterned paper behind my photo using total legend and all star
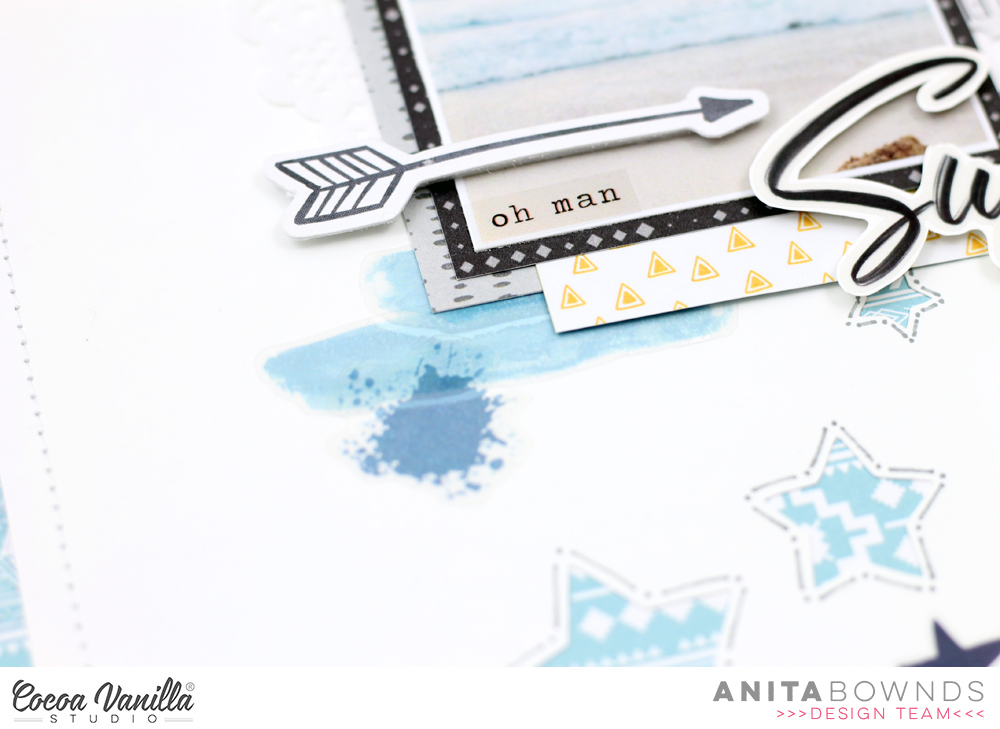
And to add more texture and dimension I tucked accessory stickers and ephemera in the layers of the photo. I add a hand made take using patterned paper and tucked into my photo layers.
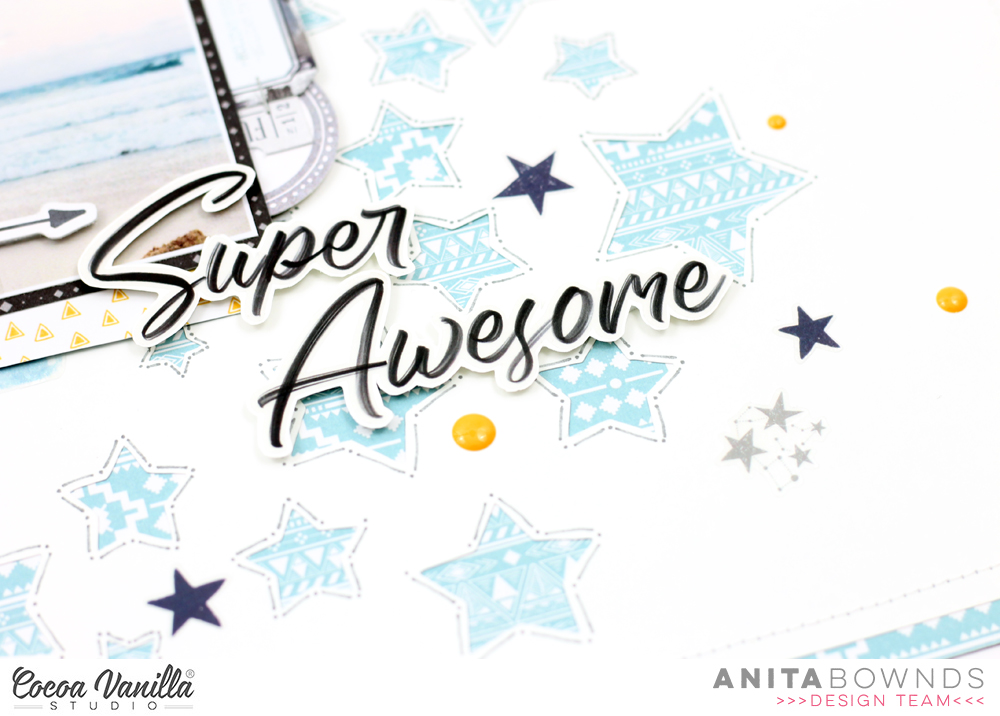
Using double sided foam tape I popped up my title using the clear stickers adhered on cardstock
I then added more of the clear stickers around my photo just underneath
I scattered the stars stickers around the layout and title along with a few enamel dots to add more texture and dimension are the cut file stars
I also used a few stickers from boys ruleaccessory stickers and clear stickers.
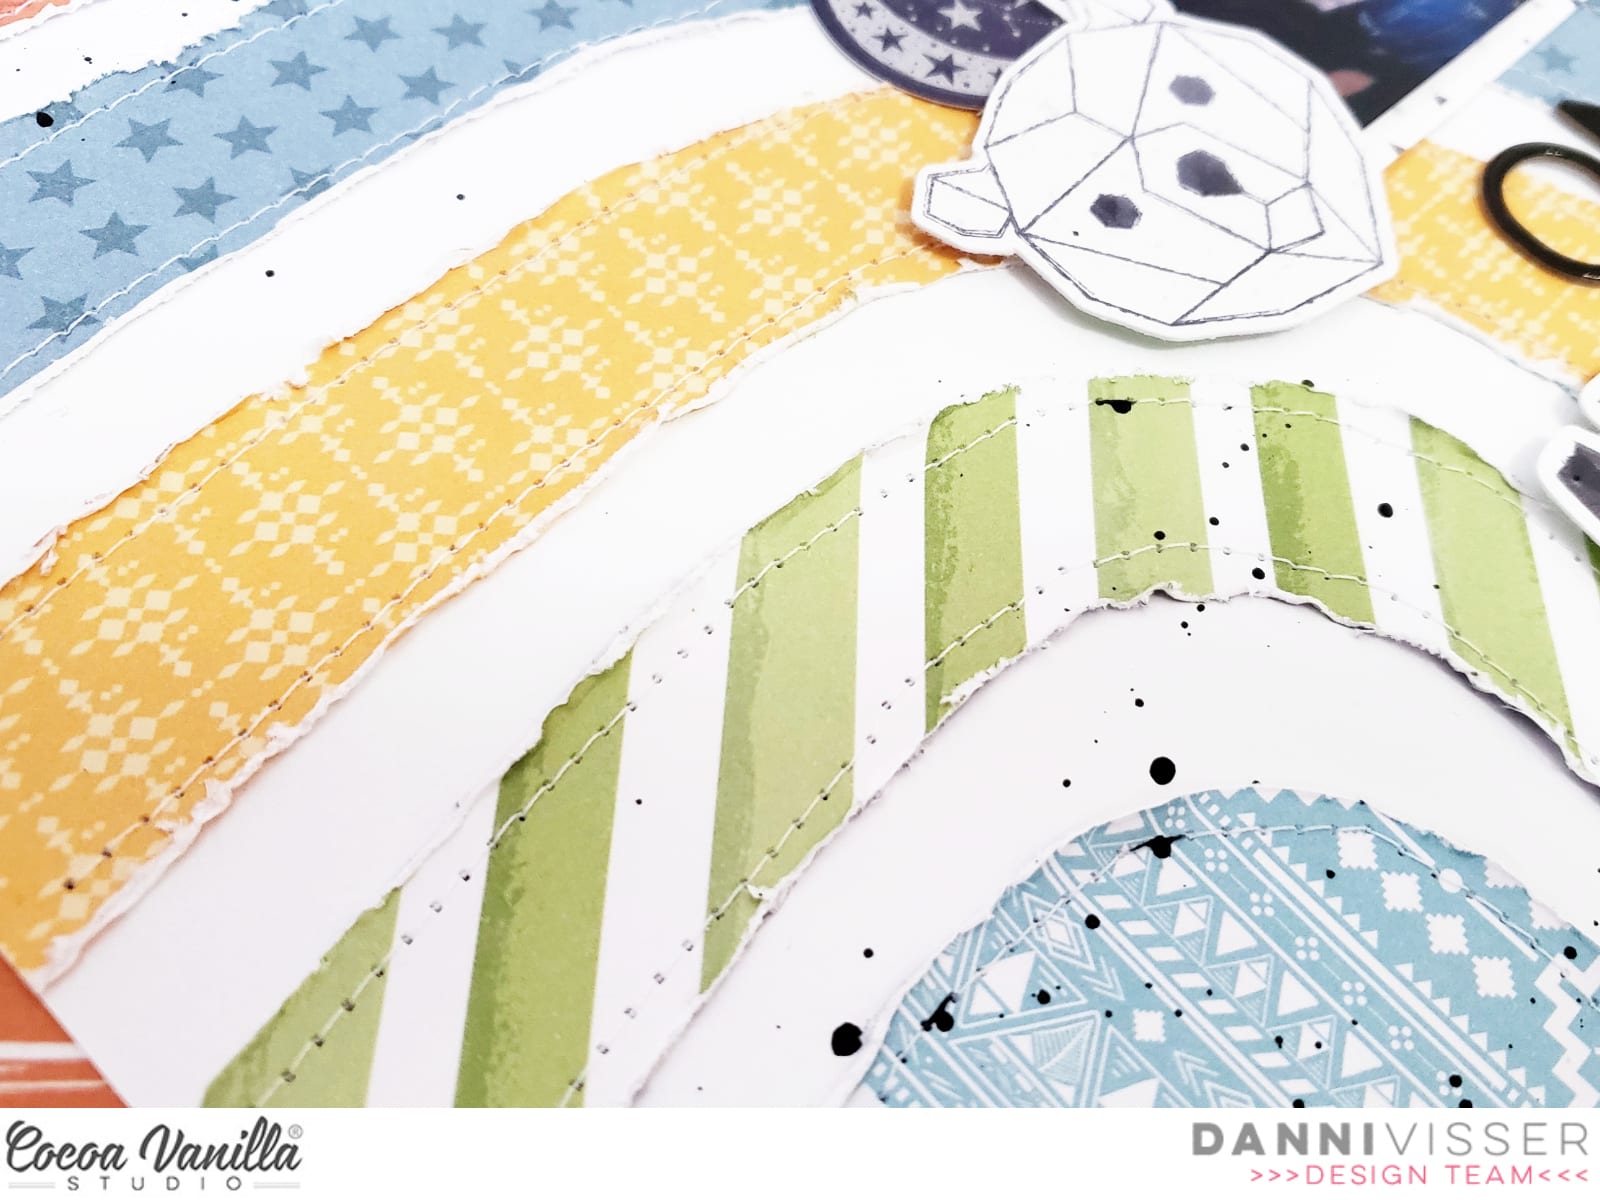
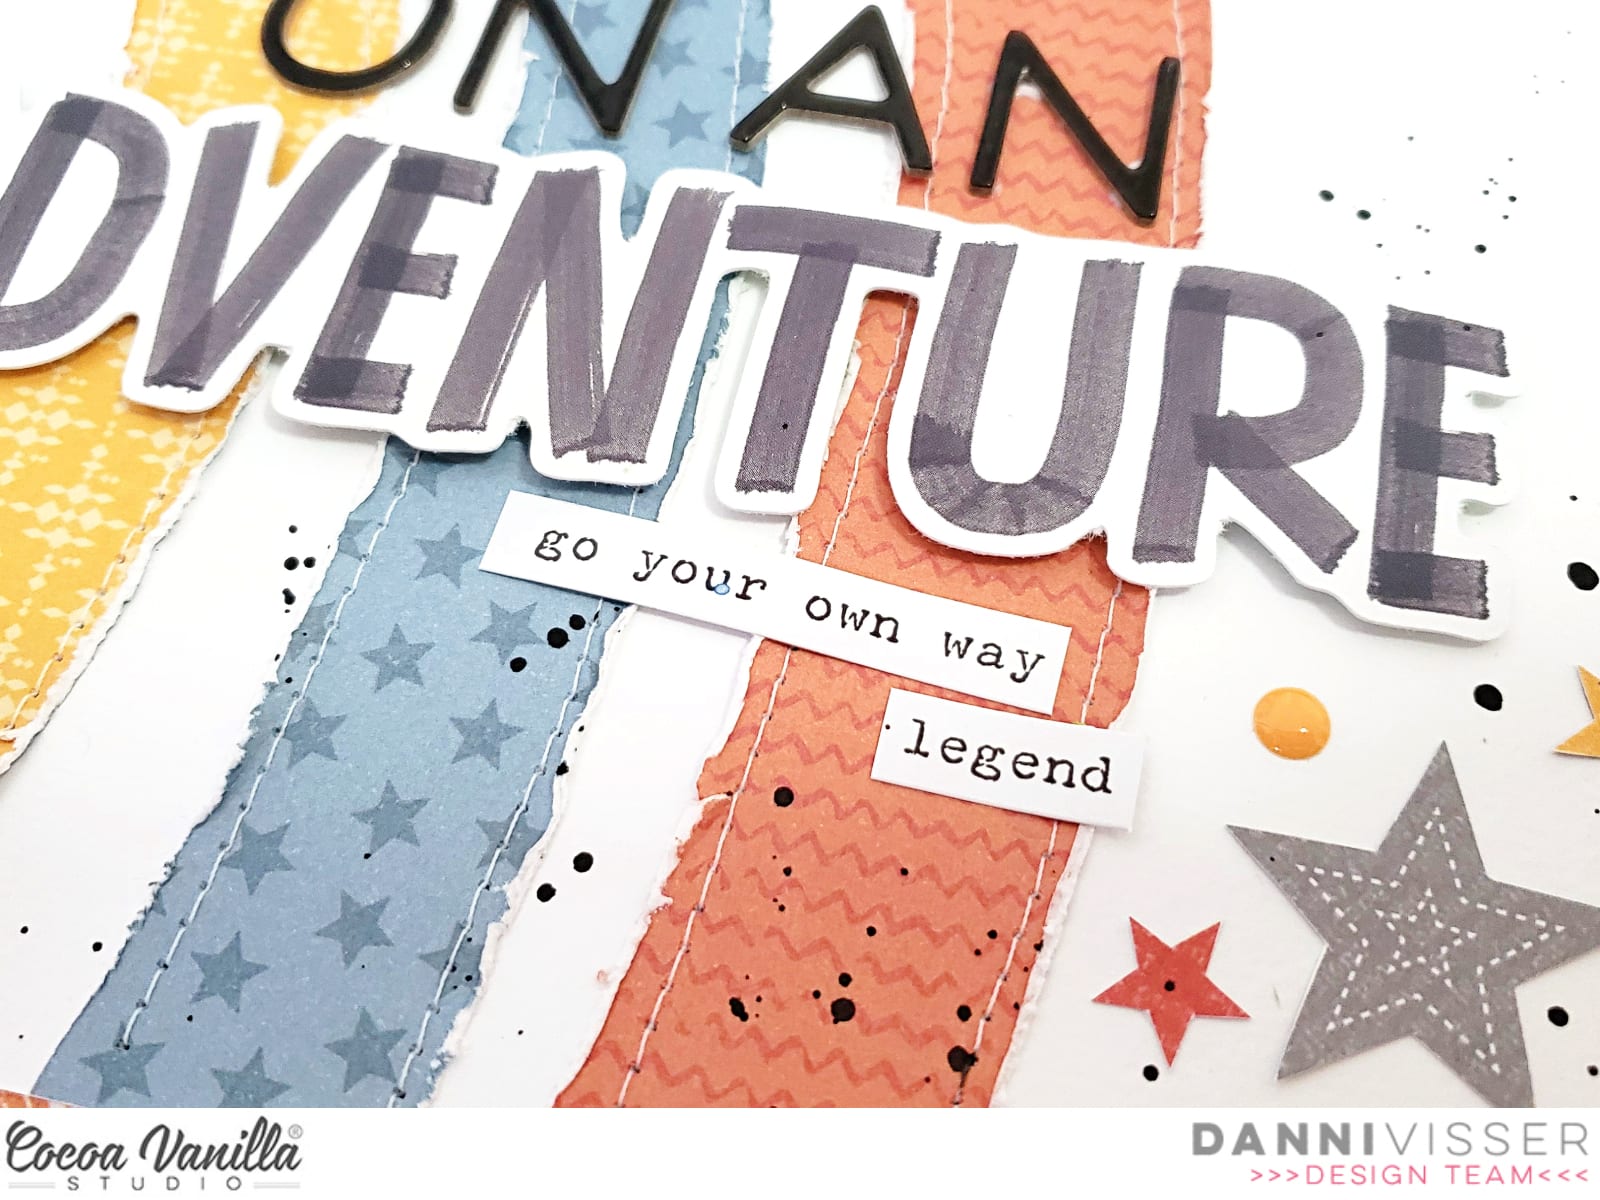
Hi Cocoa Vanilla fans! Danni here, back with another layout using the incredible Legendary collection. This one is a super simple dimensional rainbow layout that doesn’t require any fancy equipment, just a pair of scissors! I added some machine stitching for extra interest, but that step is definitely optional.
I started with a white cardstock background and added a border with Wild One 12×12 paper to echo the rainbow theme. Next, I cut curved sections of paper in the shape of rainbow arches with scissors, using a dinner plate as a template guide. I used One Way, Offbeat, Wild One, Explorer and Total Legend 12×12 patterned papers to get a good mix of mostly solid colours and spaced them evenly on the page so the white background showed through between each stripe. I distressed all the edges to hide any imperfections in my cutting and added some machine stitching along the edges of each stripe.
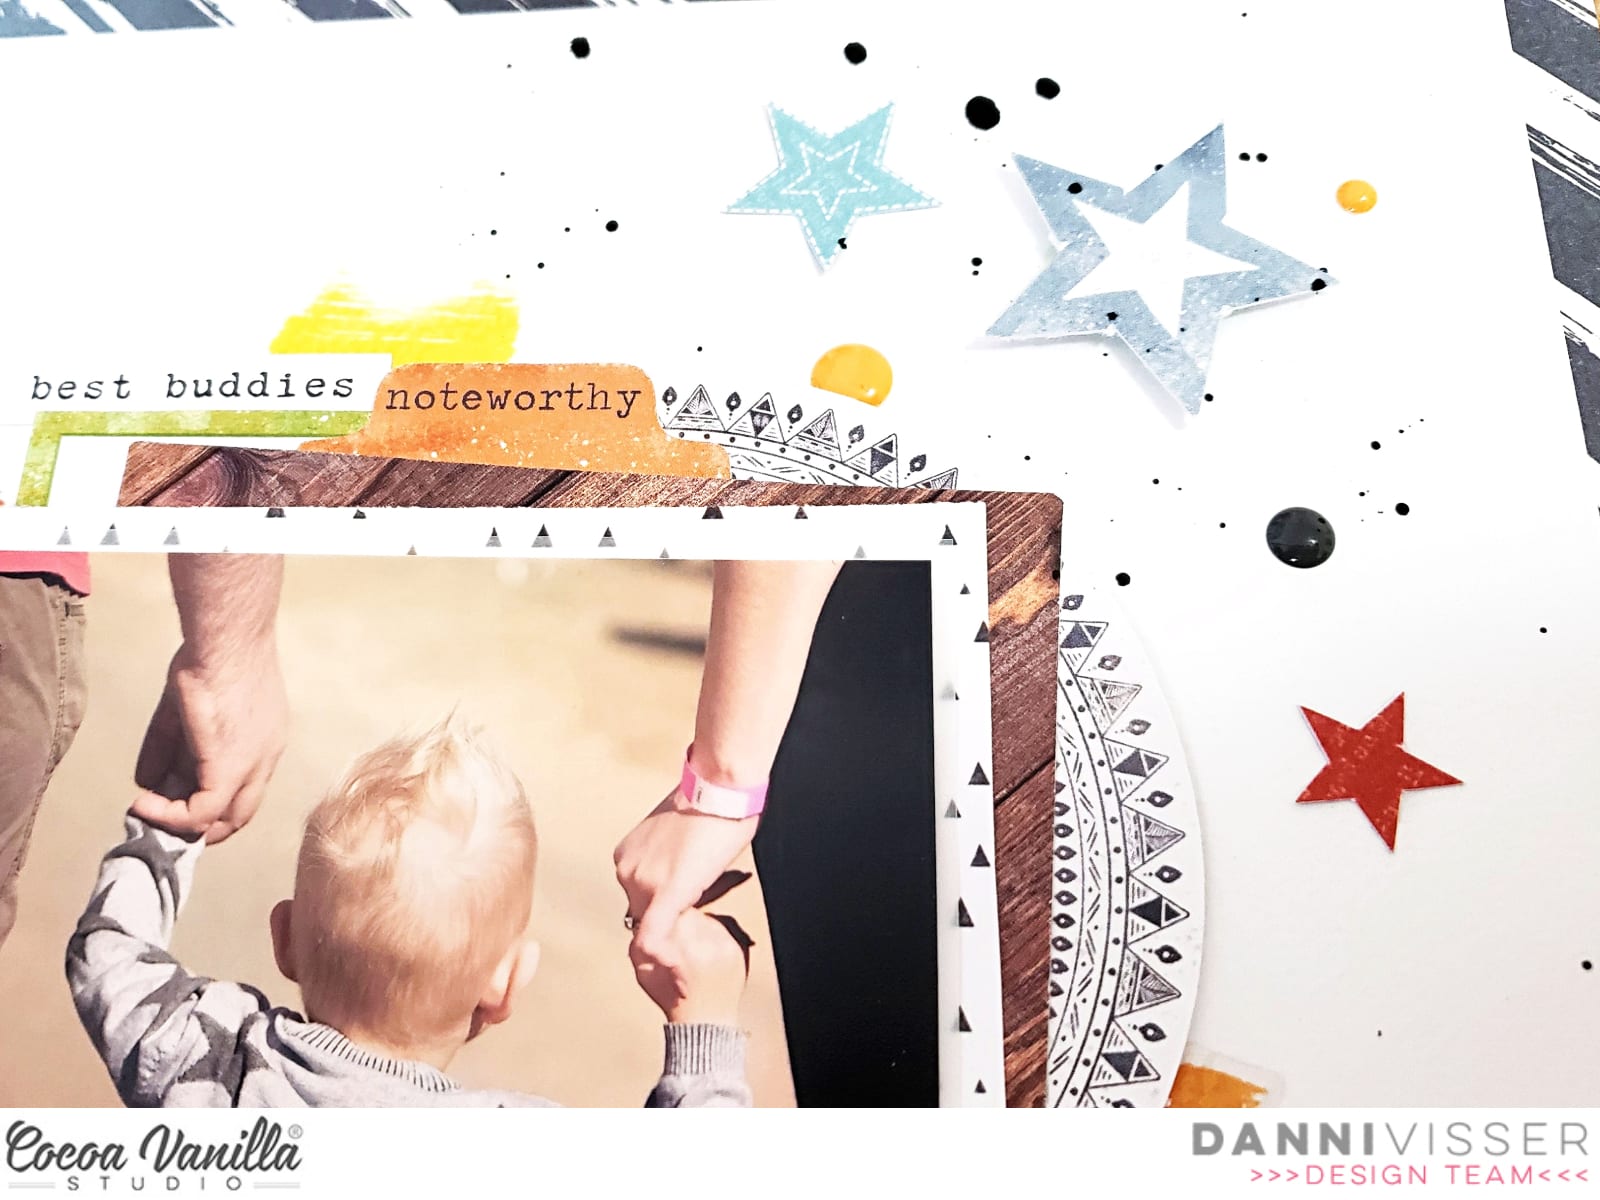
My photo is a very special one to me, of my husband and I walking with our son and holding hands. You can’t see any of our faces, but the love and feeling is still so clear. I kept the photo mats simple with a layer of plain vellum followed by Epic Tales 12×12 paper. I used a combination of accessory stickers, clear stickers and die cut ephemera to embellish around my photo. I especially love how the clear stickers really pop on a white background, so I took the opportunity to add several of them, including the watercolour brushstrokes.
I added a small cluster at the bottom of the rainbow to help balance out the heavy embellishment near the top of the page. I popped the die cut title “Adventure” up on dimensional foam and added some black alphas to complete my title, positioned underneath my photo.
I wanted to add some of the amazing stars from this collection to echo the star pattern on my son’s jumper, so I used a combination of die cut ephemera and fussy cut All Star 12×12 paper and added them around my embellishment clusters and title. I used a sprinkling of enamel dots to help fill in any gaps between the stars.
For a finishing touch I used some diluted black acrylic paint to add some splatters around my embellishment clusters. I find black splatters add the perfect bold accompaniment to the bright colours in this collection! Thank you for joining me today, there is a process video linked below if you would like to watch. Take care and happy scrapping!
Hello Cocoa Vanilla fans. It’s Anna here with my brand new, colorful page. I am sure I already mentioned it in my previous posts, that one of my favorite CVS collections so far is “Hello sunshine”. It’s an old line from few years back, but it has all the major factors I love in scrapbooking collection – colorful patters, summer themed motifs, pretty flowers and great variety of embellishments. It’s no longer available in paper version, but you can purchase a digital bundle and enjoy this line for forever :) The bundle contains of 12*12 papers and 164 elements, that are also grouped in three A4 sized PDF printable sheets – very easy to print and fussy cut. I still have some bits and pieces left from the paper version and I used them to make this page.
I started with a white paper with little, colorful triangles as my background. Next step was to cut paper with little word strips into pieces. If you have time, you can do this with whole sheet and put the rest of the strips into the ephemera pack for the further use.
I arranged those strips into a vertical column, that became the anchor of my composition. I placed two photos between them. They were taken during our one day trip to three, lovely greek islands near Athens – Hydra, Poros and Egina. Hydra was the first one, with amazing greek vibe, scenic harbour and little, old town surrounding the bay. We had only two hours to walk around but I enjoyed every second of it. Clear, blue sky and navy water are a perfect match for the colors of “Hello sunshine”.
Paper is and always will be my favorite scrappy item. Having only papers on hand you can still create very bold and detailed project. That’s why I love digital products so much. Fussy cutting is my friend and I always look for elements that I can cut out from paper to make my project even more unique.
I can’t wait to scrapbook more of my greek adventure on some other pages and albums. Summer projects are always my favorite to make. Thank you for stopping by and see you in two weeks. I have really fun page to share with you then.
Anna here today with you sharing a new layout featuring the amazing Legendary Collection. I don’t usually use photos of me in layouts, but this week my husband and I have celebrated our ninth wedding anniversary, so this is like a little commemoration. We have been together for 21 years, and we have grown together and formed a family.
For my page, I used the Offbeat paper as my background, and I added some mix media. I took a 12×12 stencil and applied white stencil paste. Before I removed the stencil, I spread some pigment powders and water. So this way, the color is only deposited on top of the stencil paste. I used the same colors on the paper.
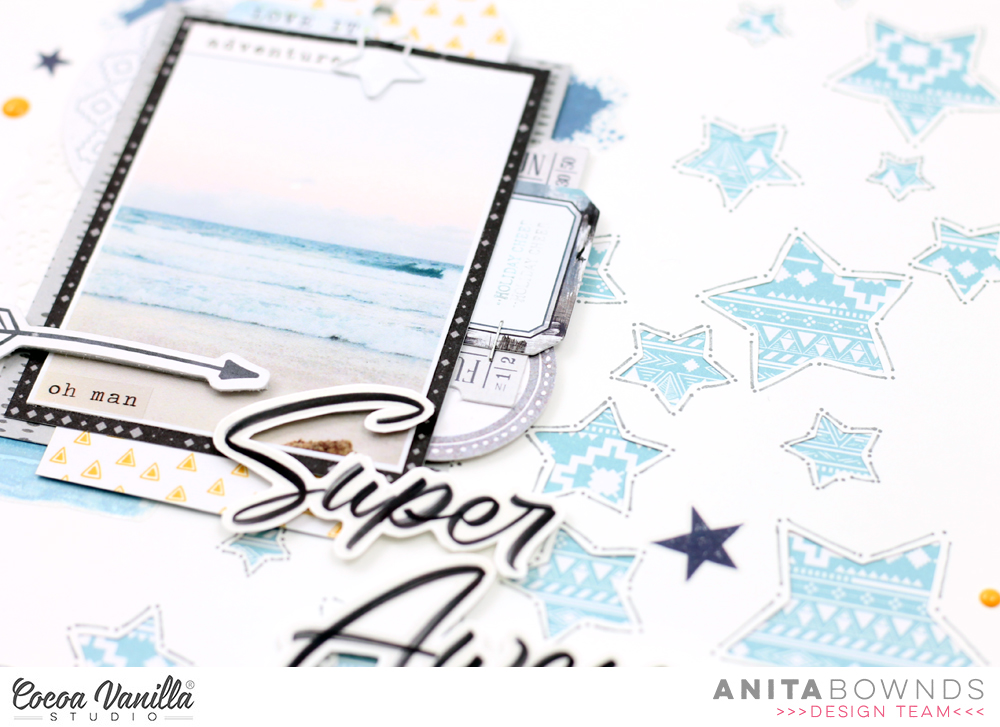
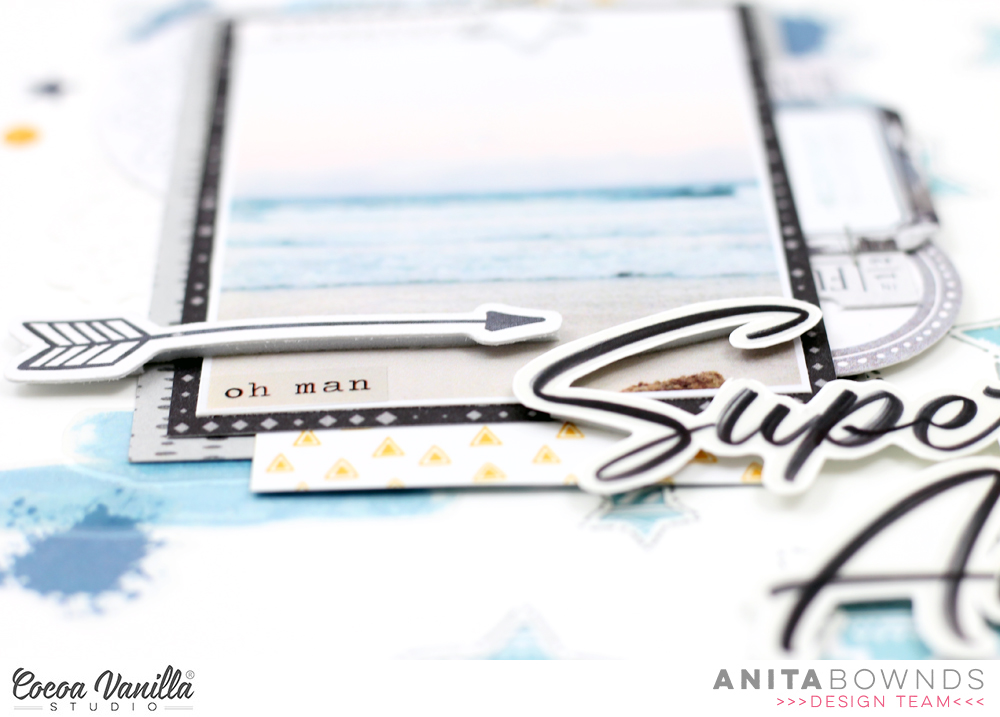
I matted my picture with the Outdoors Type paper and used some circular die cuts from the Die Cut Ephemera pack to layer it. I also stacked some stars, because there’s a star in my husband’s cap. With foam dots, I raised all the elements to give more volume to the composition.
The title consist of two different words, one from the Die Cut Titles and another one from the Clear Stickers. On top of the photo, I also added a tab and the word love from the Accessory Stickers to complete the title: “Love this adventure”.
Finally, I embellished my page with more clear stickers and two enamel dots. I didn’t want to overload the layout, to give prominence to the photo and the wonderful distressed pattern paper. As I always say, less is more.
Thank you so much for stopping by today. I hope you like this layout and inspired you to create something special with your memories. Have a great week!
Hey friends its Michelle back here today with a new layout share featuring the awesome Legendary Collection. I was so inspired by our recent Stars and Stripes theme that I couldn’t help but use that as the base for this layout. Stars are the perfect embellishment for scrapping a layout of Leila’s ‘Star of the Week’ photo from last year.
I chose a fun new cut-file design from CUT to YOU that features 3 different star designs and resized them to create different focus points for the layout. I cut all 3 designs out on white cardstock and backed the larger design using a mix of different patterns and colours to compliment the stars within the collection. Papers used – ALL STAR, EPIC TALES, EXPLORER, OFF BEAT, TOTAL LEGEND and WILD ONE.
I adhered the star to the left side of the layout using foam sheeting to raise it off the background paper (OUTDOORS TYPE) and added the super cute photo of Leila to the left backed with a piece of BRAVE HEART and a sticker tab from the Accessory Sticker sheet.
I created the title using a cardstock title piece and alpha stickers from previous collections. LOVE LOVE LOVE those white alphas! There’s a sprinkling of stars, both fussy cut and ephemera, on top of the big star also.
I kept the other 2 star designs open and adhered half of each design to the edges of the layout, creating open clusters and tying all the elements of the layout together. In the top cluster I added the ‘Hey You’ banner sticker from the sticker sheet and a mix of fussy cut and ephemera stars.
In the bottom cluster I added pieces from the ephemera pack, fussy cut and ephemera stars plus a word sticker from the Accessory Sticker sheet. Lastly a splattering of gold colour shine to finish it off.
Well friends that’s all from me today. Thanks so much for stopping by.
Hello dear friends! Thanks for stopping by the blog today. It’s Kylie back with you to share a new layout I have completed with the super gorgeous ‘Happiness’ collection. I had taken some recent photos of my girl and wanted to create something fun and florally. I’ve used a sweet birdhouse cut file designed by Paige Evans.
I trimmed 1cm off each edge from some of the MEADOW paper before adhering it over the top of a piece of the BLISS paper to create a framed effect. I then trimmed 1.5cm off each edge of a piece of white card stock and adhered it centred to my page. Using a wide paint brush and some aqua watercolour I added some stripes and random splatters to my background. I felt no need to add Gesso to the background first as I wasn’t going to go crazy with mixed media.Once dry I added a fine hand drawn border with a black marker pen.
Once my cut files were backed I adhered them to my page with some foam squares. This makes them sit up from the background, enabling me to create more dimension within my page.
There are so many lovely floral elements in the ‘Happiness’ die cut pack. I added several to the base of my page to support my photo. I used more foam tape on some, again for dimension. I printed my photo to 3″x 4″and in black and white.With so much colour going on in my page this helps to still draw the eyes attention to the photo, rather than having it lost or blend in amongst it.To finish my page I have added some of the typed phrase stickers from the sticker sheet. There are so many phrase options you can create with these!
I hope you have enjoyed seeing my latest layout today and you can enjoy some scrapping time of your own soon.
It’s Tarrah McLean back with you today to share a new ‘Throwback Thursday’ layout featuring the gorgeous Make A Wish collection!
The Make A Wish collection is one of my all time favourite collections by Cocoa Vanilla so when I got a ‘Throwback Thursday’ assignment, I knew this collection was the one I wanted to use to document a cute photo of my niece from her recent 3rd birthday.
I have again chosen to create a page in the smaller format of 8.5′ x 11′. The gorgeous Happy Day cut file title and the candles cut file are all by CUT to YOU. I have had those for a while, I was so happy to be able to use them on this layout! I backed the title with the ‘B’ side of the Hip Hooray paper and the candles with the Party Dots paper from Make A Wish. Once backed, I popped them all up using adhesive craft foam. I love the shadows and dimension this creates.
In the detail photo above, you can see I decided to add the word ‘Cake’ to the title of my layout. Happy Cake Day is the title of my layout. I used the alphabet stickers from the Make A Wish collection to spell Cake.
The background paper I chose is the Daydream paper from the collection, I then chose the wood grain paper and adhered it on top and machine stitched around the edge. I love the texture and softness this creates. I bent up the edhes of the paper slightly also.
The super cute photo had to be the main focus so I decided to adhere it to the centre of the page with one of the chipboard frames ‘framing’ it. Above the photo, I adhered the heart border strip from the ephemera pack and fussy cut out a small journal spot from one of the papers to tuck in. I also layered the ‘Fun’ banner to the top right of my photo. I adddd the wood veneer cake to the right of the photo and added some of the stars from the ephemera packs and accessory sticker sheet. Lastly I added some of the phrase and word stickers also from the Accessory sticker sheet and dated the date stamp.
Thank you so much for joining me on the Cocoa Vanilla Studio blog, it’s always fun to revisit some of the past collections for Throwback Thursday!
Hey CVS friends Rachel here. Last week I decided it was time for a sort out of my CVS collections, as often when I am creating I get messy and end up throwing my product back in its pizza box and close the lid to hide my laziness! Well it took me far too long but it was worth doing as I discovered I had more than I thought (of course) and I also realised how many papers from different CVS collection go together beautifully. This is what inspired this layout and it is a CVS all sorts!Firstly I chose this super sweet rainbow with cloud cut file (Silhouette Design store). I kept to the rule of thirds choosing three papers that coordinated. I used Navy flower vellum paper and Grow wild paper from Wild at Heart collection, the third paper is from the Midnight collection Moonlight. I added the rainbow with foam tape knowing I would tuck elements under it (and it creates a 3D effect). I used a polka dot embossing folder on my cloud which added texture and design (this stops it looking flat), I added the cloud with double sided tape.
I added a flair from Happiness collection, I chose the hot pink ‘good vibes’ one as it contrasted against the white.
I then used a mix of embellishments from various collections to pretty up this page. As always I added a paint/watercolour clear sticker behind my cloud and adding a die cut butterfly over it, both these elements being from the Unforgettable collection.
On the opposite side I added a floral cluster using die cuts again from Unforgettable, finishing this cluster off with a phrase sentiment and enamel dots.
I found a chipboard polaroid frame for my photo in a pretty polka dot peach and used a grey min bow to finish off. I added a die cut camera under the rainbow, added an enamel dot to the lens centre and lastly added another phrase sentiment.
I created my title using a mix of chipboard word (using a paint brush stroke clear sticker behind it) and accessory sticker phrase sentiment and a clear sticker butterfly. To create a visual break between the cloud and title I added a peach scallop die cut.
All thats it from me today! Thanks for taking the time to stop by and I hope you have a wonderful week.
Hi everyone! It’s Sue here to share my latest design team project with you. Today I am sharing a 12×12″ layout I created featuring the beautiful ‘Unforgettable’ collection and some recent photos of my daughter at the beach. As my daughter gets older (she’s now 12), I am finding it increasingly difficult to get photos of her, as she doesn’t enjoy posing for me as much as she used to. (Unless she is dressed up in a costume, but that’s a whole other story!) So you can imagine my delight when I managed to capture these photos of her, and I couldn’t wait to scrap them.
I chose to use the ‘Unforgettable’ collection because I just can’t pass up the chance to create something gorgeous and girly whenever I have the chance. I began my page with one of my favourite papers from the collection – the fabulous aqua diagonal stripe print on the reverse of the Sprightly paper. Instead of keeping the sheet as a whole, I decided to add some extra interest by cutting off a strip along the left edge and flipping it over to reveal the abstract watercolour pattern on the other side. Before re-joining the two, I also added a narrow strip of the Unscripted paper between them. I also distressed the edges of the joins slightly to add some extra texture.
With my page base constructed, it was then time to create a focal area for my layout. I layered several smaller pieces of paper (Sprightly; Garland; and Pretty Bits) to form a mat for my photos, adding some cardboard behind the left photo to lift it up a little higher than the other. Then it was time to play with some pretties!
I decided on three main embellishment clusters placed in the bottom left, top right and bottom right corners of my photo mat. Beginning with the top right cluster, I used a die cut circular frame and a large floral piece from the Die Cut Ephemera pack as the anchors for the cluster. It was at this point that I realised I really needed to draw in the stunning blue colour of the water in my photos. Unfortunately, this colour didn’t feature in the collection so I had to come up with another solution. I found a small floral cut file called Flower Bunch (designed by Paige Evans) that I had cut previously, and coloured it using watercolour paints.
Once dry, I cut it into three pieces so that I could use a portion of it in each cluster. I tucked the largest of the three pieces in underneath the die cuts I had started my first cluster with. I then added two smaller die cut flowers; and a small tab and phrase from the Accessory Sticker sheet. I then finished the cluster with a beautiful die cut butterfly.
For my second cluster in the bottom left corner, I again used a large die cut floral piece from the ephemera pack combined with another section of the painted cut file. In behind the floral piece I tucked a pretty little tag (also from the ephemera pack), which I tied with a little twine. I then added the little moments labelled arrow, which I popped up with little foam tape to give it some dimension.
My third and final cluster was to be my title cluster. I had already picked out the living the dream die cut from the ephemera pack for my title piece (it was an easy choice – just look at that beach on a perfect Queensland winter day). I added another die cut flower and leafy branch, as well as the remainder of the painted cut file. I used foam tape under the title, which allowed me enough room to add a watercolour style Clear Sticker under the edge.
I finished off with a small die cut heart alongside my title cluster and then some tiny splatters of blue ink scattered around my page.
Thanks so much for stopping by today so I could share this with you. I hope I have inspired you to get some supplies out and create something pretty too. (Besides, we all need to make room for the new ‘Daydream’ collection coming soon, right?!)
It’s Sophie with you today and I am sharing a girly layout created with the gorgeous Cocoa Vanilla Studio Unforgettable collection. It is a simple page featuring my sweet little girl.
I used a thick white cardstock as my background, cut about half an inch around it and adhered it on the back side of the Storyteller paper to create a border all around my page. I also machine stitched with white thread around it.
I did a few watercolor splatters on my background, centered my photo and backed it with tissue paper and adhesive foam.
I used a fussy cut card out of the same Storyteller paper as a big quote next to my photo. I punched out a few stripes of different patterned papers that I stuck down under the card and adhered everything on the left side of my photo.
I also cut out three labels out of the same patterned paper, added a white stitch around them, ruffled up their edges with scissors and placed them on the right side of my photo. The overall look is like a grid design.
Then, the fun part begins: Adding embellishments ! That’s also the part where it’s hard for me to know when to stop ! There are so many gorgeous flowers, leaves and feathers in the Die Cut Ephemera Pack that match so beautifully… It was a challenge not to put literally everything on my page !!
You might also notice that I created a few watercolor leaves of my own, that I fussy cut and arranged here and there around my page.
I truly hope that you like my layout and you feel inspired to use this amazing Unforgettable collection. Please feel free to comment or ask any questions, and it will be my pleasure to answer you !


 Firstly I chose this super sweet rainbow with cloud cut file (Silhouette Design store). I kept to the rule of thirds choosing three papers that coordinated. I used
  I added a
  I then used a mix of embellishments from various collections to pretty up this page. As always I added a paint/watercolour clear sticker behind my cloud and adding a die cut butterfly over it, both these elements being from the
  I found a chipboard polaroid frame for my photo in a pretty polka dot peach and used a grey min bow to finish off. I added a die cut camera under the rainbow, added an enamel dot to the lens centre and lastly added another phrase sentiment.
 I created my title using a mix of chipboard word (using a paint brush stroke clear sticker behind it) and accessory sticker phrase sentiment and a clear sticker butterfly. To create a visual break between the cloud and title I added a peach scallop die cut.
 All thats it from me today! Thanks for taking the time to stop by and I hope you have a wonderful week.


