It’s Sophie with you today with a non-christmassy layout created with the lovely Merry & Bright collection.
My assignment for today was to create a page about something new…
Well, the last months haven’t brought anything new for me… aside from a new -completely different- way to practice medicine. As a doctor working in the hospital during this Covid era, all I had in mind was all the new protocols and guidelines to which we had to adapt when seeing our patients. Seriously, what a tough year….!
I first hand drew it on white paper, and when I was satisfied with the result, I copied it on the beautiful “Star Bright” paper. I machine stitched on it with matching thread and painted with green watercolor the edges to create depth.
I cut a strip of the “Jingle All The Way” patterned paper for the upper edge of the mask, added two pieces of twine, and dimensional foam before adhering it to my page.
My title is a cut out of the “Season’s Greetings” patterned paper (NEW) and an alphabet cut file from JustNick Studio (Reality) that I backed with the beautiful “Oh Christmas Tree” patterned paper. I also added adhesive foam under my title.
I cut two large strips of the “Jingle All The Way” paper that I put on the two sides of the layout, with a tiny scalloped punched border from the “Star Bright” paper.
I created a beautiful floral cluster beneath my title and on the top of my photo, that are fussy cut out of paper and from the Die Cut Ephemera pack.
Finally, I handwrote my journaling on a Pocket Card that I hid behind my photo, documenting my adaptation to this new reality.
Here are some close-ups:
I really hope that I could inspire you today. Why not use this gorgeous Merry & Bright collection for non Christmassy layouts ? See how versatile it is ?
I wish you all a splendid beginning of 2021 with lots of joyful crafting time !
Hey everyone, wishing you all a Happy New Year. I hope you have all had a lovely Christmas and holiday break. I am here sharing my first layout for the new year with you all, with the theme of ‘new’ in mind. This layout is featuring the beautiful Daydream collection. For today’s layout I have also ventured back into creating a 12×12” size, a layout size which I have not created in for a few years now.
Here is the layout I created:
The theme of this layout is around the word ‘new’. I decided to document the ‘new’ way of teaching and learning that we all encountered in 2020. As a teacher I had to adapt to implementing and supporting the learning of my class via online platforms – and as a Mumma I had to juggle teaching my class and supporting the learning of my own school ages children. It has certainly been a ‘new’ way of teaching and a challenging year for all in this current pandemic.
The photo in particular was taken after we had just finished a stint of remote learning and I had run an evening of successful Zoom parent/teacher teacher conferences. This online learning thing was so challenging for all, I think on this particular evening I was just so proud to have made it to the other side, still smiling! I printed the photo at around 3.5 x 4.5” in size via my Epson Picturemate in black and white. I printed the picture in black and white as this picture was taken in my classroom, which had a lot of bright colours and displays in the background. This made it easier to choose and use the Daydream collection to document this story.
The cut file in those layout is one from the Cut to You store. I loved the graphical look of the design and the ties to schooling in a pie chart and thought it would work well to document this story. I used a combination of the 6×8” paper pad papers and the 12×12” papers to back the cut file sections. I used the Garden Variety paper print in two sections as I wanted this layout to feature clusters of the gorgeous floral ephemera pieces. A love creating with a simple cut file like this as they are super easy to back but look really effective on a layout.
The ‘heaviest’ embellishment cluster I created was to the right of the photo. This cluster had a mix of floral ephemera and fussy cut florals from the Garden Variety paper. I also delved into my enamel dot stash from past CVS collections to add those finishing touches to each cluster created.
The title of the layout is ‘captured’ and created using a past collection ‘Unforgettable’s’ foam stickers. Love a bold title that contrasts on a page, so these black foam stickers were perfect. The other words within the pack of titles were not as suitable as this was not necessarily a time that would fit the title of ‘the good life’ or ‘the best’ – I thought ‘captured’ works well as it gives a title that is just documenting this moment in time.
As always I have documented my story on a typewriter and cut it into strip form. For something different though I have adhered it with a thin dimensional adhesive tape (I use an affordable Bunnings one I have featured here). I love how it has added a slight shadow underneath each strip of my story.
Another cluster was created to the bottom left of the journaling. This cluster helps to balance the heaviness of the photo and the cluster to the right of the photo. This cluster features floral ephemera and fussy cut flowers.
To the top left of the photo I added another small cluster of embellishments. This helps to balance the layout. You will find that on most layouts I work in groups of three; in embellishment clusters and small embellishments too.
Thank you so much for stopping by the CVS blog today. I hope you have found this layout inspiring.
Hey Creative Friends, Happy New Year to you all. I’m back on the blog today kicking off the 2021 inspiration with a scrapbook layout share for Cocoa Vanilla Studio. For this page, I thought it would be fun to scrap this black and white photo of myself, taken at the end of 2020 at my local ballet studio.
For this page, I was inspired by the current Inspiration board, in particular, the image with all of the frames in it and the quote that says ‘This is where the fun stuff happens’. Be sure to pop by the Cocoa Vanilla Studio Facebook Community for more details on how to play along.
To begin my page, I backed a cut file from CUT to YOU called ‘Snapshots‘, with pattern papers from the ‘Pretty Bits‘ pattern paper, the ‘Story Teller‘ cut apart sheet and papers from the 6×8 pattern paper pad. I’ve also backed my photo with the pattern paper ‘Lacewing‘ and stitched around the edge for added detail.
I’ve placed my backed cut file centred on the page and added a frame to my background using the ‘Natural Beauty‘ pattern paper.
Now it was time to embellish. For this, I worked with a visual triangle to create three clusters around my page. I’ve chosen elements from the Ephemera Pack, Die Cut Accessory Stickers and a Flair button.
My main focus for creating the clusters was to balance out the colours on the page, especially the pops of black. I’ve also made sure to represent all of the colours in the inspiration board including the soft Apricot/Peach tone you can see below in the butterflies.
Here’s a close up of all the lovely layers of my page.
To finish off my page, I’ve added in some of the Enamel Dots in the two tones of Pink.
I’ve also made a YouTube process video which you can watch here:
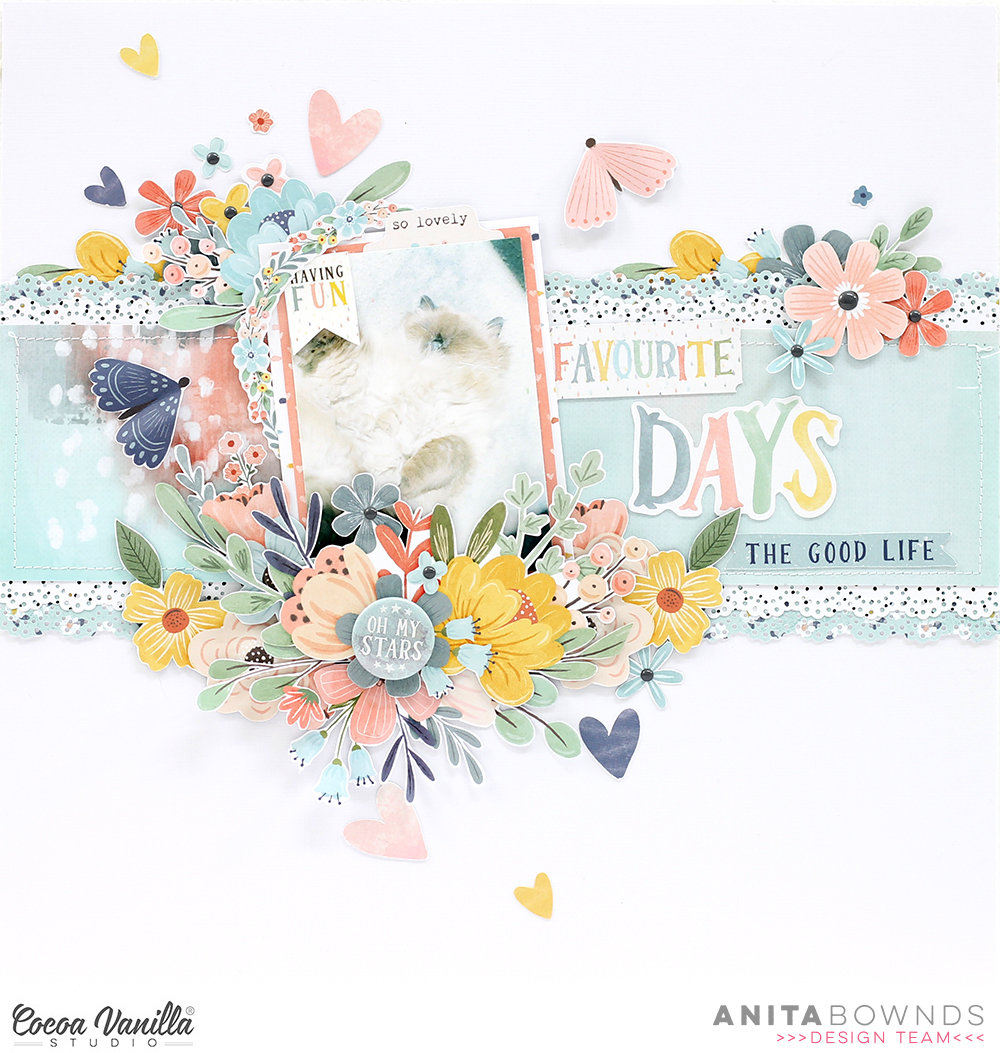
Anita here with you today sharing my first layout of the new year using day dream collection
My photo is of my kitty enjoying the morning sun in front of the window this was before we decided that all that fluff needed to be shaved off … and yep he wasn’t happy about losing his fluff!!
I started off by trimming a 12×12 by 5 inch strip from sweet serenity and machine stitching around the edges then I cut 2 more little strips 1 inch by 12×12 from sweet serenity then using daisy days I cut 2 more strips 12×12 by inch and then with all the little strips I punched a border on each of them
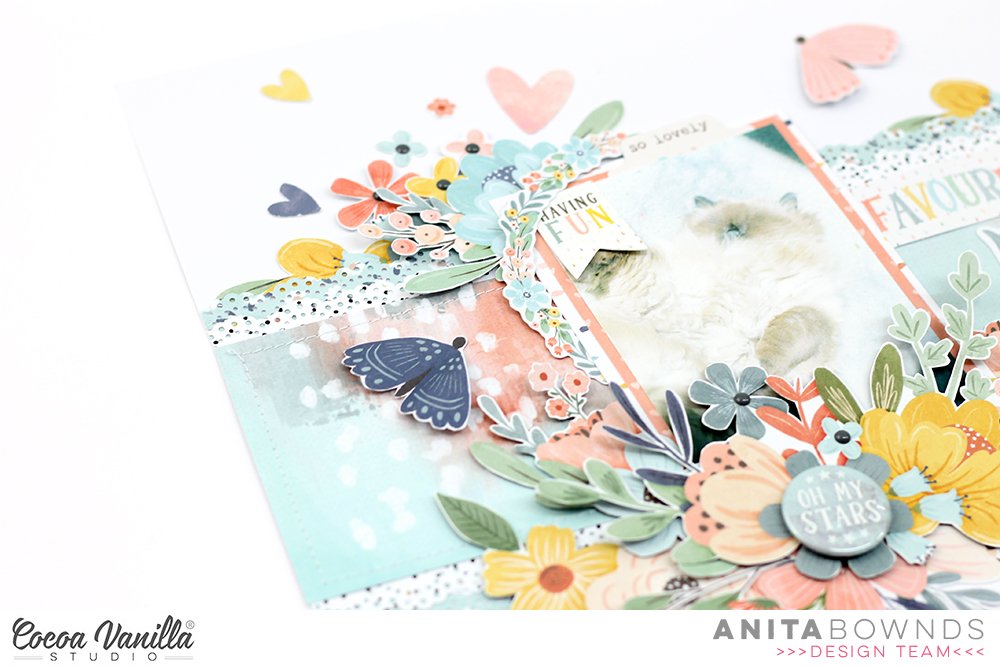
Then I matted my photo on papers from the 6×8 paper pad ( you can substitute the 6×8 for the 12×12 using all aflutter and sun shower ) I then tucked a the circle ephemera piece behind the photo that I fussy cut around the edges.
Using garden variety pattern paper I fussy cut out a bunch of flowers and started adding flowers around the bottom of my photo along with flowers from the ephemera pack that I fussy cut around to match the rest of the fussy cut flowers
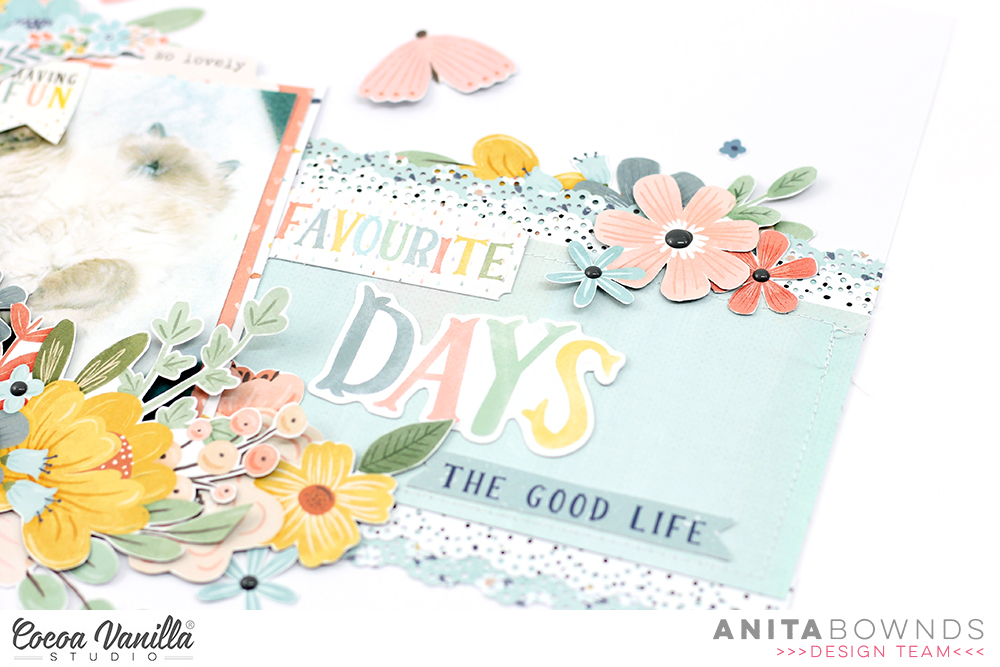
I added ephemera around my photo and more clusters of flowers around the photo and to the right side of the layout I also added some other bits from the ephemera, butterflies and my title then finished off with hearts around the flower clusters and enamel dots in the center’s of the fussy cut flowers..
Hi Cocoa Vanilla fans and Happy New Year! Danni here sharing my latest layout featuring the gorgeous Cocoa Vanilla Studio Daydream collection. We are starting off the new year with ‘New’ themed projects, so I have chosen to document these photos of my daughter’s new ‘do – her first ever baby haircut…adorable right?
I decided to keep things fairly simple for the background, using some plain white cardstock and a patterned paper border. This is a go-to technique for me because it is quick and easy but the border keeps the cardstock from looking too blank. I used Daisy Days 12×12 patterned paper for the border, making sure to gut the centre of the paper first so as not to waste any of the beautiful quality paper.
Next, I wanted to use up some of the scraps from the 12×12 patterned papers that I have already cut into for other projects. I had quite a few scraps by now, so it was time to get them used up! Instead of matting my photos individually, I cut several of the scrap pieces into varying sized rectangles and layered them together to form an interesting arrangement. I then distressed all the edges with my scissors for texture and dimension before adhering my photos on top.
I love adding paint and mixed media to my layouts, so I decided to go ahead and add a soft pink shimmery watercolour to the background. I used my paintbrush and added some messy brushstrokes and delicate splatters peeking out from behind my patterned paper layers.
For the title I chose a combination of die cut titles and some glittery alphas from my stash, as well as some tiny words from the accessory stickers to provide some subtitles. This is a great way to use these little phrases and I adore the typeface font.
I stamped the date on a label accessory sticker and added it above my photos along with a few extra stickers and a couple of lines of journaling in white gel pen. I love using white pen on top of patterned paper as it is nice and legible while keeping things light and bright.
I embellished either side of my photos using some floral die cut ephemera pieces and a couple of the adorable little houses. I popped on a flair button and some fussy cut butterflies from the 6×8 paper stack for good measure. I love how these tiny details finish off embellishment clusters beautifully.
I love how this sweet page turned out! The Daydream collection makes layouts like this come together like an absolute dream. I hope you enjoyed joining me today as much as I enjoyed making this layout. Have a wonderful day and best wishes for the new year!
Hello Hello! Its Michelle here with you today. I hope you’ve all had a wonderful festive season and are all rested and ready to see this crazy year off and start a fresh new one in the next couple of days. I have another instalment of Christmas Memory sharing for you all – the second half of the 2019 album I shared with you last month featuring loads of bits n bobs from the very cheerful Merry & Bright Collection. Like the first post, this one is also very photo heavy so lets jump straight into it..
… starting with the middle of December. There was lego building, tree building and secret letters from Twinkle our Elf. I’ll leave links for all the products I’ve used at the very bottom of this post
This time of year is also when Leila or one of us in this house tends to fall ill. In 2019 for Leila sadly it was a stomach bug that had her wiped out next to the undecorated Christmas Tree’s for an entire day
I created a flip/ shaker pocket to conceal the photo and journalling from that day using a label from the cut apart sheet Oh What Fun and ’14’ from the Countdown paper. There’s some glitter and a couple of ephemera hearts sprinkled into the front of the pocket on top of the pocket page card. To keep them all in place I sewed the flap directly onto the pocket page below.
Over the page I’ve kept things pretty simple using more numbers from the Countdown paper. I’ve repeated this step through the entire album to keep things cohesive.
In between the pocket pages I’ve added a giant paper tag insert using 2 pieces of pattern paper from the A5 paper stack – Joy to the World and the text side of Oh What Fun. I’ve created the round glitter shaker over the top of the floral pattern using the large circular wreath ephemera piece, some left over clear packaging, a tonne of sliver glitter and machine stitched around the wreath to keep out closed. I added flowers and banner from the ephemera pack, then stapled a piece of coordinating ribbon to the top.
I kept the text side of the tag blank as the album is already quite bulky, plus theres a lot going on in the photos to the right. The 18th of December last year was quite the busy day – we treated ourselves to a new car and Twinkle got up to mischief in my craft room creating signs for the Christmas Tree. It was a sad time for Leila saying goodbye to our first family car, but we were all very excited with our new wheels!
Top right of the pockets is another see through glitter pocket using the numbers from the Countdown paper, a single puffy gold star and machine stitched along the top edge to stop the glitter going everywhere.
As we start to creep towards the last third of the month it gets a little busier. The end of school, long days at work, House Elf getting up to mischief and HOT HOT HOT weather.
Another flip pocket using pocket page cards, ephemera and some off cut strips of Jingle all the Way (candy cane stripe) conceal more photos of Leila’s last day at school. One a photo of the crazy mask she made and the other a photo with one of her favourite teachers ( not shared for privacy reasons)
This kid is a hoot! An accessory sticker was perfect to embellish the photo I took of a well needed coffee at work. What a crazy time of year working in Pharmacy can be, and not because its Christmas!
We made it to see Santa to share with him all the things Leila was hoping to receive for Christmas. I had Leila write on the Dear Santa card herself which was the perfect touch to this spread. If you’d like to do the same with your children you can find this card on the Oh What Fun cut apart sheet.
We didn’t get the chance to ‘trim the tree’ until quite late in the month. The lead up to and start of December is always chaotic for us with work, school and Leila’s Birthday so the poor tree always gets neglected until the last minute. We make sure to enjoy it for a few weeks into January before packing it all away.
I used some of the wonderful woodgrain found on the Seasons Greetings paper or in the A5 paper stack as a base for this mini layout. I cut a frame out of the Candy Cane stripe Jingle all the Way to frame the photo then layered 2 trees from the ephemera pack and some stickers to finish it off. On the right hand side I used the darker green print of Oh Christmas Tree to cut a tree design cut file from CUT to YOU. I backed it with some clear velum and sprinkled glitter within each circle to create twinkling lights. I’ve machine stitched the tree onto the Oh What Fun paper to keep it in place.
On the back I created a simple sequin shaker pocket using another ephemera frame and adhered it to some Countdown paper with ephemera pieces and a strip of ‘Christmas rainbow’ diagonal stripe that can be found along the bottom of the Oh What Fun paper.
Over the page I kept the pockets simple using cards from the pocket page card pack. I also documented a photo I screen shot from facebook when our beloved country was on fire.
Were on the home stretch now, just a few more to go…
Another simple insert between pages of photos using vellum, ephemera pieces and a puffy gold star
with a very similar cluster created on the reverse to coincide with the photos of family from Christmas Eve.
Another photo heavy spread with pocket page cards as fillers with the addition of a couple accessory stickers and a cute ephemera house
All the fun of Christmas Day contained in 1 spread. This is literally all the photos I took on this day minus a few extra blurry ones. I chose to live the moments in person rather than a face behind a phone camera, but I’m happy I took just these few.
Lastly we round out the month with a few crazy faces from New Years Eve. Every year so far this crazy kid has been awake and ‘celebrated’ it well and truly into the new year with us. Last year it was on the couch watching fireworks from around the country on tv with her beloved stuffed animals.. and a few crazy selfies with me. You’re welcome lol
Well friends thats a wrap on my 2019 Christmas Memories album, and my creative shares here with you for 2020. Its been a crazy year for us all, and I cant wait to see what the next year brings.. Lets hope its a little less chaotic than 2020 but a heck of a lot more happy!
Thank you all for your love and support throughout the year.
Hey y’all! Laura Alberts here with a 9×12 layout featuring the gorgeous Merry & Bright collection! Using mostly paper for this one for an extra challenge! I wanted to let this sweet photo stand out on this layout, so I kept my design simple and embellishing light. Using the floral swag from the opposite side of this Happy Holidays patterned paper tucked behind my photo with three paper strips behind it as a base.
I layered a few smaller florals that I fussy cut from the Joy to the World patterned paper on top of the large swag as well as tiny florals that are sprinkled around the edge of the cluster. I also added dots of Nuvo Drops in gold for a soft dimensional detail and gold ink splatter as a finishing touch.
I fussy cut this “Joy” title from the Season’s Greetings patterned paper and then popped it up on foam to give it a little interest and dimension on the otherwise flat layout. This helps to keep the attention on the photo by overlapping the edge of it slightly. I have included a sketch based on this layout to inspire you to give this design a try!
I hope the sketch for this layout inspires you and this embellishment style encourages you to look at your pattern papers a little differently! It’s fun to see how you can change things up. If you’d like to see the Joy layout come together, I have the entire process in the video below!
It’s Anna here with you. I hope you are having a wonderful Christmas surrounded by your loved ones. For today’s project, I’ve created a new layout featuring the “Merry & Bright” collection, full of pinks and greens.
I started with a watercolor sheet, making a mixed media background using pigment powders in this peach color matching the collection. Then, I made splatters in two green tones with dye inks and gold mist.
I choose a picture of me and my little daughter (one of my resolutions for the new year is to take more photos of myself because I’m always behind the camera). I framed it with one of the 3×4 double sided cards and a piece of tissue paper.
Cocoa Vanilla floral die cuts are the best. I would never get tired of using them. So, I created a big floral cluster in the lower-left corner of the picture and another in the upper left corner. Also, I added three puffy stars and a couple of Christmas trees.
Between the two clusters, I placed a lovely flair button with two hearts. Finally, I stacked a sticker from the accessory stickers in the upper right corner of the photo.
To create my title, I fussy cut the word “happy” from the Season’s Greetings paper, and placed it below the floral cluster, raising all the letters with foam squares. Below it, I put another sticker from the accessory stickers. For the final touch, I made a little cluster in the upper right corner of the page with some die cuts from the die cut ephemera pack.
I hope you like this sweet page and thank you so much for stopping by today.
Enjoy these days, relax and craft! See you in 2021!
Hello everyone! It’s Kylie with you, on this, Christmas Day. For all of you who celebrate, I hope it’s a lovely time for you all. Today I thought it would be fitting to share a festive layout featuring the new Merry & Bright collection.
Included in this beautiful collection is the Christmas Tree Large Die & Backing Set It is a fast way to bring together a layout thanks to the background being complete already! It even features lovely shading with an effect of mixed media behind it, so all you need to do is add your favourite photo(s) and embellish! I have added some of the Puffy Gold Stars to my tree for some extra sparkle.
From the die cut pack I selected 3 baubles and adhered them to the top right hand corner with foam adhesive. I punch a small hole to the top of them so I could add some sparkly twine through them, finished off by stapling the ends to the top of my page.
My photos were printed in black and white for this particular layout, (mainly because my son had a bright blue shirt on! ….OOPS!) and were adhered to my page with more foam adhesive. More of the cute die cuts were then layered around the base of my photos until I was happy with the balance.
I love how fast this page came together! Thanks so much for stopping by the blog today. I hope my layout has given you a little inspiration for your own festive scrapbooking.
Hello Hello and Happy Christmas Eve to you all! It’s Michelle here today with a new layout share for “Throwback Thursday, our regular fortnightly throwback to beloved Cocoa Vanilla Studio collections from the past. This week I’m sharing a super fun layout using the awesome Legendary Collection which is perfect for documenting all kinds of funny moments, especially funny photo’s of my sweet Leila who just recently turned 10!
The layout was based on a fun title idea to use with a funny photo of Leila on a toddle ride at a local shopping centre. She’s way too big to fit in the actual seat so she was perched on top for her Epic Adventure to ‘Toy Land’.
I started the layout by making the title then worked around that to create the whole layout. I’ve used the woodgrain paper ‘Outdoors Type‘ as the backing and layered in a couple of other pattern papers ‘Offbeat‘, ‘Epic Tales‘ and ‘Wild one‘ to make the photo stack pop.
There’s some hidden journalling tucked into the top of the photo too, using a tag from the Ephemera Pack and shared up close further down this post.
I like creating titles with mixed fonts and this collection has plenty. I’ve fussy cut the EPIC letters found on the cut apart paper ‘Epic Tales‘ to give them a more 3D look when adhered to the layout with foam tape. Under this I’ve added a Die Cut Title word plus another strip piece from the cut apart paper. The alphabet stickers I used for Leila’s name are an older CVS product thats currently not available. To the right of the title I added the hot air balloon from the Ephemera Pack.
I added the giant stars from the Ephemera Pack to the top and bottom of the layout on a diagonal across from each other, then layered more Ephemera pieces and Accessory Stickers to create open clusters. I certainly love a cluster of stars, almost as much as I love a cluster of florals!
I used a range of adhesives to keep some pieces flat and give some slight dimension. More often than not I use my tiny attacher, foam tape and tiny glue dots. Oh and sometimes I sneak in a little machine stitching
To finish the layout I’ve splattered gold ink everywhere, added a sprinkling of Enamel Dots within the clusters and added the journalling to the hidden tag. It certainly was hilarious watching her try to squeeze into the seat that day!
Well crafty friends thats all from me today, here’s one last peek at the layout I’ve shared with you today..
I hope you’ve enjoyed seeing what I created for this weeks Throwback Thursday post. If you don’t already have the Legendary Collection in your stash you really should add it. There’s plenty of ways you can use it, even if you don’t have boys to scrap!
Thank you all so much for stopping by today. I hope you all have a safe and wonderful Christmas with your friends and family. Stay safe and be Merry! I’ll be back in a couple of days to share the remainder of my Christmas Album using the Merry & Bright collection.
Until then, Happy Scrapping.. if you get the time to that is.