It’s Sophie on the blog today sharing a layout created with the gorgeous DayDream Collection.
I took out my heart punches today and created numerous hearts in various patterned papers from the collection. I made a machine stitch with matching thread on the bigger hearts and bent the edges a little bit.
I used a white cardstock as my base for the design backed with a soft blue cardstock. I did a few zig zag stitches around the edges of the white cardstock.
I teared a strip of the beautiful Sweet Serinity paper that I put on the bottom of the page to ground the photo and the myriad of hearts.
I scattered the hearts around my photo in a “Rainbow” order, the darker shades of hearts on the bottom and the lighter ones on the top.
I also used the beautiful DayDream Sequins that I adhered around the hearts. I made sure to use matching colors between the sequins and the hearts.
Finally, I sticked down a few words stickers, added a beautiful Flair, my journaling and stamped the date.
I love the very soft feel of the overall look of this page. Two simple heart punches can go a long way !! And it allows to use many different patterned papers on a layout without making it look too busy.
Hey everyone – it’s Raquel here today sharing my first layout featuring the new and beautiful ‘Sunkissed’ collection. I know I say it every time that a new collection is released – but “wow”, Zoe really knocked this one out of the park. The bright patterns, the variety of embellishments and the cute icons and phrases has got me completely in love!
Here is the layout that I created:
The subject of this layout is a photo I took on our summer holidays that we spent together as a family in a coastal town a few hours from our house. Both the kids, hubby and I look forward to this special trip together each and every year. Our favourite time is when we get to visit the beach – a walking distance from where we stay. The kids have an absolute ball – the Mr and I get so much joy from seeing their happy faces.
Along with the photo of course, one of the main features of the layout is the sun in the background. The sun was created using a maths compass to draw the circular semi circle design and fussy cut out. I then free hand cut out the triangles to be placed around it as the suns rays. I love how it turned out! The yellow patterned paper was an exciting find in the small paper pad. I love that the paper pad has differing designs than the 12×12 papers.
To embellish the page I have used a small selection of the floral ephemera to go in either side of the photo. I used a variety of dimensional adhesives to add depth and dimension to those floral clusters. Are you as happy as I am that CVS has released a floral ephemera pack?!? Sooo exciting!
I loved the ‘welcome to paradise’ ephemera piece and I just knew it was the perfect title for this photo of our favourite place – ‘our paradise’. To add some more detail to that piece I added a yellow fishtail banner to below the label from the remaining yellow paper in the paper pad. I also added with foam adhesive the phrase sticker ‘nothing but sunshine and blue skies’ as a sub-title.
as always – this layout features journaling. I love documenting my thoughts in simple form when journaling on my pages. As I am not a lover of my handwriting – I prefer the method of typewritten journaling to get our stories onto paper.
I hope this layout has inspired you today. If you have not yet gotten your hands on this stunning collection I assure you should do You won’t regret it!
Gwen back on the blog with a new share and today I’m stash busting once more. It’s ‘Throwback Thursday’ and I thought it might be fun to pull out my stash of the ‘Happiness‘ collection. I also thought it might be fun to scrapbook an older photo of my daughter for this one. This photo was taken quite a few years back now celebrating her wins at a local swimming carnival.
For this layout, I was really drawn to use the bright colours in this collection and team them with a black and white photo. I was also keen to use one of the prints as my background for the page and decided on the ‘Little Things‘ pattern paper. It’s pretty bold for a background print, but I really love it. I’ve also added a frame to my background using a floral from the collection, this one called ‘Botanical Bliss’. To finish the frame off, I’ve used a contrasting coloured thread and stitched it around the outer edge. I’ve also used this stitching on my photo.
Next, I’ve used the ‘Meadow’ pattern paper to back a cut file. This one is from CUT to YOU. I have cut the file quite large so that it acts as a background feature for my page. It also has two positions for photos in it which makes the photo placement really easy. As I only have one picture for this layout, I’m going to use the other photo block as a spot for my title. This is going to be a centered design, so I’m careful to make sure everything is positioned nice and straight and perfectly centered on my background.
I’ve chosen the ‘Good Vibes’ pattern paper to back my photo, it contrasts beautifully with the pink tones in the ‘Meadow’ paper. I’ve also raised my photo on foam for some dimension.
For my embellishments, I’ve used elements from the ‘Ephemera Pack’. There are lots to choose from in these packs, they really go a long way. The title ‘Happy Times’ is also from the Ephemera pack, but there is also a ‘Die Cut Titles’ pack in this collection which includes a STACK of fun layout titles. I’ve also included a flair button from the ‘Flair Buttons’ pack to round out my top right-hand side cluster. The ‘Good Vibes’ banner sticker which you can see below is from the ‘Accessory Sticker Sheet’.
When positioning my embellishments, I’ve focused them in the top right square section of the cut file and then worked them down towards the bottom left-hand side of the page where my photo is. The main idea here is to help lead the eye down towards the photo.
To finish the page, I’ve fussy cut out some of the pretty butterflies from the ‘Bright and Beautiful‘ pattern paper. I love using fussy cut elements as embellishments and as they are essentially a piece of pattern paper, they are very inexpensive so would definitely recommend picking up some designs like this one. I tend to fussy cut a bunch in advance so that I have them ready to go when creating. I’ve also been sure to include some of the typed sentiments from the ‘Accessory Sticker Sheet’, these are always a nice finishing touch to a page.
I hope you enjoyed seeing how this layout came together, now is the perfect time to stash bust if you are waiting for the arrival of the new ‘Sunkissed’ collection.
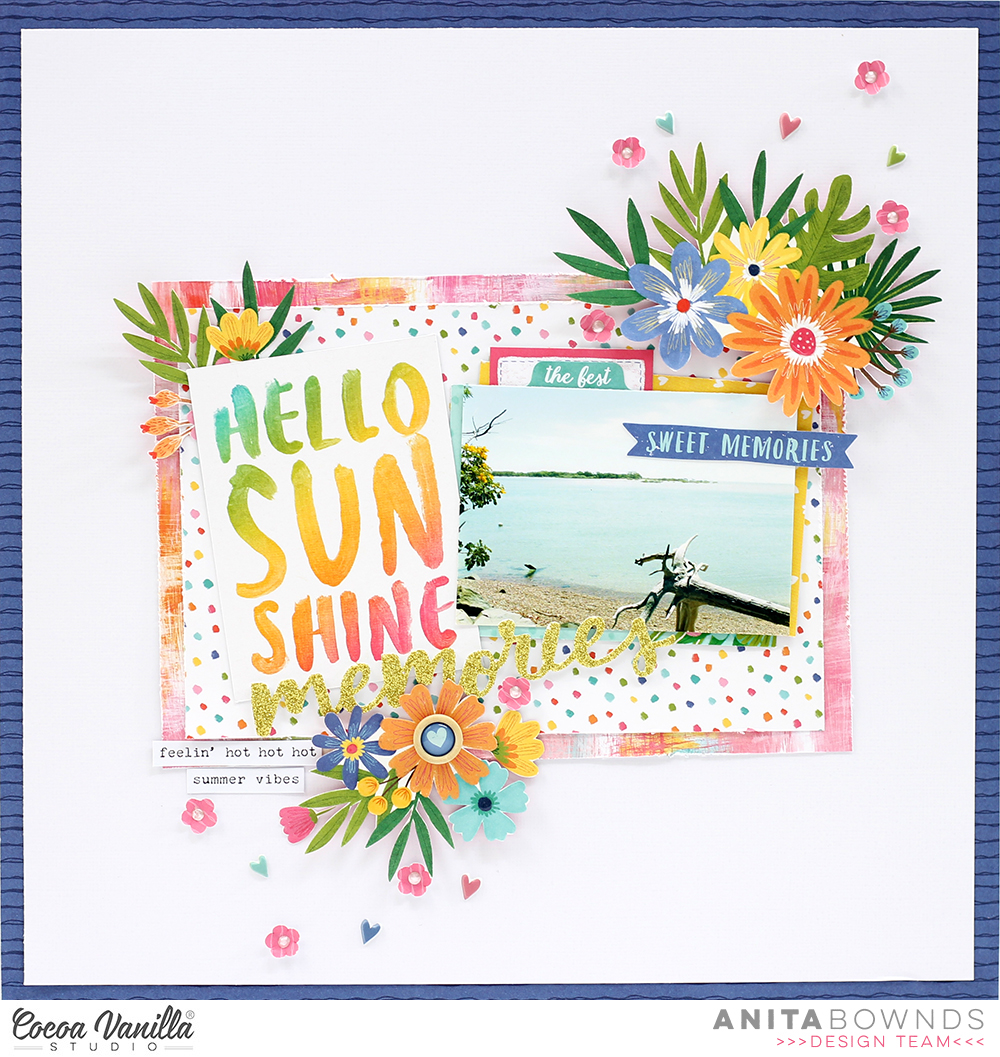
Hey lovely’s Anita here with you today sharing a fun scrap lift swap with the lovely Danny Visser
Using the new beautiful Sunkissed collection so bright and beautiful
A day at the beach breathing in that sea air just absolutely love it ….
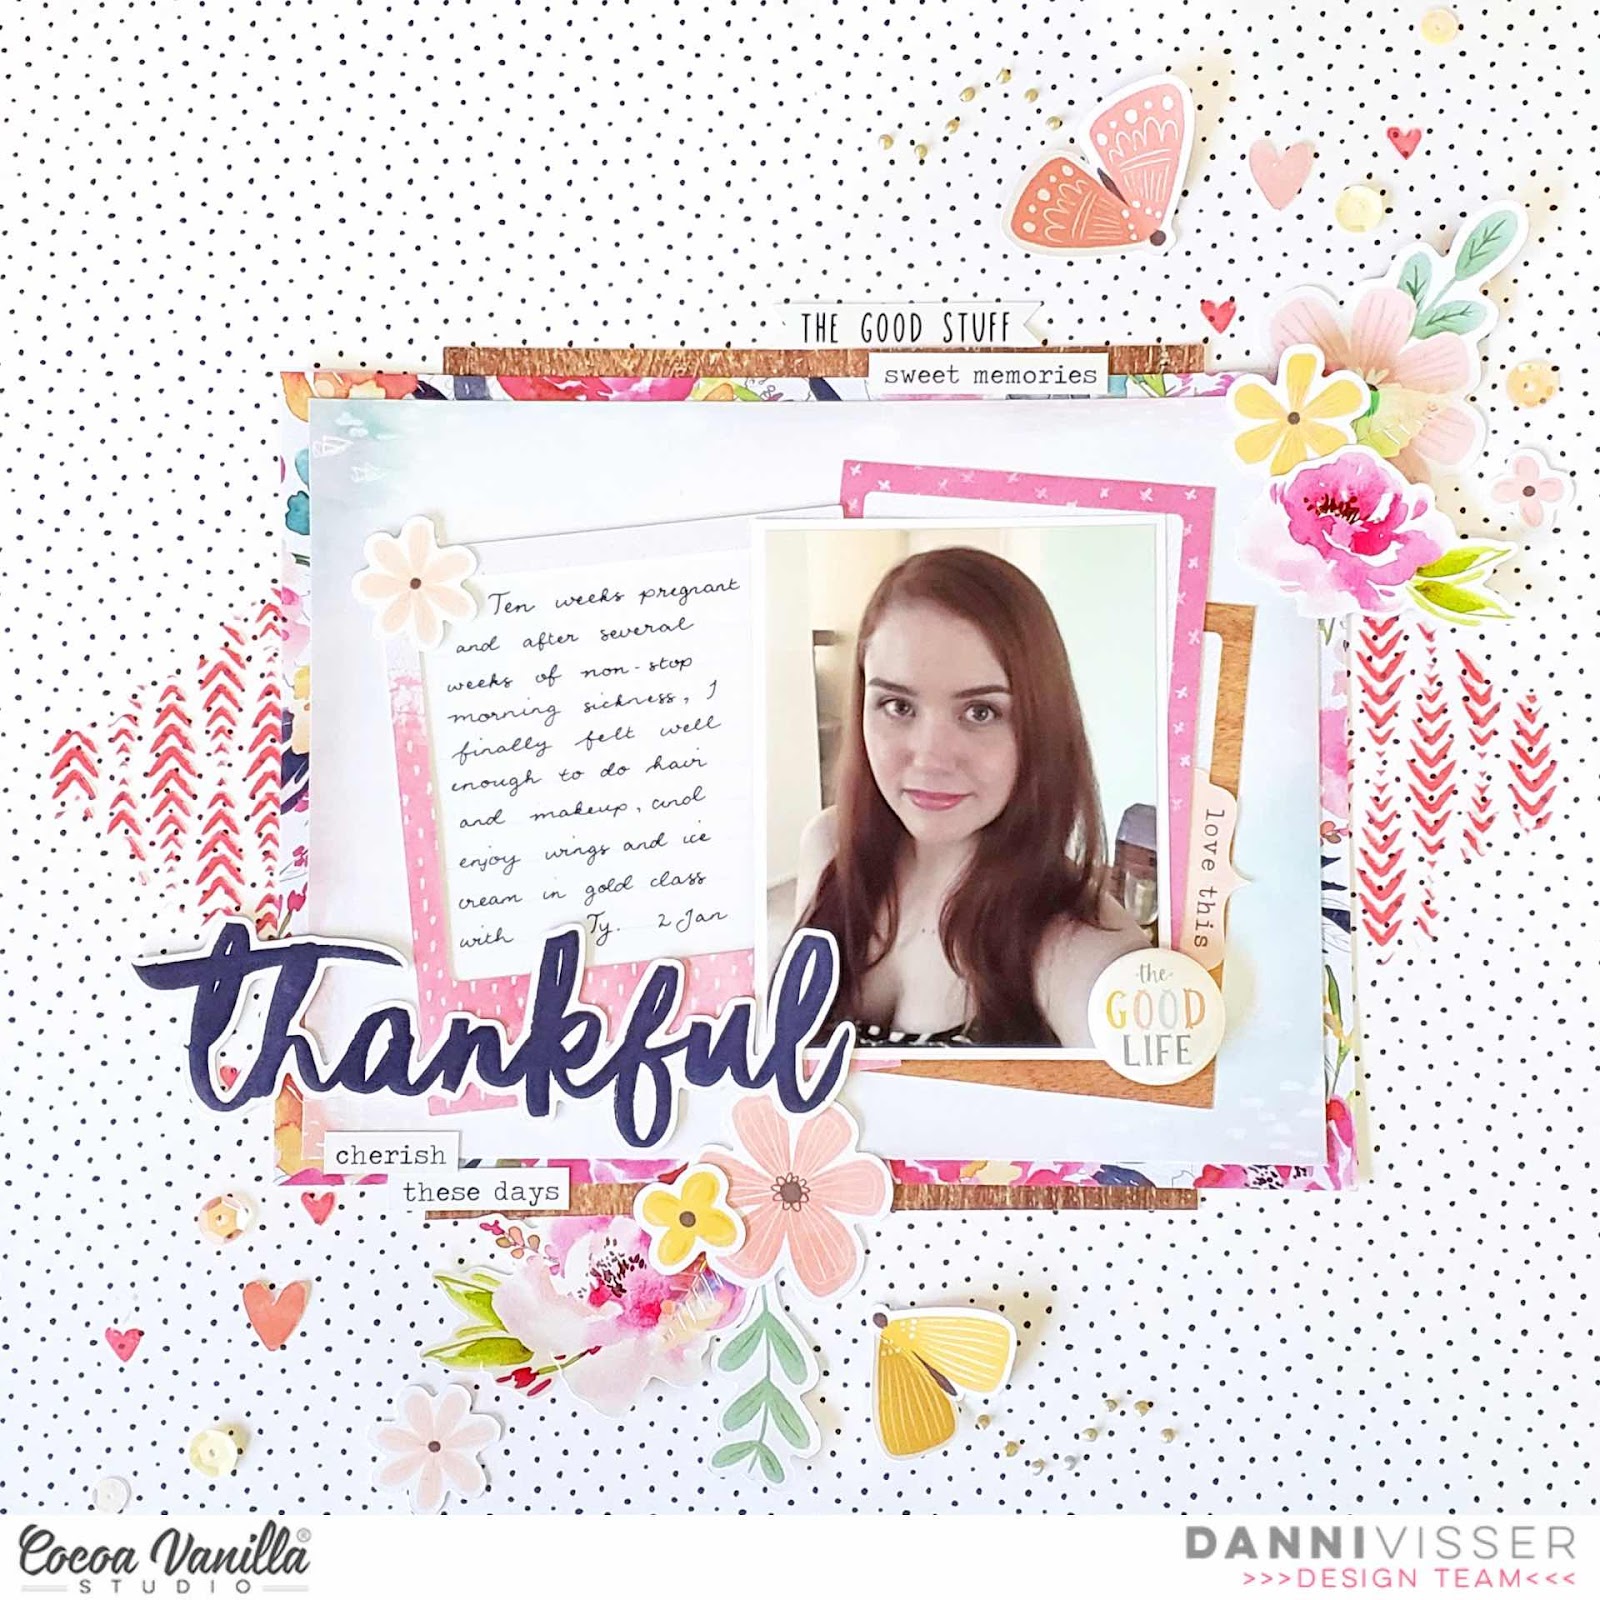
(Check out Danny’s sweet layout below )
If you missed seeing Danny’s scrap lift of one of my layouts check it out here
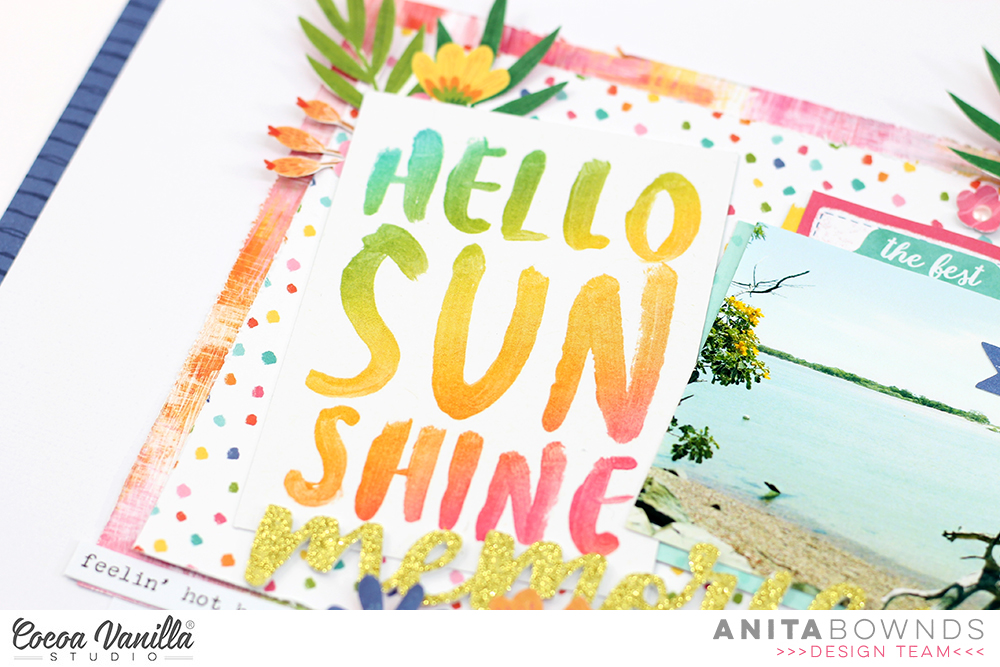
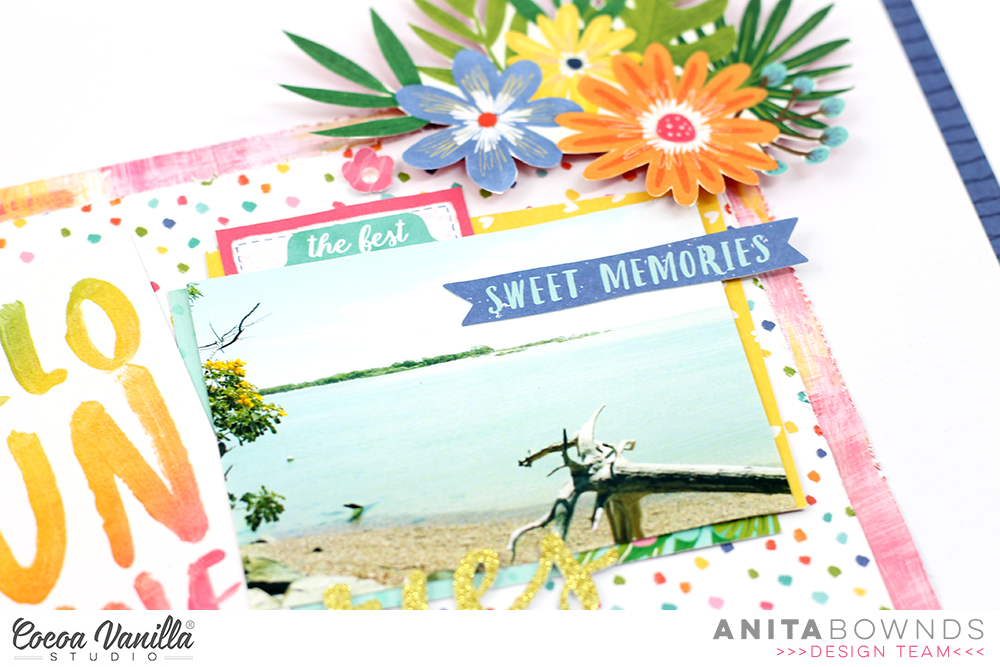
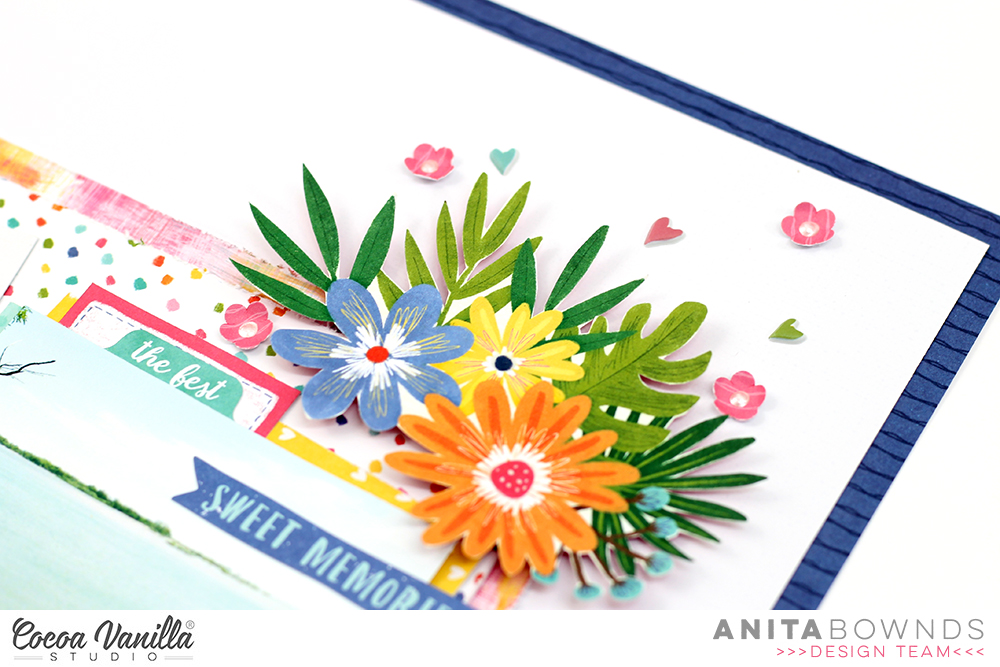
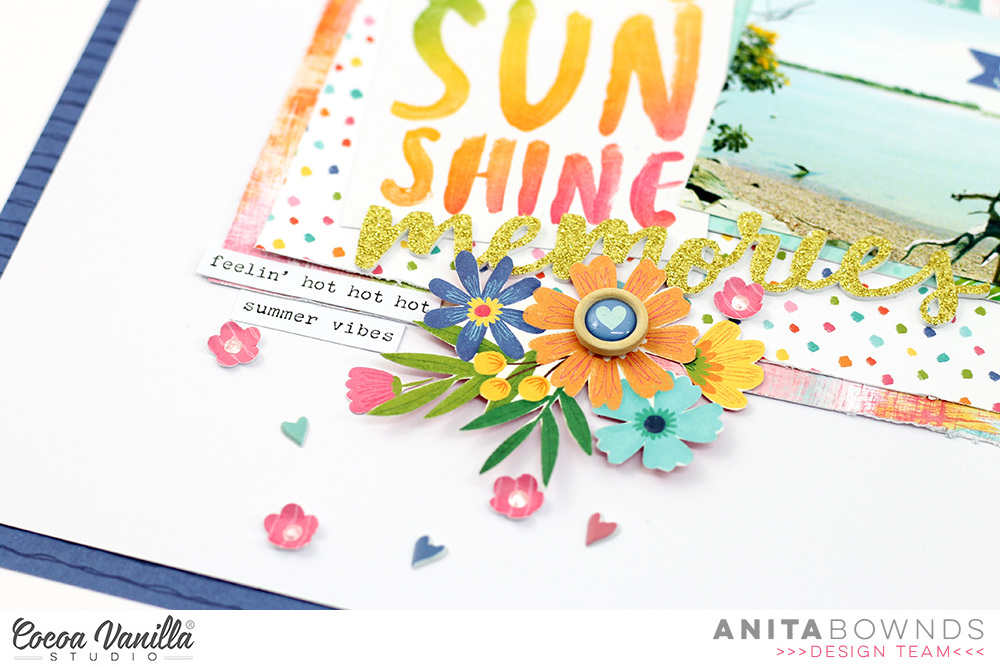
I started off with white cardstock and trimmed 2 sides to add more colour to the background adding Bright side Then I chose 2 pattern papers from the A5 paper stack and adhered them in the center of the layout Next I Matted my photo on 3×4 cards and added a card next to my photo to add a sub title and then started tucking ephemera around the photo along with some cutout pieces from the A5 paper stack
Next I fussy cut out a bunch of flowers from growing wild pattern paper and added them around the layout I also added the rest of my title underneath the pocket card using glitter foam titles
Then I punched little flowers and scattered them around the fussy cut flowers
I popped some of those little puffy hearts around the little flowers from the puffy stickers
Then I added some accessory stickers and a wood epoxy button in the center of one of the flowers to finish off the layout
I hope you have enjoyed my scrap lift inspiration today
Today I want to share with you this baby boy-themed layout. I usually do more girly layouts, but once in a while, I like to get out of my comfort zone. Also, I know that many of you will be happy with some masculine inspiration with the Legendary collection.
On this page, I’m documenting a photo of my sweet nephew Roger. He’s so smart and happy, always with a smile on his face. Isn’t he cute? My sister sends me a lot of pictures of him, and I love making layouts with those pictures. For this page, I started with the Offbeat paper as my background.
Then, I cut out triangles in different sizes from Outdoors Type, Total Legend, and Wild One papers. I’m not going to lie, I struggled with the arrangement of all these triangles until I found a design that I liked, placing them on the left side of the page.
I also cut my picture into a triangle shape to fit it in the design, framing it with a white border. I used foam dots to raise some triangles and give more dimension to the layout. The reason to put the photo on the left side, it’s because the baby is looking to the right, so it looks like he’s looking across the page.
For my title, I combined the Die Cut Titles with the Clear Stickers to write “Super cool kid”. I raised the die cut titles with foam too. I love to combine different fonts to build my title.
Under the title, I placed another clear sticker as a subtitle and my journaling. Finally, I spread some enamel dots and a couple of stickers from the Accessory Stickers. I couldn’t help to put this cut geometric bear too.
And that’s all for today. Thank you so much for stopping by. I hope you like this page, and it gives you some inspiration for documenting your boys’ pictures. I think Cocoa Vanilla Studio has the best masculine collections ever!
Have a great weekend and save a little time for crafting!
Hey Hey! It’s Michelle here today with another instalment of what I like to call ‘Scraplift a follower’. The past few days members of the Design Team have been set a scraplifting challenge here on the blog and I’ve chosen one of our friendly CVS Community Group members to inspire my creation. I used the Bohemian Dream collection and even got a little messy with some mixed media on the background, which was kind of fun for this “clean” scrapper.
I love how this came together combining all the elements of the original, created by Petra de Vroege, with some slight changes to make it my own. I’ve scrapped a photo of Leila from 4 years ago when she was going through a hilarious dorky dress up phase. A time when she kept us constantly entertained, oh how I miss those days. Now its all Youtube, Roblox and Nintendo nonsense and hardly any dressing up at all. The colours in the photo worked so well with the patterns and colours from the Bohemian Dream Collection, which I must note its sadly no longer available as you all LOVED it so much it sold out! There are plenty of other gorgeous collections to choose form though
Heres a look at the layout Petra created..
Super cute! Those scattered stars down the page were what originally caught my eye, and I’m a sucker for cute photos and mixed font titles too!
What a character! This photo was around the time that Leila could finally wear this costume without tripping over the mermaid tail, which was about the same time that posing for photos was no longer fun.
To begin the layout I started with the stars, cutting out a range of different sizes on my silhouette using a free star cut file I found via Pinterest. I chose a few different pattern papers from the 6×6 paper pad that all complimented each other and the photo then popped them to the side once cut to continue with the background
I got a little messy and tried out the plastic packaging technique using the flat side of some bubble wrap and smooshed different coloured inks that were watered down on some white cardstock. The texture of the bubble wrap left a pretty cool pattern, although most of it was covered by the stars and photo and also my hands lol. I splattered a few extra colours that coordinated with the Bohemian Dream collection over the top then left it to dry. At this point I may or may not have freaked out a little when I saw how warped the paper was so I pilled a pack of cardstock on top overnight once it was dry to help it flatten out a little
To create the title I used a mix of Chipboard words (raised off the layout using foam tape and glue dots) older alphabet stickers (sewn through to keep them adhered for years to come) handwritten words and a banner sticker from the Legendary Collection sticker sheet.
Next I’ve added strips of pattern paper to the top and bottom of the layout, which is different to the way Petra has added hers to the sides. I tucked the half labels underneath and added word banners on top along with some chipboard hearts
Lastly I added the stars, scattered randomly at the top and bottom of the photo to recreate the vertical line Petra has used. I adhered the stars with foam tape, glue dots and tacky glue to give different heights of slight dimension. I added in a couple of enamel dots too
Here’s a final look at the entire layout inspired by Petra’s super cute creation
I love how it all came together and can happily say I will definitely be trying some more messy backgrounds in the future.
Well thats all from me today, thanks so much for stopping by! Be sure to keep sharing your own creations using Cocoa Vanilla Studio products with us in the CVS Community Group on Facebook. We love to see what you make using these amazing products, and you just never know when we might pick your creations to be inspired by.
Hello, hello Cocoa Vanilla fans. It’s Kylie back with you today on the blog with some scrappy inspiration for you all. My design team assignment for today was to scrap-lift a design from the Cocoa Vanilla Community Facebook group. I actually chose a design by fellow DT member Raquel Bowman to scrap-lift. I was really drawn to her design which you can see below, followed by my scrap-lifted completed works.
As you can see by my page I have adapted the ‘Merry and Bright’ collection for my layout even though it is a Christmas themed range. When I was working with this stunning collection at the end of last year, I was totally obsessed with it and also found many of the paper elements and die cuts could be easily adapted into a non-Christmas themed project! I was really excited to try this and was super happy with the finished result! The centrepiece of this page is a lovely cut file which has been designed by Cut To You! I selected papers featuring neutral themed designs and prints to back each ‘pie’ section before adhering it over my background papers. The ‘Jingle All The Way’ paper was used as the border piece of my page. Even though it featured some holly shaped leaves, you really couldn’t pick those out once I had added the‘Seasons Greetings’ paper over the top.
The ‘Seasons Greetings’ paper had 1 cm trimmed off each side and a machine stitched border added before adhering it over the top of the floral.
My photo was printed to a smaller scale of 3″x 4″ and adhered over the top of the cut file using foam adhesive squares. From here I was able to add lots of different floral elements from the die cut pack. I made sure to cover any Holly leaves or remove them from the flower first.
To complete my page I added a large title using the foam title stickers from the ‘Unforgettable’ collection which balanced my page nicely. I also added a button flair which featured a sweet double heart print and matched my theme.
So that you can see exactly how my page came together, I have also filmed a short process video-
Thanks so much for stopping by the blog today. I hope you have enjoyed seeing my scrap-lifted layout and that you may even be tempted to try a non Christmas themed project with the Merry & Bright collection too!
It’s Tarrah back with you today to share a new layout featuring the stunning Happiness collection! My assignment for today was to scrap lift a layout from the Cocoa Vanilla Community on Facebook. Scroll down to see the gorgeous layout I chose to lift!
The layout above is my scrap lift of this gorgeous layout below created by Niki Rowland! I just love the colours and how everything was centred underneath and around her photo on the page. Niki used the stunning Daydream collectionon her layout while I chose to use the Happiness collection as there are similar elements in both collections.
I love how Niki used so many titles from the Daydream title pack, I chose to use 1 title however I added a few coloured rainbow cut files ( an old cut file from The Cut Shoppe) to balance and replicate Niki’s title placement. She also added small rainbow embellishments so the cut files I chose to use were a perfect addition to my page.
The photo I am documenting is of my eldest niece – she is wearing a cute rainbow dress, the photo was my inspiration for this page with the colours and theme I was going for. To make the photo stand out from the colourful background, I added a small piece of the navy paper under my photo. As I don’t really do a lot of mixed media and Niki has done a little on her page, I opted to use the gorgeous water colour clear stickers from the Happiness collection, I love how these add a little subtle colour without the mess and having to wait for things to dry! (I am so impatient!) You can see I did add a little sprinkling of gold Heidi Shine, that’s about as messy as I get!
When it was time to embellish my layout, I simply went with a tone on tone look. I arranged the rainbow cut files how I liked them and then added similar coloured small embellishments close to the colour of the rainbow. If you look at Niki’s layout, she did a similar thing. You can see in the above photo that I placed an orange clear sticker under the orange rainbow, fussy cut an orange butterfly and adhered it with a small orange flower. I did this for all the colours on my page. I also added some green sequins like Niki did and a pink and white stripe bow from an older Cocoa Vanilla collection. I trimmed down the white cardstock so that I could add the navy 12′ x 12′ paper as a mat to the entire layout. I do this quite often if I use a plain white cardstock background in the beginning.
I hope you enjoyed seeing my take on Niki’s beautiful layout today. Be sure to check out the Facebook Community group for amazing inspiration from fellow crafters. Share your projects in there too!
Hi everyone! It’s Sue here today,and I can’t even begin to tell you just how excited I am to share my very first layout with the brand new ‘Sunkissed’ collection. I have to admit, I had another project already prepared to share here today, but after this landed on my doorstep on Friday afternoon, I just COULD NOT WAIT to use it! Let me tell you, the colours in this collection are nothing short of amazing! It’s everything my colour-loving heart could have possibly wanted.
Here is my layout “Sweet Recharge”, (aptly titled, as it features a photo of my kids that I took when we went out one day for milkshakes at a local cafe)…
I began my layout with the gorgeous warm ombre print on the B side of the Summer Lightspaper as my background. As I was dealing with strong, bright colour to start with, I decided to dry brush some white acrylic paint to define the focal area of my page. This would help provide some separation between the background colour and the colours of the papers I was going to use.
I then took a sheet of the rainbow striped Good Vibrations paper and cut a piece from the area that had the warm tones on it. I layered this with a piece of the rainbow print of the Sunny Dayspaper; then topped it with the polka dot print from the A5 paper stack. (This print is exclusive to the paper stack, and does not appear in the 12×12″ papers.) I also tucked in a small piece of the animal print from the reverse of the Growing Wild paper, then added a paper doily, some frayed gauze for soft texture, and my photo placed on top.
When it came to embellishing my layout, I really was spoiled for choice. This collection has sooo many delicious embellishments to choose from, and I just wanted to use them all! I started with flowers. First, a couple of floral pieces that I fussy cut from the Growing Wildpaper, which is the signature floral from the range. I tucked these pieces in around my photo (one to the right, the other below). I then started a third cluster using some flowers from the new Floral Ephemera pack, which I placed up in the top left corner of my photo. (This formed the “visual triangle” around my photo.)
Also included in this small cluster was the so happy tab, and a cute watermelon sticker (both from the Accessory Sticker sheet) on the corner of my photo; a sweet little flower from the Puffy Sticker sheet; and one of the Wood Buttons. I also placed a phrase sticker from the Accessory Sticker sheet nearby. Above my photo I tucked in a label that was fussy cut from theFun in the Sun cut apart paper, which I wrote my journalling on.
I padded out my remaining two clusters with more flowers and leaves from the Floral Ephemera pack, bending up some of the petals and leaf tips for added dimension. Down at the bottom of my layout I added a cute little garland from the Die Cut Ephemera pack and another couple of phrases from the Accessory Sticker sheet. (One of which I actually used as part of the title.)
The main part of my title came from the new Glitter Foam Title stickers which are really pretty and sparkly. (And if you know anything about my love-hate relationship with glitter, you would know how happy I am to say they did not shed all over my desk!) I finished off my title with one of the cute Puffy Stickers.
Finally, I added a few little heart Clear Stickers; and splattered around some black and white ink. I absolutely love how this page came together and am crushing all the gorgeous colours in this collection! I hope you are feeling inspired and planning on adding this collection to your stash too!
If you would like to watch this one come together, you can watch my process video here:
Thanks so much for stopping by so I could share this with you. Until next time, happy scrapping! X
It’s Sophie here with a grid design layout to share, this time with the lovely “Unforgettable” collection !
The beautiful “Story Teller” patterned paper was my starting point, as I was inspired by the black pocket card on it for my title. That’s what gave me the idea to create a grid.
I separated my layout in four quadrants and stitched a vertical and a horizontal line that crossed in the center of the page with aqua thread to divide my grid. I then applied watercolors in tones that matched my color scheme on each of the four quadrants.
I placed my photo, printed in black and white, on the upper left quadrant. I added many layers behind it; tissue paper, adhesive foam, “Forgive me not” and “Pretty bits” patterned papers. I used a Die Cut Ephemera “Living the Dream” next to my photo and added a beautiful Flair Button.
On the upper right, I added adhesive foam behind the Pocket Card and aqua cardstock. I decorated this section with two beautiful Ephemera labels and butterflies.
On the left lower quadrant, I selected two pieces of patterned papers: “Sprightly” and “Pretty Bits” and attached them with pink baker’s twine together. I added Ephemeras, Enamel Dots and a sticker from the Accessory Stickers.
On the last section of the grid, I used the “Sprightly” and the “Forgive Me Not” papers as my base. I cut out a part of the “Storyteller” paper to write down my journaling and embellished it with flowers, Stickers and Emanel Dots.
Lastly, I created a little floral cluster on the base of the grid, tying everything together. Some of the leaves in the cluster were created with watercolor and fussy cut out of whatercolor paper.
Here are a few other close-ups:
I love the result. Working to decorate one section at a time in a grid design is so fun ! It’s also a great way to use many different patterned papers and embellishments without making it look too busy.


 To embellish the page I have used a small selection of the floral ephemera to go in either side of the photo. I used a variety of dimensional adhesives to add depth and dimension to those floral clusters. Are you as happy as I am that CVS has released a floral ephemera pack?!? Sooo exciting!