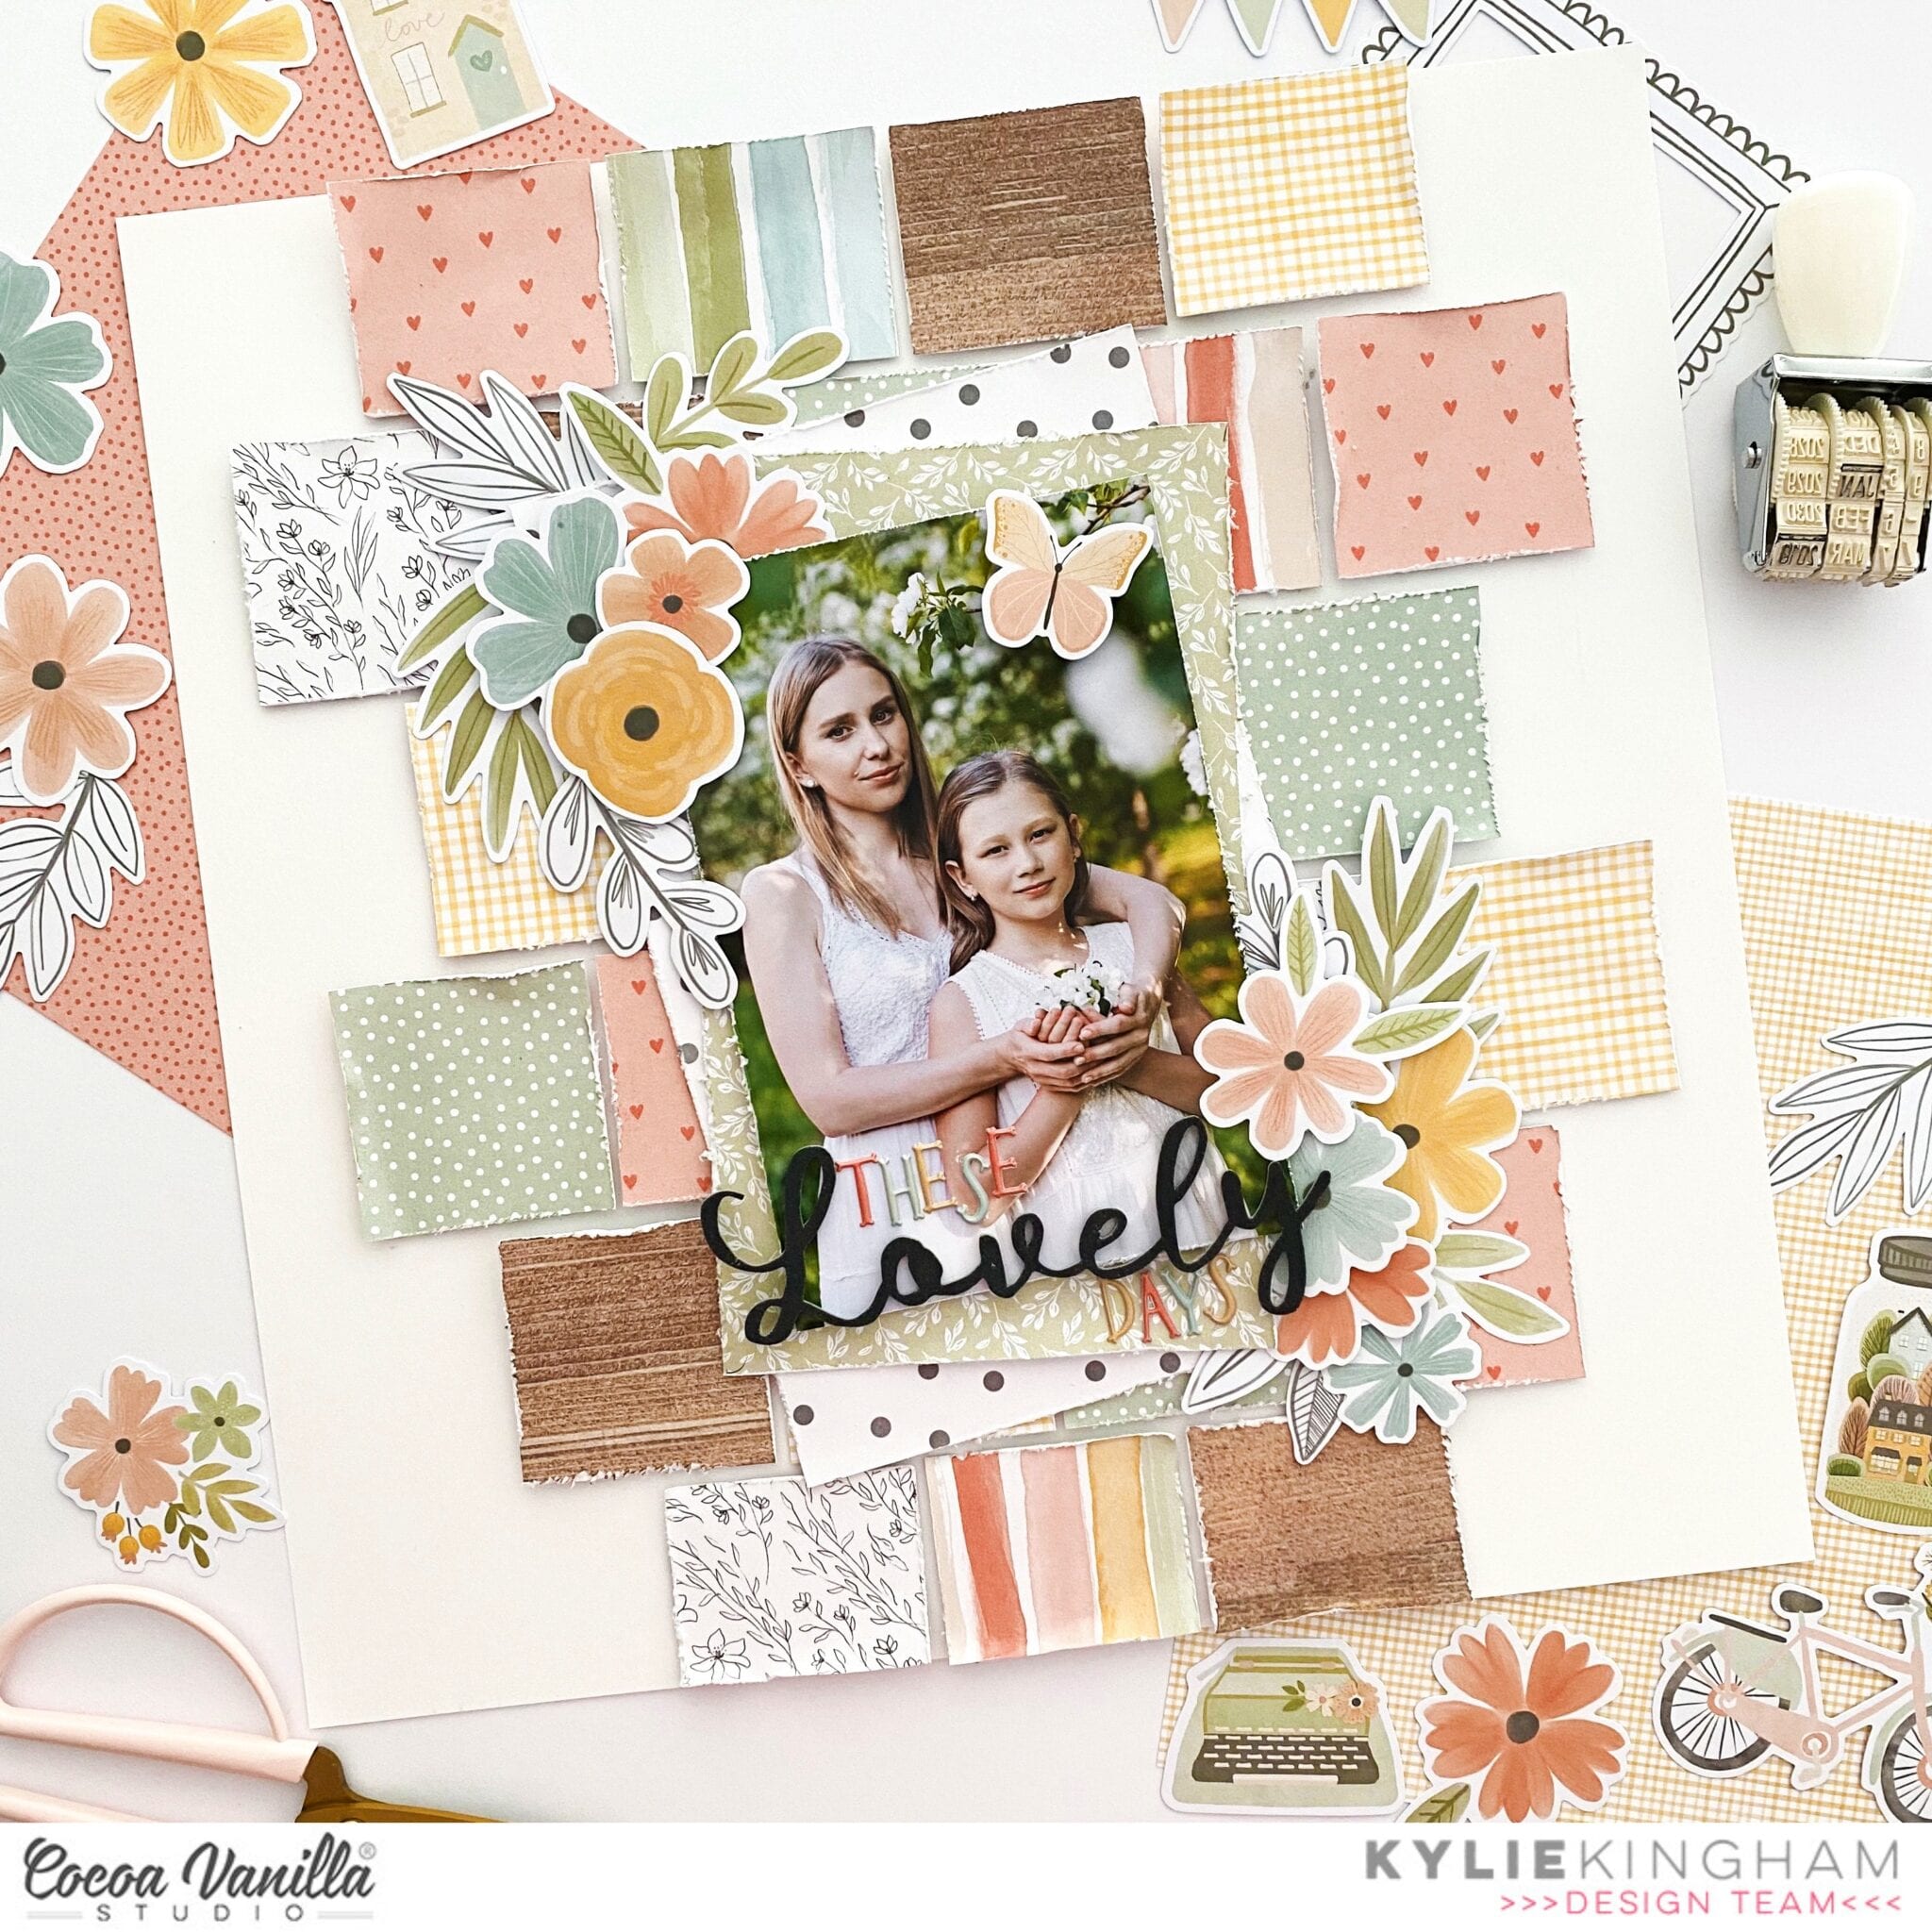
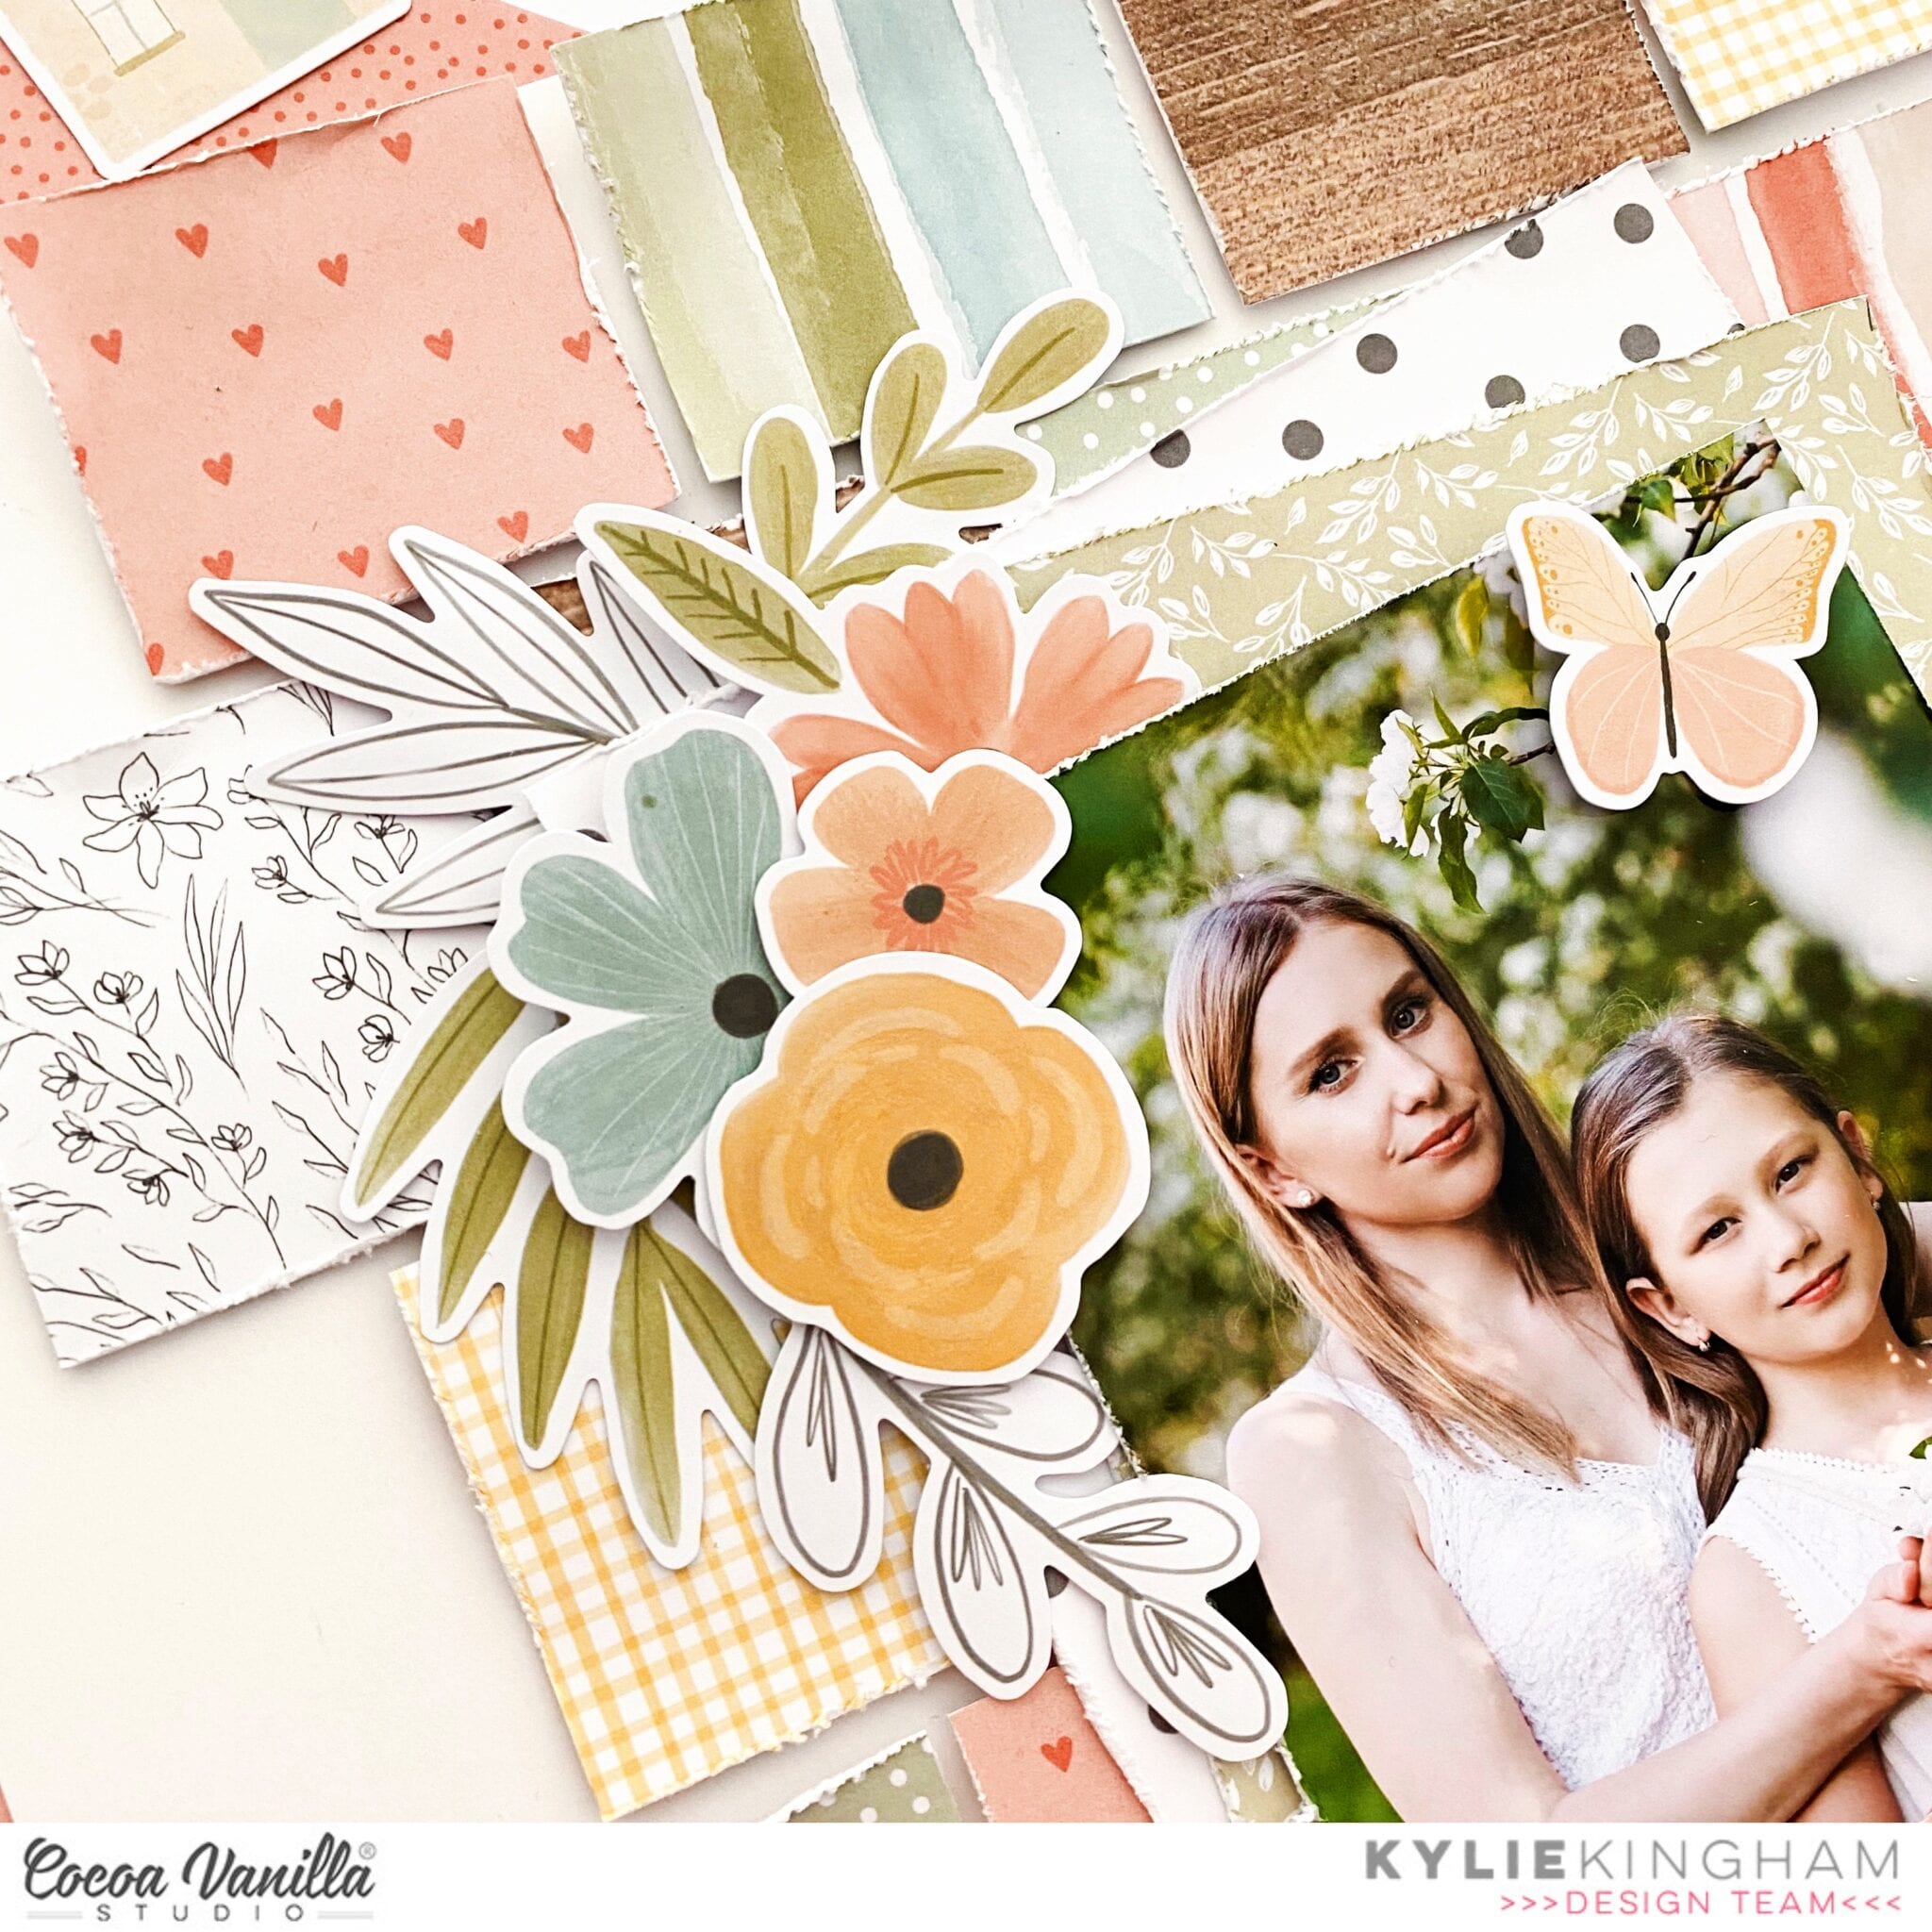
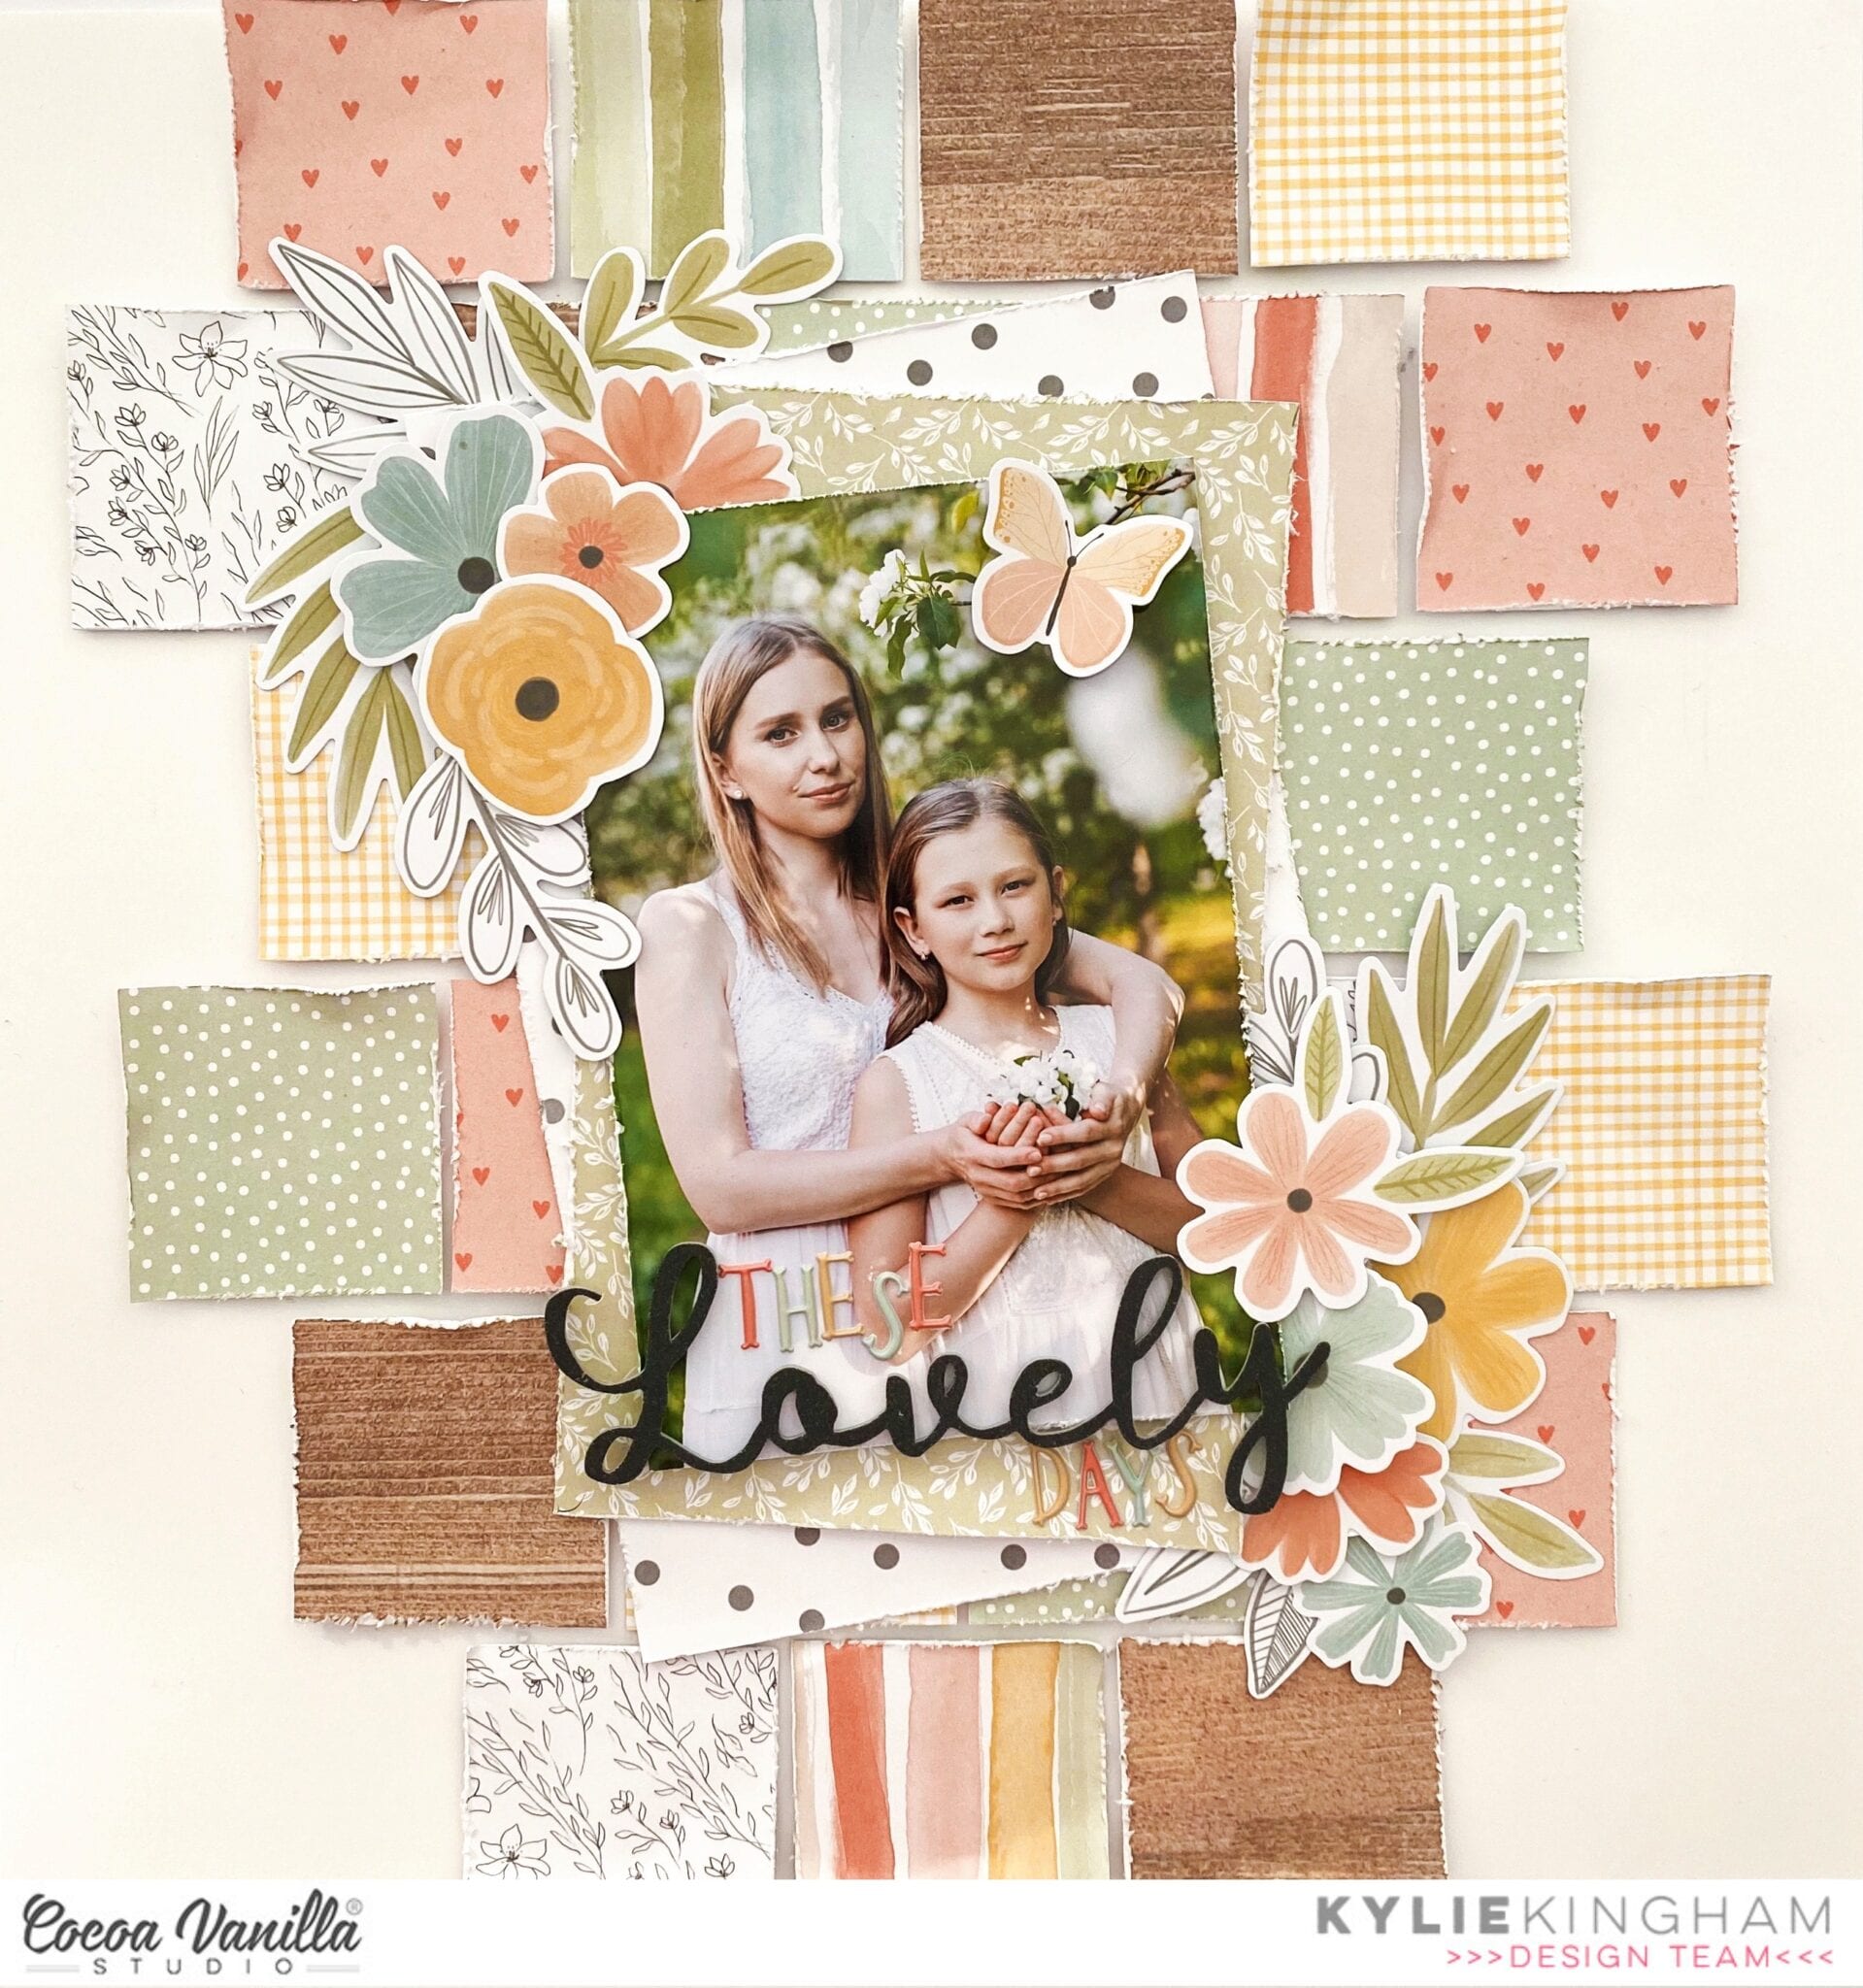
Hello everyone! It’s Kylie with you again and the theme for today’s blog post is to create a layout featuring Puffy Phrase and Alpha Stickers. I couldn’t think of a more perfect collection to use for this theme than the brand new ‘These Days’ collection. I wanted to create a very soft and ‘shabby chic’ themed page today, showcasing a variety of different paper prints also.
Six different papers were chosen to form my background. I trimmed some neat squares of each measuring 2″x2″ each and distressed the edges of them all. They were placed in a brickwork formation over a white cardstock background, using foam adhesive tape.
My photo was printed to 4″x 6″ and adhered to the centre of my page with two stacked papers behind, all with distressed edges.More foam adhesive squares were used to help build height and dimension to my page. It also gave the opportunity to add some embellishments amongst the different layers. I SOOO love the Floral die cut pack.
I created a fun title to add to my page using both the super cute Alpha stickers as well as the foam phrase stickers. They were adhered over the top of my photo and created a nice balance for my layout. Once completed my layout had a lot of colour but thanks to the softness of the pastel colour palette it gave a delicate overall finish.
Thanks for stopping by the blog today. I hope my layout has given you a little inspiration with your own scrapbooking.
It’s Tarrah back with you today to share a new layout featuring the stunning new These Days collection!
I am documenting a sweet photo of my sister and her family and this week we are focusing on the gorgeous puffy alphabet stickers and the black foam title stickers from the collection.
I decided to go with a circular design to showcase the gorgeous puffy alphabet stickers, I traced a circle using a dinner plate and pencil, I then spelt out some family/together themed words placing these around the circle. I then took the stunning gold puffy hearts and adhered these between each word. I rubbed out the pencil marks with an eraser.
I layered some of the 3′ x 4′ cards under my photo and adhered these slightly to the right and the top of the circle design. On the right of the photo I created a small cluster of embellishments including some floral ephemera pieces, puffy stickers, an epoxy wood bead and a clear sticker. To showcase the foam title stickers I chose the word ‘Together’ for my title and adhered this word below my photo, overlapping the photo slightly. I took a few of the phrase stickers from the Accessory sticker sheet and placed these under my photo to help tell the story.
On the left of my photo I created a slightly larger cluster here as there was a little more room for placement. I tucked in quite a few floral ephemera pieces and the super cute typewriter die-cut. To add some more of the foam title stickers I added a few of the small leaf foam pieces tucking them into various places, I really like the pop of black this adds to my page.
Above my photo I added the sticker that says, ‘Together is the Best Place To Be’ as it was perfect for the theme of my page and it also fitted perfectly above my photo.
Lastly I stamped the date stamp and finished off by adding a few last small heart puffy stickers.
Thanks so much for stopping by the Cocoa Vanilla blog today! I hope you enjoyed my layout as much as I enjoyed creating it.
Hi everyone, it’s Sue Plumb here to share my latest design team project with you.
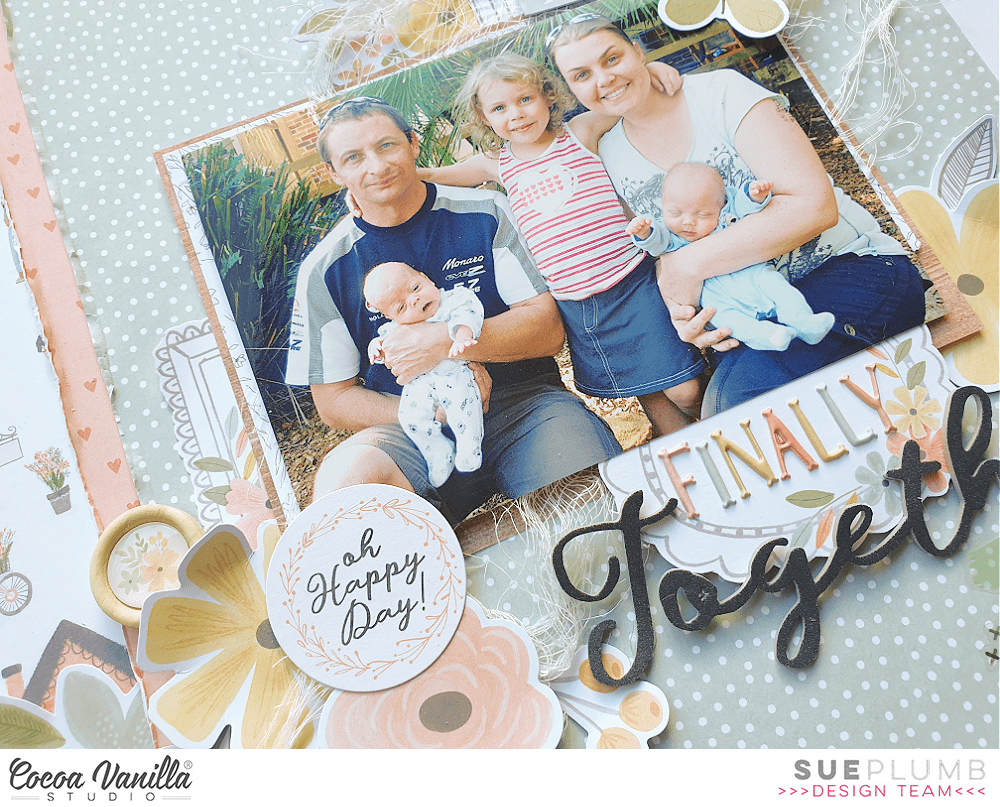
For this layout I was working with the gorgeous new ‘These Days’ collection. As this range has such a lovely home / family theme I decided to document one of my favourite ever family photos. This photo of the five of us was taken not long after we had finally brought our boys home. After being born prematurely, we spent over 10 weeks (which at the time felt like forever) in hospital and just looking at this photo reminds me of the elation I felt when we were finally able to be a family at home.
I knew I wanted to use a patterned paper background for my page, but I started with a sheet of white cardstock as the base. I chose 3 papers – the tiny heart print Good Life; the adorable house print Neighbourhood and the spotty green Family Ties. Starting from the left edge, I added various sized vertical strips of paper, slightly distressing the overlapping edge as I went.
For my photo, I added two layers of patterned paper to mat it – the black and white floral and the wood grain print, both from the A5 Paper Stack. On top of those paper layers I also added some frayed gauze for texture before adding some cardboard and then my photo on top.
I then turned my attention to my embellishments, beginning with the Wall of Fame patterned paper with all the doodled frames on it. I fussy cut three of the frames, and then tucked them in around my photo to create the bases for my embellishment clusters.
For the cluster in the top right corner of my photo I used the home sweet home sticker from the Accessory Sticker sheet, which I placed inside the frame I had tucked there. I then chose several floral pieces from both the Die Cut Ephemera pack and the Floral Ephemera pack and tucked them in around the frame. I then added a small heart and small butterfly – both from the Puffy Stickers sheet; a small Wood Button; and a couple of leafy branches from the Foam Title Stickers pack. I also added a die cut butterfly to the corner of my photo.
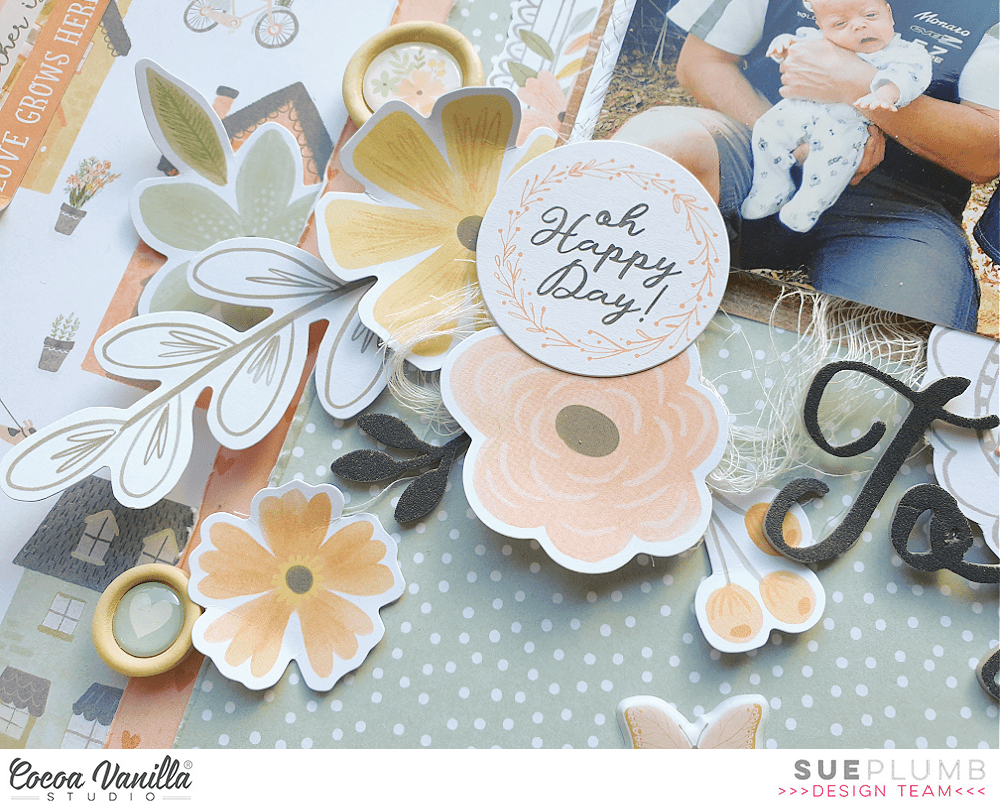
To keep my design cohesive, I used the same types of embellishments in the cluster on the bottom left corner of my photo – Die Cut Ephemera, Floral Ephemera, Wood Buttons, Puffy Stickers and Foam Title Stickers. I topped this cluster with the oh happy day! sticker from the Accessory Sticker Sheet. I arranged this cluster so that it trailed towards the bottom left corner of my page, which helped give my layout design a horizontal flow through the photo from top right to bottom left.
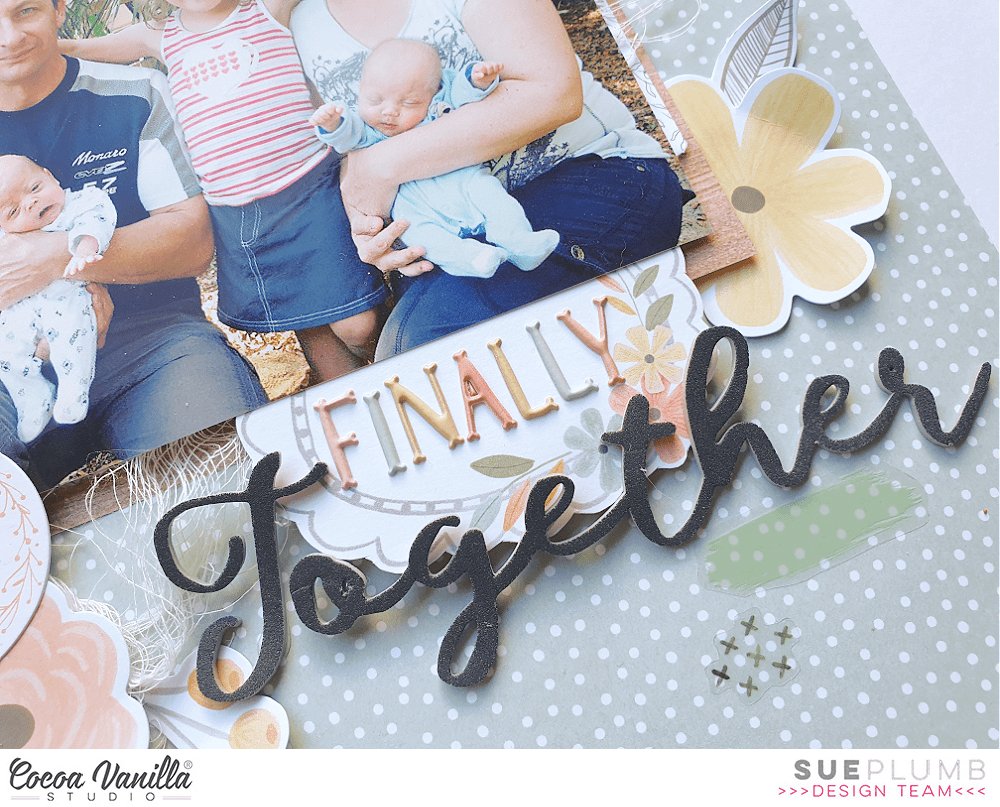
My title was the focus of my final cluster, along the bottom edge of my photo. I used the fussy cut frame I had placed there as the spot for the first word of my title, finally, which I created using the Mini Puffy Alphas. (These alphas are so gorgeous, and one of my very favourite things from this collection.) For the second word of my title, I used the word together from the Foam Title Stickers pack. These stickers are a beautiful script font, and a lovely charcoal colour. I love mixed font titles, and I think the combination of these two styles look great together. Below my title I added a brush stroke sticker and a small cluster of crosses from the Clear Stickers sheet.
Along the left edge of my layout, I added a couple of sweet phrase stickers from the Accessory Sticker sheet so that they ran vertically in line with the layered paper strips. And that was my layout done!
I am loving working with this collection so far; it’s one of those ones that is just so easy to work with, and I love how many embellishments there are to choose from! If you haven’t gotten your hands on it yet, ask your favourite scrappy retailer, or check with a stockist from the stockist list HERE
It’s Sophie on the blog today and I am SO EXCITED to be sharing my very first layout with the amazing These Days collection !!!
Ahhh where to start when everything from the collection is so gorgeous ?!
I decided to go with a simple page and wanted to use plenty of different patterned papers.
I cut strips of different width and length of many patterned papers from the collection as well as a few colored cardstock from my stash and curled one end of each strip, turning them around a brush. I aligned them in a horizontal line on the lower third of the page to “ground” the rest of the design.
I stitched one or two French Knots with matching embroidery floss on each strip.
I used a square photo of Sabrina hugging our dog Fiona (what’s new ?!!). I printed it in color and I think it matches perfectly with the color scheme of the collection. I backed it with tissue paper and adhesive foam and placed it on the right side of the layout.
For my title, I used a beautiful frame from the Die Cut Ephemera pack, added adhesive foam and the B side of the “Home Grown” patterned papers. I used the Mini Puffy Alpha Stickers for “Just So” and the Foam Title Stickers for “Sweet”. I placed it on the upper left side of the photo and added a die cut banner and a few die cut hearts scattered around the title frame.
I handwrote my journaling directly on the background cardstock and placed a cute typewrite just next to it.
Finally, I added a few floral embellishments and clear stickers and that’s a wrap !
Here are more close-ups:
I hope you like my page today and feel inspired to use this gorgeous collection !
Hey everyone. Happy Thursday! It’s Throwback Thursday here on the Cocoa Vanilla blog. I decided to throw it all the way back to ‘Bohemian Dreams’ one of my fave collections ever. Purple is one of my fave colours lately so this collection was certainly calling my name.
Here is the layout that I created:
This subject of this layout is myself and my bridesmaids at my Wedding. The image was taken by our photographer and one I just adore. The photo being black and white allowed me to bring in a lot of colours into the designing of the page. Normally I love to feature cut files on my layout but for this layout I wanted to focus more heavily on the papers and patterns within the collection.
I decided to make the ‘Beautiful Mess’ patterned paper a feature of this layout by cutting the individual 4×6″ and 3×4″ pieces. I layered these pieces below my matted photo in a somewhat vertical design, trying to distribute colours as best as I could. These were adhered together to form one piece and then adhered to my layout with a foam adhesive.
To the right of the photo I added a large photo cluster comprising of many pieces of ephemera and other embellishments. The title ‘so happy’ was also used from one of the accessory stickers.To achieve dimension on the clusters – elements are adhered to the page in varying depths using a combination of glue dots, double sided tape and foam adhesives.
Instead of journaling on this page I used the tiny word sticker sentiments from the accessory sticker sheet. These were able to tell my story, just in fewer words.
I think my favourite part of this collection, well actually most CVS collections are the florals. I have to hold myself back from adding more when I am embellishing.
One of my favourite staples in the ephemera packs is the small file tabs. They are one piece that I will add to most pages – usually to the top left corner of my photos.
As you can see from the image below the layout features a lot of dimension, particularly from the embellishments.
I hope that you have been inspired by my layout today for this Throwback Thursday. Thank you so much for stopping by the CVS blog to check it out.
It’s Gwen and I’m back on the blog today sharing my very first layout using the stunning new ‘These Days’ collection. The moment I saw this new collection I knew I’d love using it to document everyday moments of my family. For this layout, I thought it would be fun to document my Miss 14 and her continued obsession with reading and her favourite book right now.
To begin my page, I’ve created my background using the ‘Family Ties’ and ‘Daybreak’ pattern papers. I’ve also added some stitching around the edge for added detail. I love using pattern papers for the backgrounds of my layouts and love this pretty green tone paper.
Next up, I’ve used the ‘Daybreak’ pattern paper to back a cut file from CUT to YOU as well as my photo. This particular pattern paper is one of my favourites from the new collection. I’ve popped the cut file onto foam tape for dimension and positioned onto my background along with the photo making sure everything is nice and straight with my T-square ruler.
For the embellishments for this layout, I have gone with a visual triangle, however, instead of the photo being inside the visual triangle, I have positioned my title inside of it. The clusters I’ve built with similar elements including pieces from the ‘Die Cut Ephemera pack’ some ‘Wood Buttons’ and fussy cut out butterflies from the ‘Take Flight’ pattern paper.
I’ve also added some stickers from the ‘Accessory Sticker Sheet’ which I’ve mounted onto foam for dimension. I love the sentiments that are included in this collection, perfect for sweet little family moments. You’ll see each of my embellishment clusters has these elements in it, I find when I do this, it helps pull the page together.
I love the contrast of the white cut file shown here sitting onto of the background pattern paper. You can also see here the elements of one of the embellishment clusters and my fussy cut butterfly.
If you would like to see how this page came together, I have a YouTube process video you can watch here:
Hello Cocoa Vanilla fans! Danni here with another layout from the gorgeous new These Days collection. Are you enjoying this one as much as I am? I may have a new favourite collection!
I am documenting a couple of photos of myself and my friends, taken last year when we were beginning to be able to get together again after lots of isolation. You can see how happy we all are to see each other! I have recently purchased a new hexagon punch, so I really wanted to play with using lots of punched out shapes on the page.
I punched out a bunch of hexagons from several of the papers from the 12×12 patterned papers and the A5 paper stack, varying between subtle and busy patterns. I decided on a white cardstock background to really show up the patterns in the papers.
My idea was to use the hexagons almost as a border around the outside edge of the page. To create some extra interest on the plain background I splattered some soft blue, yellow and pink inks around the outer edge of the layout as well. Then I went ahead and laid out my hexagons, varying the placement to create visual interest.
With the hexagons already making a big statement on the layout, I kept the rest quite simple. I matted my photos with the black and white patterned paper from the A5 paper stack and layered them together in the centre. Then I added a lovely large foam title below – these are such a pretty script font!
I used floral ephemera and puffy stickers to create two floral clusters either side of my photos. I included some of the coffee cup die cut ephemera – very appropriate for a café catch up. I used some accessory stickers to tuck in little words and tabs around the edges.
Three of the butterfly die cut ephemera and the beautiful sparkly puffy hearts sprinkled around the page made the perfect finishing touches on this layout. Everything in this collection is so stunning it makes layouts come together so easily and beautifully! I hope you enjoyed joining me today. Happy scrapping!
Hey y’all! Laura here again with a stunning floral filled, multiple photo layout featuring the stunning new These Days collection. Focusing on the A5 paper stack, I used two of the bright happy papers to mat my photos and fussy cut the entire A5 floral paper as well. Layering all of these fussy cut florals around the outside edge of the Daybreak patterned paper allowed the mixed media background to peek through. This photo strip of four 2×3 inch photos was a great way to squeeze in additional memories while still capturing the moment of my daughter and her friend leaning on each other. I love how beautifully the two papers under the photo compliment each other, one a painted stripe and the other an ombre sunset.
In addition to the florals framing the entire layout, I also tucked in two clusters of florals at the top and bottom of the larger photo to fill in the gaps left by the photo strip. This really helps to remove any sharp angles that may draw too much attention to themselves in those corners as well as tying in beautifully with the fussy cut frame I added to the repeated photo. By framing the smaller version, I emphasized the importance of that shot and the relationship it represents.
I especially love the details of the tiny fussy cut florals scattered around as well as the puffy hearts and butterflies that bring a little movement and whimsy to the finished page. I used Nuvo drops in gold to create the small accents and butterfly trails, then a bit of gold ink splatter for fun! The title is a statement all to itself, loving the versatility of the foam words and how many ways they can be used to create a plethora of titles. The little word phrase underneath was just the finishing touch it needed.
I hope this inspires you to look at your A5 papers a little differently and incorporate them in a big way on your projects too! To see how “These Days” came together, check out the process video below!
Welcome to the Cocoa Vanilla Studio blog today! So happy to see you It’s Josefine here sharing a new mixed media scrapbook layout with you that I made using the absolutely gorgeous summer collection “Sunkissed” just cant’t get enough of this collection.
For this summer layout I used the pocket page cards the 6×8 paper pad some die-cuts, a wooden button and stickers.The cut file I used is from Cut to you calls ” Lazy summer days” I started with a white sheet of cardstock and start mixing my pink colored distress oxide with a little bit of water and created a big stain in the center of this layout and at the end I splatter with the same color (Kitsch Flamingo)
I used a 6×8 star design paper sheet and cut it to size in a banner shape. I choose several patterns of pocket page cards and cut them to size and sew them on top of the star design paper using my sewing machine. I placed the two banners in the center of my layout and cut several 6×8 design papers to size and layer them behind the photo. I cut the title “Lazy summer day’s” with my Cricut and colored it with the color “peacock feathers” Distress Oxide and used a blending tool for the ombre effect.
I grab several die-cuts, stickers and word strips for decoration. Some die-cuts I sew with gold sewing thread and make clusters on both sides of the banners. At the top of the banners, I use white cotton thread for extra decoration. I sew gold thread through the center of this cutfile and place it under the photo. Finally, I make some white splatters with white acrylic paint for a festive look!
I had a lot of fun creating this layout for Cocoa Vanilla Studio! So I hope I was able to inspire you with this layout using these beautiful summery papers, die-cuts and stickers! Wish you all a great and crafty day! Xo, Jo
Hey Hey! It’s Michelle here today with a brand new layout share using our wonderful NEW collection These Days. I’m also excited to kickstart our product feature for the next few days on Pocket Page cards and the A5 paper stack from this awesome collection. I don’t know about you, but I cant wait to see what the other DT chicks create.
Here’s a look at what I got up to with thePocket Page cards…
I LOVE LOVE LOVE Pocket Page cards. They’re a super versatile 3x4inch card that can be used for more than just pocket page scrapping. They make a great base for simple layout designs, are perfect to layer together in photo stacks, use them whole or cut them up to recreate strips of papers. The selection of designs within the These Days Collection pack are all kinds of magical and even feature a few sweet frame designs. I used these as the main focus of my layout by cutting the Inside of the frame out and adhering photos behind.
I strung the photos across the layout using different adhesives for slightly different heights of dimension. These photos are quite old now, its hard to believe Leila was this little once, especially in this new stage of life, the Pre Teen years.
She had so much sass this day and was really hamming it up for the camera. She knew she was cute haha
I used 3 other pocket page cards to create strips down the edge of the layout, cutting 2 of them into 6 strips (length ways) and laying one above the other down each edge. I sewed through each on my machine using a straight stitch and zigzag. The other card I cut wider strips from and only used half for this layout.
Next up was the banner strung between the photos. I used a mix of stickers and cutapart pieces that I adhered to some cardstock to keep them in place so I could sew through the tops.
I added the title under this using a mix of foam title pieces, mini puffy alphabet stickers and a cut apart label from the A5 paper stack.
You all know what comes next… floral clusters of goodness YES! All the pretty florals were cut from the A5 Home Grown paper and the sweet butterfly from the A5 Take Flight paper. There’s also a hint of black from the title stickers pack, a cute little gold glitter heart and a phrase sticker from the accessory sticker pack.
I created a smaller cluster on the other side of the layout using the same elements as the first with the addition to a tag from the accessory sticker sheet.
Final touches included adding tiny fussy cut flowers around the clusters and then a big splattering of gold ink to finish it off.
Well friends that’s all from me today, thank you so much for stopping by! Be sure to check back in tomorrow to see what the next DT Member has to share with you for our Pocket Page Cards and A5 Paper stack feature.