Colour Fun | Sunkissed collection | Sue Plumb
Hi everyone, happy new year! If you are anything like me (4 weeks deep into school holidays), you are having trouble remembering what day it is and are tired of hearing “muuuuuum” for the five hundred and twentieth time today. (Hang in there, we’re past the half way mark!) Fortunately, I do know today is Thursday, because it is actually “Throwback Thursday” and my turn to bring you some fresh inspiration using an older collection. I didn’t go too far back though, because today I am sharing a layout featuring the beautiful ‘Sunkissed’ collection which is still available in the Cocoa Vanilla Studio online store.
For this layout, I wanted to create a mixed media page and decided to use some of my stash of acrylic paint. I love using paint because it is quick, easy, economical, and available in a great range of colours. And even those of you who are not “mixed media people” will usually have access to paint if you want try a technique like this yourself. (I didn’t use any fancy paints – cheap student grade acrylics will do the job!)
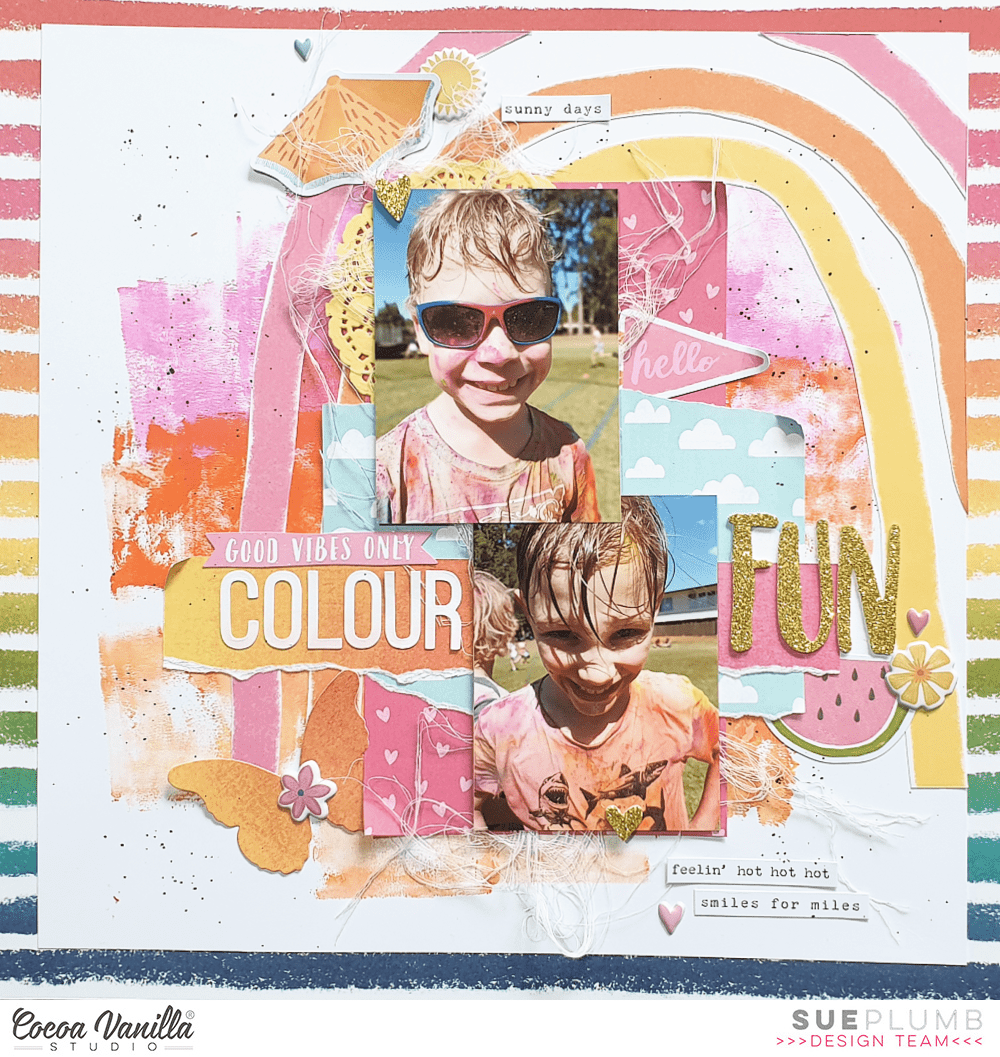
The photos I documented on this page are of my two boys taken on the day of their colour run at school. This was not long after they had crossed the finish line and they were both so proud of how wet and coloured they were. (And no, I didn’t bother trying to wash the clothes, they were destined for the bin anyway.) It was the colours of the paint on their clothes that inspired my colour choices for this layout.

As I mentioned above, I used acrylic paint for my mixed media background on this page. I used three different colours which I applied with a small brayer. (This method is great if you are short on time as the thin application means it dries super fast!) I then mounted my painted cardstock on top of the beautiful Good Vibrations striped paper, which created a fun page border.

Next, I added my rainbow arches, which had been fussy cut from a piece of the Bright Side paper left over from a previous project. I cut only the pink, orange and yellow arches (or what I had of them anyway) and stuck them onto my background.
I then created a layered mat for my photos to sit on using a piece of the heart print Feelin’ Fine paper, topped with a piece of the smaller scale cloud print paper from the A5 Paper Stack and finally a scrap of the Summer Lights paper. I also added a small yellow paper doily and some frayed gauze for texture before adding my photos on top.

The next step was to add my title, which I ran along the horizontal strip in my paper stack. To the left of my photos I used some alphabet stickers I had left over from the Love Always collection for the word colour and then to the right, I used the word fun from the Glitter Foam Title Stickers. Look at that gorgeous golden sparkle!

With all the main components in place, it was time to add a few fun embellishments. I chose a number of pieces from the Die Cut Ephemera pack including a flag, umbrella, and a watermelon slice. These were chosen purely based on their colour, but I love that they add a touch of whimsy to the page. I also added several stickers from the Puffy Stickers pack.

I finished off with some phrases from the Accessory Sticker sheet and some tiny black ink splatters. I love how fun and colourful this layout turned out!
If you would like to see exactly how it came together, you can watch my process video here:
Thanks for stopping by so I could share this with you, I hope you are feeling inspired to bust out some of your older Cocoa Vanilla stash now too! Until next time, happy scrapping!


 I used the beautiful designer paper with the Christmas wreath for this layout. Love, love, love the beautiful wreath design and also so easy to use with all the great embellishments. I cut the center and glued a design paper behind it with golden dots.
 I made two rosettes from the beautiful design papers. I punched out several leaves and stitched them with gold thread. I put everything in a wreath on the design paper and used adhesive tape and 3D foam. This way I create different layers. I cut different flowers from the design paper and put them between the leaves. I used die-cuts, stars, chipboard figures and puffy stickers to decorate my layout.


