Today I’m sharing a page using the new ‘Storyteller’ collection with a focus on florals.
I decided I wanted to divide my page into thirds, using blue, yellow and red as the focus for each section. To start my page, I used a strip of white cardstock to stamp florals using my distress oxides..the red is Candied Apple, the blue is Faded Jeans and the yellow is Fossilized Amber.
I chose 3 of our wedding photos and printed them in black and white so they didnt compete with my colours. I wanted to have something to pop out from behind my photos, so I used some gauze that I coloured with the same inks…this adds a nice texture to the page.
Next, I went through all the embellishments..the ephemera pack, the chipboard, accessory stickers, wooden buttons and puffy hearts and pulled out all the colours that matched and icons that would work…making sure I used florals in each cluster.
While going through my collection I also found a yellow and blue stitched heart from previous page so I included these as well..
For my title, I used the Foam Title Stickers, placing one word on each line of the page… including some of the black foam hearts…perfect for a wedding page right?!
I hope you found some inspiration today and enjoy CVS florals as much as I do!
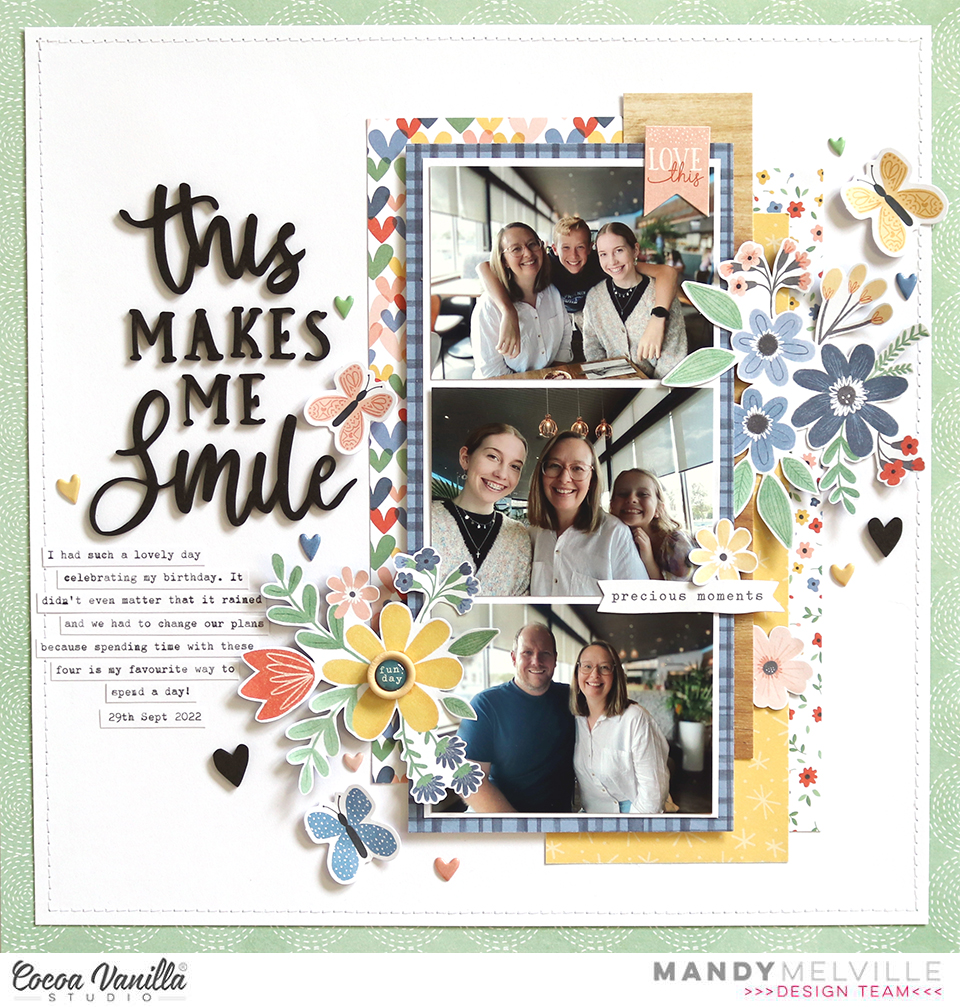
Mandy here with you today to share another layout using the amazing Storyteller collection! For today’s layout I chose to document a few photos from my recent birthday. We went out for brekkie in the morning, which is one of my favourite things to do. It was the perfect way to start the day, and even though we didn’t end up being able to go the beach like we’d planned because it rained, I had such an amazing day. The Storyteller collection was perfect for scrapbooking these happy snaps taken of me with family while we were out to brekkie.
I started this layout off by trimming down a sheet of white cardstock and matting it on the green Fly Away paper. I then printed my three 3×4 inch photos and arranged them into a photo strip. I layered multiple patterned paper, mostly from the A5 Paper Stack, behind the photos to create a bright and colourful photo mat.
I love fussy cutting the beautiful floral clusters on the Spring Fling paper to embellish my layouts with. Here you can see that I added one of these floral clusters to the right of the photo strip. I adhered just the centre of the flowers to the page, allowing the leaves and springs to lift off the page to create some movement and interest.
I added another fussy cut floral cluster to the left of the photos. This one I adhered with foam tape and overlapped it over the edge of the photos. I also added a wood epoxy button to the centre of the larger flower in the cluster. I love the texture and dimension that this adds to the page.
Lastly I added my title and journaling. I couldn’t go past using the amazing Foam Title Stickers for my title. There are so many great words and phrases in this pack, and I settled on using the phrase ‘This makes me Smile’. It was the perfect sentiment for these photos. I typed my journaling on my typewriter and added the journaling strips under the title.
I finished the layout off by adding a few die cut butterflies and a sprinkling of puffy heart stickers to the page.
Thanks so much for joining me here on the blog today! I hope that you enjoyed taking a look at my layout and found some inspiration.
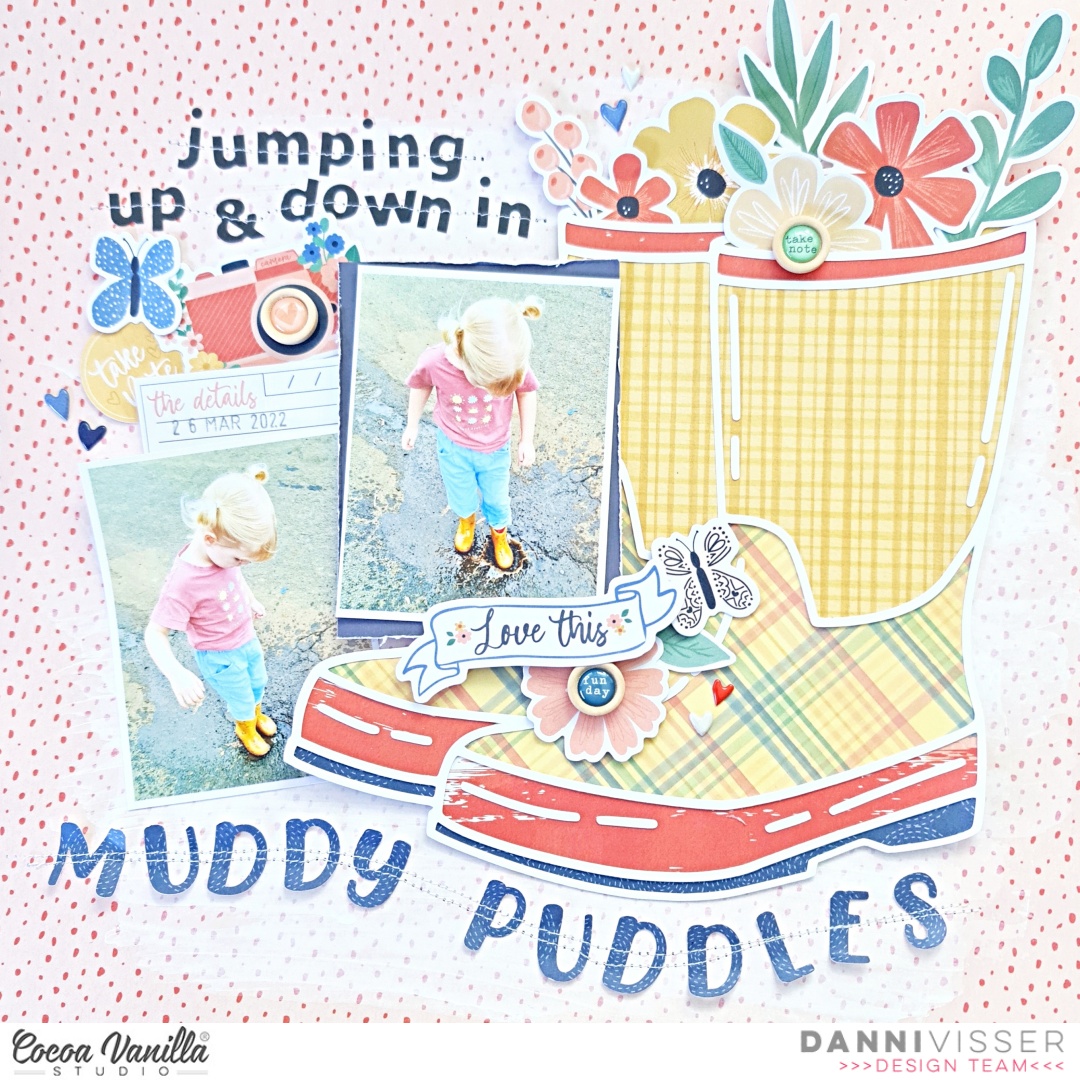
Hi Cocoa Vanilla Studio friends! Danni here with a layout featuring the beautiful Storyteller collection. I used lots of patterned paper in this one; I think patterned paper has to be my favourite scrapbooking supply as it is just so versatile!
I have some photos of my littlest child splashing in some puddles in her bright yellow rain boots that I have been dying to document. This collection features the perfect shade of yellow to match her little boots. I started with the Oh My Heart 12×12 patterned paper for my background because the pattern reminds me of raindrops. I added some white acrylic paint to the area behind where my photos and embellishments would go to help them stand out on the patterned background.
Next I created a cutfile of some rain boots using a free image and my digital cutting machine. I backed it using the A5 paper stack. I used a yellow ink to fill in the white background of one of the patterns to add even more yellow to the boots.
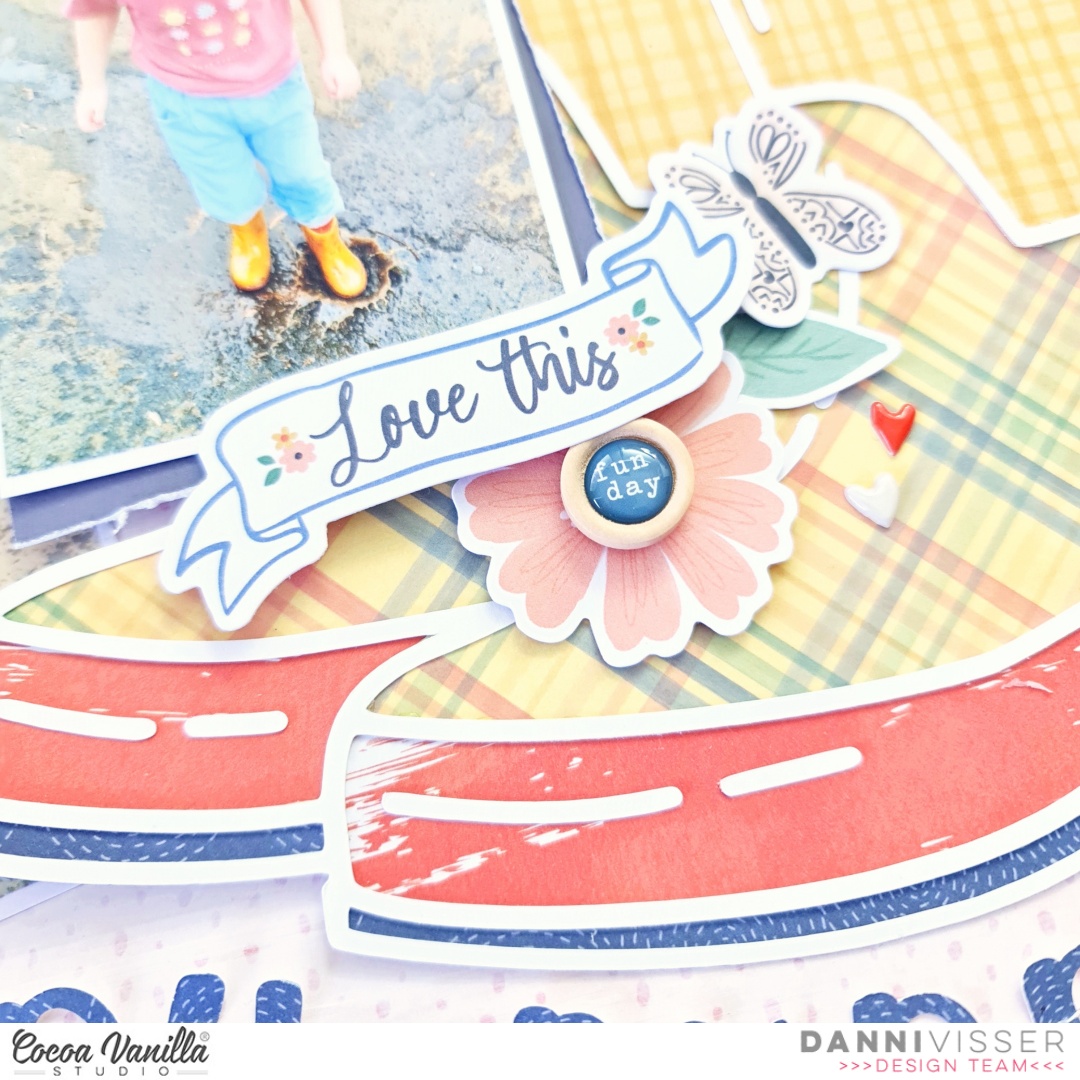
I used a double sided3×4 card to mat one of my photos, distressing the edges for texture. Next I created three embellishment clusters. Two of the clusters I positioned framing the photos using the die cut ephemera, for the third cluster I filled the top of the boots with floral die cut ephemera pieces.
I added some of the small wood epoxy buttons over the camera lens and flower centres of my die cut ephemera. I stamped the date on an accessory sticker and added a sprinkling of puffy sticker hearts around my clusters.
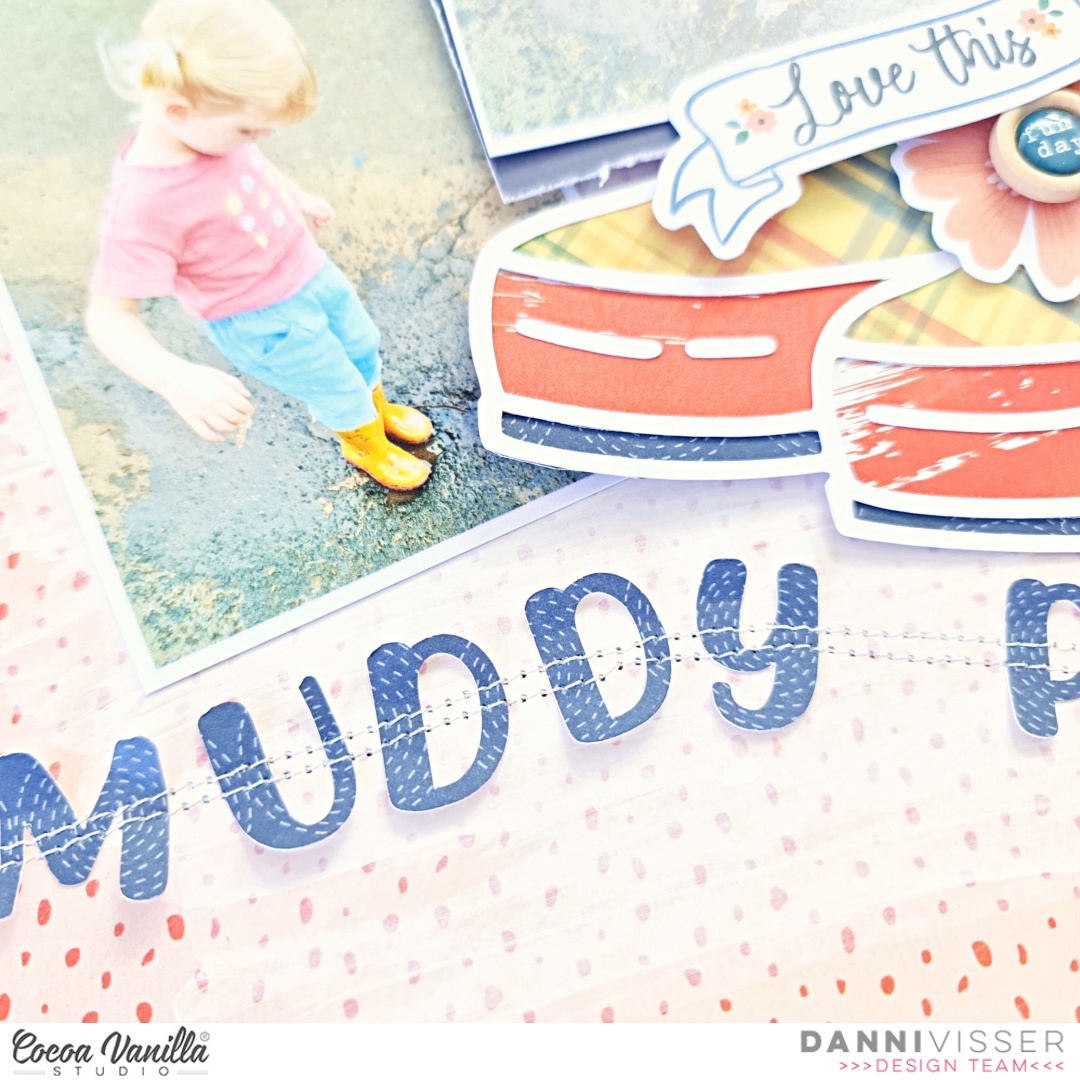
Finally I added my title. I used a navy paper from the A5 paper stack to cut some letters on my digital die cutting machine, then added some messy machine stitching for extra texture and interest. This also enabled me to bend the edges of the letters up to create even more dimension.
I hope you enjoyed joining me for this layout. Happy scrapping!
Hey y’all! Laura Alberts back again with the Storyteller collection! These sweet photos of my puppy were perfect for a heart-filled layout I opted for a fairly simple vertical background with three of the stunning patterned papers in this collection: Oh My Heart, Little Love, and Ditsy Daisy. Layering a lovely paper doily behind my main 4×4 inch photo, then matting with paper from the A5 paper stack gave these photos a real pop on the page!
Underneath of the main photo, I placed a couple of banners from the icon ephemera pack to add a little movement on the page and guide your eye to the small 2×2 photos on the left. Around each of these photos, I added small word phrases and fussy cut florals for extra detailing. The title is from the foam words pack that accompanies this collection and nestled in beautifully around my photos.
For a little extra whimsy on this page, I added butterflies that I fussy cut from the 12×12 and A5 version of the Fly Away patterned paper. Fussy cutting out little details like these add such a special touch to a layout. Along with tucking a small cut apart piece from the A5 paper stack next to my photos, I added a sweet little cluster at the top, center and bottom of my cluster.
I hope this layout inspires you to have a play with clustering your photos together or adding clusters around your photos! To see how “You Are So Cute” came together, see the process video below!
It’s Jo here on the Cocoa Vanilla Studio blog today sharing a new scrapbook layout with you. For this layout, I was inspired by two seasons. I chose to create a fall layout in spring colors. I had some leftovers from the Daydream and These Days collections and chose to combine them both for this layout.
I grab a 12×12 white watercolor paper and choose one of my fave color distress oxide called “saltwater taffy” I create three stains on the white background by using a kitchen sponge. I make a stamping motion on the watercolor paper with the sponge and the Distress oxide color. Don’t forget to wet the sponge a little bit so the ink flows out nicely on your paper. I take a watercolor brush and splash some ink. I love the effect of ink splatters on my layouts. These splatters give my mixed media background more demension and a festive look.
I use a beautiful cutfile designed by Cut to You called “Autumn leaf” I cut out the cutfile twice by using my Cricut Maker and backed it with yellow and pink colored design paper from the gorgeous Daydream collection from Cocoa Vanilla Studio.
I placed both cutfiles on top of my light coral pink mixed media background.
I fussy cut a few flowers from the pattern papers and placed these under my Happy Autumn selfie picture. I made a cluster on both sides of the photo with the gorgeous Die-cuts elements, stickers and figures from the Daydream and the These days collection.
I placed a few extra embellishments like butterflies, sequins, labels and stickers to decorate my Autumn layout with spring vibes. Some of the embellishments I added white sewing thread with my sewing machine. Finally I give my layout some extra white gesso splatters.
I hope I’ve given you some fun ideas for combining different collections and themes like spring and fall with each other. I love to see you next time on the Cocoa Vanilla Studio blog and social with a new crafty scrapbook project! Can’t wait to see your gorgeous inspiration on the Cocoa Vanilla FB groep! Happy creating and I wish you a fun and crafty day friends!
Hey Hey! It’s Michelle here today with a new layout to share with you all using the StorytellerCollection. This layout was inspired by our current MonthlyChallengeboard and I have to admit, of all the layouts I’ve ever made in the past, this would have to be the most random subject I’ve documented lol
Inspired by the pumpkins on the board, I went down a soup making rabbit hole and came up with this creation using a pumpkin design cut file from CUT to YOU.
There are so many different ideas that come from this board, it was quick tricky to figure out what would work for me and the random photos we take as a family each year.
The piles of pumpkins had me, and I got to work in silhouette studio resizing the CUT to YOU pumpkin file to create 1 large pumpkin to sit in the background of the layout and a second smaller pumpkin to act as the base for the title I was adding to the layout.
I used the Oh My Heart paper to cut out the pumpkins and backed the larger size with some vellum and the smaller with a pink paper from the A5 paper stack. Both pumpkins were adhered to the layout over the torn woodgrain strip (Cross if Off) using both double sided foam tape and thicker foam sheeting to add a slight hint of dimension.
I used multiple photos of my soup and sanga making time, printed out in a 3.7inch grid then cut into strips to overlay each other. I used the cute little rainbow hearts paper from the A5 paper stack for layering underneath then embellished with an accessory word sticker and label from the Story Time cut apart paper.
Next up I added the title using my beloved whitealphas adding machine stitching to hold them in place, whilst adding a little pop of texture to the layout.
On both pumpkins I created a cluster on top of the leaf area, using multiple fussy cut florals in all sizes from the A5 paper stack version of Spring Fling. Slowly but surely I am making my way through all those tiny sweet flowers
I also strung a tag from the ephemerapack to the top of the larger pumpkin and adhered it to the cardstock using foam tape
Here’s a closer look at the florals cluster on the smaller pumpkin, using a mix of adhesives for varying layers of dimension. Tacky glue, glue dots and foam tape would have to be the most used items in my stash.
1 final cluster added to create the visual triangle of embellishments on the layout, then the usual splattering of gold ink to finish it all off..
Super quick and easy layout to recreate if the need be, other than all the fussy cutting of florals that is.
Here’s one final look at the end result..
Thanks so much for stopping by, I hope you’ve enjoyed seeing where my inspiration of our current Monthly Challenge board took me, I certainly enjoyed creating it.
Please be sure to check out the Cocoa Vanilla Studio Community Group on Facebook to see all the other entries, and enter your own for a chance to win. We really to love to see what you all create, and where your inspiration takes you each month.
It’s Tarrah back with you and today I am sharing a sweet Spring themed layout featuring the gorgeous Unforgettable collection!
We are focusing on our current seasons this week on the Cocoa Vanilla blog with our projects! Currently we are enjoying some Spring weather here in Australia so my layout today is all about the florals and my title is pretty fitting as well! I am documenting a photo of my niece in front of a beautiful rose bush, the Unforgettable collection compliments my photo perfectly.
I chose the gorgeous teal coloured paper from the Unforgettable collection as my background. I did trim this piece down and adhered it to a sheet of plain white cardstock, I then bent the edges up to create some texture.
I chose a beautiful floral cut file from CUT to YOU that I cut up slightly and then backed it all with some of the gorgeous papers from the A5 paper stack from the Unforgettable collection.
Once the cut file was all backed, I added craft foam to the underneath and adhered it to the background paper. By using the craft foam, it creates shadows and dimension on my page which I love. Because I cut up the cut file, I was able to strategically place my photo between the 2x floral clusters, I added a small banner die-cut to the top right corner of the photo.
Next it was time to embellish and add the title. I decided to use a die-cut title from the Midnight collection – called Bloom & Grow. I added the word ‘Bloom’ to the left of the photo overlapping the small journal sticker that is tucked in to the side of the photo. I also added the ‘&’ and the ‘Grow’ at the bottom of the cut file. On the right of the photo, I added one of the super cute flair buttons from the Unforgettable collection and below the photo, I added a phrase die-cut and a word accessory sticker. I took out some of the larger florals from the ephemera pack and adhered some with craft foam and some with regular adhesive.
Some of the smaller flowers I adhered with craft foam to help them pop up and give the page some more dimension. Next I tucked in some of the pretty feathers from the ephemera pack and bent the edges up slightly on them to make them look more realistic. I just love the enamel dots in this collection and quite a few made it onto this page, I placed 2 in each cluster. I created 3 clusters of the enamel dots.
Lastly to finish my page, I stamped the date stamp and sprinkled some white mist around the page. Do you have any of the Unforgettable collection that you’re hoarding?!
Get it out and use it for some gorgeous projects!
Thank you so much for stopping by the Cocoa Vanilla blog today! I love how my layout turned out and I hope you enjoyed reading how I created it!
Hello CVS crafty friends! I have another spring themed layout to share this month. This time it is all about Paris in Spring featuring a photo of my daughter strolling in Paris. I have use the beautiful Storyteller collection.
I found a pretty floral frame cut file from the Silhouette Design store. I cut the floral piece using Little Love paper and paper backed them using Ditsy Daisy paper. I next added a bright blue water colour wash to my white card stock base. I then added the floral frame. I added some floral sprigs and leaves from the Floral diecut ephemera pack.
I next added my title. I used a mix of the Foam Title stickers and Accessory Sticker sheet. I then added a die cut camera and die cut butterflies, which I added with foam tape.
I added my 6×4 inch landscape photo which I matted on a blue paper piece from the A5 paper pad. I love the quote ‘the story behind the photo’ and the size perfect to fit under my photo with foam tape. I added one of the phrase sentiment die cuts to the top of my photo ‘love this’.
I went back and added centres to the floral die cut, some I cut from paper and others I added Wood EpoxyButtons which adds dimension.
I love the mix of blue and yellow and with small pops of other colours and use of a small floral print finished of with a black title, so eye catching. Definitely Spring vibes here!
Thank you for stopping by today and I hope you all have a wonderful week with lots of time to create!
It’s Sophie here and I have a new layout to share! I used the Storyteller collection for this autumnal page of my children and doggies going to the pumpkin patch!
I used a thick white cardstock for my background and teared a few different patterned papers to ground my photo. I printed the photo in black and white, mounted it on tissue paper and foam adhesive, and centered it on my page.
My title is from the beautiful Foam Title Stickers.
I created a little pumpkin with a few papers from the A5 paper stack and machine stitched on it for more texture.
I handwrote my journaling, embellished around the photo with fussy cut flowers and die cuts from the Floral Ephemera pack, placed a few stickers from the Accessory Stickers and added white Nuvo Drops as the finishing touch.
Welcome back to the CVS blog friends…hope you are doing well!
It’s Kellie here, and today I’m sharing a page with this months prompt of ‘Spring.’ For my page, I have used a lot of the ‘Daydream’ collection with a bit of ‘Storyteller’ thrown in…. here it is!
To start my page, I used the paper from ‘Daydream’ that is a white with a black dot….this is a great paper to use as a background as it’s not too busy. Next I decided to look through my cutfiles to see what I had that would help represent spring…and this one from Confessions of a Paper Addict with the suns, rainbows and clouds was perfect! To back the cutfile I used a bunch of the papers from both Daydream and Storyteller and added in some plain vellum for the clouds as they give a nice, soft effect. For the centre of the suns, I made some shaker pockets with some yellow/gold sequins.
To add some more colour to my page I used some distress oxides behind different spots of my cutfile to enhance the design.
For my title I used some yellow alphas from my stash and the word ‘Days’ is from the Daydream ephemera. I love using different fonts in my titles!
I love the florals in the Daydream collection so I used these next to my title and on the right hand side of my picture. I also added some butterflies around my page….
I hope you enjoyed my ‘Spring’ inspired page today and you are having fun with your Cocoa Vanilla products.