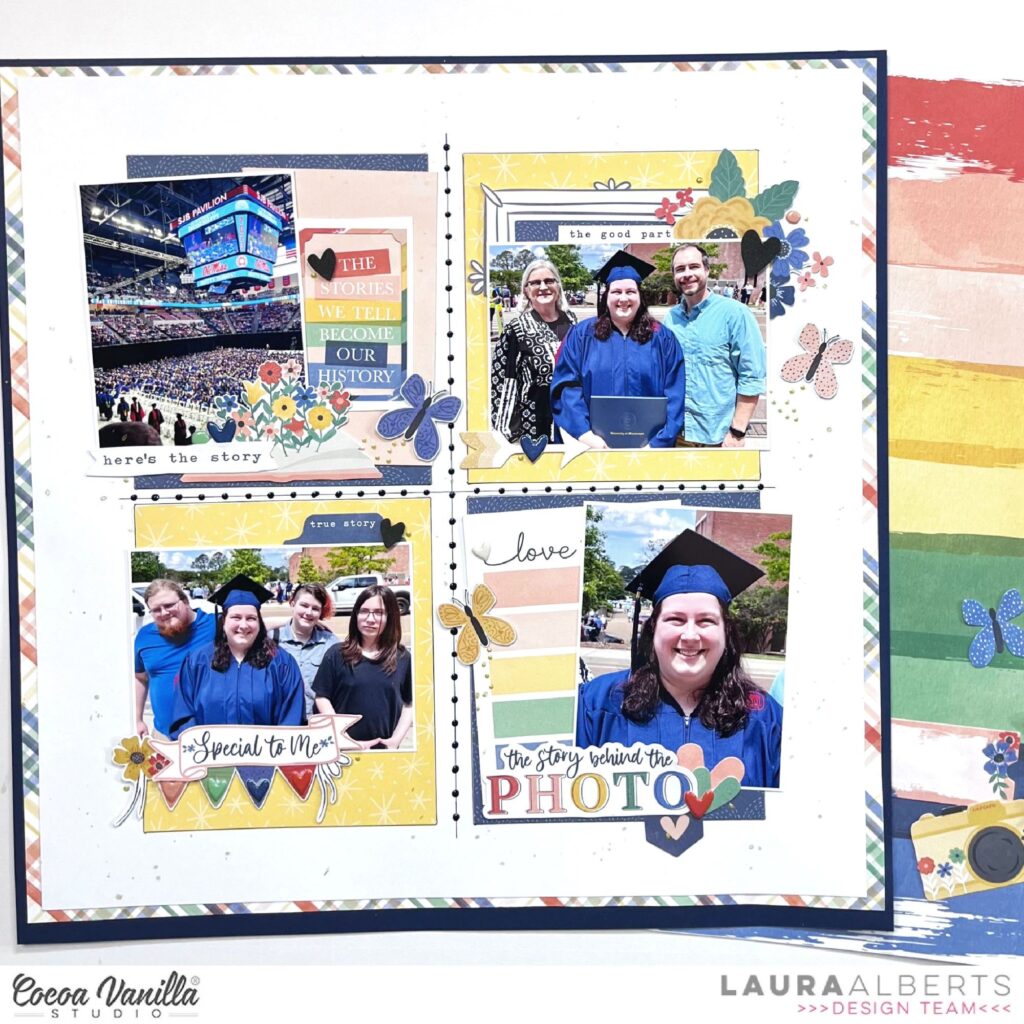
Hey y’all! Laura Alberts back again with a fun grid layout using the Storyteller collection for my graduation photos! If there was ever a set of pictures that had a story to tell, it’s these ones! I love how perfectly the colors in this collection matched my robes and stadium.
For this grid, I used four 4 x 4 1/2 inch bases for my 3×4 inch photos. By pairing journaling cards with the two profile photos and frames or flags with the landscape style photos, I created continuity across the grid that allowed me to go wild with the embellishing! Chipboard butterflies gave these layered squares a 3D effect that really made them pop.
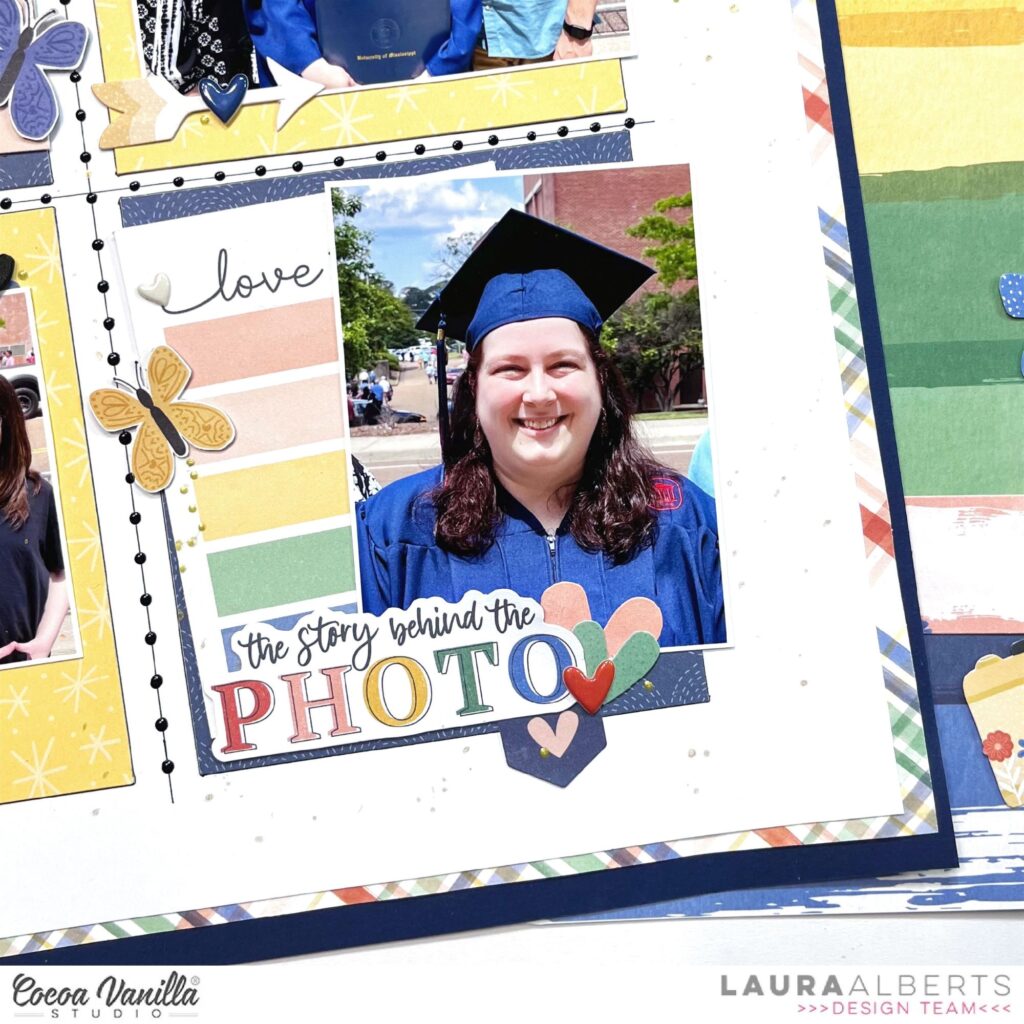
By choosing colors for my bases that either contrast or compliment the photos, I can make specific photos more of a focal point on the page. The yellow squares give two of the photos a little bit more prominence and catch your eye first thing. Using a mix of puffy stickers, chipboard, and ephemera to embellish these squares makes each of them unique and interesting.
But, my favorite detail on this page is the Nuvo drop border between the grids. It’s a small addition that gives this page so much character!
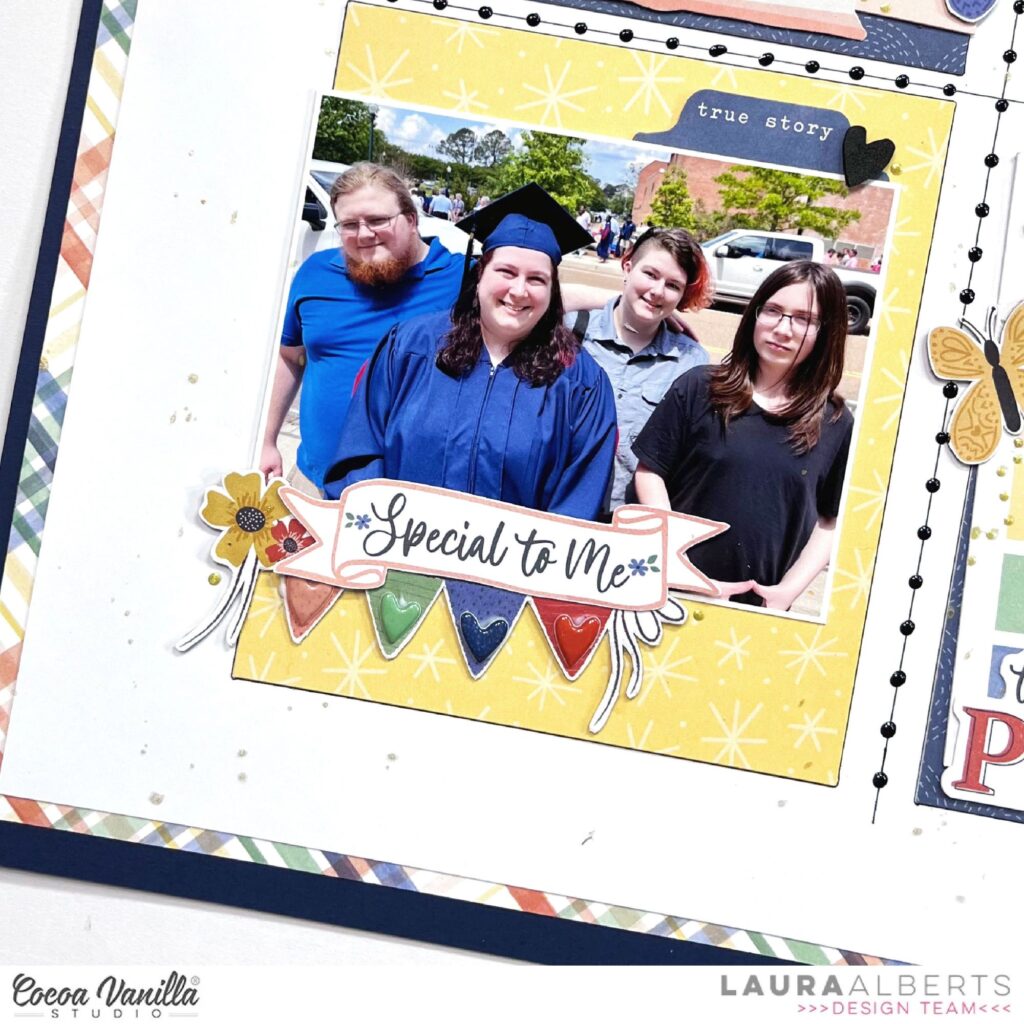
I hope this layout inspires you to freshen up your grid layouts with a variety of embellishments! To see how “Special to Me” came together, check out the process video below:
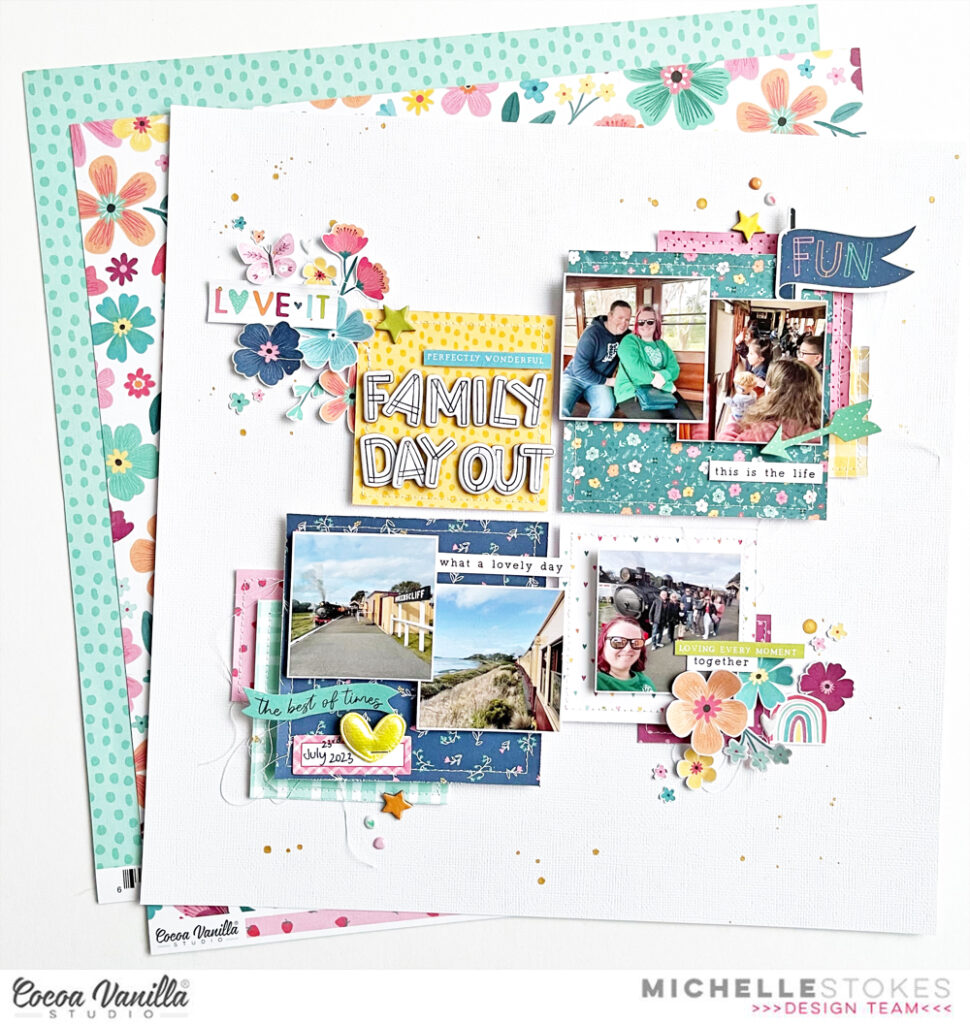
Hey Scrappy friends! It’s Michelle here today with a new layout share for you all. I think this might be the last I share with the amazing HappyDaysCollection for a little while as I just received a fresh box of the NEW collection Heart & Home and oh my is it stunning. But first, lets take a walk through this fun creation.
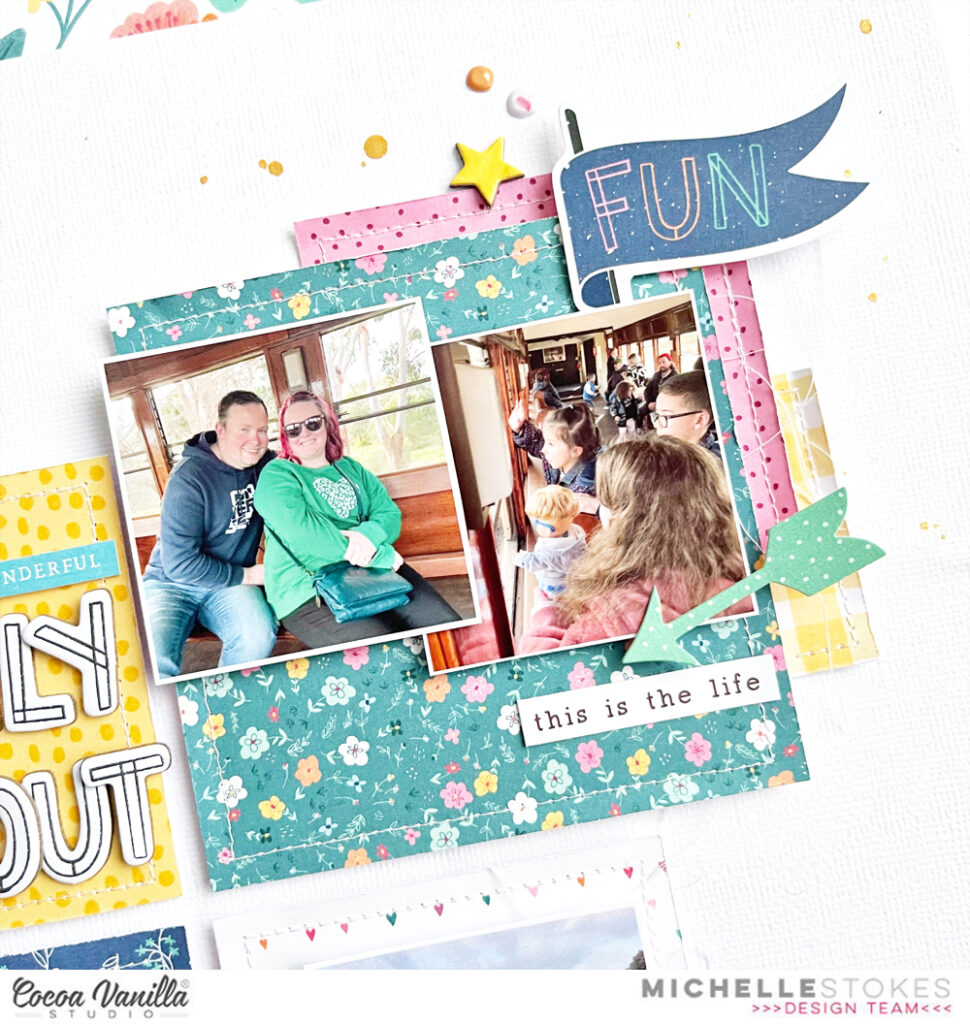
We recently had a family celebration of 50 years marriage for my partners parents, and what better way to celebrate than a family day out on a steam train ride. The kids (both young and old) all had the best fun hanging their heads out the windows as we rolled along the seaside
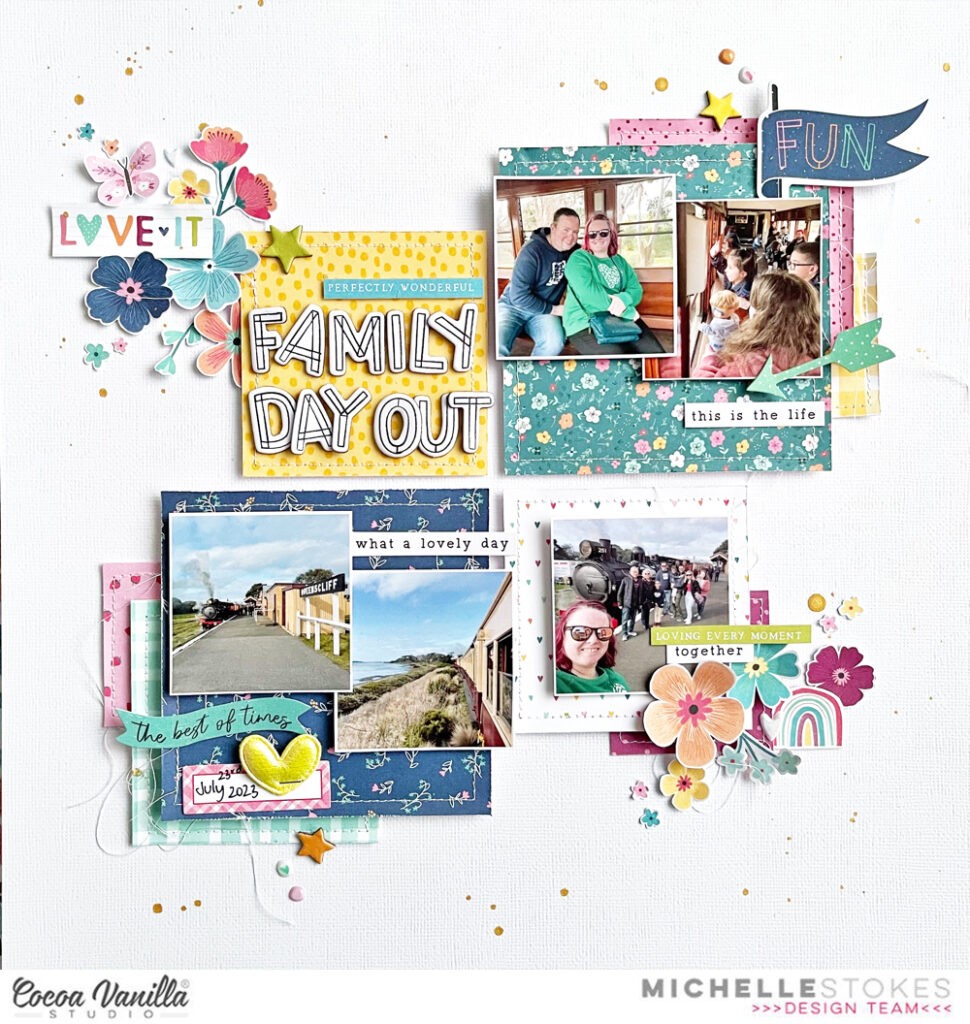
I had a couple of photos that I wanted to use to document this special occasion, so I thought a “rough” grid design would work for the base with lots of layers and different sized squares of pattern papers. I used a mix of both 12×12 and A5patternpapers from the collection and cut them into 4×4, 3×3 & 2×2 inch size pieces to layer together. I added machine stitching around the edges for extra detail and left the strings loose for extra texture on the page.
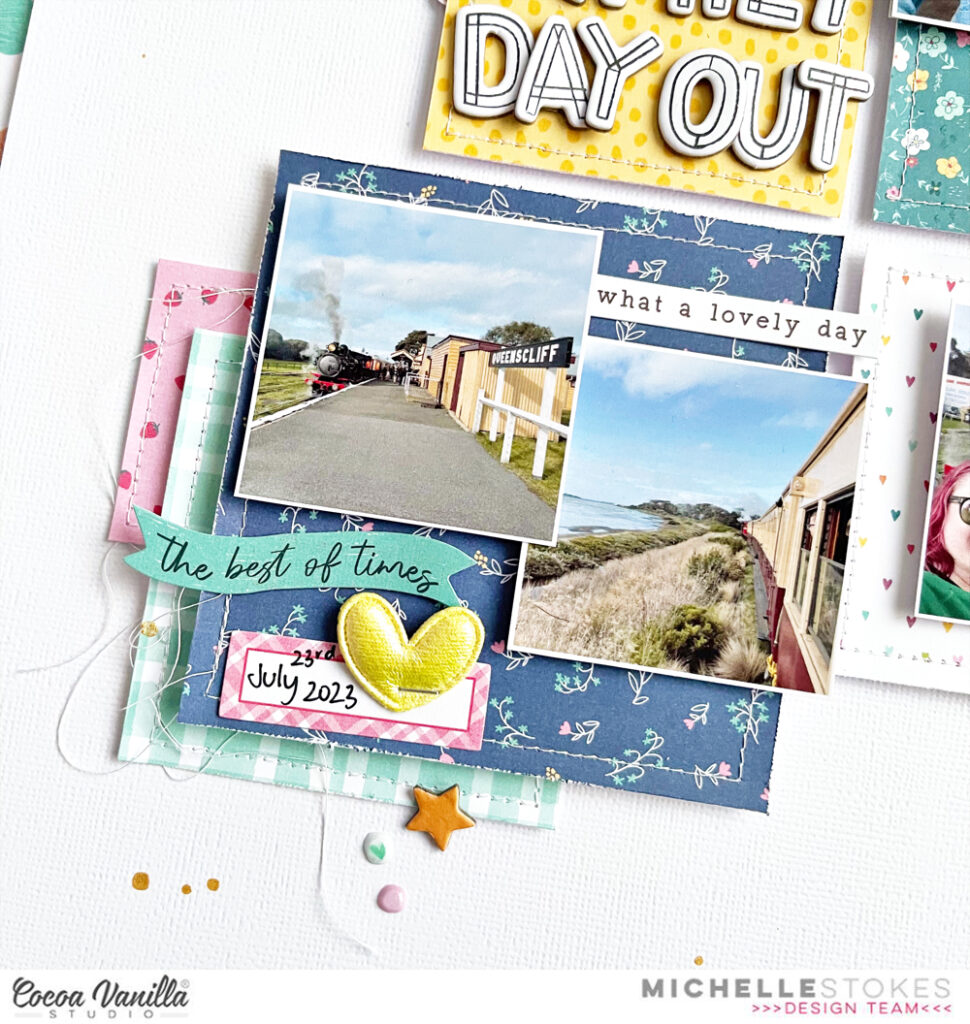
I grouped photos together and layered one over the top of the other to continue the layered effect I was going for with the pattern paper
I added pieces of ephemera, accessorywordstickers, chipboard pieces and puffy stickers/heart to the photo stacks to create interest in these areas
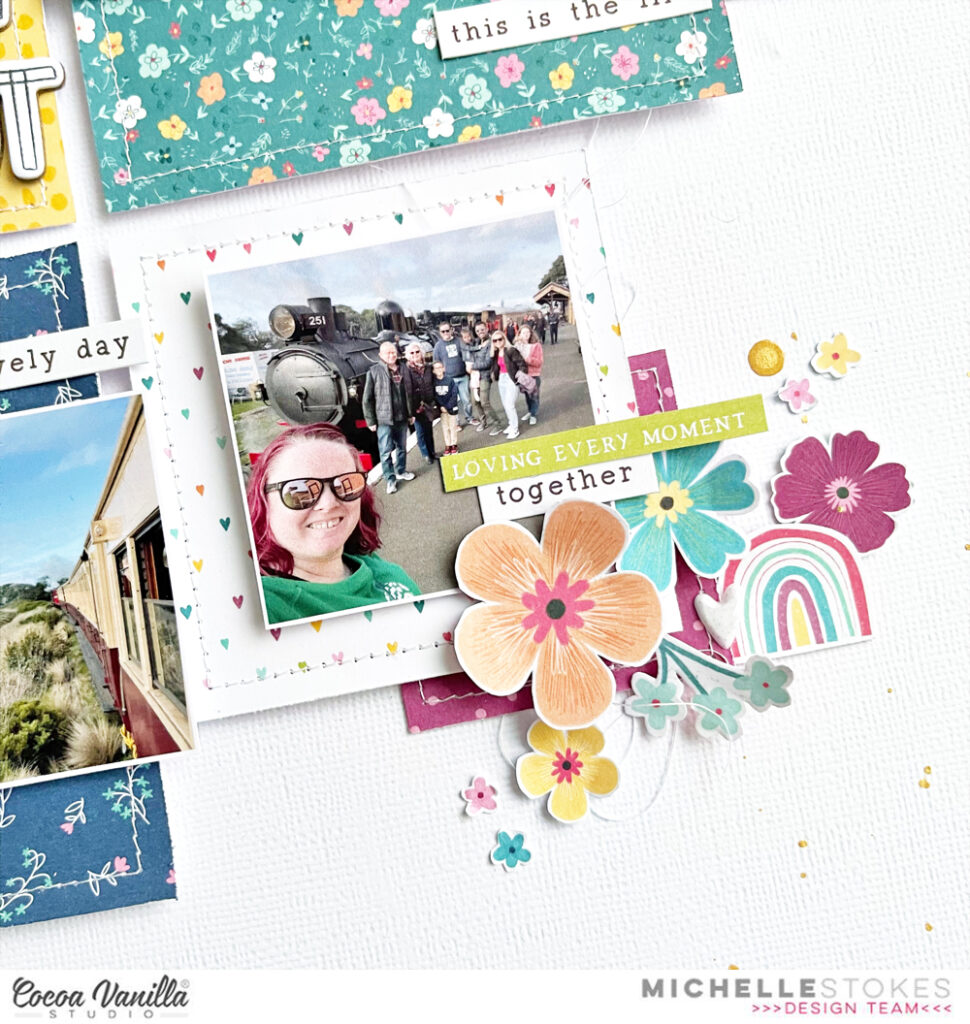
I created my usual floral clusters diagonally across from each other by fussy cutting florals from both 12×12 & A5sizes of the LUSHBLOOMS paper then grouping them together with cut apart pieces from the FEELGOOD paper
To create the title I’ve mixed letters from the CHIPBOARDTITLES pack to create my own words, and added a words strip from the FEELGOOD paper above.
Lastly I added a few splatters of gold ink and some tiny puffystickers in both hearts and dots to finish off the layout
I’m really happy with how quickly it all came together, with the fussy cutting being the most time consuming process of it all.
Well thats all from me today, thanks so much for stopping by! Can’t wait to see the new collection start appearing online within the next couple of weeks, so be sure to keep your eyes peeled for inspiration from the team in the coming days.
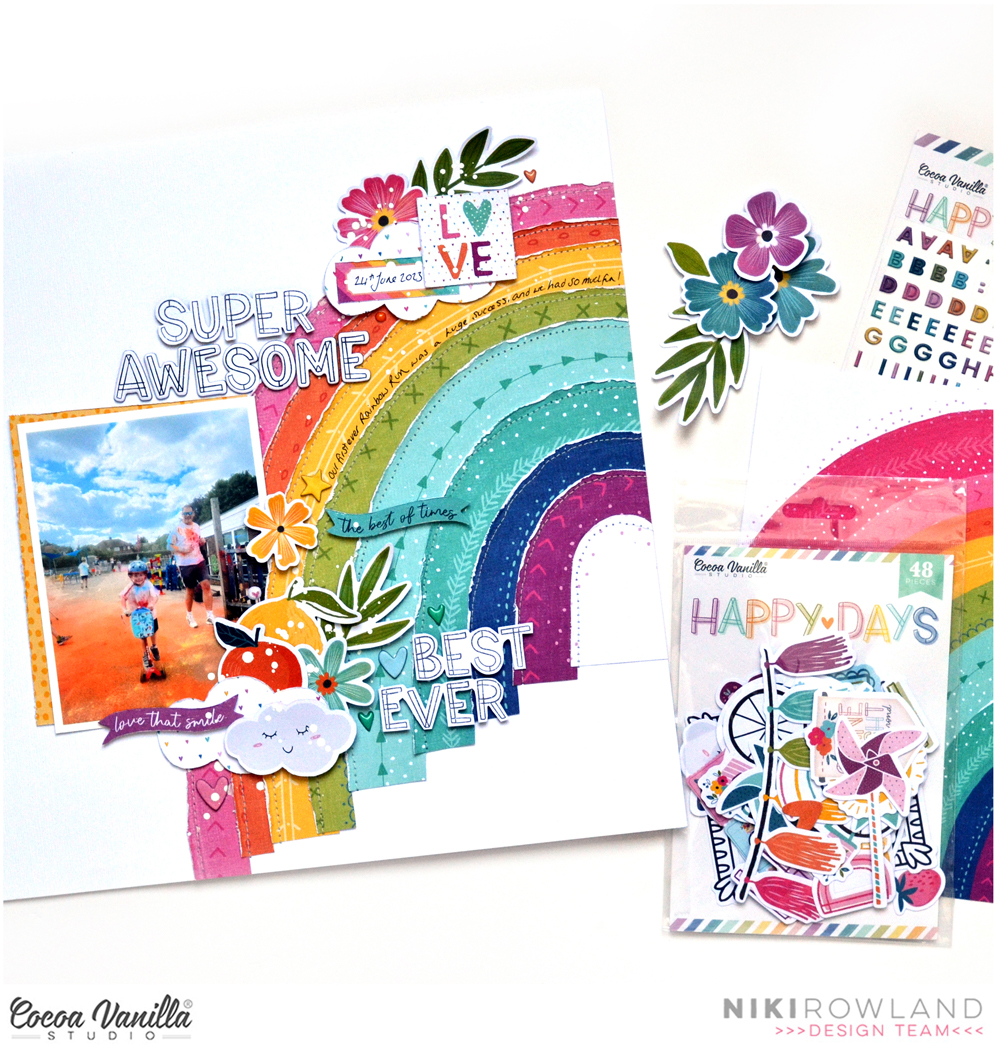
Hi everyone! This is Niki (@nikiclairecreates) and I’m so happy to be back with another layout and process video using Happy Days. After my Guest Designs over the past two months, I was delighted to be invited to join the team on a permanent basis! Thank you so much to Zoe & Cocoa Vanilla Studio for having me!
For today’s layout I decided to use THAT rainbow paper – you know the one, it’s called Rainbow Bright and has a big beautiful rainbow on it!
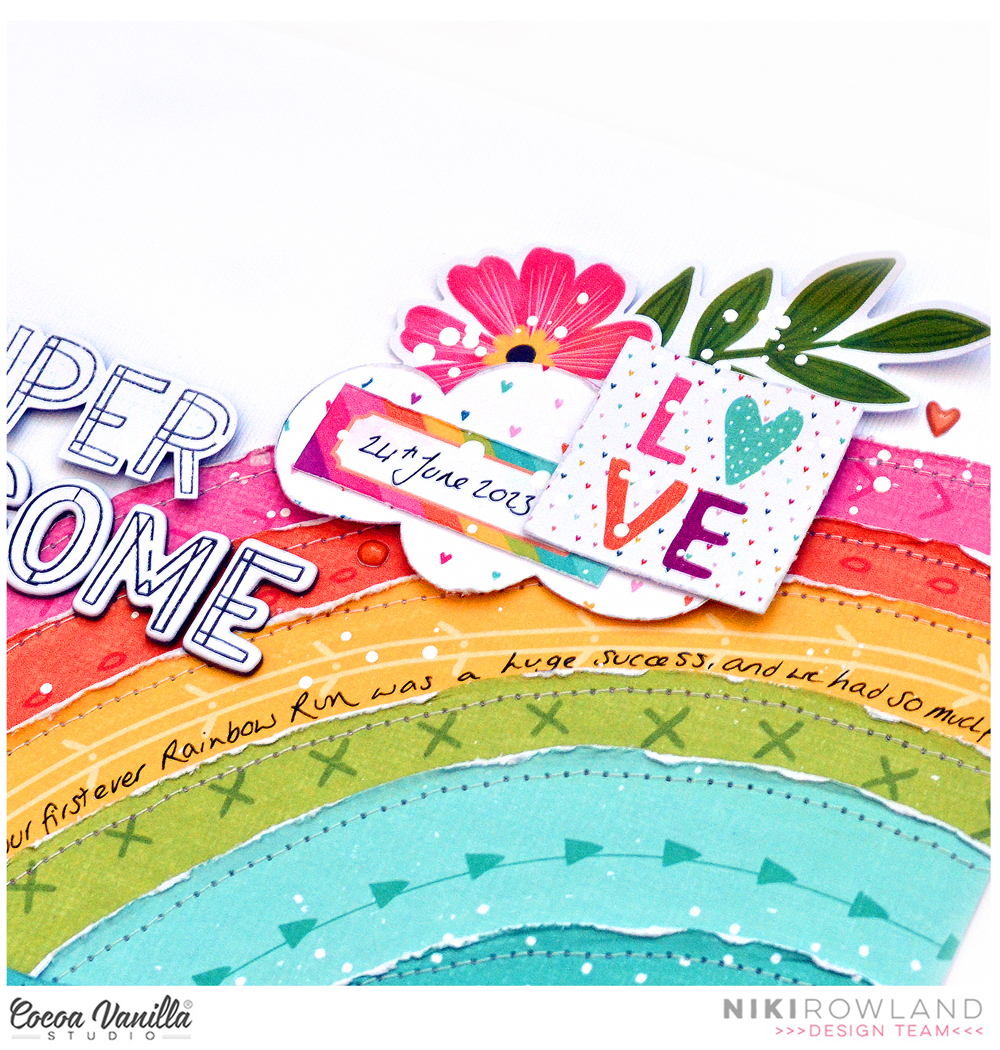
I cut all the arcs apart, distressed the edges of all, then stuck them back together, overlapping a little, onto a piece of white card. They overlapped the right edge of the cardstock background quite a bit so I just chopped off the excess. I then added machine stitching around each of the arcs.
I added my photo to the left side of the page. I wanted to mount it on yellow paper but didn’t have any left! So I used a piece of the A5 Paper Stack that I had a small piece of and just about managed to mount two sides of the photo!
I added some clusters to the top and bottom of the layout. I included two fussy cut clouds, that I had leftover from when I made a mini album. I also added Die Cut Ephemera, and Floral Ephemera to these clusters and Accessory Stickers too.
For my title I used ‘super’ fussy cut from the Definitive paper and the word Awesome from the Chipboard Phrases. I also added a sub-title ‘best ever’ also fussy cut from the Definitive paper.
I finished off by handwriting my journaling around the yellow arc, and adding a few chipboard hearts and puffy hearts to the layout! I have created a process video for this layout, which can be watched below, I hope you enjoy it.
I absolutely love how this one turned out and I hope you do too! Thanks so much for joining me today and happy scrapping!
It’s Tarrah back with you and today I am sharing a new boy-themed layout using the awesome No Limits collection! The No Limits collection is a bit of a throwback to one of the older Cocoa Vanilla collections but I love revisiting older collections! I don’t know about you but if I have heaps of a collection left, I like to challenge myself to use it up!
I started out with a white cardstock background as I mostly always do, trimming it down to measure 11′ x 11′ and adhering it to a sheet of black cardstock. I took the Nebula paper and tore rough edges down each side. I then took some of the Latitude paper and tore a piece vertically, I adhered the Nebula paper down and the yellow side of the Latitude paper on the right side. I trimmed the colourful border strip from the Universal paper and adhered this piece to left of the Nebula paper. I bent the edges of the papers using my fingers to add some texture and to add to the grunge/boy theme feel of the page. On the right of the papers, I added some black twine also for some added texture.
The photo is of my youngest son just after a haircut, he was loving his haircut and I just loved the look on his face so I snapped a few photos of him! I placed the photo in the centre of the papers, I layered one of the 3′ x 4′ pocket cards under the photo for an extra layer. I added some phrase stickers from the Accessory Sticker Sheet here to help tell the story of my layout. Although Certified Wild and Beast Mode may not be quite true lol! The One of a Kind chipboard certainly is true though and I placed this piece at the very top of the page.
To the right of my photo, I placed my title which is made up of the Die-cut Titles, I used craft foam underneath these to pop them off the page. I don’t know about you but I love the font of these titles! I added some phrases below the title here and then began to add some of the smaller embellishments. I added lots of star embellishments, including die-cuts, chipboard stars and puffy stars. I also added wood epoxy buttons and some tab stickers from the Accessory Sticker sheet.
I love the dimension, detail and texture that all the different papers and embellishments add to a page. The last thing I did was I stamped the date of when my photo was taken, I sprinkled some black mist and freehand drew a black border around the edge using my journal pen. I love how my boy themed layout turned out and hope you enjoyed reading about how I created it.
Hello CVS friends! Today I have a fun summer themed layout to share. I chose a 8.5 x 11 inch layout as this is the size I always use for my travel layouts. I have of course used the gorgeous Happy Days collection.
I found this summer fun cut file in the Silhouette Design store and cut it to fit my 8.5 x 11 inch layout. I used a turquoise card stock. I used the Feel Good paper, yellow cheque side cutting at 8.5 inches and tearing at 1.5 inches. Before adhering to the top of my page a added a tiny strip of Lush Blooms paper to add a contrast. I next added two die cutephemera butterflies with foam tape to add dimension and finished off adding a die cut sun which I added two blush pink puffy stickers for the cheeks.
I adhered the cut file with a small amount of wet glue. I used the A5 paper stack to create my layered photo frame. My photo is 3.5×3.5 inches. I set about making this my focal point. To the right I created a floral cluster using the floral ephemera. At the top of my photo I created another embellishment cluster adding die cut strawberries, tab and word sentiment.
To the left of my photo I added a die cut camera with foam tape tucking it slightly under my photo. Tucking elements under and over photos prevents your layout from appearing ‘flat’. I added journalling using the accessory sticker sheet, phrase sentiments on my photo and under it.
I used some yellow paint and made random splatters over my page (protecting my photo of course!) I added a journalling block to the bottom right of my page and will add details of photo later.
This design could be used for so many different themed layouts! I hope my layout has inspired you in some way and if you have only ever tried a 12×12 inch layout I encourage you to try a different size.
It’s Sophie on the blog today with a new layout to share!
I used the Happy Days collection for this page. I had a photo of my daughter on the lake and had the idea to cut a few wave shaped borders out of patterned papers and arranged them at the bottom of a 11×11 inches white frame to create movement and fun waves.
I placed the frame on a 12×12 white cardstock.
I mounted my photo on tissue paper and adhesive foam, and embellished around it with beautiful flowers from the Happy Days Floral Ephemera pack.
I used the Happy Days Chipboard Titles for my title and added a subtitle cut out of a patterned paper.
I handwrote my journaling directly on the white cardstock, added a few embellishments at the top of the photo and stamped the date.
Here are more close-ups:
It’s very simple and different. I really like the result! I hope you like it too!
Thank you for stopping by, you will find a Reel of my process on the @cocoavanillastudio Instagram account and on mine @so_scrappy
Welcome back to the Cocoa Vanilla blog everyone, it’s Kel here today to share my next layout using the Happy Days collection.
I decided I wanted to limit my colour choices to the magenta, yellow and aqua colours in the collection and this is what I came up with… I just LOVE this colour palette..
To start my page, I traced some circles in different sizes onto my background using a black permanent marker, then coloured them in using some watercolour. Next, I added some stamping in circular shapes in corresponding colours to help fill in my background.
To keep with the circular elements of my background, I cut my photo into a circle and backed it onto another circle using the Feel Goodpaper. I also cut some circles out of the Feel Good, Little Blossom and Flutterby papers to help fill out the background.
Next, I worked on my title. I used the ‘Hello’ banner flag from the Ephemera pack and some of the Chipboard Title Stickers.The word ‘girl’ didnt come as a word in the pack so I just made my own word with the letters on offer.
Next came the fun part of embellishing! On the right side of my photo I used the two pinwheels from the Ephemera Pack and also the sun which I layered under the ‘Hello’ flag.
To the left of my photo I used some of the florals that I cut from the ‘Lush Blooms’paper. I also used some of the tiny florals that I cut from the A5 Paper Stackto scatter across my page. I also created a small cluster of the florals to the right side of my page.
I love the phrase stickers found on the Accessory Sticker Sheet and I used some of them under my photo and on the right side of my page.
I still felt my page need more so I used some of the butterflies from the Ephemera packand some which I cut from the Flutterby paper..one next to my florals on the left, and a few ‘flying’ up the right side. I love to use dimensional foam under these to help them pop off the page.
Lastly, I used some of the Puffy Stickers to finish off any gaps, and stamped some black hearts to co-ordinate with my black and white photo and the black in the title…this helps make the colours on the page stand out.
Thanks for stopping by today and you feel inspired.
Hey y’all! Laura Alberts here with a fun large photo layout! I love scrapping large photos like this 6×12 layout that I had printed of my second oldest on a camping trip. Love the way I can incorporate the gorgeous rainbow design on this patterned paper from the Happy Days collection. Using a tone on tone embellishing style helped this layout feel fun without overwhelming or overshadowing the photo.
On each stripe of the rainbow, I added a coordinating word phrase from the 12×12 cut-apart patterned paper and a few fussy cut elements that were close matches. I particularly loved all of the stitching details on this paper and tried not to cover them up! The trail of butterflies on the right side was a great way to add movement and whimsy to the page.
With a simple chipboard title at the bottom and journaling added in the center of the rainbow, this layout came together fairly quickly, but turned out beautiful! All of the little details make it such a memory beautifully preserved. My favorite part is the tiny, fussy cut florals on each stripe of the rainbow.
I hope this layout inspires you to try larger photos or tone on tone embellishing in your next design! If you’d like to see how this layout came together, check out the process video below:
Welcome to Cocoa Vanilla Studio’s blog; how lovely to have you here today! I’m Josefine, and I’m happy to share with you a new scrapbook layout filled with summer fun. For this project, I’ve chosen the amazing “Happy Days” collection. This bright summer colors bring my memories to life on paper, and I couldn’t be more excited to dive into this creative journey.
To start off, I’ve used a white sheet of cardstock as my base. The design paper with its vibrant rainbow pattern caught my eye, and I carefully cut each colored strip separately. Adding a touch of light blue stitching along the edges by using my sewing machine. So I create a lovely touch to the strips.
With the strips I begin to arrange them into a triangle design. For some of the strips, I fold them slightly to create more depth and dimension, adding a playful touch to the overall layout. Now, it’s time to incorporate my summer fun photo, almost in the center on top of the colorful strips. I also select various shape die-cuts and flower die-cuts to create clusters around the photo. To add more charm, I cut out butterflies from the patterned paper and place them strategically between the clusters. A smaller cluster in the upper right corner helps to balance the layout.
For the title, I go for a combination of different alphabet sets. “Sweet Summer Days” perfectly captures the essence of this layout, and I love how the mix of these two different alphabet sets adds a playful touch. A little colored tab beneath the photo and a few cardstock word strips complete my layout. And there you have it, a finished a summer fun scrapbook layout!
I hope this layout sparks some creative ideas for you, and I wish you a fantastic and artistic day. Until next time on the Cocoa Vanilla Blog.
Hey everyone! This is Niki (@nikiclairecreates) and I’m excited to be back with another project and process video Guest Designing for Cocoa Vanilla Studio! This time I have made a mini album. It is a box in the shape of a rainbow, with an arch shaped mini album inside!
To make the box, I started with the front and back covers. I hand drew a rainbow onto a piece of scrap cardstock and cut it out and then used this as a template. I traced around it onto lots of different papers from the A5 paper stack and cut them all out, then distressed the edges and layered them all together. I then mounted this onto a piece of white card and cut out leaving a white border. I added pink hand stitching around the edge using embroidery thread I did all this twice so I had identical rainbows, one for the front of the box and one for the back.
To make the clouds I did the same: hand-drew a cloud onto a piece of scrap cardstock and cut it out to use as a template. I drew around it onto that super-cute ditsy heart print which I cut out and mounted onto white card. I added pick stitching around all of the clouds, then added them to my rainbows.
To make the inside part of the box, I used yellow cardstock to make an insert. I make these really simple, just two pieces of cardstock cut and folded – you can see more details on the process video.
With the box assembled, I moved on to making the mini album itself. I again created a template from white cardstock for the pages and cut that out. I then used this as a template for all pages. I drew them onto more papers from the A5 Paper Stack and cut them out. I then stuck them all together, back to back, to make a super-easy album, which I secured around the outside with ribbon.
I embellished the front of the box with a Chipboard Title, a few pieces of Floral Ephemera, a fussy cut butterfly and some phrase stickers. I also added the title ‘Rainbow Run’ using those adorable Mini Puffy Alphabet Stickers, to one of the clouds.
To embellish the album itself, I wanted to include the wooden medal from the Rainbow Run (this mini album is all about a sponsored run I took part in) and the actual ribbons from the medals at the event. I managed to incorporate those onto the front page and the ribbons are what tie the album together I think it’s really great to include momentums like that within albums if possible and these were perfect!
The album itself is quite interactive – I have 40 photos to include, so it had to be! Some pages have photos that flip up or flip out, there is a ball-chain containing 11 photos, there is also a pocket page. On one of the pages, I made a shaker pocket: I cut a piece of acetate to the same size as the page, pierced holes all the way around the edge and chain stitched with the same pink thread used for the album covers, trapping the sequins inside. I love how this looks!
I used more papers from the A5 paper stack throughout the album to decorate the pages and mount my photos. I’ve also used lots of Floral Ephemera,Phrase Stickers and several of the puffy heart stitchers throughout the album. I also used some of the other Chipboard Titles to make feature pages.
I absolutely love how this turned out, it is just adorable and so pretty to look at and I had the perfect photos for a rainbow album! I really hope you have enjoyed it too. I have made a process video of this mini album, which includes a flip through too, you can watch it here: https://youtu.be/jvOZK-Qy43o . Thank you so much Cocoa Vanilla Studio for having me as a Guest Designer, I have loved it!