Water bike cruising | Storyteller + Hello Sunshine | Anna Komenda
Hello crafty Friends. For the couple of days we will be focusing on combining old and new CVS collections as an inspiration for you and here is what I have come up witth. The newest Cocoa Vanilla line is beautiful “Storyteller”, which I am sure you are already familiar with. It’s saturated colors and very versatile theme are perfect for all sorts of projects. I was thinking of other collection that has similar color palette and “Hello sunshine” was the first one that came in my mind. It’s probably because I am a big fun of all summer themed lines :). They are always so colorful and fun. Combining “Storyteller” and “Hello sunshine” is the perfect idea as I am running really low on papers from the old line and as they are no longer in stock, I am stuck with leftovers only. Every new collection that shares similar vibe is a chance for me use up those leftovers and let this well loved line shine once again.

As I mentioned before, I am running low on pattern papers from “Hello sunshine” collection. But who can blame me? They were fantastic. That’s why I am more than happy to use this pattern “Brighter days” with colorful stripes from “Storyteller” line as a base of my project. It’s quite bold but with a cluster of four pictures it was toned down a bit. With blue nad navy on the bottom it kind of looks like landscape during the sunset. This page is about enjoying the lake so I decided to use this pattern this way exactly.
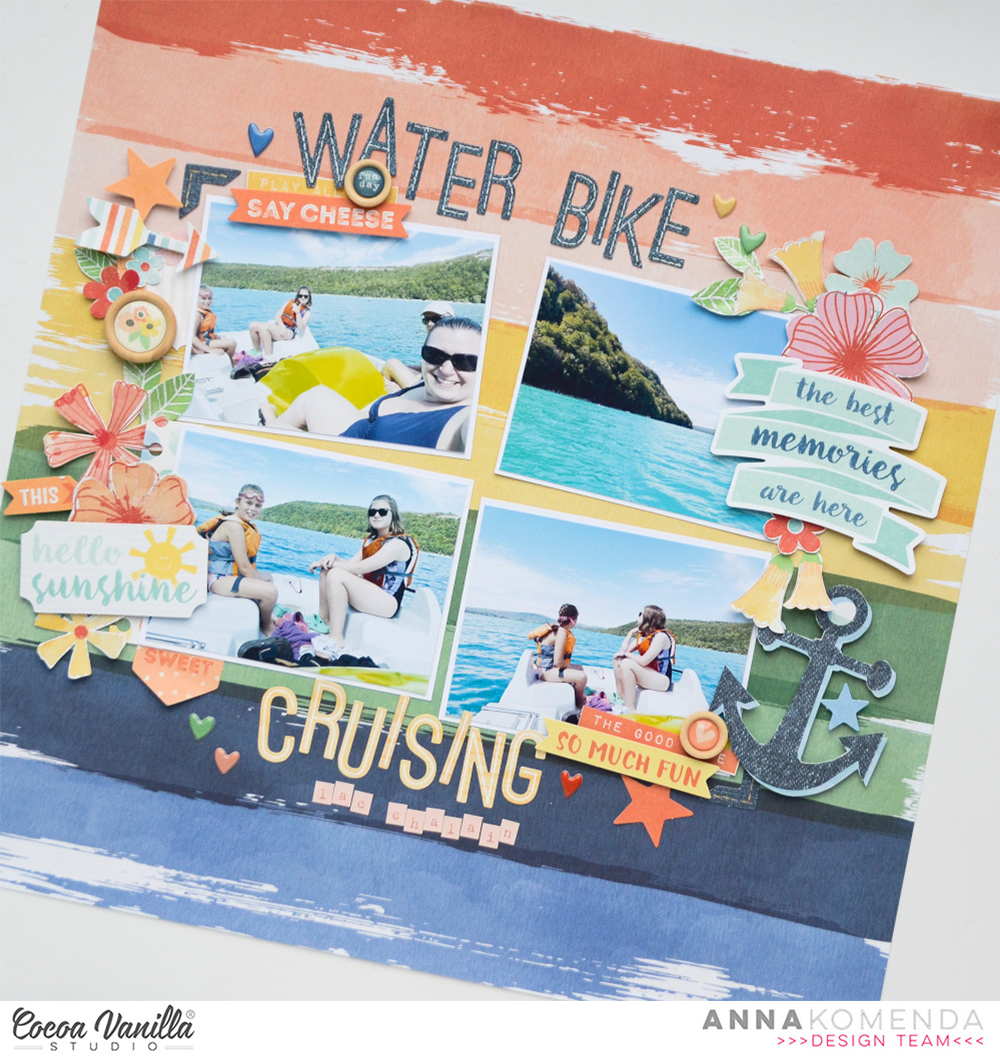
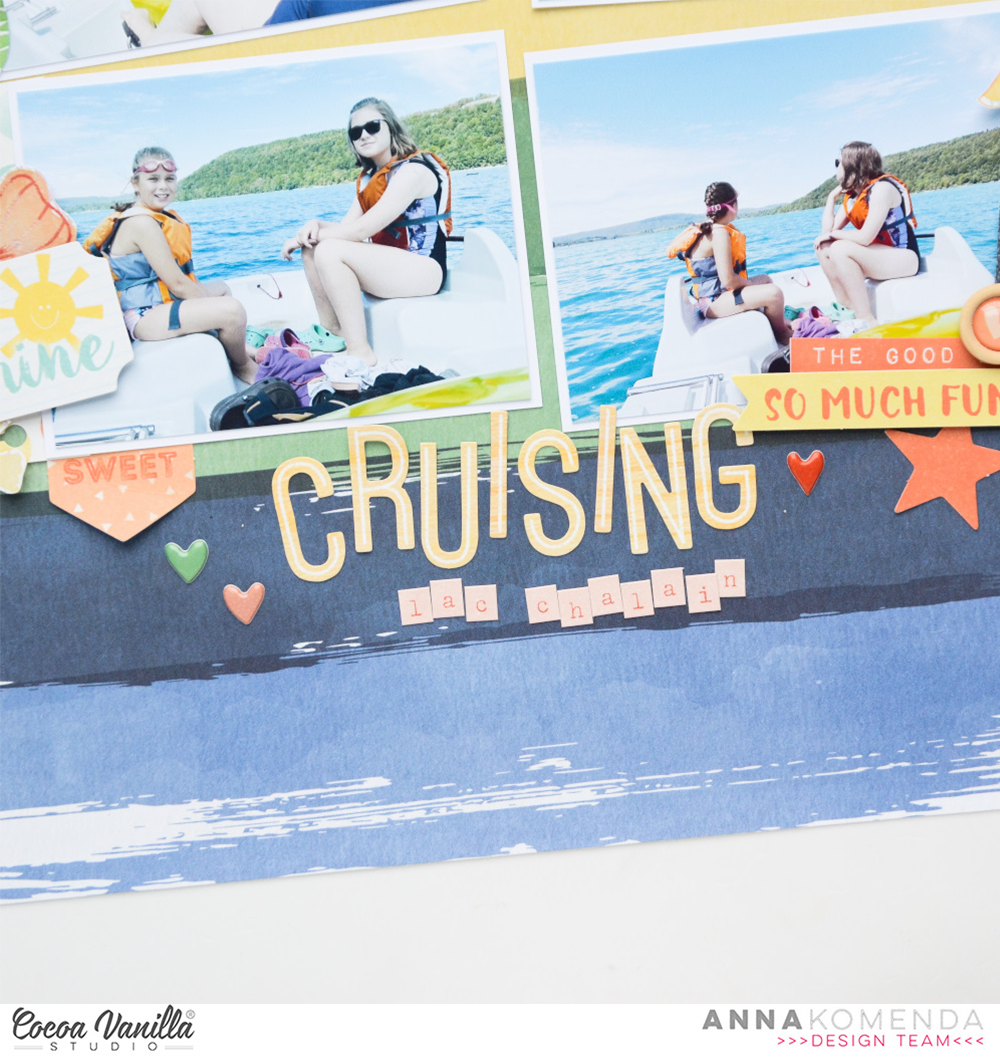
Next step was to add my photos. They are all the same size and they take a lot of background space. I glued them down in the middle of my background leaving a little bit of space on the left and right for some embellishing and on the top and the bottom for my title. We had so much fun renting water bike during our last vacation in French Jura and swimming around the lake. Kids were jumping to the crystal clear water, we were taking turns with pedaling – it was such a fantastic, family time, worth a whole page.

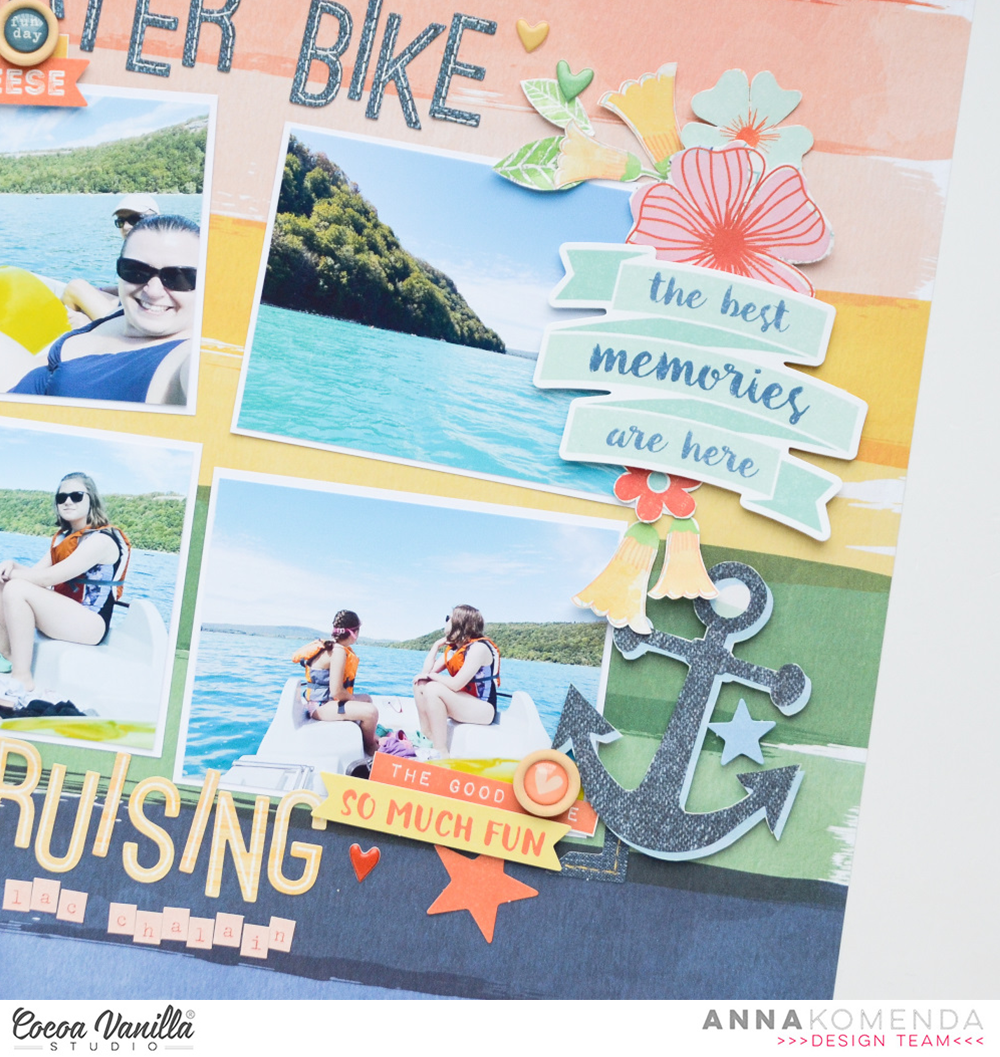
After using “Storyteller” paper as a layout base, it was time to embellish it with some bits and pieces from “Hello sunshine”. I have a digital version of this line but I was too lazy to print anything so I focused of whatever I have left in the ephemera pack. I also fussy cut some flowers from one of the papers. I arranged those bits and pieces on both sides of the photos adding few stickers from 6*12 sticker sheet.
With all the embellishing done, I was ready to add a title. Once again I reached for my everlasting pile of alpha stickers, that once were part of CVS collections. I used two different colors – yellow on the bottom as it contrasted well with navy and navy on the top as it contrasted orange better. I am running out of some letters so I needed to make E from an F. It’s totally possible and I do that a lot. If you need more tips or missing alpha latters here they are. Use V turned upside down as an A (just add a piece of other unsed letter in the middle), turn F into E with an estra strip of other sticker. Cut a piece of T, turn it upside down and make L of it. If you need Y, take X and cut out on the the bottom “arms”. Turn G into C by trimming part of it. Use W instead of M or the other way around.
After adding the title, I circled back to my “Storyteller” embellishments and added few puffy hearts here and there and three epoxy buttons. They look like taken from the same line! I just love those lucky coincidences!
That it all for today my Friends. Thank you so much for staying with me through the whole post. Don’t forget to come back to see what collections other DT girls will me “marrying together”. See you in two weeks.
XO Anna


 To begin my layout, I chose a fun cut file design from The Cut Shoppe and cut it out from yellow cardstock. I then adhered the cut file to plain white cardstock. I love the contrast of the bright yellow against the white cardstock, reminds me so much of summer! For the very centre of the design of layout, I picked the ‘In the Summer Time’ sticker from the accessory sheet and popped it up on foam dots and placed it in the centre of my page.
 Like I said earlier, I matted my photo using just the one piece of patterned paper, this photo is a very recent one of my sister and her eldest daughter in the waters of the Jurassic Coast in England! How gorgeous is that archway and water?! So inviting! I popped my photo up to create some dimension and shadows and then the next step was to embellish.
  I chose some of the die-cuts from the ephemera pack including the coloured star strip, the iceblock rectangle piece and the journal tab. These 3 pieces I tucked it below the photo and to the right side of the photo. I created a focal point towards the centre of the page by adding a cute flair button, a wood veneer heart and another sticker. I also had to add that Sunshine puffy sticker, I just love the puffy stickers from this collection!
 Lastly I added some of the super cute enamel shape stars around the edges of the sun to add some colour and interest. I also splattered a few splats of black mist and added the date stamp to finish off my Summer page!