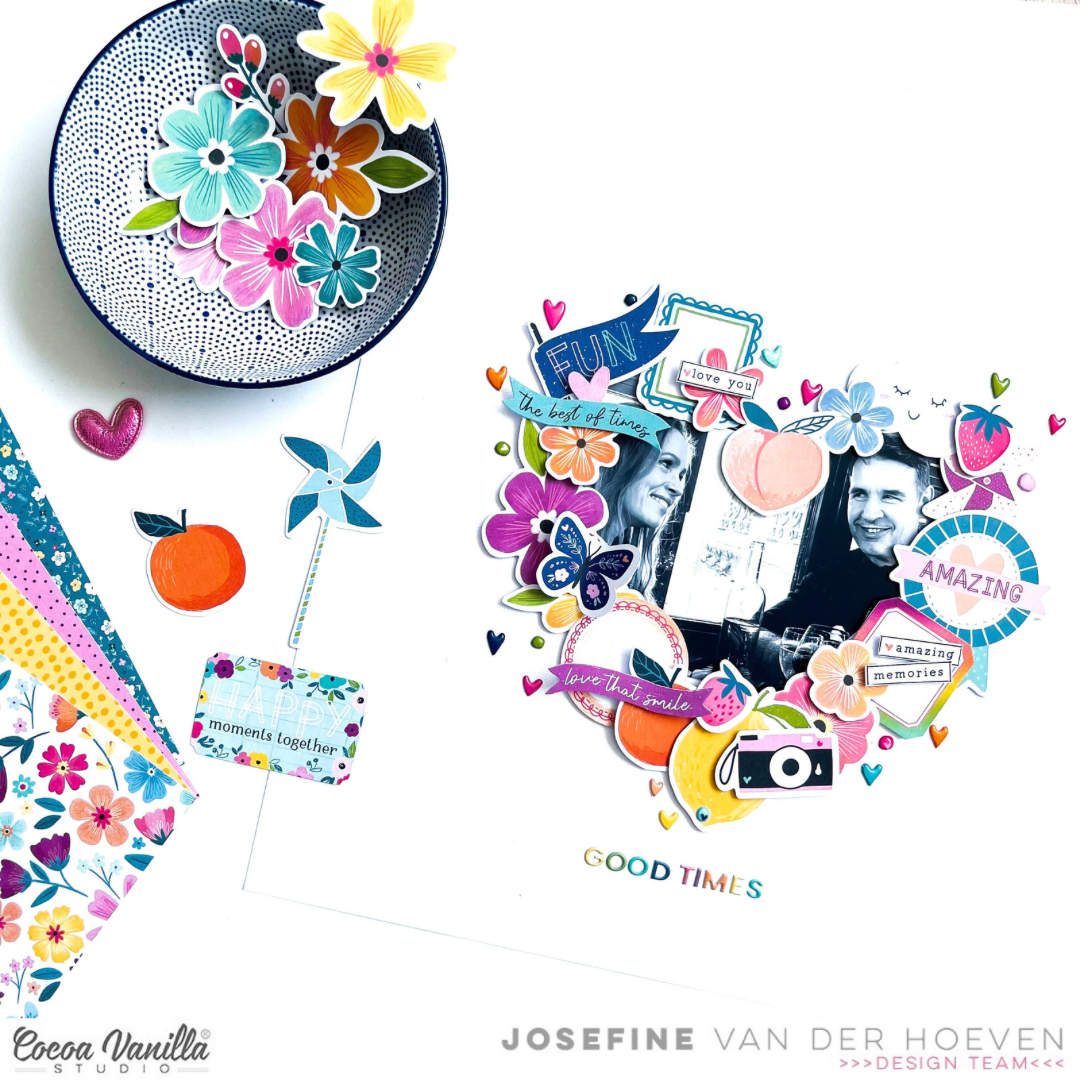
Hey y’all! Laura here with a fun graduation layout! When I finished my degree last month, it was a proud accomplishment and I couldn’t wait to scrap it! With a dark and mostly neutral color scheme, this photo needed the bright, celebratory colors of Happy Days to make this it pop. I started by fussy cutting out the frames from the specialty paper and backing them with patterned paper from the A5 paper stack.
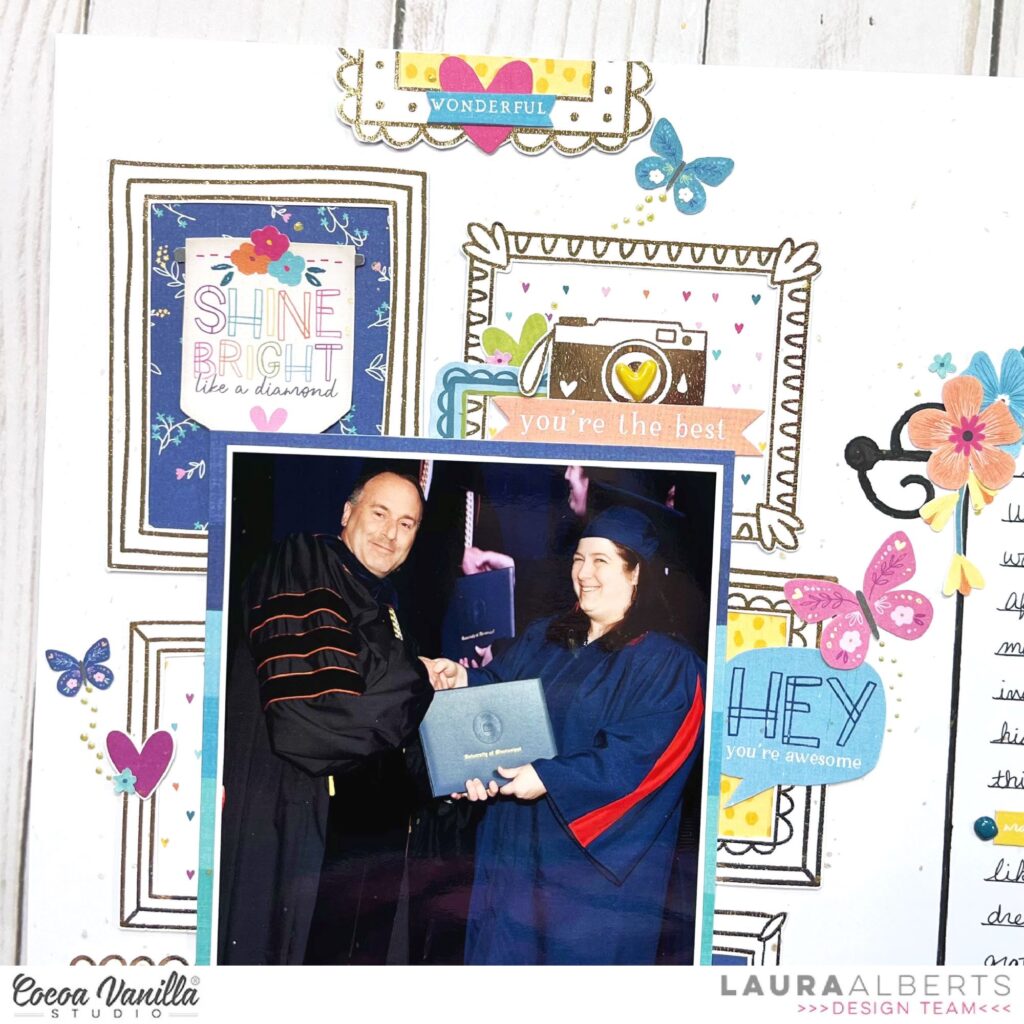
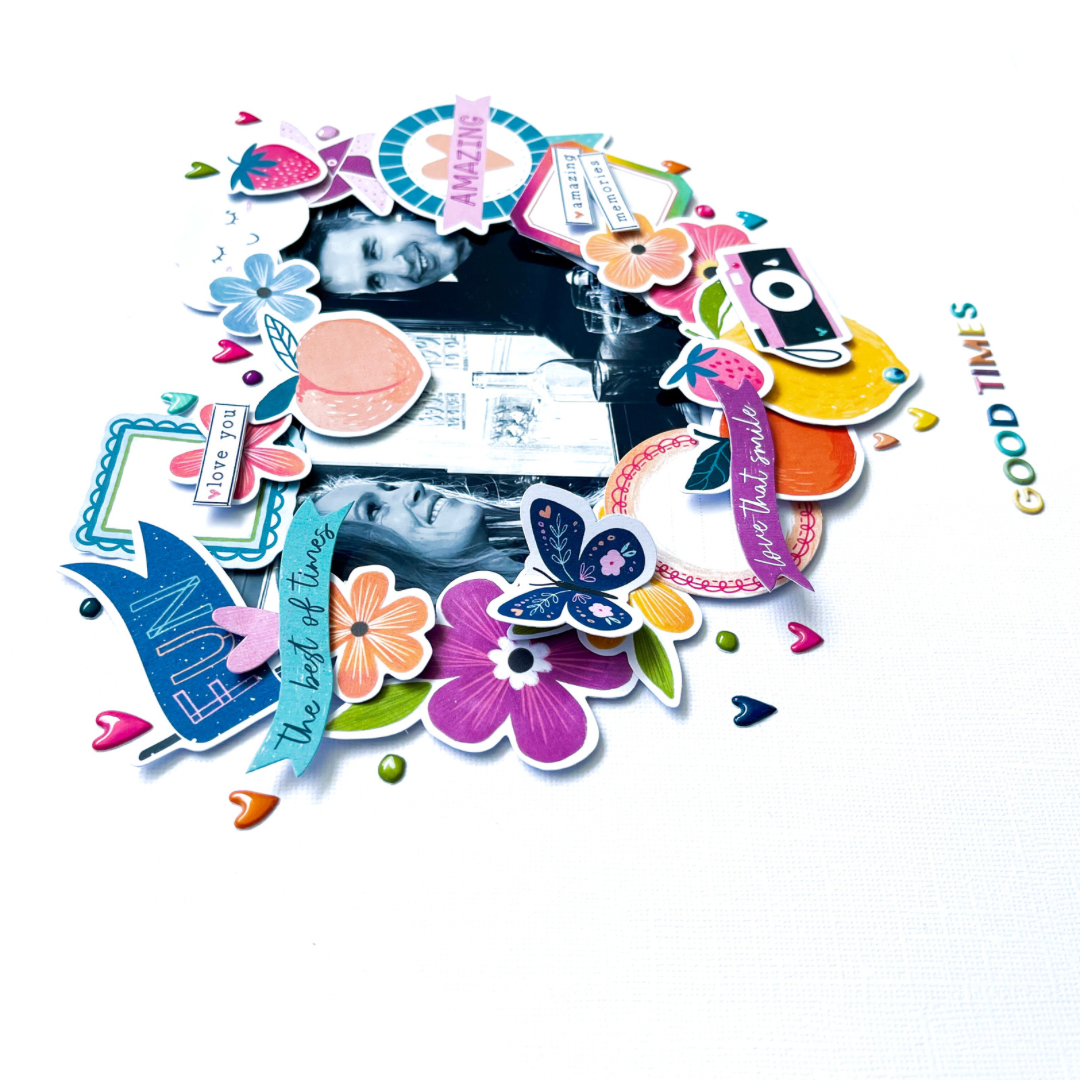
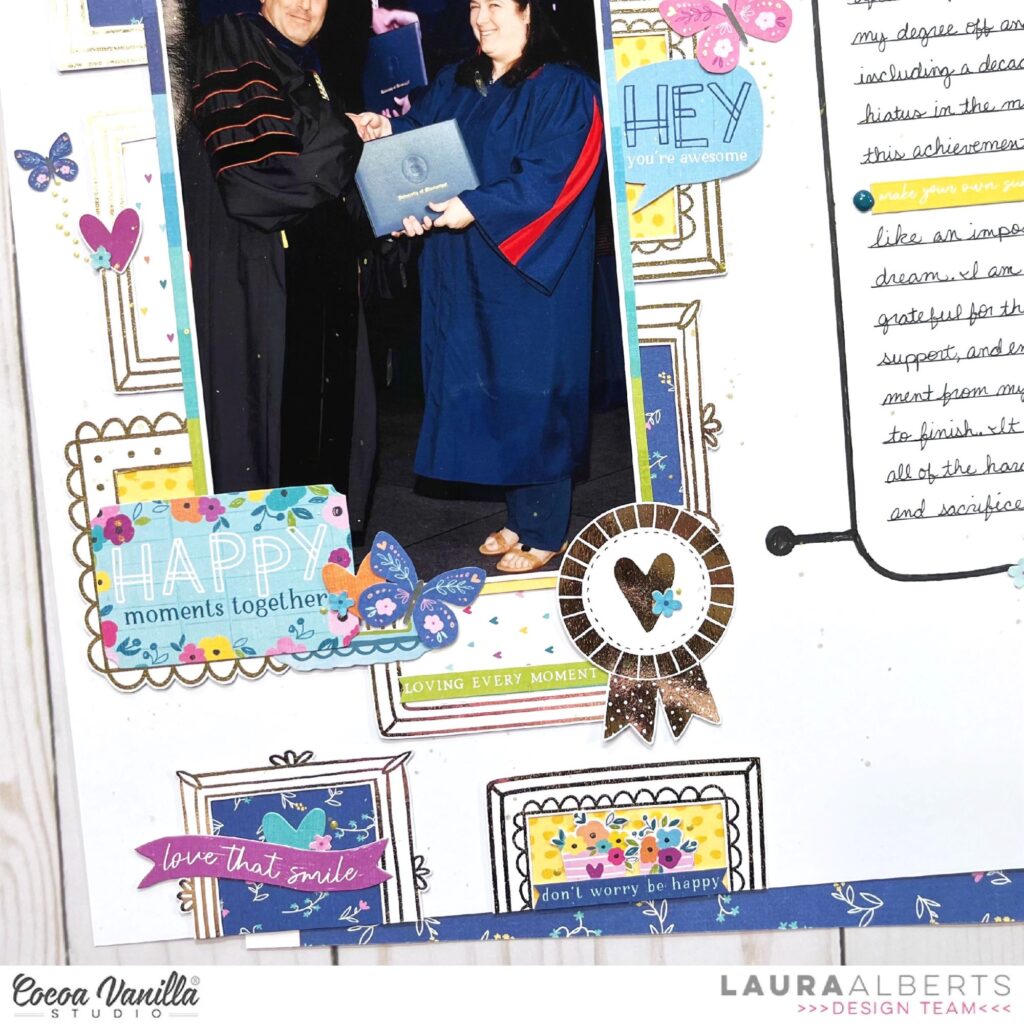
I then matted my photo on the gorgeous Sunshine Lollipops patterned paper to help it stand out and tie together the main colors I chose from Happy Days to incorporate into my layout. Then, the fun part! I added clusters of fussy cut icons and ephemera pieces to create clusters in and around my frames. Puffy stickers and Nuvo drops added the detailing to finish them off.
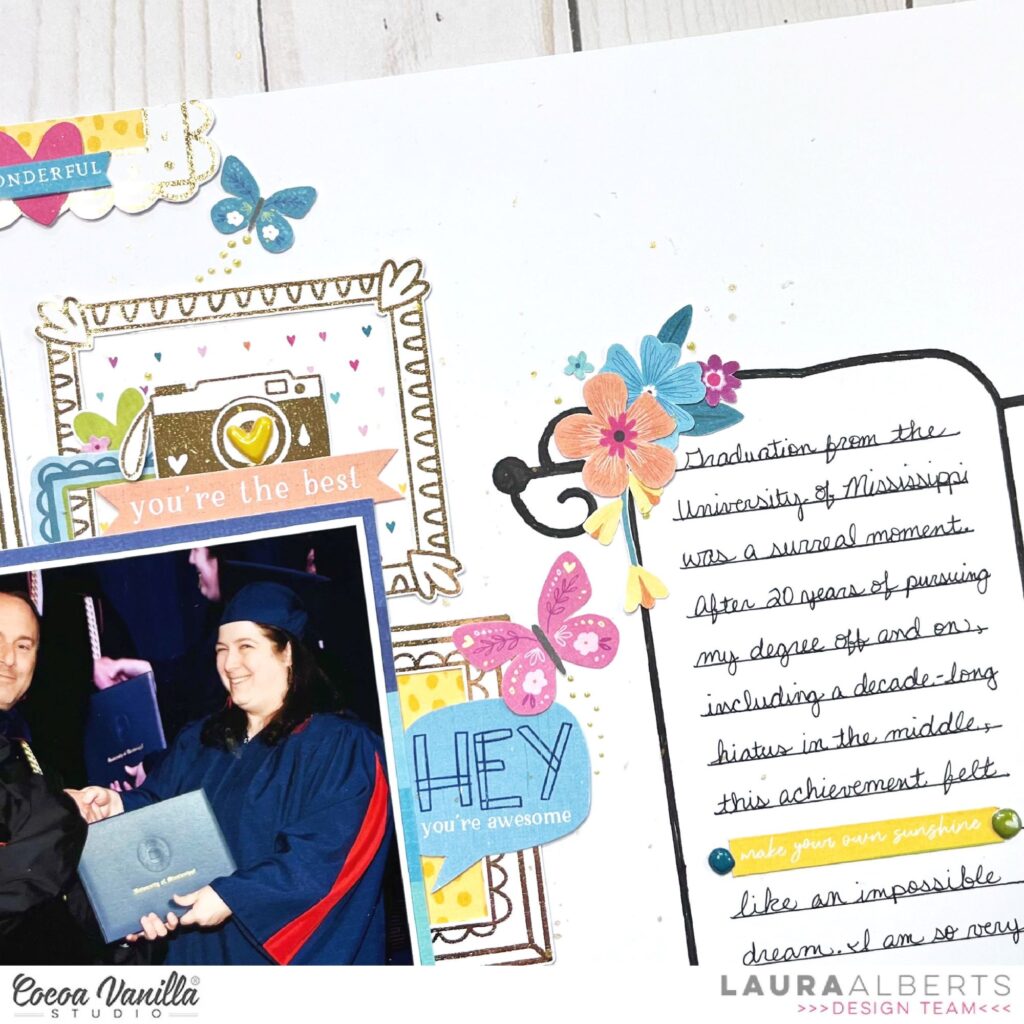
For my journaling, I used a journaling stencil to create this lovely scroll design to hold a large block of journaling that imitates the feel of a diploma with it’s elaborate design. Such a fun addition and a great way to include a large block of journaling in a way that doesn’t detract from the photo!
I hope this layout inspires you to have a play with your frames from the Happy Days collection as well as to try some creative journaling techniques! To see how “Happy Moments Together” was created, check out the process video below:
Hello crafty Friends. It’s Anna here with my second June post. This one is related to the first post, where I shared with you four cards for the teachers of my daughter. I also made matching notebook to go with one of the cards, using the same colorful and pretty “Happy days” collection.
As always I made it from scratch, starting with the covers, through all the pages and connected everything with a transparent, plastic spring. My covers are cut from the white cardboard and wrapped with blue cardstock. You can use pattern papers for this purpose too but it would require using up two the same ones from my precious pile and I wasn’t ready to say good bye to them. That’s why I chose blue cardstock.
Covers are decorated with beautiful rainbow pattern called “Lollipops”, both on the front and on the back. I added this fun texture of stitches using jagger. You can but it very cheap in sewing stores or departments. As this notebook will be used frequently, I couldn’t add too many embellishments to the cover. They would fall out easily and it would be hard to write on the left sides of paper. I picked few pieces from Ephemera Pack and few flowers from Floral Ephemera Pack and glued them down.
Inner covers are decorated with filled with words “Definituve” paper. Back cover also got a useful pocket for any loose pieces of paper or keepsakes. Notebook carry 120 sheets of checkered paper and few decorative dividers. Those dividers are made with A5 Paper Stack as they are just a perfect size!
Each one is also decorated with ephemera pieces and stickers from 6*12 Sticker Sheet. I even added stickers to some of the pages to make them prettier. First divider could be a little bit bulkier so I also added “My days” wording with Chipboard Titles.
With all the elements ready, I could use my old but still good Cinch machine to bind everything together. I could use metal wire but I chose plastic spring instead. They are both equally good. I just liked the transparent look better.
I hope my little gift will bring joy to my kid’s favorite teacher. Now it’s time for two months long vacation! Summer is in full swing and we can’t wait to soak up the sun.
Thank you so much for spending your precious time with me. Sending you lot’s of hugs.
Welcome to the Cocoa Vanilla Studio blog. It’s Josefine here with a new scrapbook layout created with the amazing ‘Happy Days’ collection. In this blog post, I wanted to highlight the die-cuts ephemera. I chose a white cardstock background so that my heart die-cut frame gets all the attention it deserves.
First, I used my Cricut electric cutting machine to cut out a large heart in the center of the layout. I enlarged a black and white photo of my husband and me in Paris and adhered it behind the heart using double-sided adhesive tape. Now, let the decorating begin…
I love all the ephemera die-cuts and matching them by color, pattern, and theme. First, I select which die-cuts I want to use, and then I arrange them in a heart shape around the photo. Once everything is in place, I use 3D foam to secure the ephemera die-cuts. I’m super happy with the result, and the colored die-cut ephemera stand out beautifully against the black and white photo. It creates a explosion of color around the photo.
The small puffy hearts are so adorable that I give them a special place around the frame. For the title, I use the gorgeous colored mini alphabet and choose the title ‘Good Times,’ which is fitting because I thoroughly enjoyed our trip together. I also select a few word strips, add a thin black line to the edge using my fineliner, and place them on top of the die-cuts.
I hope I’ve inspired you with this layout and look forward to seeing you again on the blog for new inspiration! Have a wonderful and creative day!
Hey Crafty friends it’s Michelle here today. I’ve created a layout using the wonderful Happy Days Collection for part of my annual scrapbooking series documenting my daughters current loves.. To keep a cohesive look to this project I make all the pages in the same design, just switching out the collections to suit the feelings of that year. Leila allowed the use of pink for this years layout, which is a big thing compared to the previous years.. Lets take a look
The bonus of creating one of these layouts each year is that it comes together so fast. The design of the layout is already pre-decided, I just need to select the papers, cut them to size, machine stitch around the edges and adhere to the layout. This years layout features pretty papers from the A5 paper stack as the smaller scale print works well when combined together with multiple patterns. Each square is cut to roughly 3 3/4 inch and set around the edges of the layout with white space in the opposite diagonal corners.
I added a 3×5 size photo to another A5 pattern paper and adhered to the middle right side of the layout, overlapping some of the background pattern papers. I added the list of favourites to the left of the photo using a piece of notepaper adhered to some pattern paper to create a ‘clipboard’. I used ephemera pieces to create the title and my own handwriting to write the list of loves
I add minimal embellishments to these layouts as I really want the list of faves to stand out with each one I create. For this layout I made 2 main embellishment clusters in the top and bottom corners, diagonally across from each other. Both contain fussy cut florals from the LUSH BLOOMS paper, ephemera pieces, butterflies from the FLUTTERBY paper, punched mini flowers and some mini puffy stickers.
Theres also a couple of punched flowers in the same pattern paper as the bottom left corner, just for a little hidden dimension
Heres a final look at the entire layout, plus a link to last years post that shares all the previous years layouts can be found HERE ..
I really enjoy creating these pages each year, and look forward to seeing them evolve each and every year. Theres a couple of years that I want to go back and create pages for that were before the times I started this project so I hope to share those with you all one day in the future. Do you document your kids favourite things each year? Please share in the Community group if you do, we all love to see different ideas on how people document these kinds of things, and It really is fun to look back on
Well thats all from me today, thank you so much for stopping by!
Hi everyone! This is Niki (@nikiclairecreates) and I’m delighted to be back Guest Designing with my second layout and process video using Happy Days. I am obsessed with those gorgeous words on the Definitive paper and have spent some time fussy cutting a lot of them out. I wanted to make a feature out of them on this layout.
I chose the purple side of Flutterby paper as my background, which I paired with the pink strawberry side of Lush Blooms paper. I trimmed these both down and distressed the edges, then stuck them together offset slightly. I then positioned these onto a sheet of white card.
I mounted my photo onto a darker patterned paper and added that to my layout together with a gold fussy cut frame from the Specialty Foiled paper. I then arranged all the fussy cut words around the photo, cascading down from top to bottom. I raised them all on foam pads to give them some dimension.
I then added some of the Floral Ephemera to the bottom corner of my photo, and another cluster in the top right corner. I chose mostly pinks and purple flowers but also added a few yellow ones. Purple and yellow are opposite each other on the colour wheel, so are therefore ‘contrasting colours’. Contrasting colours work best when there is a lot of one colour with a small amount of the contrasting colours and this is exactly what I did with the yellow – just a couple of small pops of it in amongst all the beautiful purple.
I added another tiny cluster in the bottom right corner of the layout using some of the Die Cut Ephemera. I added some butterflies and handwrote my journaling under all the words. I also embellished the words with lots of Puffy Heart Stickers.
I finished off with a few splatters of white paint over the top of the embellishment clusters! I absolutely love how this turned out, I adore purple as a colour so love how this looks as a background! Here is the link to my process video for this layout if you would like to watch along: https://youtu.be/2ygAZcQKt0c
Thanks so much for joining me today and happy scrapping!
It’s Tarrah back with you and today I am sharing a new layout featuring the gorgeous Happy Days collection!
For this project I was given the assignment of using patterned paper for my background and chose the ‘B’ side of the ‘Feel Good patterned paper’ to document a photo of my Mum and I taken a few years ago.
I chose a title cut file from CUT to YOU to add to my layout, cutting it from white cardstock. I then backed the open letters in the word ‘Happy’ with various papers from the A5 paper stack. I added craft foam to the underneath of the cut file and then adhered it to the background. I love how the white cardstock is a big contrast to the yellow background, this really helps the elements pop off the yellow patterned paper. I made sure to only use a small amount of adhesive so that things could be tucked underneath the cut file.
Above the cut file I tucked in my photo, I first layered one of the papers from the A5 paper stack under the photo, I also tucked in two of the stickers from the Accessory Sticker Sheet and tucked them in either side of the photo. I cut out some phrases from another sheet of the ‘Feel Good patterned paper’ and adhered one on top of the photo and the other on top of the cut file. I love to layer embellishments on top of cut files to add some more interest.
At the bottom of the cut file, I adhered the long paper strip with the tabs on it to also from the Feel Good patterned paper, I love how that looks like the cut file is sitting on a shelf of sorts. This was a great opportunity to add some of the small phrase stickers from the Accessory Sticker Sheet to the strip. I cut out the Choose Happy journal card also from the Feel Good paper and adhered it to the right of the photo, I then added some quotes about being happy to it.
Some of the smaller embellishments I added to my page are the Chipboard hearts, the gold foil butterflies cut out of the specialty paper, puffy hearts, ephemera, enamel hearts and some more accessory stickers. I love the dimension that my layout has and I love how it turned out too. Lastly I stamped the date stamp as I always do on my layouts. Don’t be afraid to use a busy patterned paper as your starting point for your page, you can still keep the focus on the photo by using clever techniques to draw your eye to the photo.
Thank you so much for stopping by the Cocoa Vanilla blog today! I hope you enjoyed reading about how I created my layout as much as I enjoyed creating it!
Hello CVS crafty friends, tomorrow I leave for Europe and I am just a little excited. After Australia being locked down for over two years due to COVID this will be out first overseas trip! This inspired my layout, Time to Travel, and Italy is one of our countries we will be visiting. I have used the new and beautiful Happy Days collection.
I chose a 8.5×11 inch layout, as this is the size I always use for my travel layouts. I used Rainbow Bright (reverse side) as my base paper, the coloured tiny hearts perfect as a background paper. I next added two 1 inch strips of Feel Good paper, the yellow plaid adding a bright contrast.
I used a cut file from the Silhouette Design store which is perfect! I cut the title in a pink dot paper from the A5 Paper Pad. I used Definitive paper for the map marker icon. I used Sunshine Lollipops paper to cut the airplanes so they had varying colours showing which stops them looking flat.
I created two floral and embellishment clusters, one next to my photo and the other on the opposite side, I added foam tape to some of the elements to add dimension. I added puffy stickers to some of the flower centres and then hearts around the clusters.
You can see here I used the mini puffy alphabet stickers to add my destination Italy. Here I added floral die cuts over my photos which is a great way to make no people photos a little more eye catching.
I lastly created an embellishment cluster at the bottom right of my page using the fab camera from the die cut ephemera pack and finished off with some phrase sentiments from the accessory sticker sheet and a few more puffy stickers.
So there you have page 1 of 2023 Europe adventure scrapped! You certainly do not need a specific travel themed collection to create travel layouts.
It’s Sophie with you today and a beautiful and simple layout to share, created with the Happy Days collection!
I went for a grid design and selected a few patterned papers from the A5 paper stack, and used a scalloped circle die from my stash to cut 6 scalloped circles.
I aligned them in two horizontal lines on a white background cardstock.
I cut three photos of my dog Fiona in a circular shape and placed them on three of the circles.
I mounted everything on adhesive foam.
My title is a mix of the Accessory Stickers, Mini Puffy Alphabet stickers and an ephemera.
I embellished the page in a color block manner with floral die cuts, fussy cut flowers and butterflies, a few accessory stickers and a paper bow.
Here are more close-ups:
Honestly, this page was very simple and easy to make! I love the result and hope you do too!
Hey everyone and welcome back for another share from me combining the new ‘Happy Days’collection mixed with the older ‘Sunkissed’ collection. These two lines combine beautifully, so if you have them both, have a go and mxing them together! Here is my page…
My jumping off point was the rainbow paper from Happy Days called ‘Sunshine Lollipops’. I cut two 2 inch strips and adhered them down to each side of my page. To add some interest I also tore some of the ‘Feel Good‘ paper and had it popping out from underneath.
I have 2 photos on my page which I double matted using papers from the A5 paper stack from the Sunkissed collection.
Next, I worked on my title. I used a cutfile from Peartree Cutfiles. Instead of backing it with patterned papers I decided to use my distress oxides in matching colours to create an ombre effect.. I love how this turned out. Backing the cutfile onto some black cardstock really makes the title pop off the page. I also added some blue oxide behind my title.
Once I decided where I wanted my photos to go, the white cardstock needed some colour so I used a stencil to add some yellow suns to my page.
All of my embellishments come from the Sunkissed collection.
Next to the left photo I added a palm tree and flip flops from the ephemera packand a starfish puffy sticker. On the bottom right there is a pineapple and flower puffy sticker.
Above my photos I have used a cloud, rainbow and word tab from the ephemera packand a sticker from the Accessory Sticker Sheet.
To finish my page, I have added some heart puffy stickers and some of the word phrases from the Accessory Sticker Sheet.
I hope you have enjoyed my page today, and have found some inspiration!
Hey y’all! Laura Alberts back again with some bright and colorful handmade cards featuring the Happy Days collection. I absolutely adore the puffy alphas in this collection and find it super easy to pair them with ephemera pieces for fun mix-and-match designs and sentiments. For the first two cards, I used papers from the A5 paper stack and frames from the ephemera pack as the base for the design, then built up from there.
For this first card, I started with a purple background and added a frame backed with striped patterned paper. The butterflies were fussy cut from the Happy Days specialty paper and one of the patterned papers in the A5 paper stack. My sentiment is simple and makes this card a versatile option for a number of events. The tiny Nuvo drops behind the butterflies creates a whimsical trail.
On the second card, I layered the frame from the ephemera pack directly onto the background and created a wreath of florals around the edge. The ephemera ribbon banner that says “the best” was a great option for my focal image on this card. I used the puffy alphas to add to the sentiment so it says “You are the best.” A clever option for a card that could be used for multiple occasions!
For the last card, I fussy cut out the banner of ribbons from the ephemera pack and layered tiny florals on top. Above the banner, I added an ephemera sentiment “happy” as well as a puffy alphas to create a simple, but effective birthday card! I especially liked dotting tiny fussy cut florals all around the sentiment on this one.
I hope these sweet cards inspire you to have a go with the puffy alphas in the Happy Days collection!