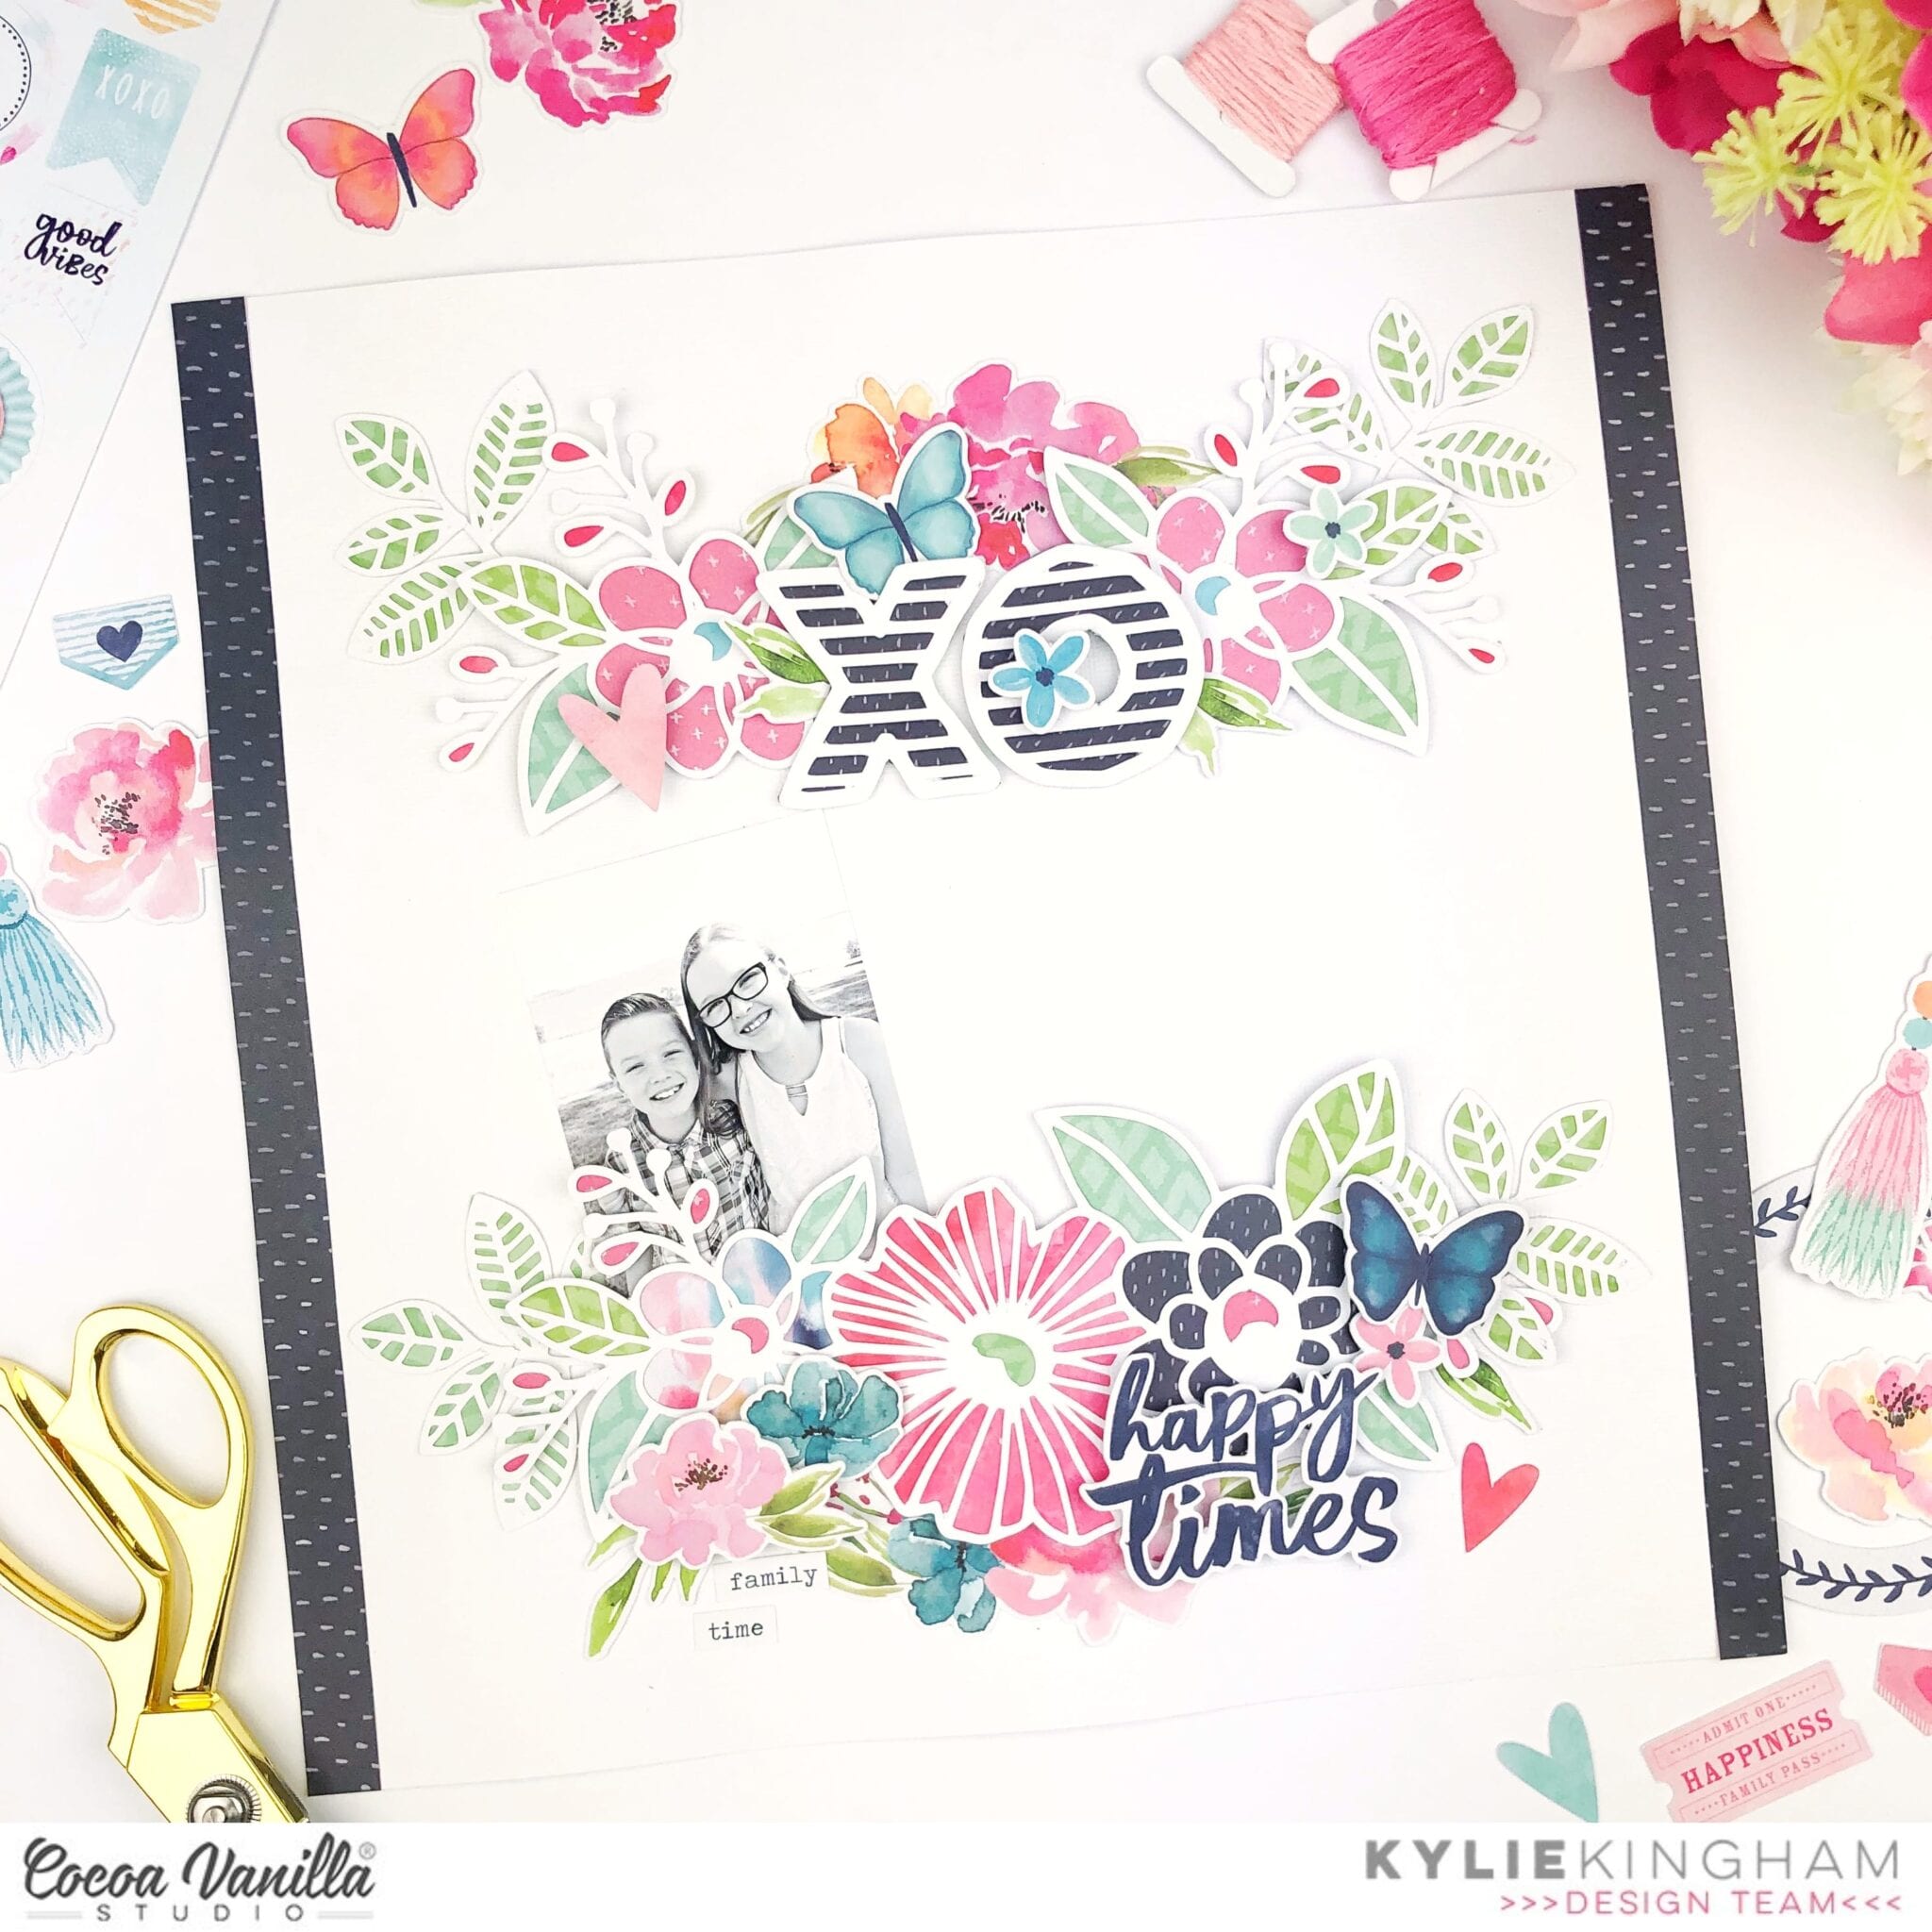
Hello lovelies! It’s Kylie back with you all today with a fun new layout. My assignment for today was to use cut files….Yay! I immediately headed to the website and found myself drawn to the ‘Colour Me Happy’ cut files. I teamed some of these with the gorgeous ‘Happiness’ collection for my layout today.
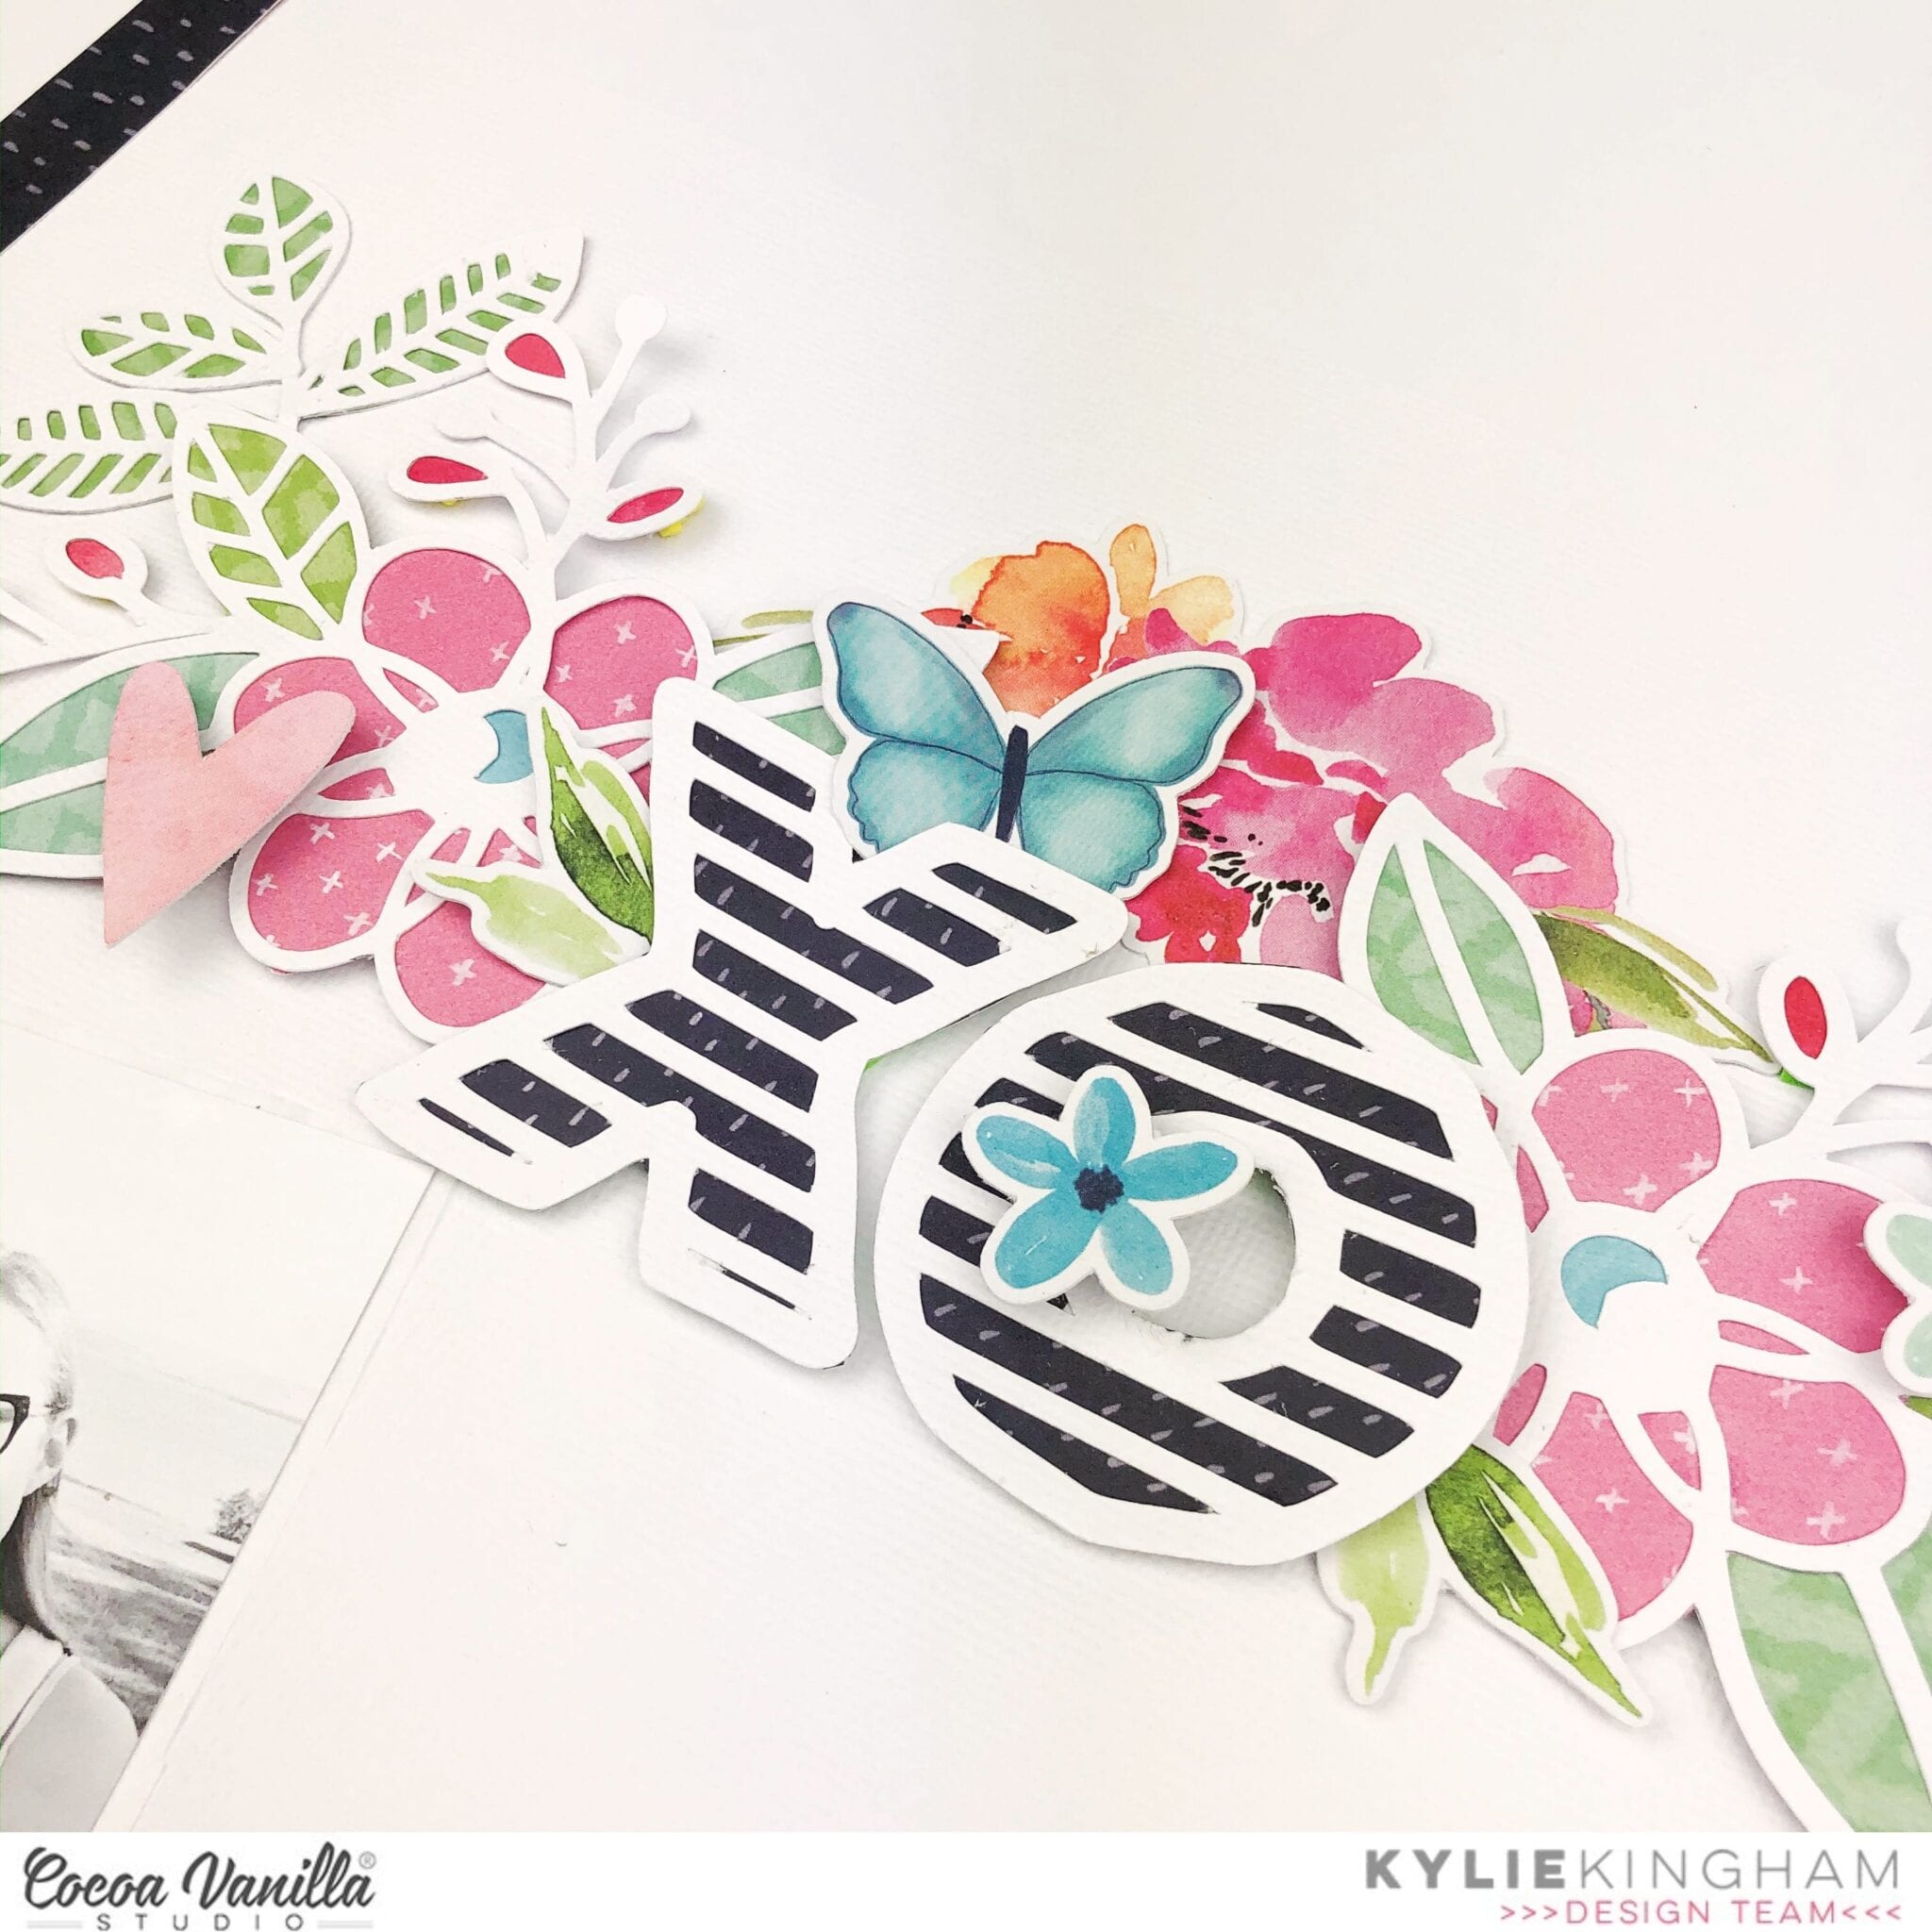
I cut some of the flower clusters from the files as well as some extra leaf bunches and the ‘XO’ letters. I wanted to work on a white background so that the colours of the papers that I backed my cut files with would really pop. With the ‘Botanical Bliss’ paper I added a 1.5cm border on both vertical edges of my layout.
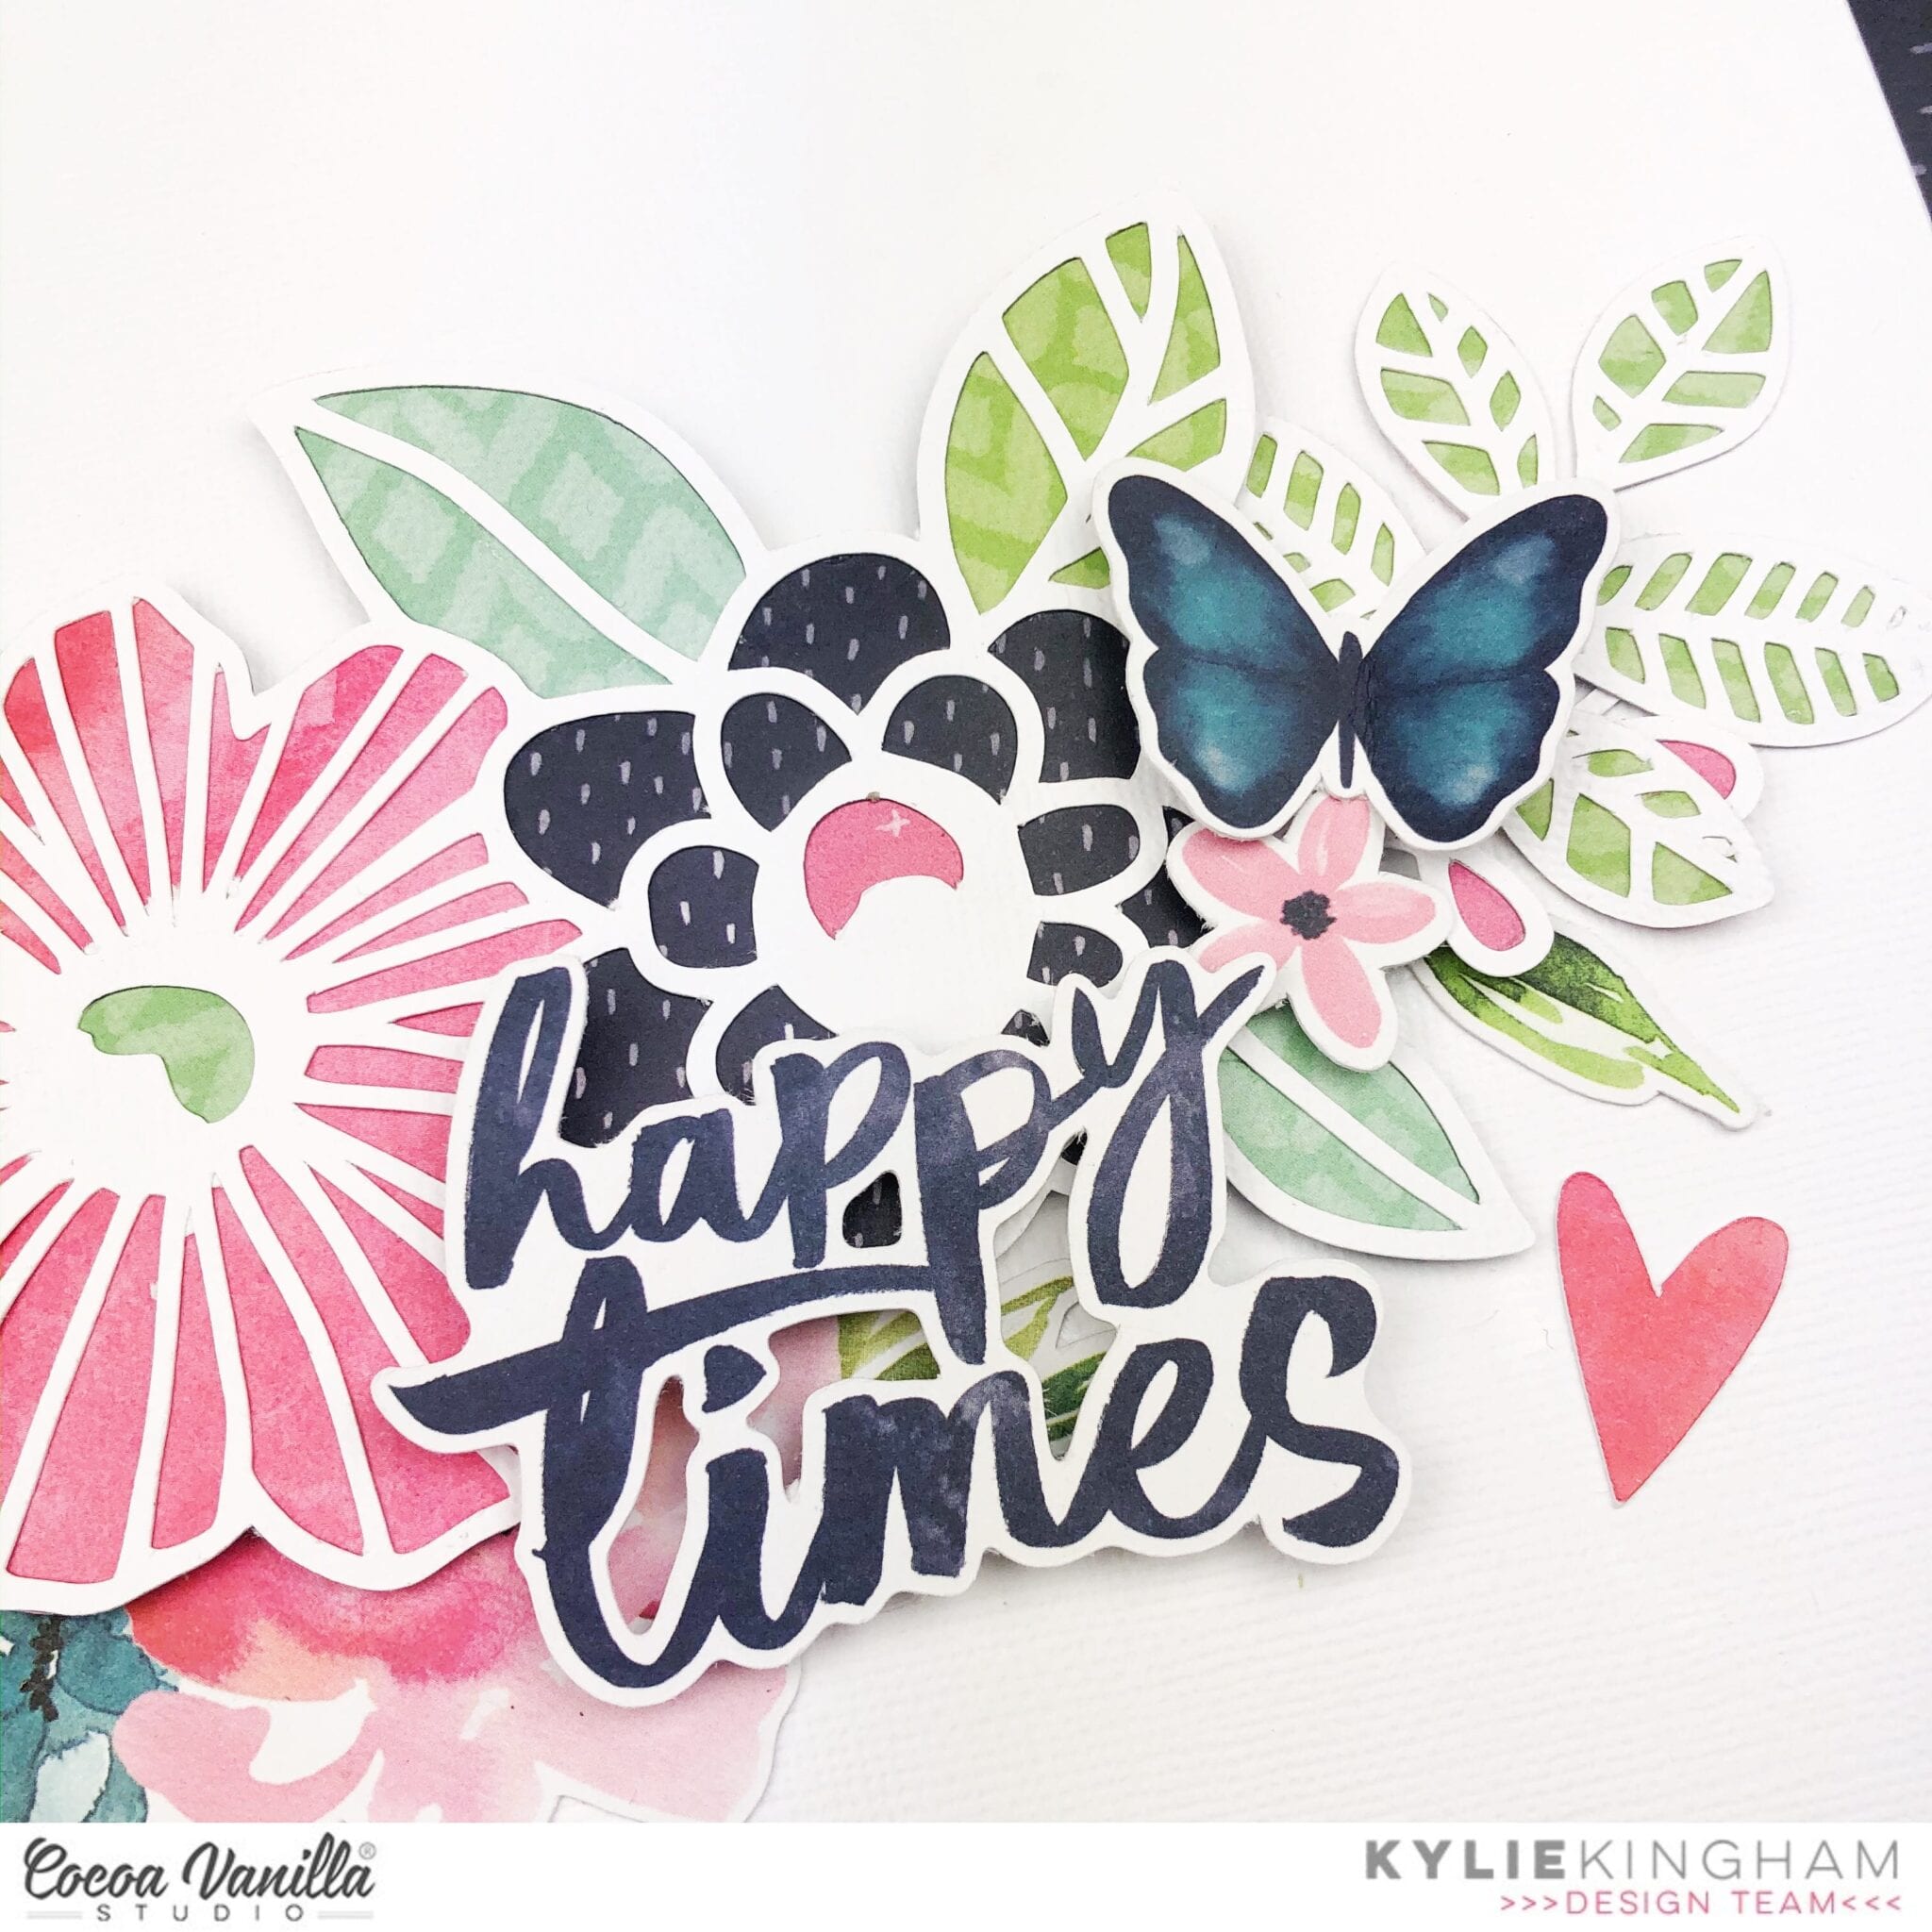
Once I had backed my cut files I began adhering them in place. I used some adhesive foam tape to back them, this way they sat up from my page with some height. I also added some extra flowers from the die cut pack with foam for dimension.
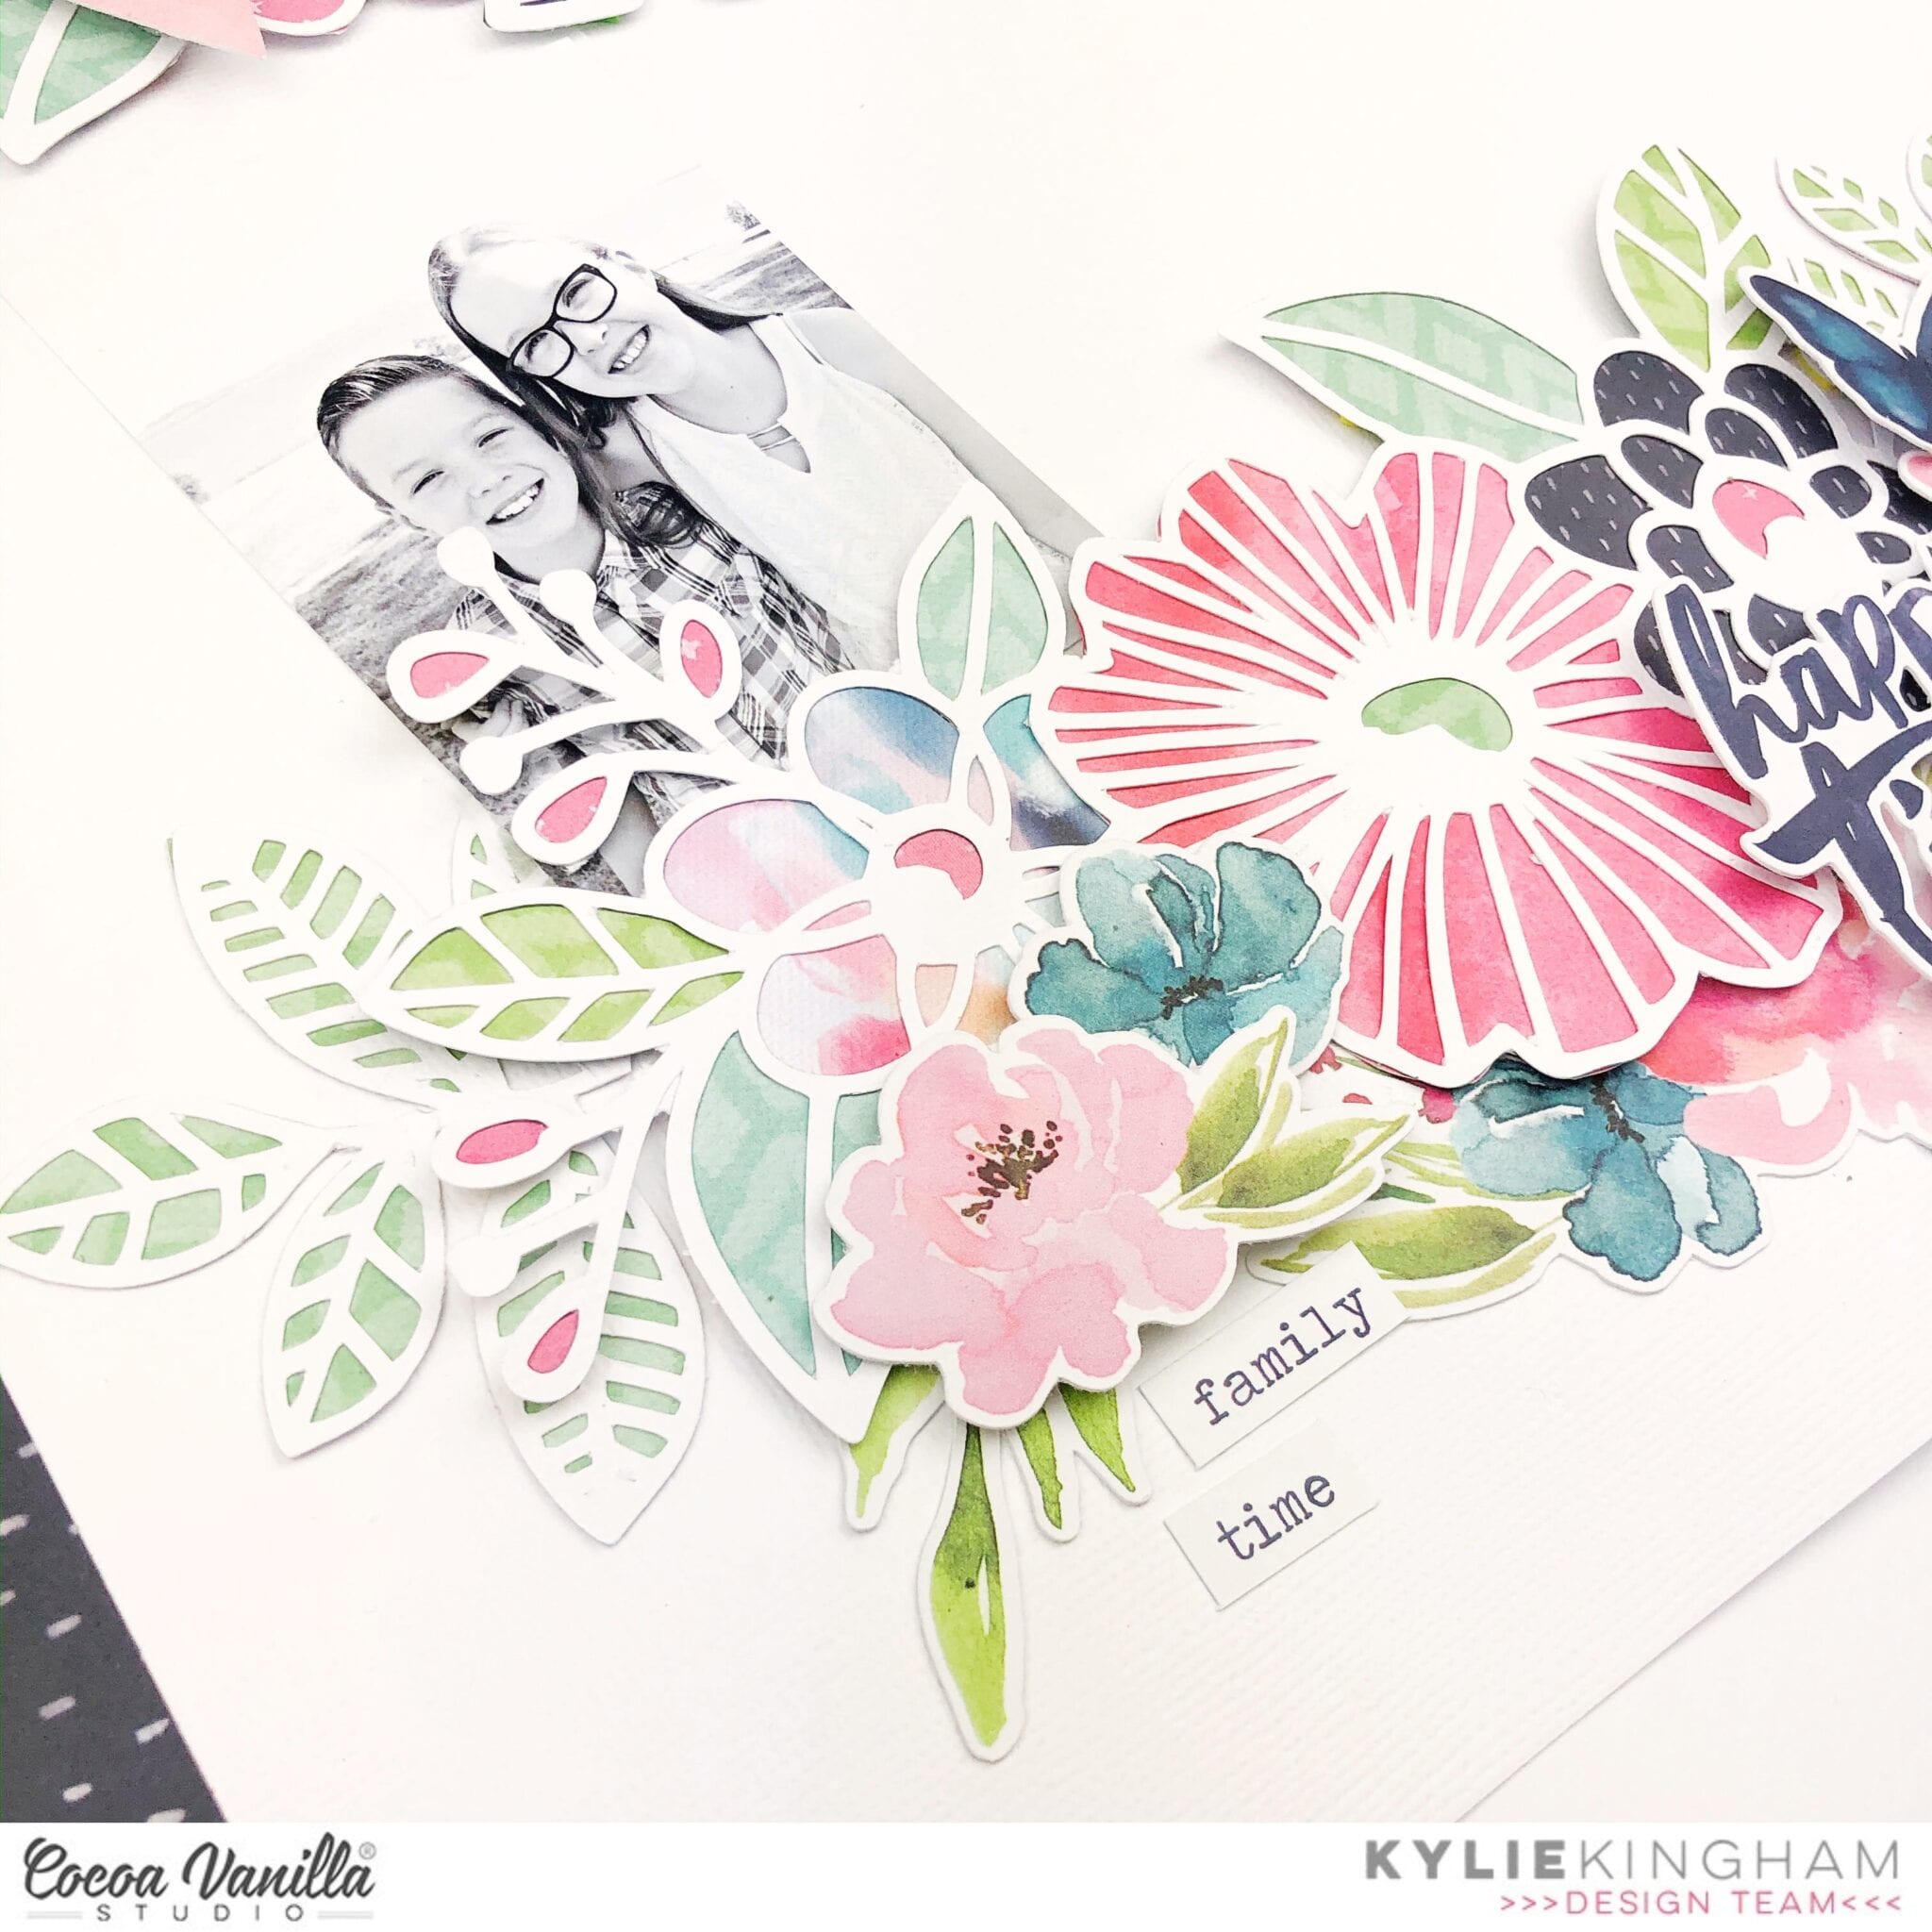
My photo was printed in black and white, and I have backed it with some white tissue paper from my stash. It was adhered flat to my page so that the floral embellishments could sit above in height for effect. Some of the typed words from the sticker sheet were used to create a small sub title phrase which completed my layout.
Thanks so much for stopping by the blog today. I hope you have enjoyed seeing my latest layout and it has given you a little inspiration.
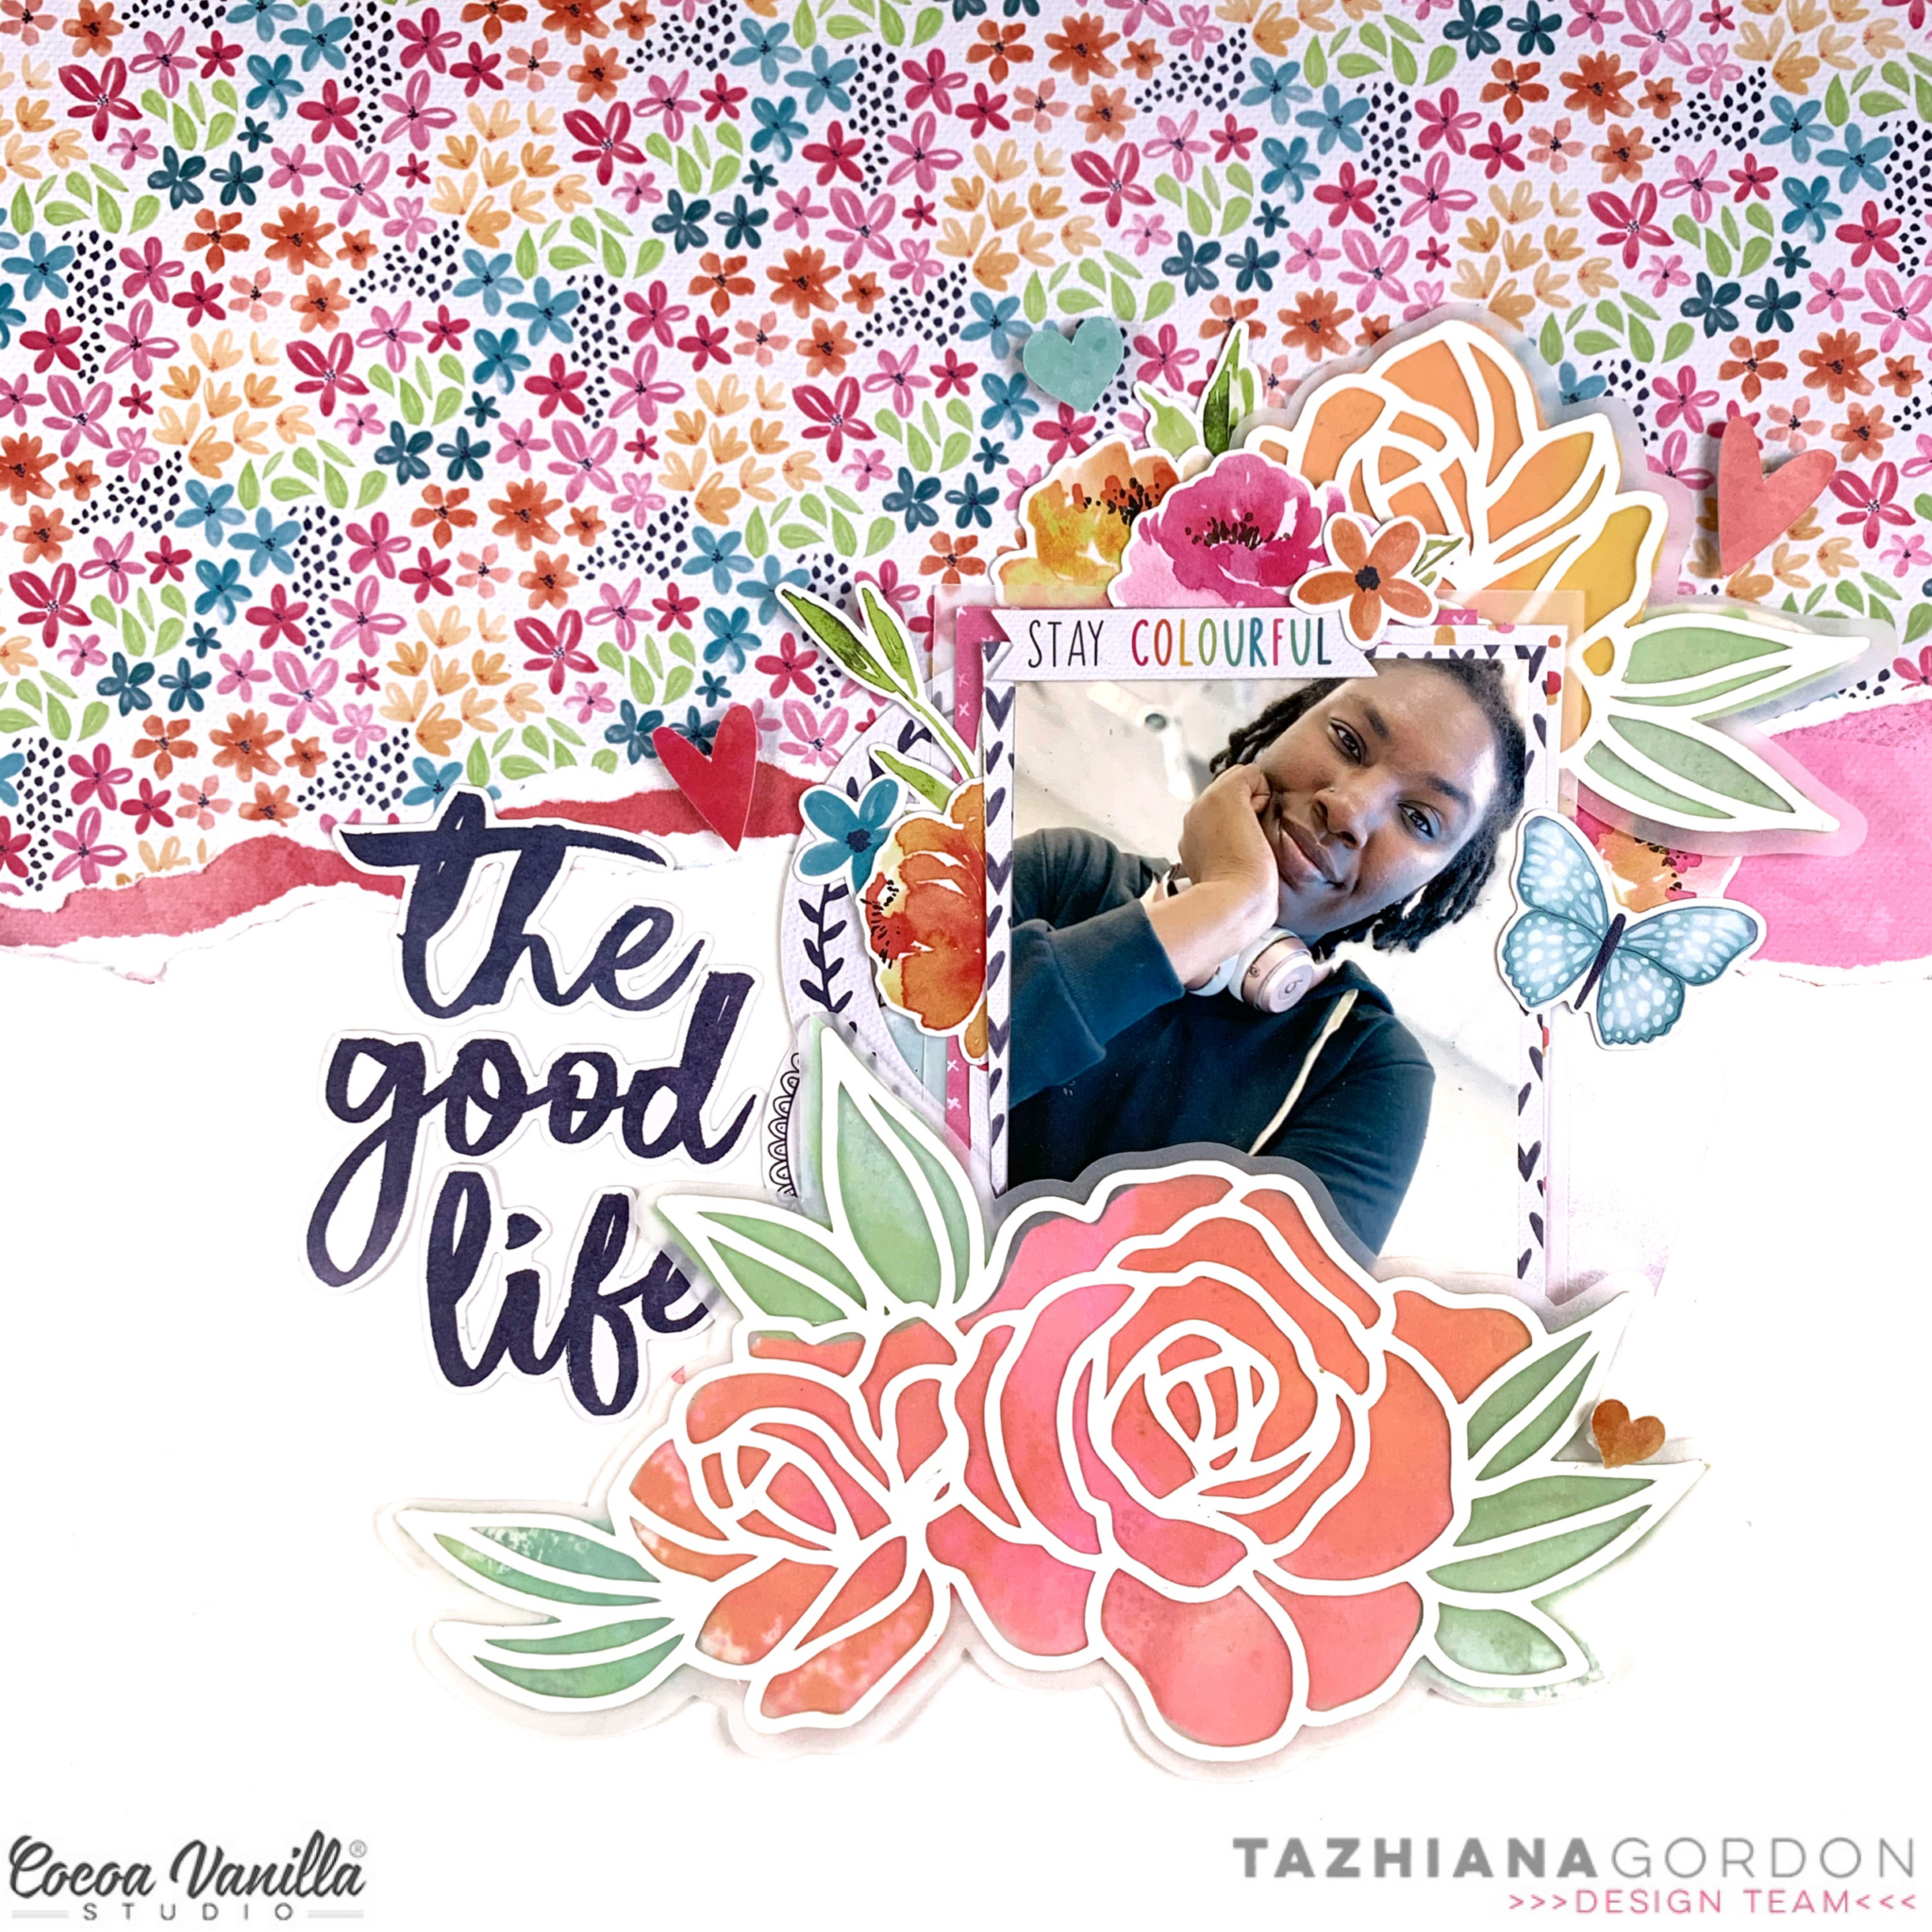
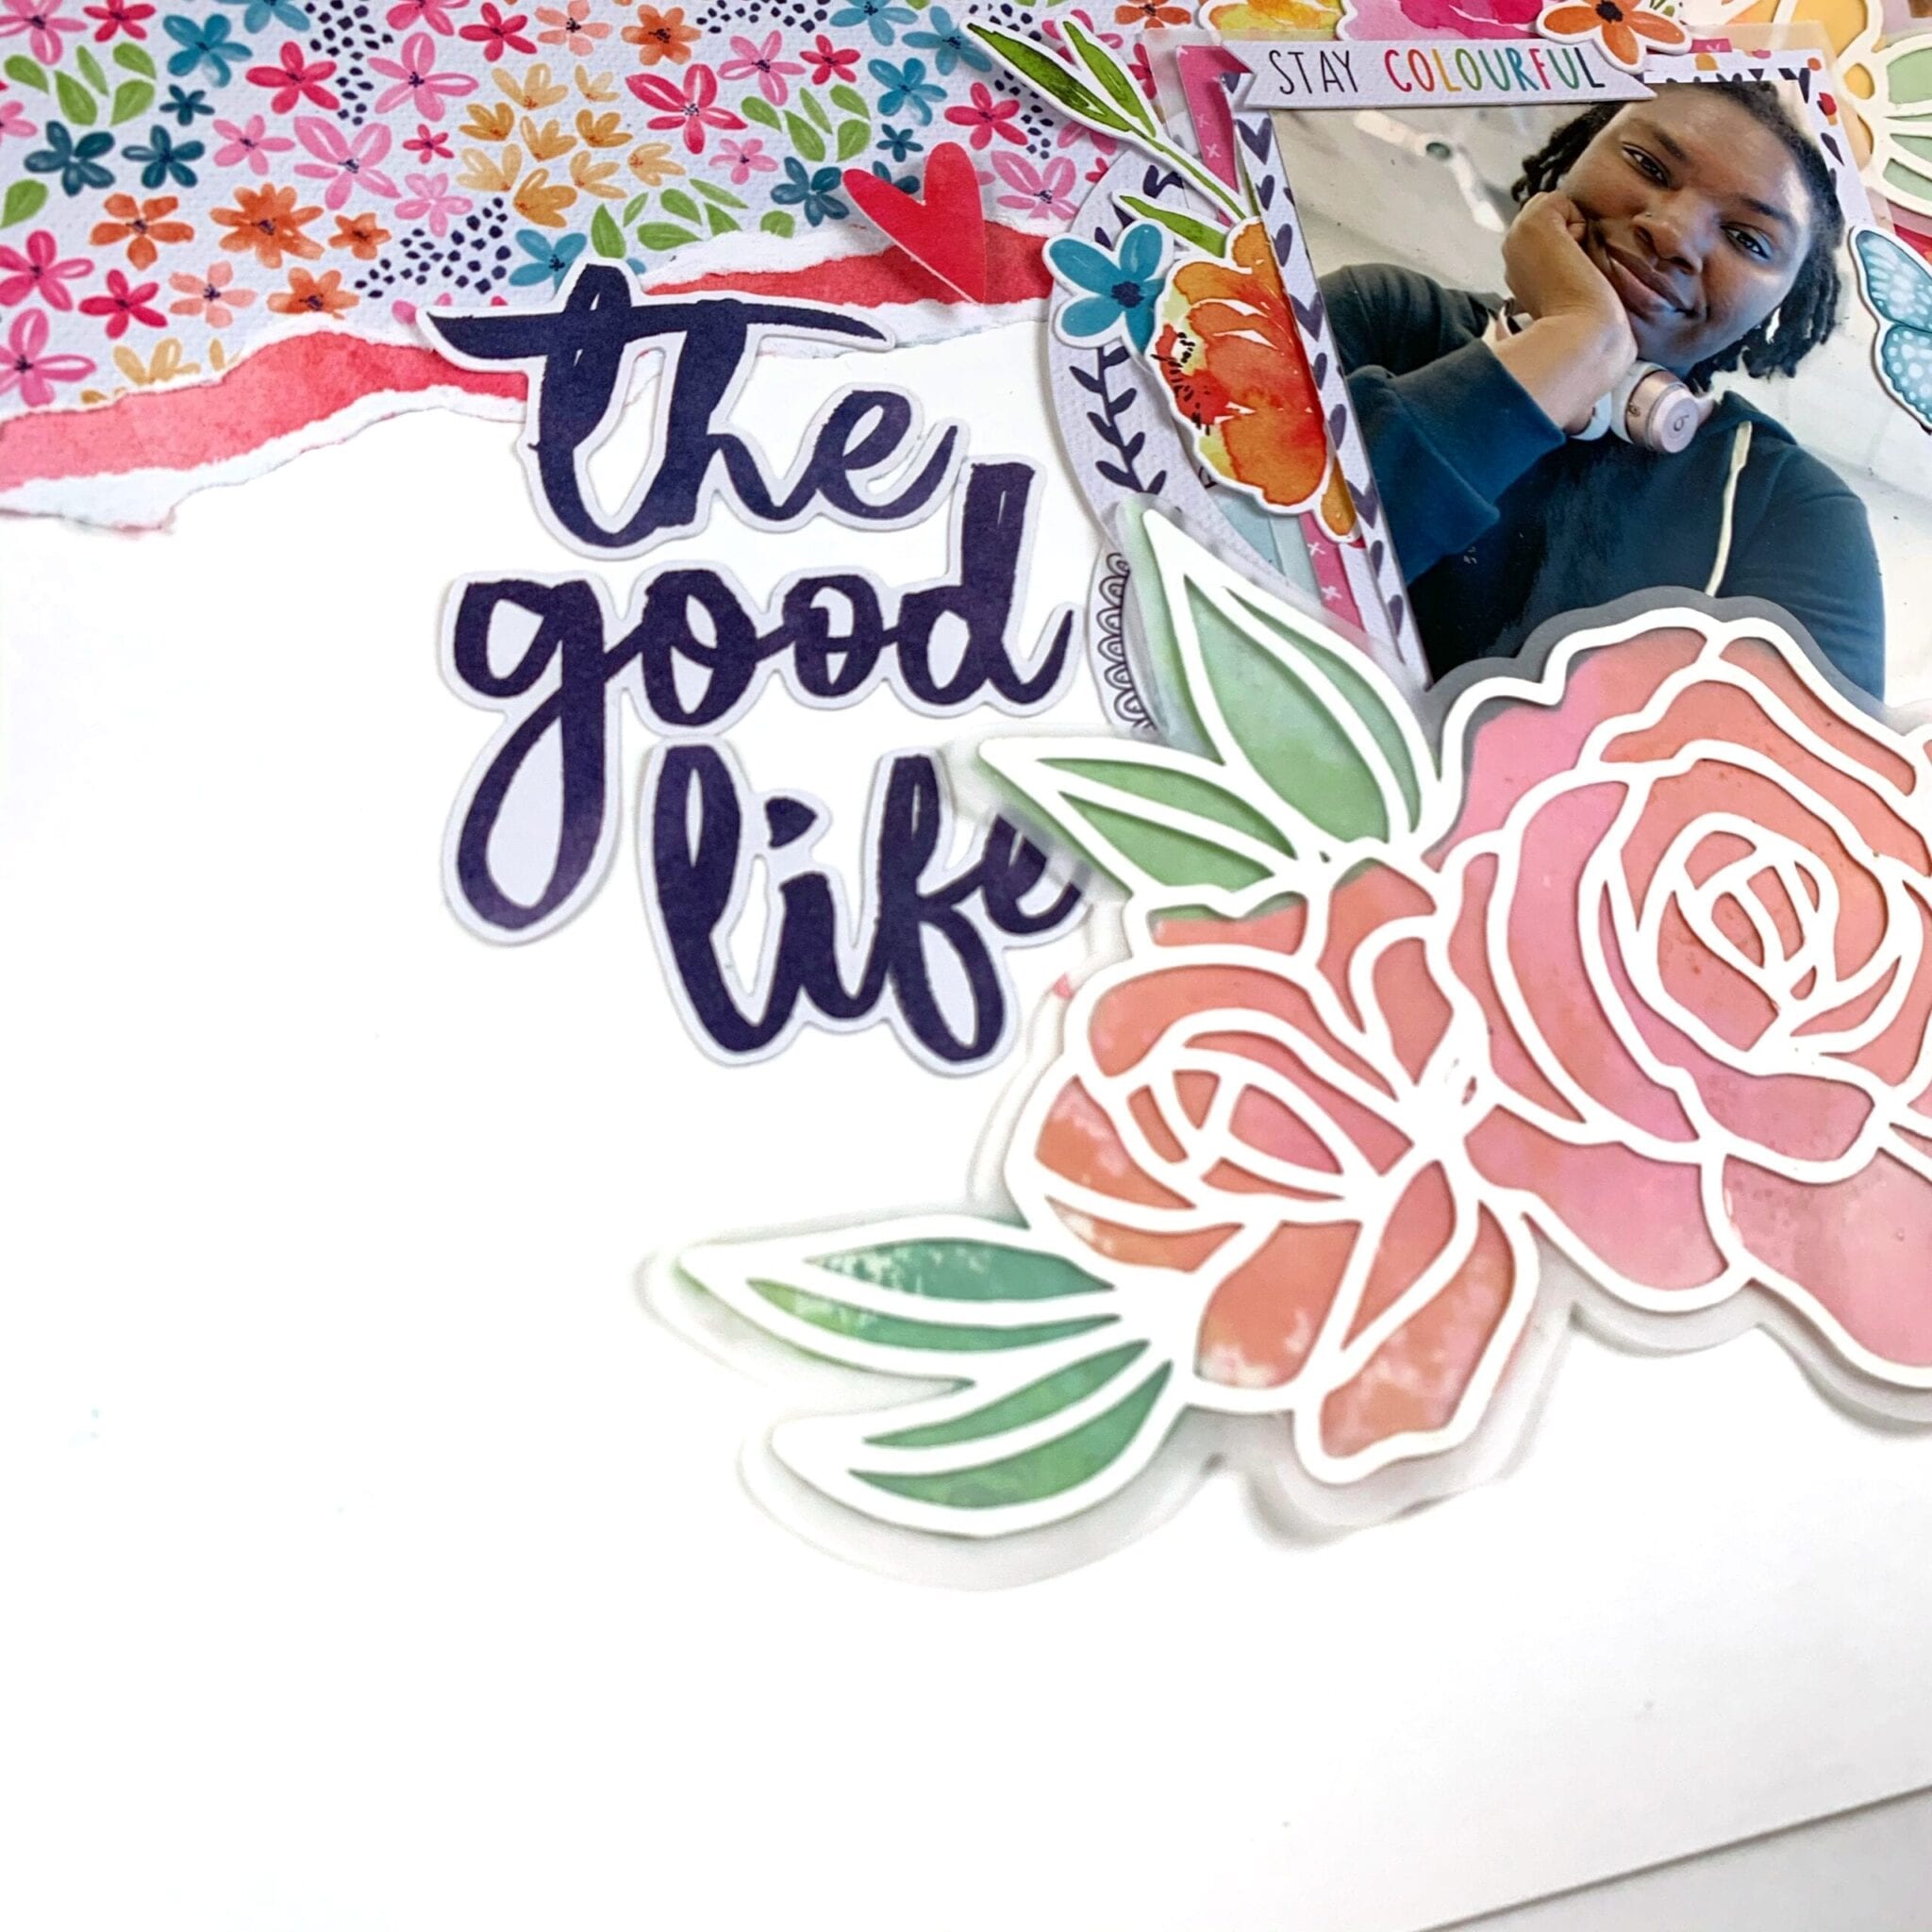
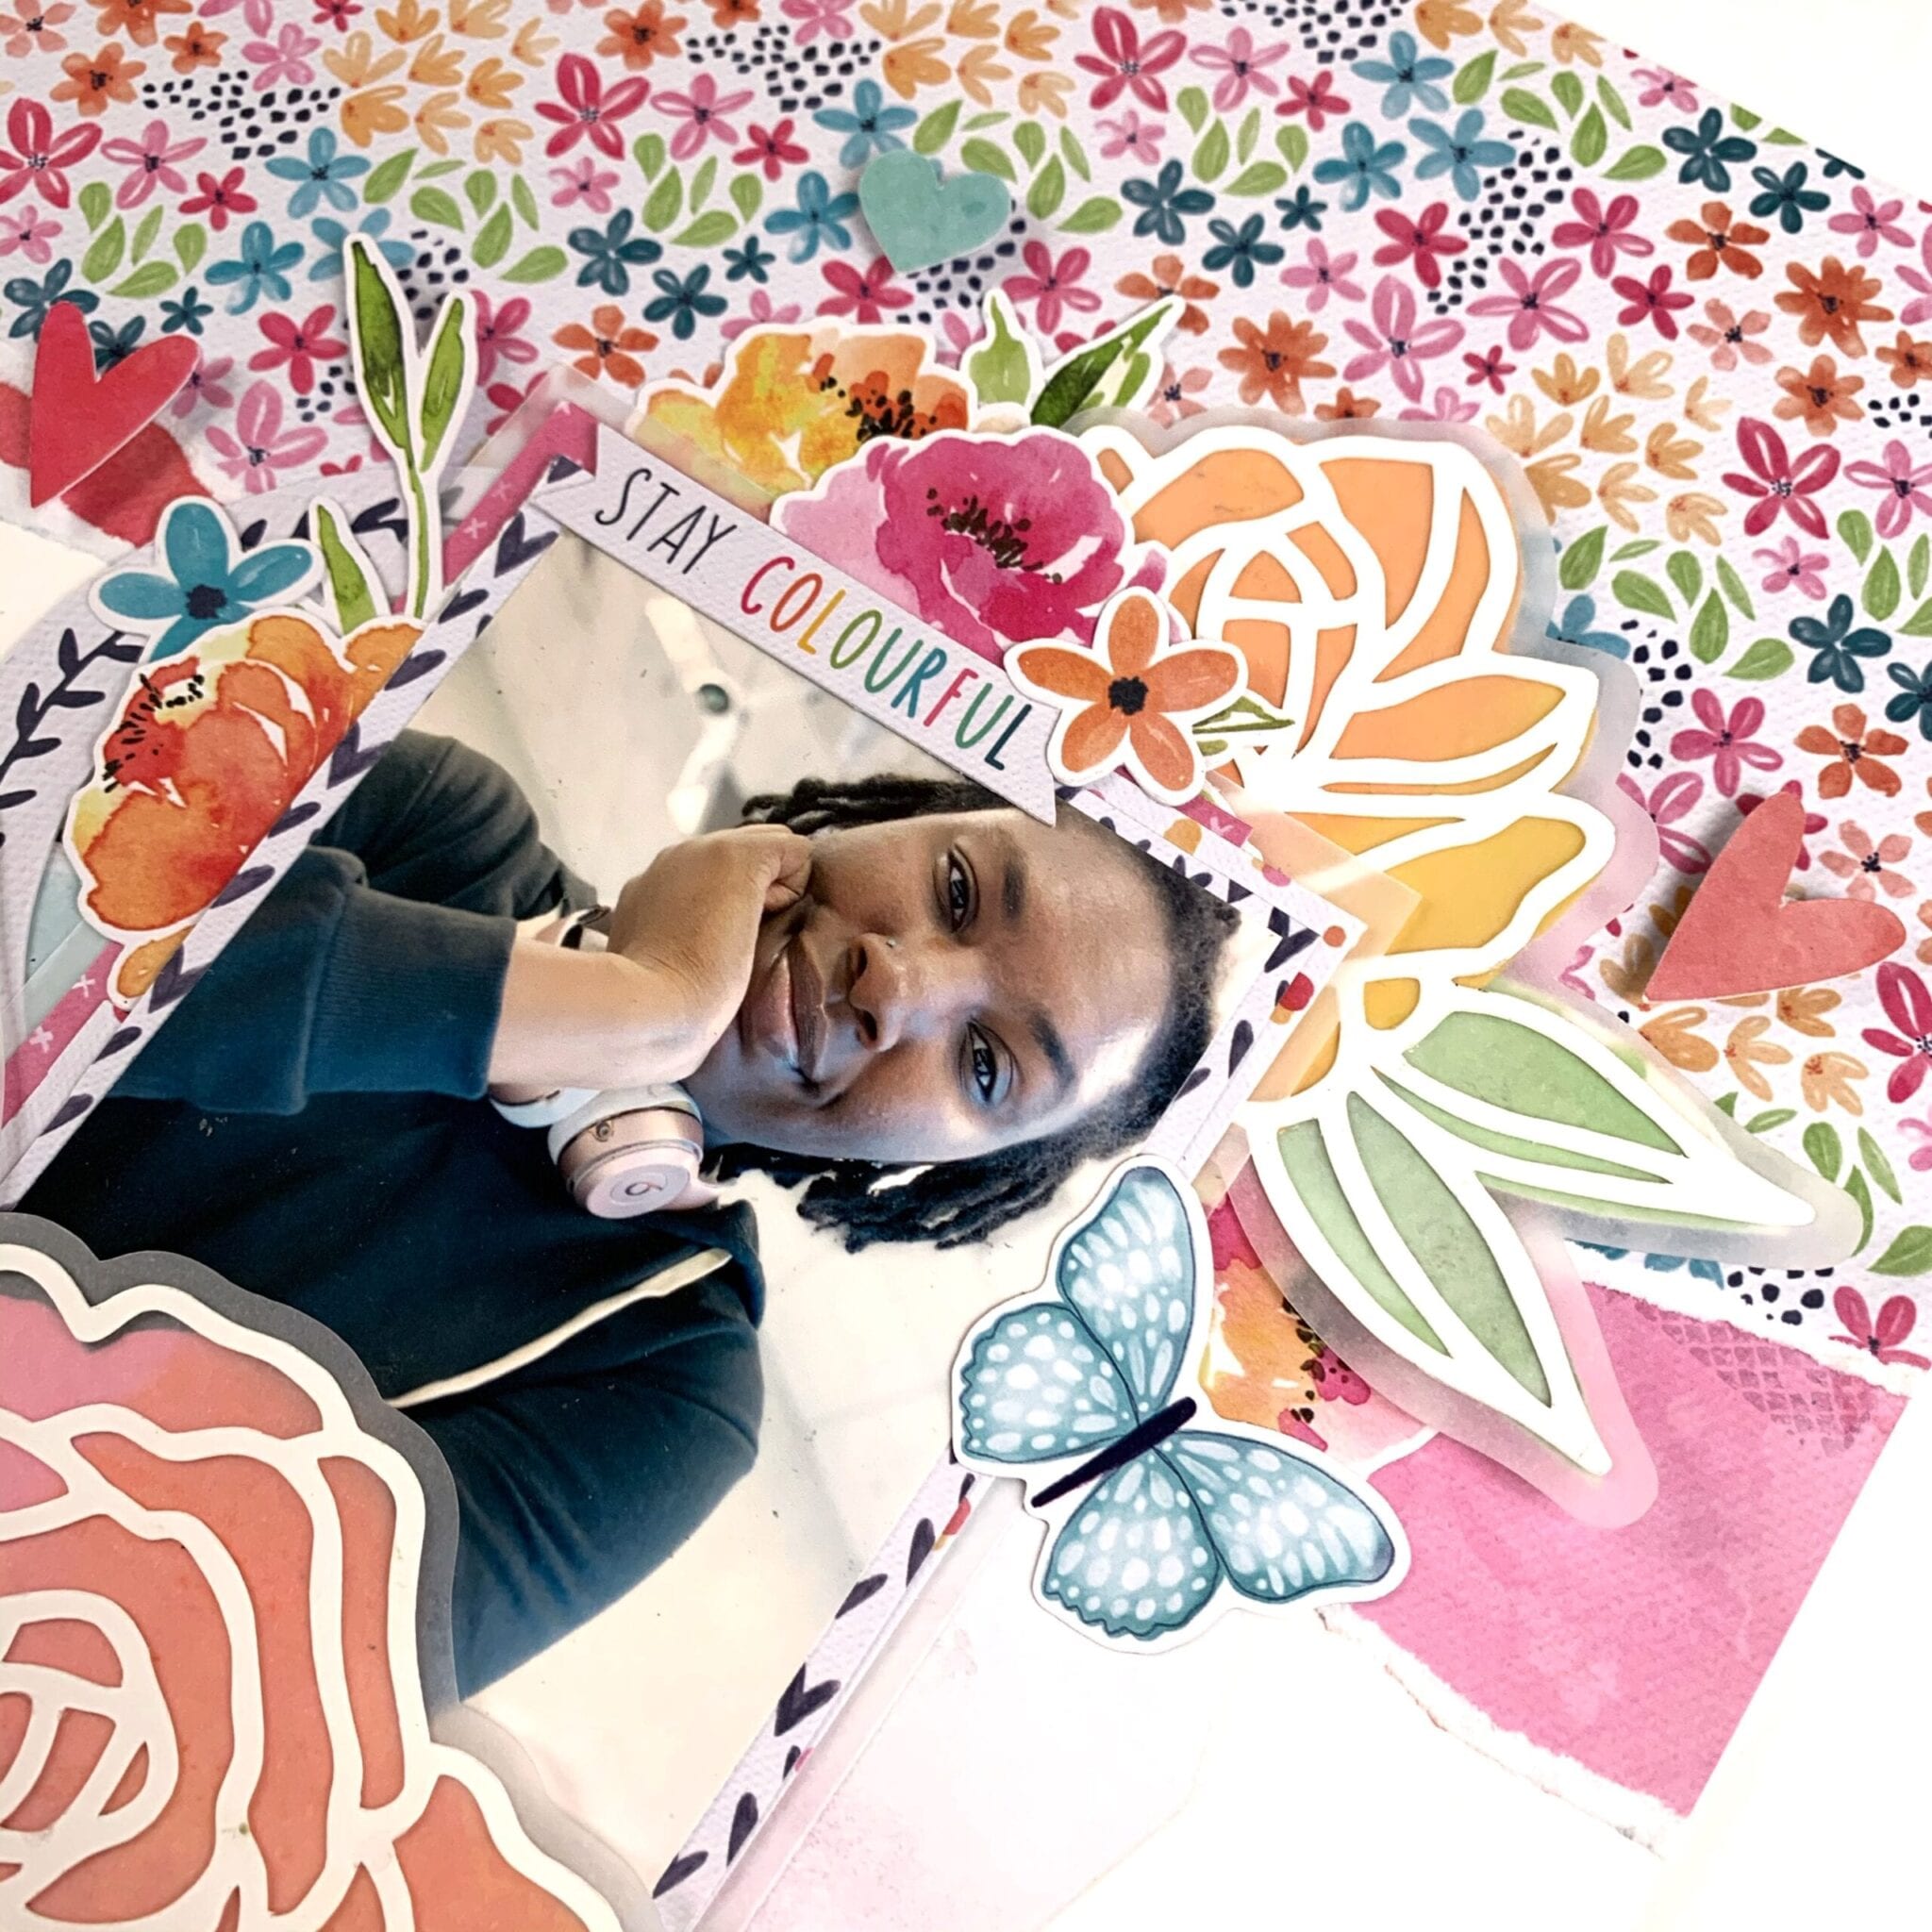
Hello Cocoa Vanilla friends, and welcome back to cutfile week! I am not a pro when it comes to using cut files but I have a few tips and supplies to make them a bit more accessible. I’m scrapping a selfie this week that I took on my 29th birthday and I’m using the Happiness collection as well as a cut file from the Cut To You shop for Cocoa Vanilla.
I started but cutting the florals on white cardstock and cutting an offset piece on vellum. I knew I wanted a more abstract look rather than perfect backing, and I knew I wanted to make my own backing paper using watercolor paper and Distress Oxides and the vellum would be perfect to mask any imperfections. I can’t take any credit for this idea – I borrowed it from my friend, Laura Wonsik. So for tip number 1: get to know your design software. I’ve had a Silhouette for years and I’m just learning all of its features like offsetting and print and cut. Watch some YouTube videos and give yourself time to play before you actually sit down to make your project.
After cutting my elements and making my watercolor backgrounds, I traced the floral pieces, roughly cut it and adhered it to my cut file. This brings me to tip number 2: gather supplies. For cutfiles, a sharp pencil for tracing, a fine tipped pair of scissors, a fine tipped glue bottle and some clear vellum safe adhesive will go a long way. My fussy cut scissors are from EK Tools and I keep my glue in an 18 gauge Fineline bottle.
Once my cut file elements were ready, the rest of the layout was easy to assemble. I ripped off some patterned paper to add some interest to my background, matted my photo with some papers from the 6×8 paper pad, and embellished using the die cut ephemera and the cardstock stickers. My title came from the cardstock title pack and I popped a few elements up on foam to add some dimension to the page.
That’s it for me this week! I hope you found some inspiration here as well as some tips to demystify the cutting machine. Till next time, keep it crafty friends.
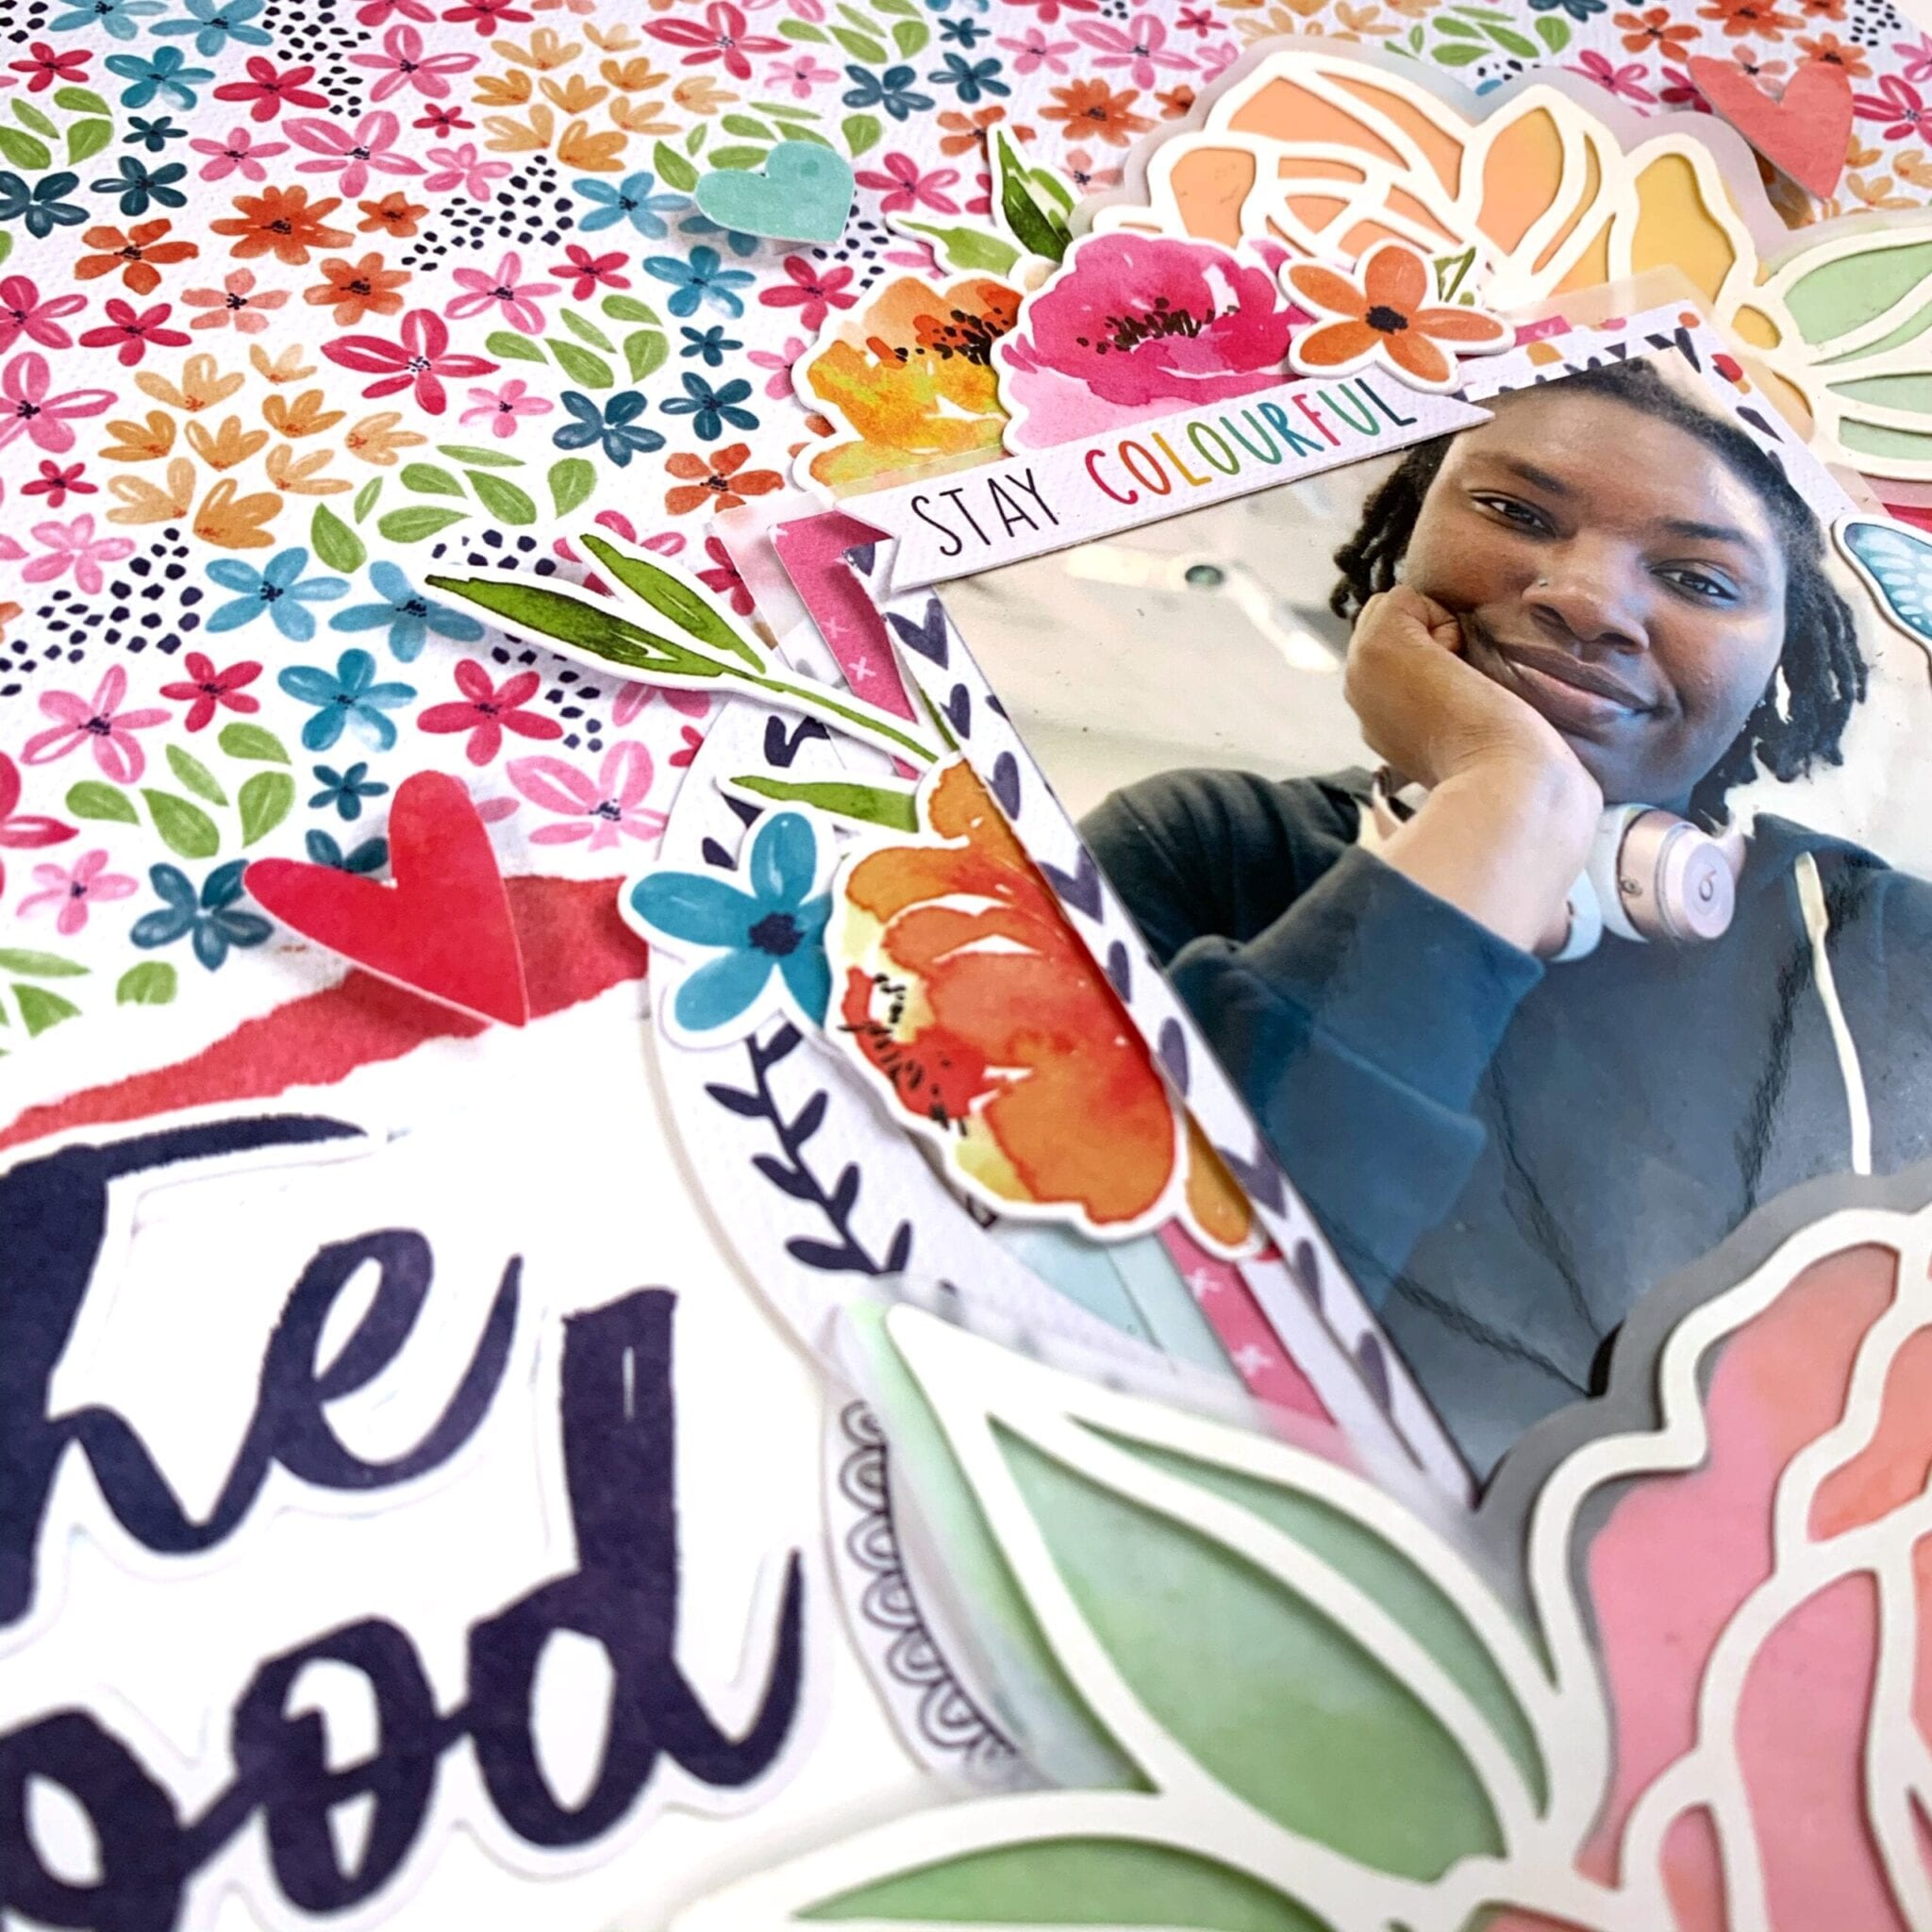
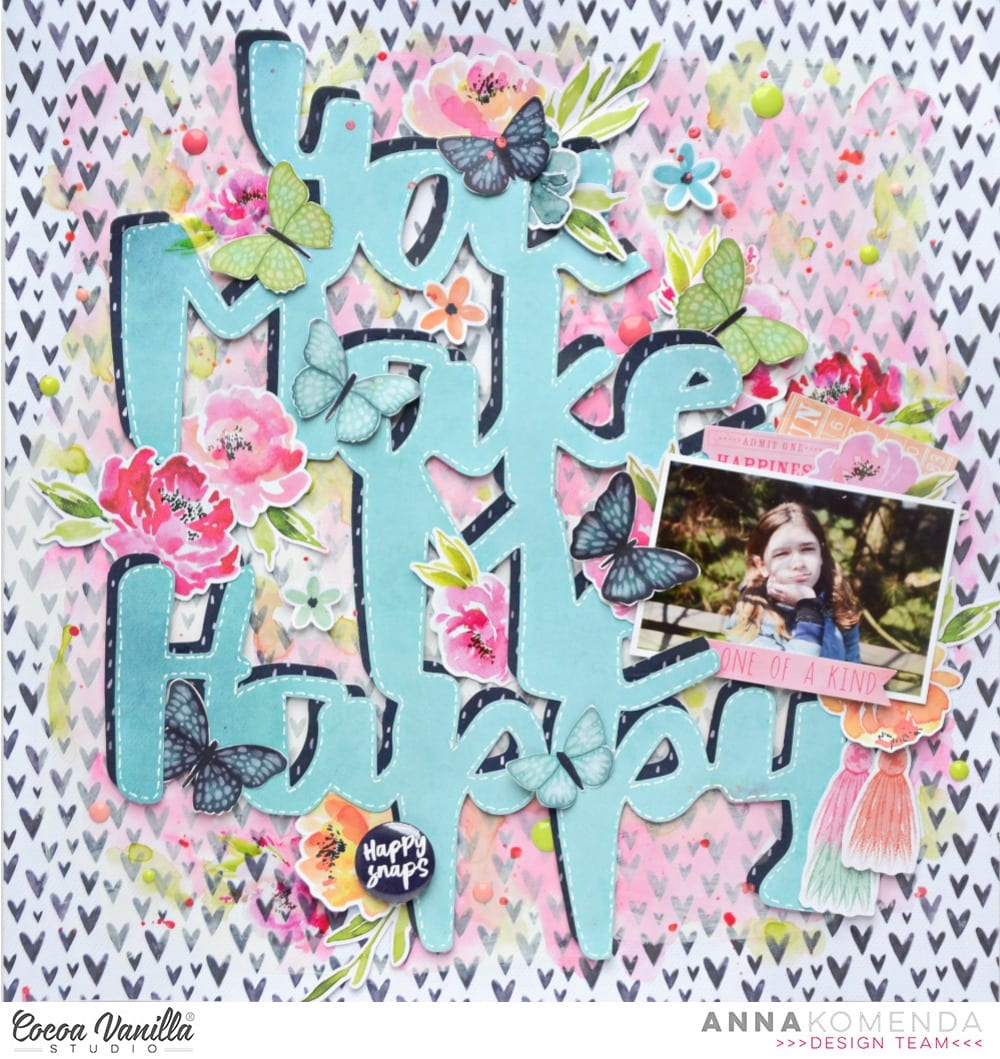
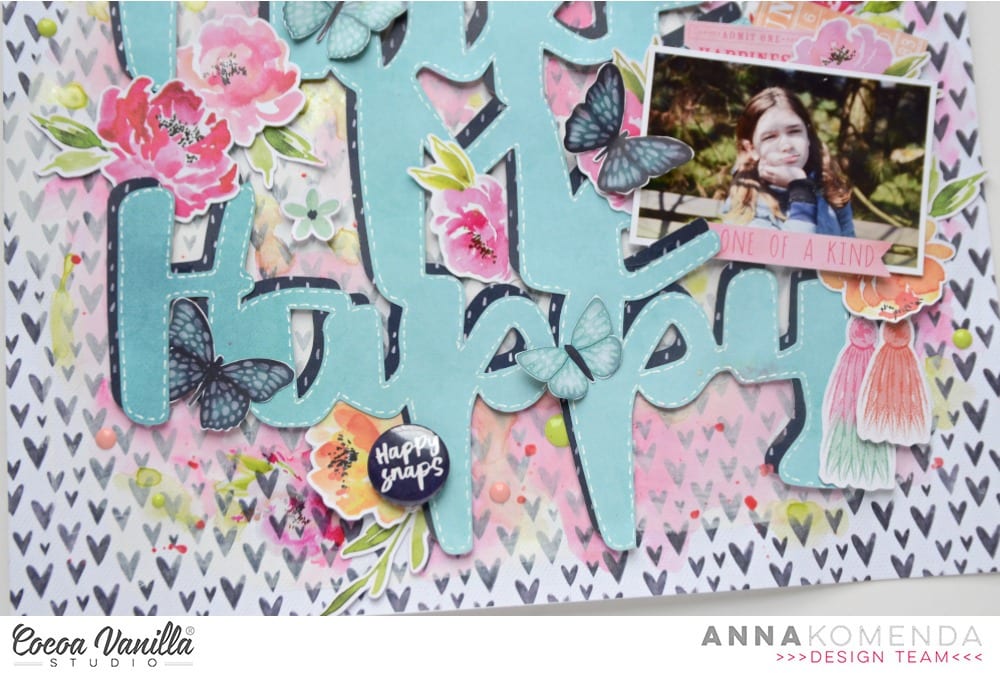
Hello CVS friends! It’s Anna here with my project created with no white background. It is a theme for this week – “White-out”. Each Cocoa Vanilla collection has plenty of amazing pattern papers to choose from so it was a real pleasure to play with them. I was going through my paper stack thinking of what line I should use this time and I was drawned to pretty colors of “Happiness”. You all know that I love colorful designs and ugly fall outside need some proper, colorful medicine to be scared away.
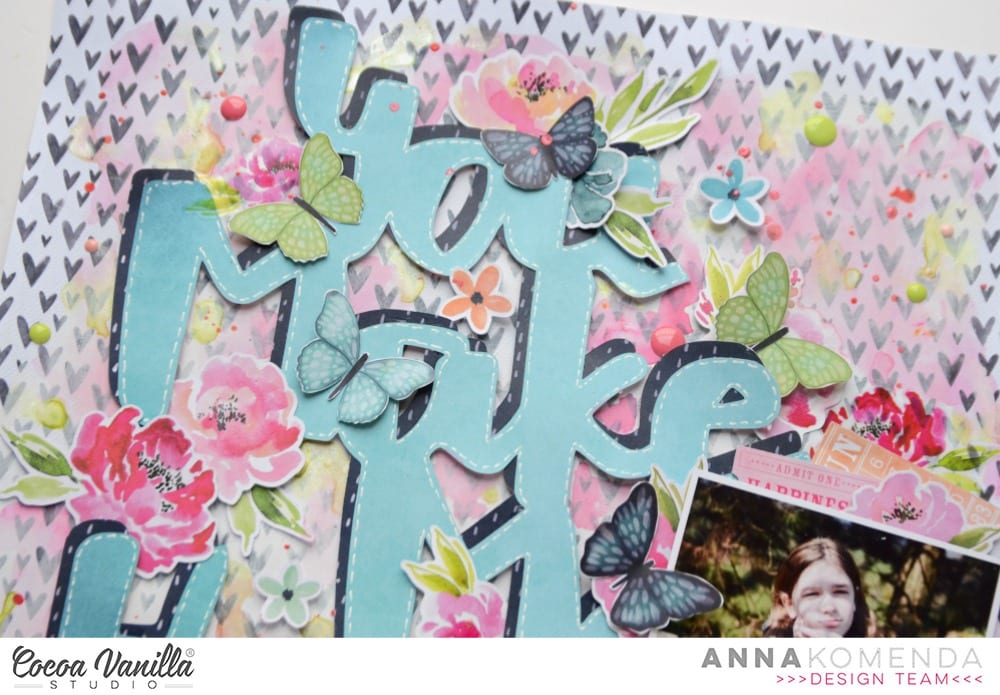
I started with cutting out my title using electronic diecutting machine. I did it twice in the same size using two different papers: “Good vibes” and “Botanical bliss“. I layered them creating kind of a shadow. I also added white false stitches around the top one using white pen. Pretty paper with navy hearts is perfect as a background paper. I added a thin layer of white acrylic paint to help my title pop a little bit more.
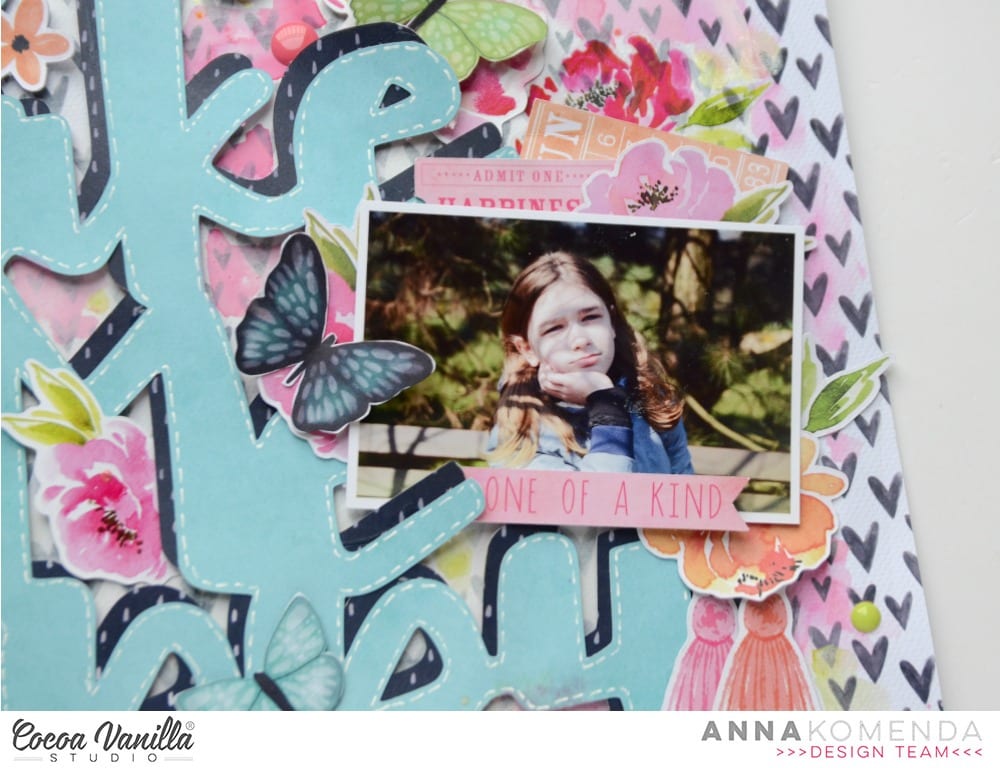
I placed my photo on one of the empty spots between the letters and embellished it with tickets and flowers from ephemera pack. I can never have enough of those amazing flowers added to this line. Pretty shape and watercolor look, combined with juicy colors are the perfect match.
Between the paper flowers I also mixed in some flowers from clear sticker sheet. Their colors are more intense and they look amazing on light background. Butterflies cut out from “Bright and beautiful” paper are great embellishment too. Fussy cutting is one of my favourite techniques. I finished embellishing by adding one of the flair buttons on top of the title. I needed some darker accent in this spot.
After I finished working with paper, I decided to add some more colors to the background. I know that usually we work in opposite order but I felt that this project is unfinished. I gently added some watercolor stains here and there with pink and green paint. It made my layout looking more cheerful and complete.
That is all for today. I love working with pattern paper as a base of my page as much as I like using white backgrounds. It’s a double joy :) Thank you for stopping by and see you in two weeks my friends.
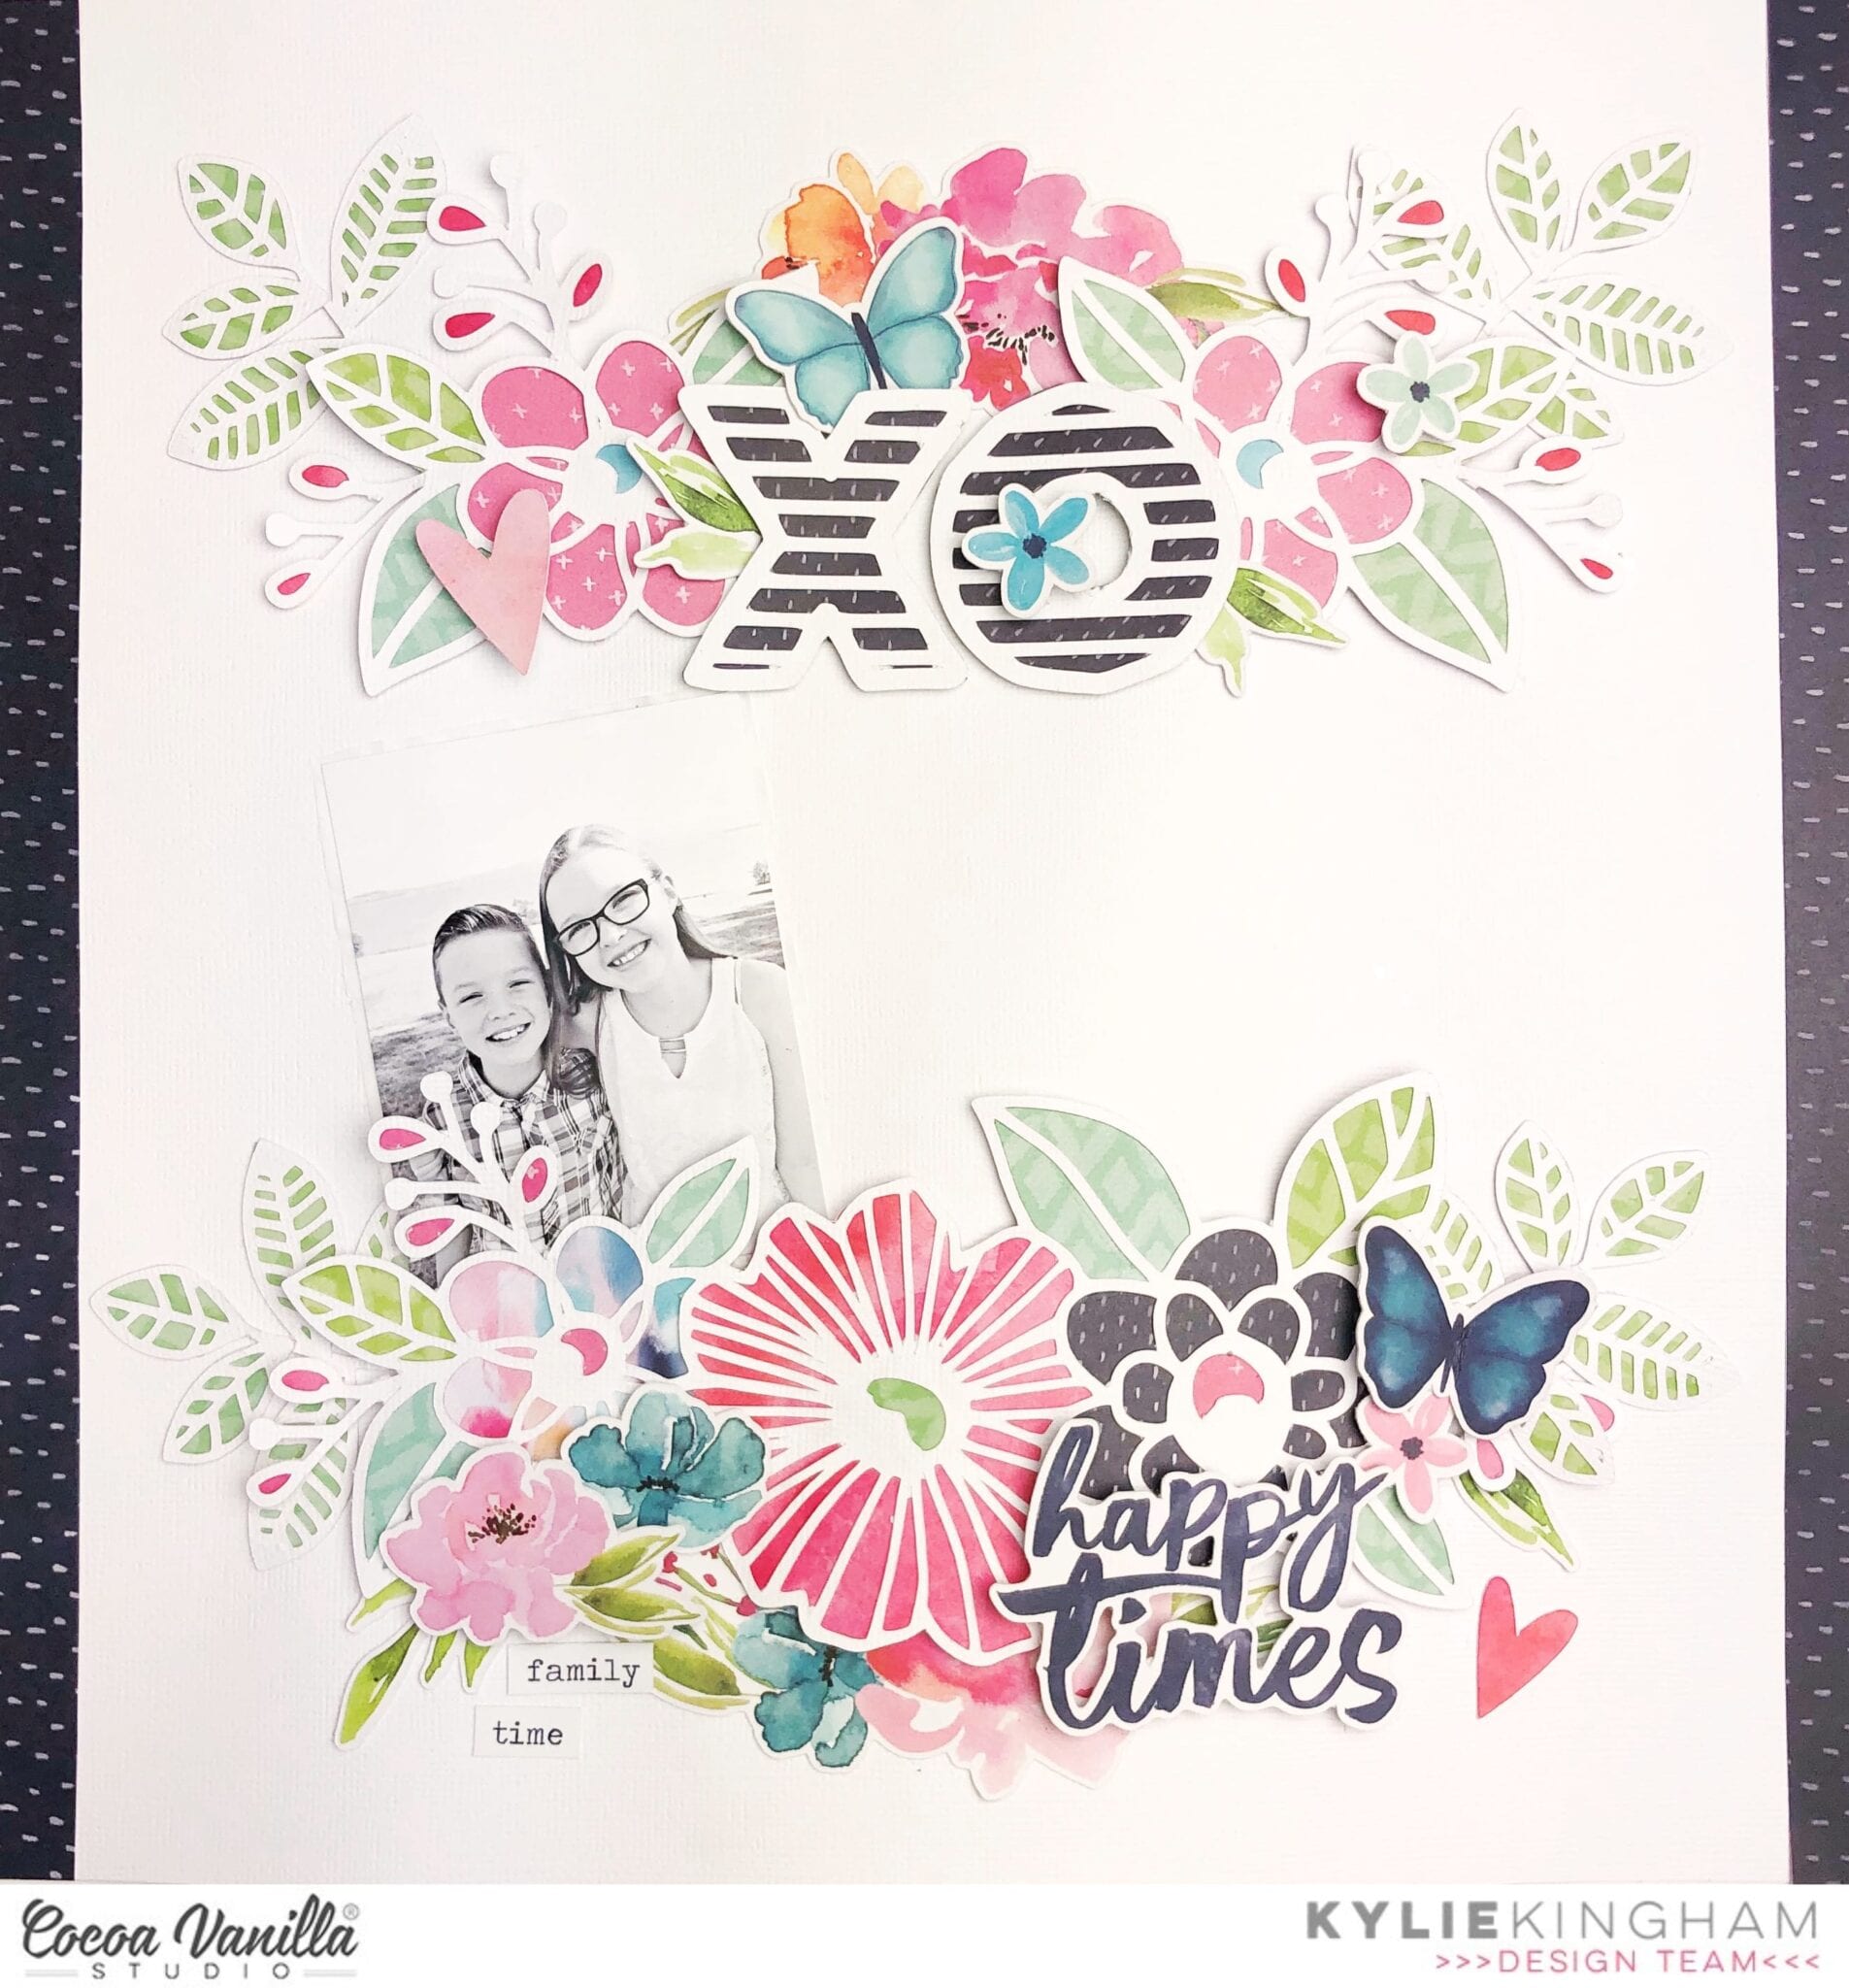
I hope you are all well! Gwen back on the Cocoa Vanilla blog today with a new share using the beautiful ‘Happiness‘ collection. This one is a little different for me because it features 5 photos! I usually create with only one or two photos per page so when my sister and I took this fun series of photos, I knew I had to come up with a plan to get them all on the one layout.
My initial thought for getting this many photos on my page was to print them small which I did first up. Then, I got to thinking about a grid design and pulled out this cut file by CUT to YOU. I had thought about placing the photos within the squares of the cut file, however I had printed them too small for that and didn’t want to waste the prints I had done… so, Plan C it was!
Unsure what to do about the photos, I put those aside and started working on the cut file. I’ve gone about backing some of the squares in the stunning blue of the ‘Good Vibes‘ paper. Then, in the heart shapes, I backed with the pink of the ‘Meadow‘ paper. To help the title stand out, I’ve backed that in the ‘Botanical Bliss‘ pattern paper. I love the deep navy with the fresh white of the cut file.
With the elements of the cutfile backed, I’ve then placed the entire design onto some white card from my stash. I have used foam tape in between the layers here for added dimension. I’ve then created a border by mounting this large piece onto the ‘Expressive‘ paper. I’ve made sure to take the centre of the pattern paper to save it for another project, this one is my favourite from this collection!
I’ve then mounted all of this onto a backing piece of the ‘Botanical Bliss‘ pattern paper. I will often use a contrasting border on my page and find it really does finish off the edges nicely.
Next, I’ve mounted my photos with a very fine border of the ‘Expressive‘ paper and then mounted onto foam tape. It was now a matter of playing with the design and layout to get it how I want. After a little trial and error, I decided to go along the same line as the cut file. You will notice the letters run from the top left the bottom right. I’ve positioned my photos in much the same way so that your eye runs across the layout top left to bottom right. Everything just flows across the page.
At this point, the page is nearly done but of course, I need some smaller elements to bring it all together! I’ve fussy cut some pretty butterflies from the ‘Bright and Beautiful‘ paper (just the pink and blue ones to match my pattern papers) as well as two of the flair from the ‘flair pack‘. I’ve also selected some stickers from the ‘Accessory Sticker Sheet‘ and a die-cut element from the ‘Die Cut Ephemera‘ pack.
I’ve added all of these elements running along the same line of my page, top left to bottom right, keeping with the flow of the photos and title of the page. It was at this stage that I changed the title to be ‘Love You’ by adding in the die cut word ‘you’ from the ‘Die Cut Titles‘ pack and it finishes the page up perfectly.
Thanks for popping by today to see my latest project, I hope it inspires you to get creating and using some of your ‘Happiness’ stash. If it does, I’d love to see what you make over on the Cocoa Vanilla Studio Facebook group. There is so much inspiration over there and worth checking out!
Hi everyone! It’s Sue Plumb here continuing on with our focus on traveler’s notebook pages. For today’s post I decided to create my first spread using the recently released, and oh-so-beautiful, ‘Unforgettable’ collection. I had a couple of photos of my sister and I that I printed in black and white, as I thought that despite being two separate pages, that they could work well side by side in my book.
I began with the 6×8″ Paper Stack, as these are the perfect sizes papers for my notebook inserts. I chose the scaled down version of the stunning butterfly Lacewing12×12″ paper for the base of my pages. I trimmed down my sheet into two pieces and placed one either side of the spine.
On the left side I then added a pink and white striped piece of paper cut from the Pretty Bits 12×12″ cut apart paper. I then adhered my photo and journalling on top. I then worked vertically from the top to the bottom to embellish my page.
At the top I used the our little moments sticker from the Accessory Stickers sheet; followed by the captured word cut from the Story Teller paper; the large butterfly fussy cut from the Pretty Bitspaper; and the small heart tab sticker from the Accessory Stickers sheet. I finished along the bottom of the page with the best things in life are free sticker and stamped the date.
I knew I needed to work in a vertical style again on the right page so that the two sides of my spread had cohesion across the design.
I started by adding the every photo has a story quote piece from the 6×8″ Paper Stack; followed by the wood grain piece from the Story Teller paper with my photo and journalling on top. Below that I added the take a photo it will last longer sticker from the Accessory Stickers sheet; then finished off with the cute pink camera from the Die Cut Ephemera pack.
For my second spread, I decided to work with the previously released ‘Happiness’ collection to document some photos of my boys and I on a day out together.
This time I was able to work with the spread as a whole, rather than two separate pages sharing a spread. I started with the 6×8″ Paper Pad, choosing the scaled down version of the Sprinkles paper as the base for my pages. I cut the sheet into two uneven pieces and placed them either side of the spine.
I then added my three photos and my journalling, which I stuck on top of a journal box cut from the Little Things paper. I also added the making memories quote card from the same paper.
Next, I added some floral pieces from the Die Cut Ephemera pack – cutting the largest piece in two and placing in on either side of the spine at the bottom of the page. I also used a couple of single flowers, which I tucked under the edges of my photos.
I then added two small phrase stickers from the Accessory Stickers sheet; and finished off with a few other elements from the ephemera pack – tickets, hearts and the title piece.
That’s all from me today, I hope I have inspired you to try some traveler’s notebook spreads if you haven’t already – it’s such a fun size to work in!
Hello Friends, Its Michelle back again with a bonus layout share for this month! I’m trying to crank out as many pretty layouts as I can using the beautiful Happiness Collection before the brand new Unforgettable collection arrives on my doorstep and all other collections are forgotten HAHA
The layout was inspired by a sweet photo of a few familiar faces from this years Creative Escape Retreat in Coffs Harbour. LOVE LOVE LOVE spending time with these lovely ladies and it was SO good to meet Anna in person
To begin the layout I cut out the Floral Banner cut file from CUT to YOU using white cardstock and backed it using block colours of bright patterns Good Vibes, Expressive & Frame of Mind. The main banner piece is backed using the multicolour spot paper Sprinkles and layered together with a strip of vellum and the woodgrain pattern of the Bright & Beautiful paper. I also cut the florals off the main banner rather than keeping them as one whole piece. This gave an extra layer of depth and dimension. We all know I love small hints of dimension on a layout!
The photo is adhered to the reverse pattern of Botanical Bliss with the addition of a couple of ephemera pieces to create part of the cluster top right.
I had a handful of florals and butterflies, fussy cut from previous layouts, that I added to the florals of the die cut. I tucked in a couple of leaves from the ephemera pack too
I fussy cut a few more florals from the Botanical Bliss paper to tuck into various places of the layout adding hints of orange. There’s also a couple of clear stickers added here n there
The title is made using a couple of accessory stickers and cardstock title piece, raised slightly using glue dots.
Lastly a few splatters of gold ink, a date stamp and handwritten journalling and it was finished.
Thats all from me for my final share this month, thanks so much for stopping by. Be sure to share all your crafty goodness using all things Cocoa Vanilla Studio in the Facebook group HERE
Hello there! It’s Kylie back on the blog today and I’m sharing a brand new layout I have just completed featuring the “Happiness” collection. Sometimes I get Scrappers block when it comes to working and bringing a layout together. I think it happens to all of us at some point. That’s where using a sketch design becomes so helpful.For my layout today I am using a sketch design by Page Maps. You can find a whole bunch of page sketches via their website.The one I am using today is from the archives, October 2018.
I must admit, when using a page sketch I am sometimes a little bit of a rebel. I like to mix it up a little, bringing elements of the sketch into my layout and add my own touches.
I decided to use a white background for my layout and trimmed 3 cm off each edge before adhering to the lovely MEADOW paper. Instead of white thread, I machine stitched my circle and border in a light pink cotton.This made it stand out a little more from the background. A small plate was used to trace around to give me a template for my circle. I then stitched around it 3 or 4 times so it had a lovely thick edge.
I really loved the scalloped border used in the sketch so I cut 2 from a cut file from the Silhouette Design Store and added them to the top and underside of my page.
My photo was printed a little smaller so that it fitted nicely for my circle. I printed it twice and have layered both together, backed with some tissue paper from my craft stash. The floral die cuts from the Happiness collection are so gorgeous and I have layered them around my photos keeping them well balanced.
In keeping with the sketch theme I borrowed a mason jar die cut from the ‘Midnight’ collection to add into my layout. It too was centred with floral blooms for balance. I’ve layered some with foam tape so that it gives the overall appearance balance.The adhesive sticker sheet was perfect for adding in some of the typed sentiments as a sub title.
To complete my layout I added some watercolour splatters and a large title with the phrase die cuts. I was nearly finished at this stage but decided to add some punched flowers.These are quite small but I scattered them randomly around my layout.
Thanks for stopping by the blog today. I hope you enjoyed seeing my latest layout.
Hello Cocoa Vanilla family, and welcome back to the blog! This week, my assignment was to play with a sketch from Page Maps and it was an interesting assignment because sketches and I generally do not get along. I think sketches are a double edged sword – they are literally the very definition of bittersweet. For a newer scrapbooker or even if you just need a bit of inspiration, they are a godsend, especially if you don’t know where to start. However, I always feel like I’m struggling to get all of the things on the page and the layout feels constrained instead of a free expression of creativity like scrapbooking normally is for me. So what I decided to do for this layout was pick a few elements from the sketch that I liked and work them into my overall design.
Here is the Page Maps sketch from October 2018 that we were working with.
I love paper layers, so I kept that aspect, as well as the big circle element, and to challenge myself, I decided to work with horizontal photos, which is something I never do. With all of the my bits and pieces sorted out, I pulled out the Happiness collection and decided to scrap a photo of my sister and her husband at their baby shower this summer.
Before I did anything else, I distressed the edges of the sheets and layered my papers for my background so I had an idea of how much white space I had to play with. I then used some watercolor paints to paint a series of concentric circle like shapes. They are definitely more oval than circular, but I painted them in shades of blue and green. Next, I matted my photos – I printed them in 3×2 so considerably smaller than the sketch was calling for – using papers from the 6×8 patterned paper pad.
After arranging my photos on my background, I worked on embellishing. This week, I used the ephemera pack, as well as a flair button, the cardstock stickers and the clear sticker packs. I aimed for a more monochromatic layout, which was challenging in itself because my layouts tend to be very pink and floral and this was my first time attempting a more “masculine” layout and I restricted myself to blues, greens, and butterflies. While I was creating the clusters around the photos, I also created the cluster in the top left corner as the sketch had a bit of paper layered in the upper corner and this is very much my speed.
Next, I went to work on my title. I knew I wanted a bigger, more whimsical font to spell out the baby’s name, and since the shower colors were blue and gold, I used this old pack of gold thickers that I had in my stash. To finish my title, I added the word “hello” from the cardstock title pack, and embellished with a combination of stickers and ephemera hearts. The gold looked a bit out of place since there was nothing else metallic on the layout so I pulled out my trusty color shine in gold and added some splatter to add some sparkle and shine to the layout.
That’s all I have for you today, guys! It was a bit of an experience making this sketch my own but once I got into the groove of things, it became much smoother to hit the ground running and to do things that made this layout my own. I hope you found inspiration here and you try to create something using this sketch today. Till next time, keep it crafty friends.
Hello Scrappy friends It’s Michelle back today with a new layout share! This is definitely one to be added to the favourites using the Happiness collection and a pretty awesome cut file from fellow DT member Gwen.
The sweet photo I’ve chosen to document is of Leila taken back on Mothers Day with her ‘new’ friend Kermit – best op shop find ever! She truly is an awesome kid, and this cut file from CUT to YOU was the perfect accompaniment for this collection. I managed to pull all of this together with just scraps of papers used on previous creations and 1 full piece of pattern paper for the background edging.
I backed all the pieces of the cut file using the scraps I mentioned before then adhered to the white cardstock using some foam tape for dimension. I layered the cardstock with a full piece of my favourite MEADOW paper for even more colour, and sewed around the edging using white thread.
I added some more of my favourite paper colours to the photo stack. These are the smaller designs you can find in the 6×8 paper pad.
At the top of the photo and bottom of the cut file I added some floral ephemera pieces to give the slight hint of a diagonal design element. I also used the negative star pieces left over from the cut file and some enamel dots (which are making a come back with our upcoming collection and goodness I am excited about it)
Lastly I added a sprinkling of gold colour shine, some handwritten journalling and a date stamp to complete the page.
Well thats all for today. Be sure to pop by the CVS Community group on facebook to share all your scrappy goodness using all things COCOA VANILLA STUDIO
Hey CVS friends today I have a fun ‘no people’ layout to share created using the stunning Happiness collection. My daughter bought me this super cute bowel for my craft room, perfect for bling I say!
I firstly cut a piece of white cardstock down to 8 x 9 inches before adding it to the Little Things paper. I added floral die cuts to each side, layering them over each other and adding extra leaves and sprigs.
I used a heart background cut file from the Silhouette Design store. I used a die cut frame from the Happiness ephemera pack and added my photo over the cut file. I typed my journalling and added under my photo. I have used the Meadow paper to cut the heart background.
My title Craft A Happy Life is a cut file from Cut to You (created by Gwen). You will see that some of the letters I have added with foam tape to add visual interest. I have used the Expressive paper to create my title. I tucked the date/year in amongst the floral bunch.
I finished my layout off adding a paint splotch clear sticker from the collection finished off with a die cut butterfly.
I love how this layout turned out, light, bright and pretty! Thank you for stopping by today and if you have any questions leave me a comment and I will respond. Have a great week and see you again soon!