Family memories | Midnight Layout | Anna Komenda
Hello Friends. It’s Anna here with my newest layout. This week we are focusing on die cut titles – awesome product for all the layout makers. You can find them in few recent collections such as “Legendary“, “Happiness” and “Midnight“. Other collections have words too, made as a foam stickers or chipboards. You can easily mix and match them on your page. Sets are perfect for title building and you can combine few words in longer phrases. I decided to use “Midnight” collection as I still have a lot of elements form it. I created five rows of words on my background making meaningful clusters that describe my photos.
![]()
I started my project with “All the things” pattern paper and arranged words in an order. It’s a really simple layout as I wanted die cut titles to shine. They are the main focus and they didn’t need much of embellishing.
![]()
I printed my photos in black and white version to better fit the overall mood of the page. Very deep navy color of the words looks almost like black and pink, monochromatic background is a good, neutral base for them.
![]()
I embellished areas around the pictures using leftover chipboard flowers but you can easily replace them with flowers from ephemera pack or the ones fussy cut from paper. I also added even more words in different size and font.
![]()
I finished my page by stitching through every row using white thread. I wasn’t planning doing that at first but the layout looked like it needed something more so I carefully step in with my sewing machine. It created extra layer of texture and I am happy I did it.
![]()
Last step was to add enamel dots. This collection didn’t have a matching set so I grabbed the ones from “Unforgettable” line.
Do you like die cut titles as much as I do? My fellow DT girls are sharing with you even more ideas on how to use them and how to build longer titles adding alpha letters or stamping. So many great and inspiring ideas!
Thank you for stopping by and see you next month. Can you believe it’s already half of the year with June just around the corner? Crazy times. Stay safe and healthy <3 XO Anna


 Instead of my go to white cardstock I used the beautiful and subtle grey white washed wood grain paper Artisan. I wanted a real pop of colour so used the bright pink paper
  I added my photo off centre with foam tape and finished off with a bow from
  I have used two different cut files from the Silhouette Design store to create my layered flowers but for those who do not have a cutting machine use a hand punch, punching at least 3 and then layer with foam tape. If you want to recreate these centres, they are super easy! Cut a 12 inch strip at 1/2 an inch. fringe cut with a pair of scissors and then roll as you would any rolled flowers. Once the glue has dried then push outwards all the way around, then glue to the centre of your flowers. I have used
  You will see that I then tucked in-between the flowers fussy cut butterflies, some die cut leaves and a sentiment from the accessory stickers.
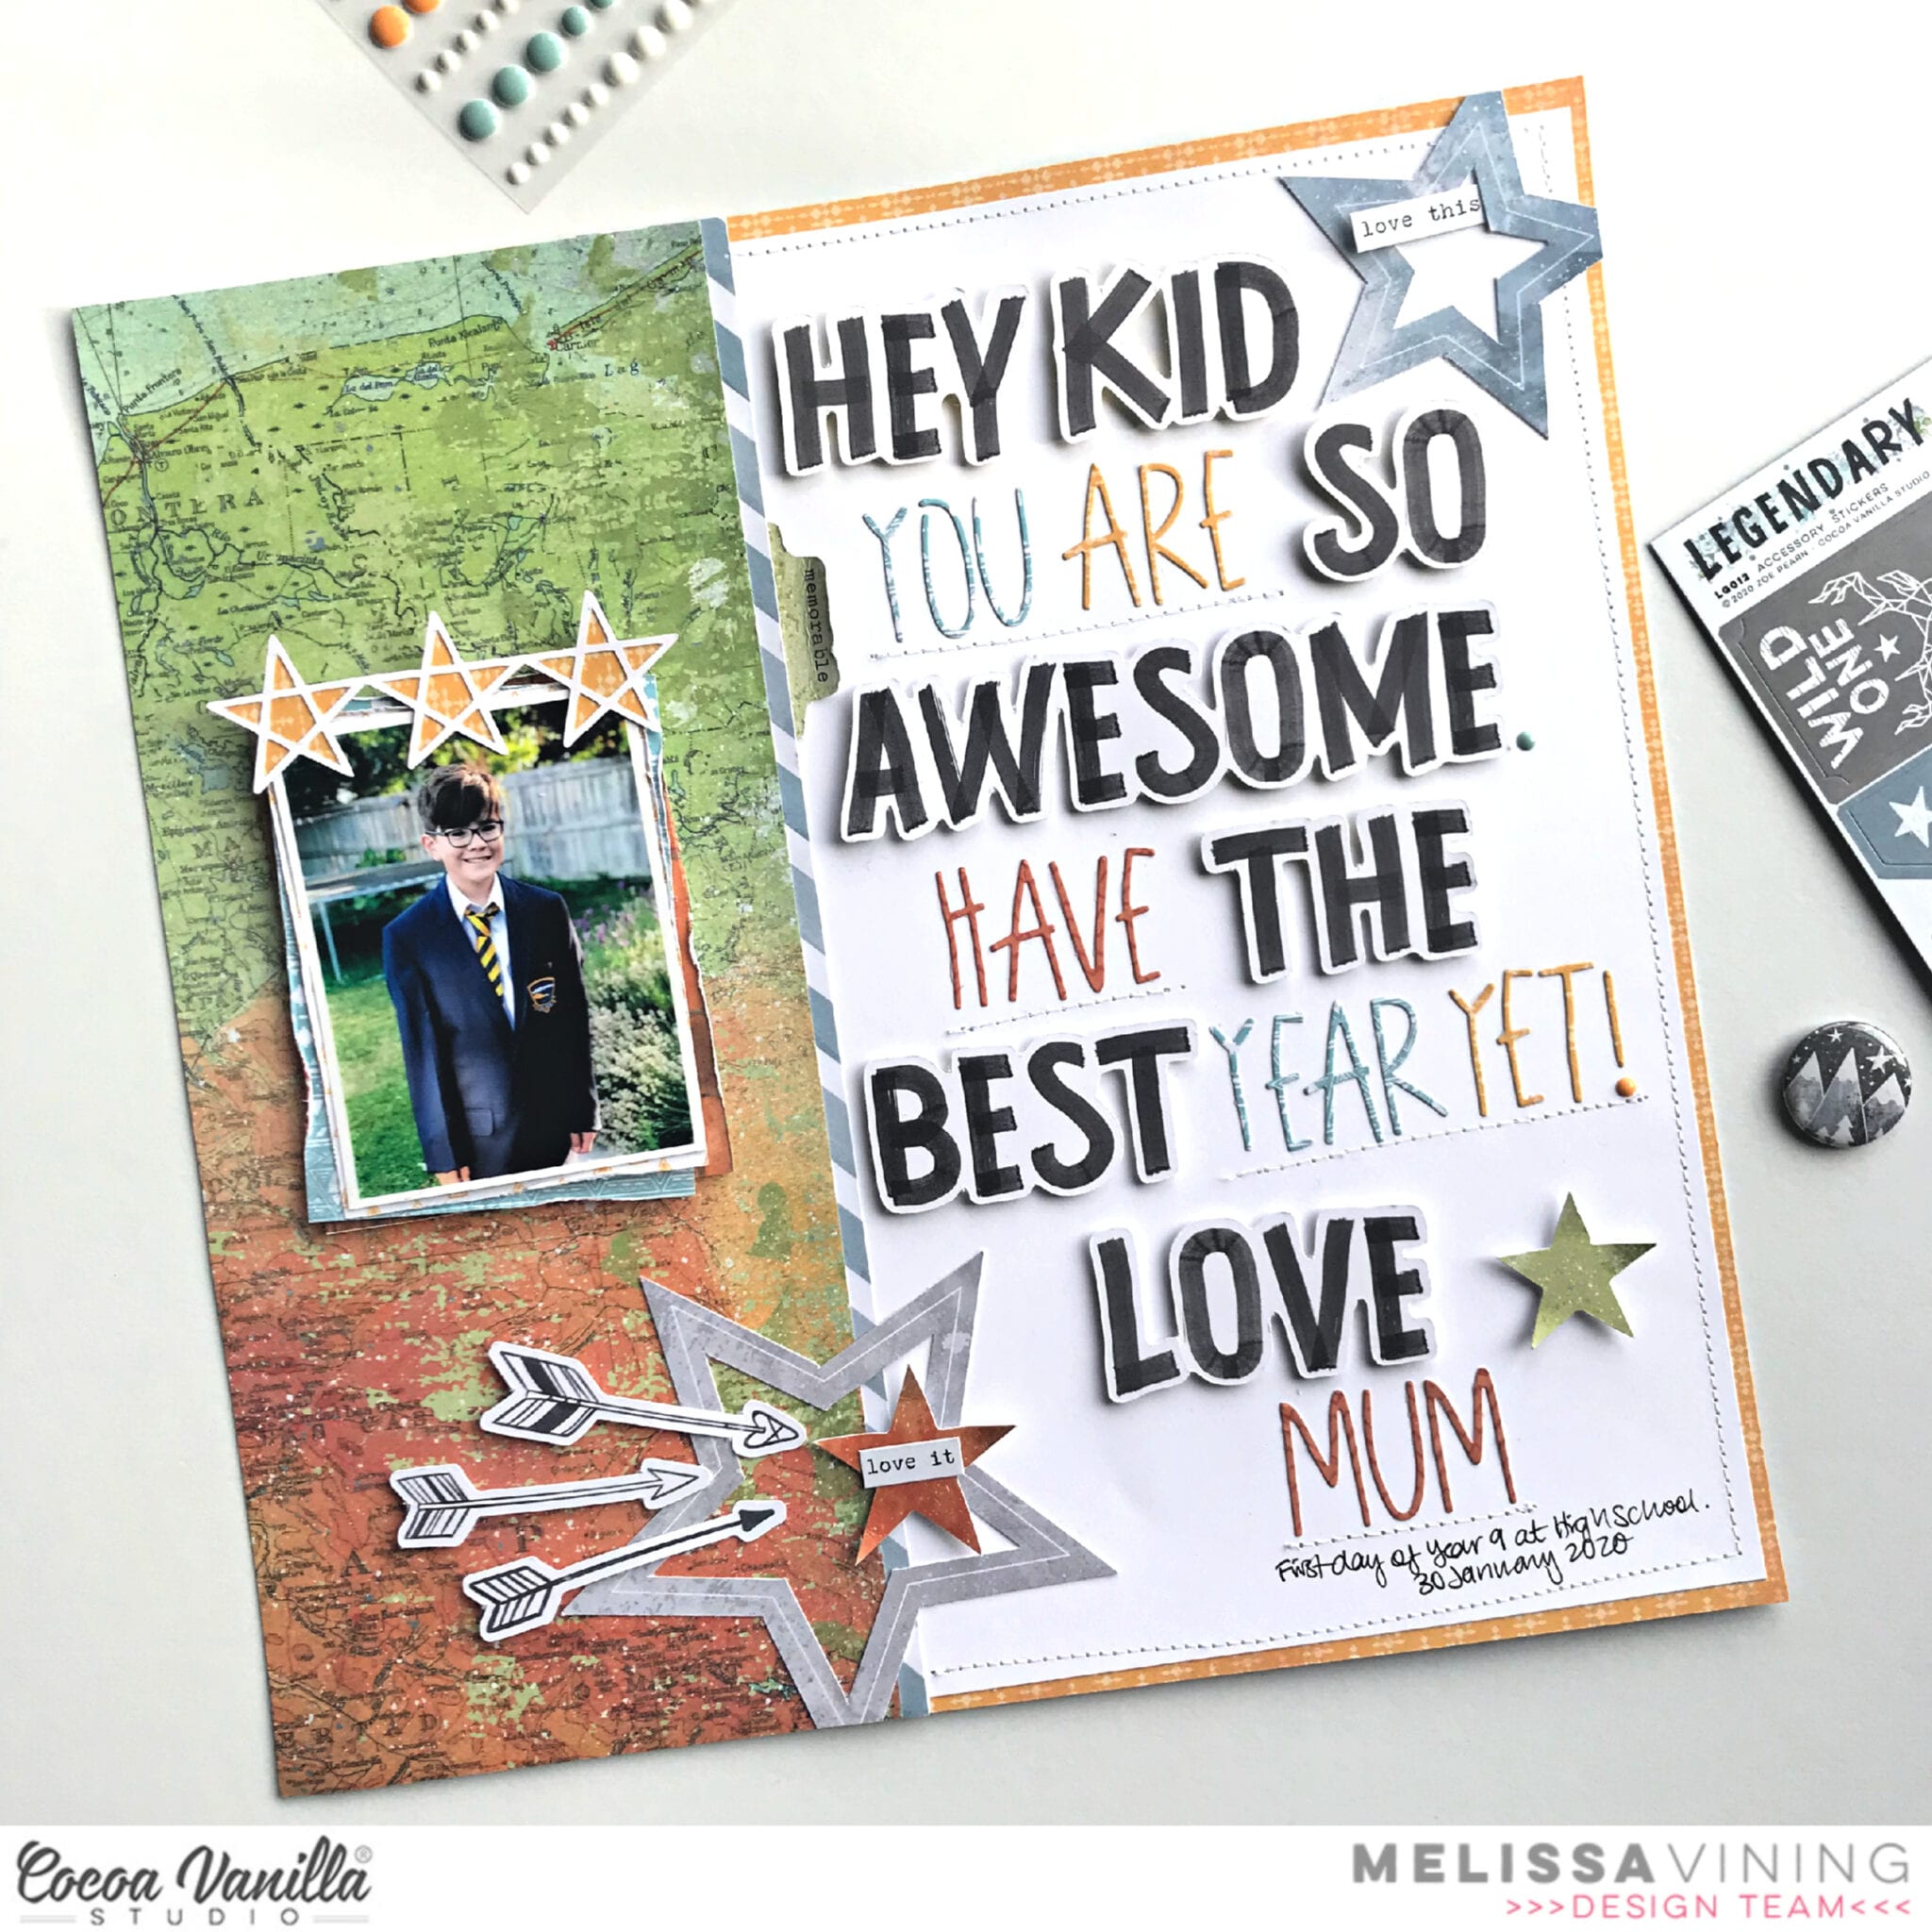
 I then created my title using
  I love using word and phrase sentiments from the Accessory Stickers sheets and you can see I added some more under my photo and under my large title.
 And there you have it, I love how this turned out! A great colour palette even though I have used several different collections. Don’t be put off because of the flowers on this layout, you can make. beautiful one’s too, time to blow the dust off those punches!


