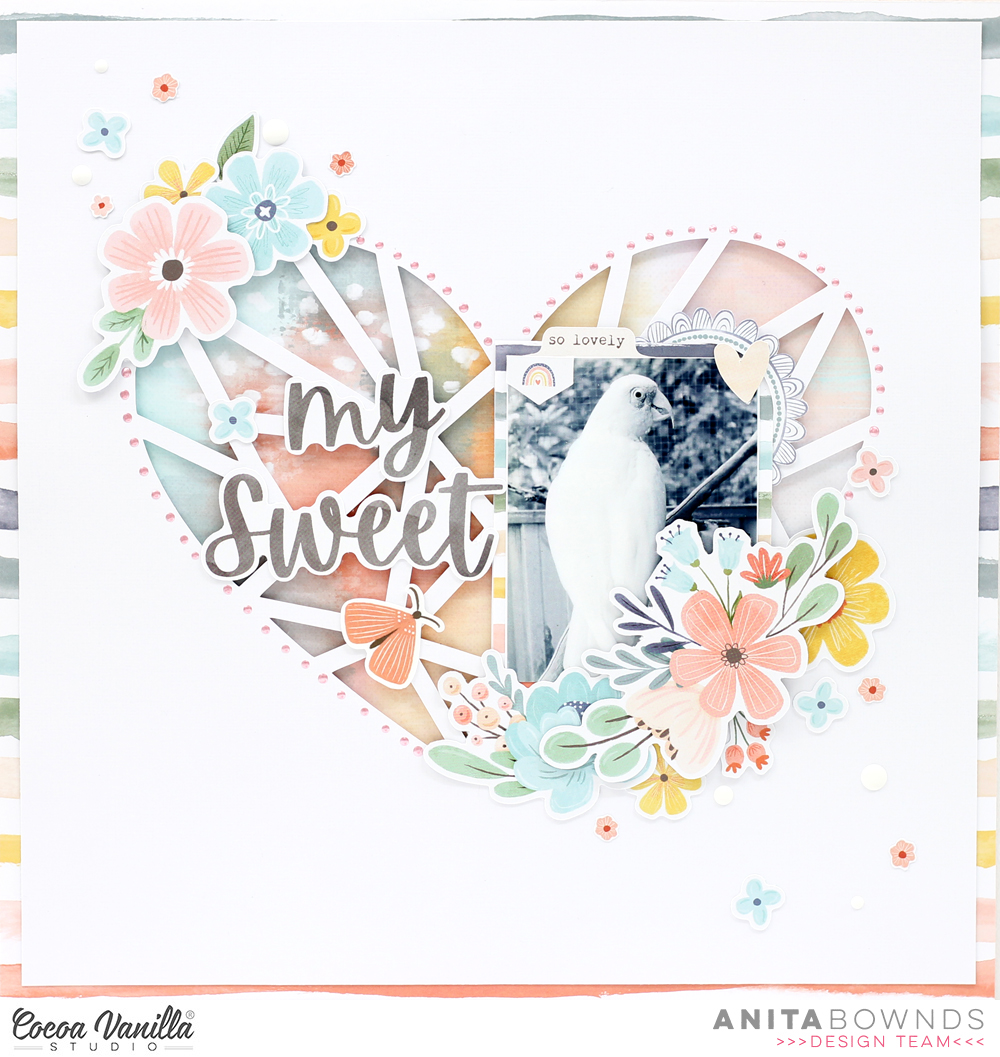
Hi there crafty friends, Anita here with you today sharing a cute heart layout created with the beautiful Day Dream Collection . My layout today is all about our cheeky bird nubby who loves digging holes and playing plastic lids.
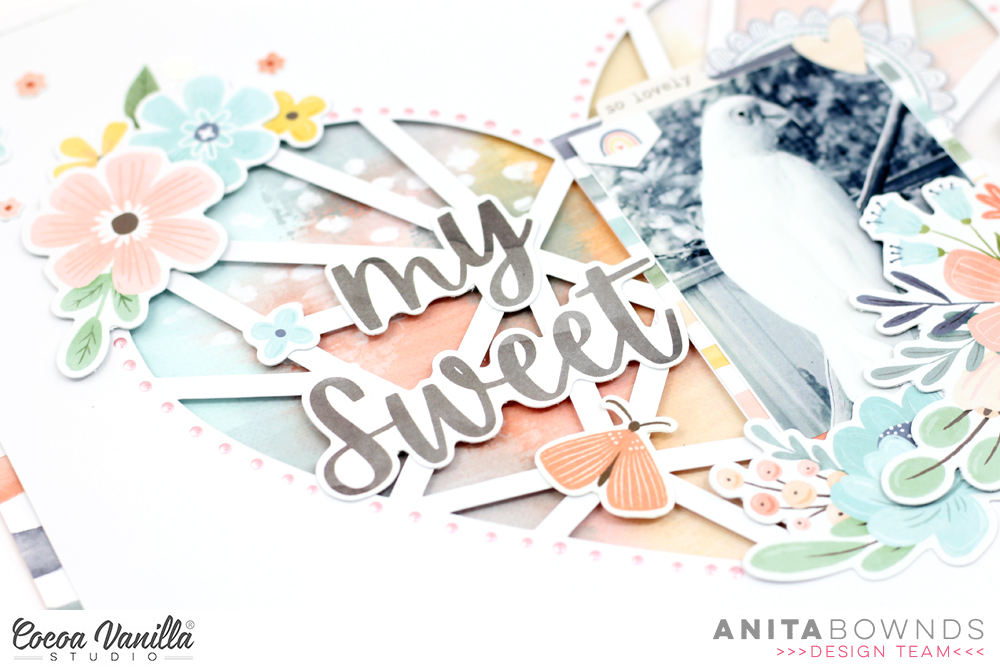
Using white card stock and my cameo I cut out a heart using a cut file from @neatncraftycutz I then back it with sweet serenity pattern paper popping it up on double sided foam tape then I trimmed he white card stock down and back it with stepping stones pattern paper.
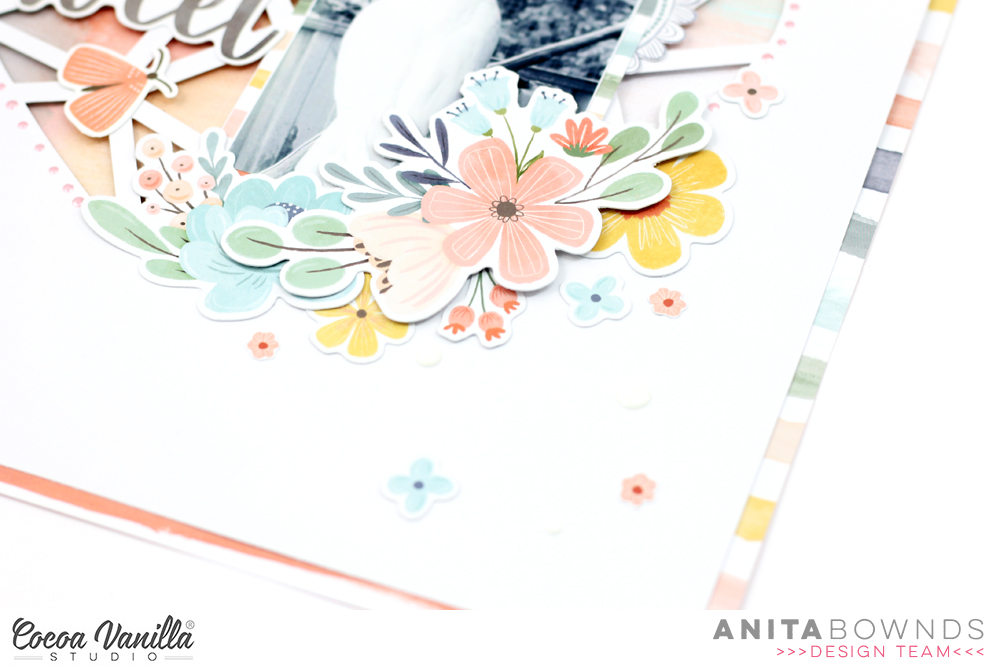
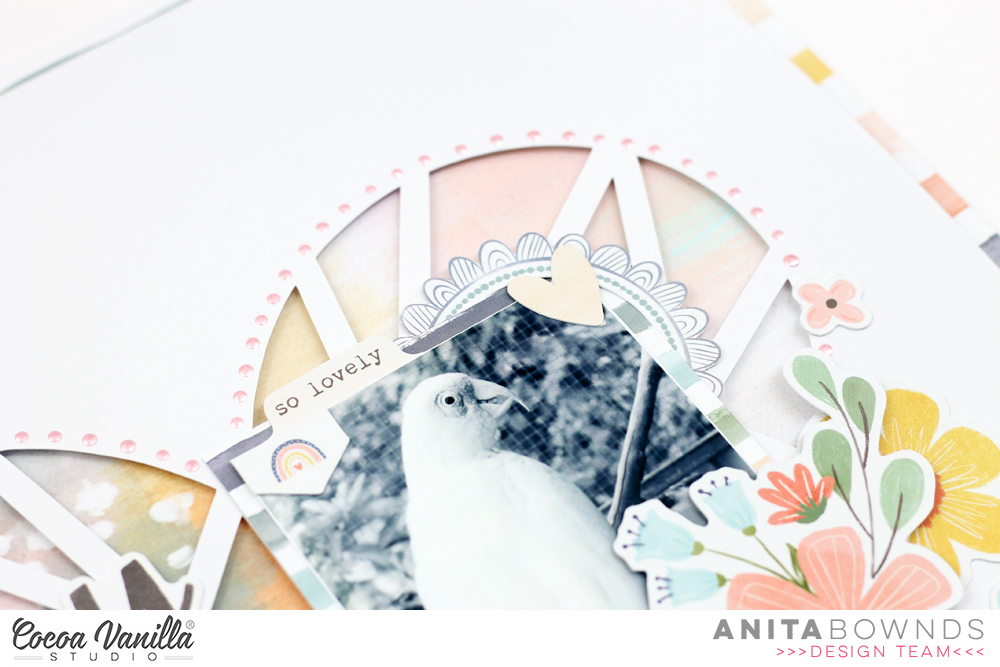
Now it’s time to decorate, I matted my photo with stepping stones pattern paper and added it to the right hand side ,I then pulled out all the flowers from the ephemera and started adding clusters of flowers around the edges of the heart A few bits of ephemera around my photo.
Then I add my title using the cardstock titles and I finished off the layout with the a few mini fussy cut flowers , enamel dots and pearls.
Hi there! Danni here with today’s Throwback Thursday inspiration featuring the gorgeous Midnight collection. I adored this collection so much that I have been hoarding a lot of it, so it felt great to put it to good use.
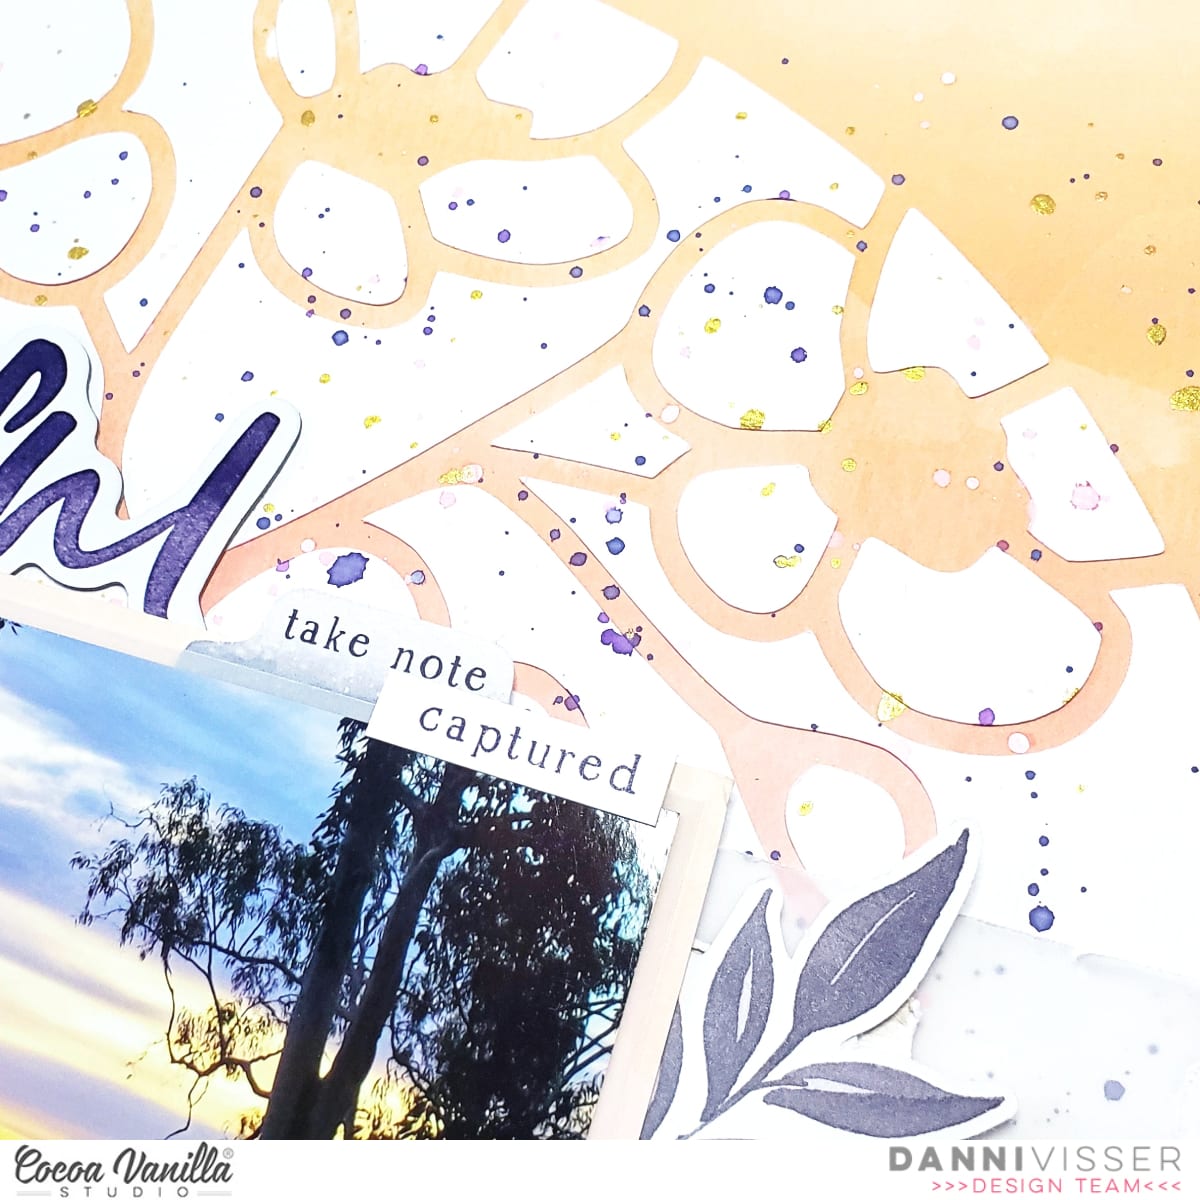
The Sunset Strip 12×12 patterned paper has always reminded me of a sunset, so it was perfect for a background of this landscape sunset photo I took in the Sunshine Coast hinterland. I had cut the floral circle cutfile for another layout, and the negative interior pieces looked so pretty on the cutting mat that I could not bear to bin them, so I carefully glued them to the background paper. It looked so lovely with the patterned paper peeking through!
Next, I used some inks and mists to add some purple, pink and gold splatters to the background. This helps tone down the stark white of the cutfile and adds some interest to the background. I used the Shine Bright 12×12 pink gradient patterned paper to back my photo and built some horizontal layers behind it with plain vellum and the woodgrain side of Shine Bright 12×12 paper to give my photo a natural ‘resting place’.
I made sure to line up the horizon in my photo with the colour change gradient in the background paper – this makes the page look cohesive and really enhances that sunset illusion.The Beautiful Moments title from the chipboard pieces fit perfectly around my photo and was the perfect sentiment for this layout. I used a tab from the die cut ephemera and some tiny words from the accessory stickers to supplement my main title.
Even though I want to hoard them forever, I placed some of the gorgeous die cut ephemera floral peonies and leaves in clusters either side of my photo, then added a pretty butterfly from the accessory stickers on the centre of one of the cutfile flowers, making sure to pop the wings up on dimensional foam – one of my absolute favourite techniques.
Finally, I added a few enamel dots from my stash in matching colours to finish off the layout. This whole layout was very quick to come together, even though it looks very full with plenty of detail – making an interesting background meant I could keep my embellishments minimal while still having a very impactful layout.
I hope you enjoyed joining me today! Please check out the video below on the Cocoa Vanilla Studio YouTube channel if you would like to see the entire process. Happy scrapping!
Hello Friends. It’s Anna here with my first ever project made with beautiful and brand new “Daydream” collection. Other DT girls already floaded you with amazing and very inspiring inspirations made with this line and I wanted to do something a little bit different. I felt so temptated to use pretty “Over the rainbow” paper but it’s basically scrapbook by itself :) You only add photo, title and few flowers and page is done. Then I got an idea of using this line into the fall project becasue of all those muted colors. I found two photos of my girls holding pumpkins. Then the second idea came to my head – let’s make a page that looks like made with digital die cutting machine without actually using it. This is how it all turned out:
I used three different pattern papers to hand cut three wonky pumpkins. After all, they come in different shapes and sizes in nature too, right? I added some stitching to make them look more like pumknins and cut out some leaves and those green swirls (I even do not know polish name for them). I glued them over the “Garden variety” paper and added the frame with wooden pattern from “Over the rainbow” sheet.
I placed my photos over the pumpkins and I was ready for embellishing. I used up many flowers and other elements from ephemera pack. I am so in love with how cute and versatile it is. I only did two projects so far with “Daydream” line but I almost use up first package of the ephemera pieces! 6*12 stickers are also a perfect little thigs for small accents.
I placed flowers on the pumpkins to add more colors to my composition. I think I would be able to use up any quantity of those flowers I have in my hands. They are so pretty.
My layout title was created with older alpha stickers from “Totally rad” line. I still have plenty of them and use them whenever I can. I also recorded a process video for you, so you can follow my creative process :)
That is all for today. Thank you for joining me and see you in two weeks.
Hello friends!! Its Melissa here and I’m back to share a grid layout that I created with the gorgeous ‘DAYDREAM’ Collection! I really can’t get enough of it at the moment, and I was so excited to create a layout for our theme this week of sequins, hearts and flowers! My oldest daughter recently turned 11, and I was really keen to get her birthday party cake photos scrapped. I went with a bold background for a change and used ‘UP IN THE CLOUDS’ which has beautiful small feathers and leaves on it.
As well as scattering sequins from the ‘SEQUINS AND FLOWERS’ from the collection I also wanted to use them in a creative way, so I hand stitched two rows of them onto one of the rainbows from the ‘DIE CUT EPHEMERA’. I used embroidery threads in matching colours, and also chain stitched on the two rows of the rainbow that I didn’t add sequins to. It ended up so cute and I love how it looks!
I didn’t add anymore patterned paper to my layout, but instead used two three of the frames from the ‘DIE CUT EPHEMERA’. I used white gesso around the frames to soften the visual transition to the bold background paper. It also enabled me to paint and splatter some shimmery mist for a subtle mixed media effect. I embellished the frames with ephemera flowers, and I also used three of the paper flowers from the ‘SEQUINS AND FLOWERS’. Of course I had to add one of the “PUFFY HEARTS’ and Azaria chose the yellow one.
I made my title with one of the ‘DIE CUT TITLES’ and the “Happy Day” is from the ‘DIE CUT EPHEMERA’, but I cut the ‘s’ of the end of the word ‘Days”. I really wanted to play on the birthday theme of my page.
I added two rows of machine stitching to my third frame and popped up an ephemera flower cluster. I also added a sticker from the ‘ACCESSORY STICKERS’. I also added some of the gold leaf sequins to my flowers for extra interest.
You can watch my layout come together in the process video below.
Have an awesome rest of your weekend!! I hope I’ve inspired you to use your sequins, puffy hearts and flowers.
It’s Anna here with you today, with a new layout featuring the gorgeous Daydream collection. This week it’s all about sequins, flowers, and hearts. And that’s because this collection includes a lot of flowers (a must on CVS collections), a pack of beautiful sequins, and some adorable puffy fabric hearts. I don’t usually use sequins (we are not good friends), but for today’s project, I decided to create a shaker title as the focus of my page.
I started cutting out the word “moments” on the B side of the Garden Variety paper. I did it with a basic font that I already have on my computer. Then, I cut the same word on a piece of white foam, which I glued (the negative, not the letters) onto the B side of the Happy Place paper. I filled in all the letters with the sequins and covered the word with acetate.
The last step was to put the Garden Variety paper which I had previously cut on top of the acetate, fitting well all the letters. I used liquid glue. To make the word stand out a little more, I followed the outline of the letters with a white gel pen. I completed my title with the word “sweet”, from the Die Cut Titles (I raised it with foam dots), and the word “happy” from the Accessory Stickers.
I used two photos in this layout. I framed one of them with one of the die cuts and attached a little tab, and backed the other one with a piece of patterned paper from the 6×8 Paper Pad. Between them, I created a little flower cluster. To balance the design, I made two big clusters with the die cut flowers. I placed one next to the word “sweet”, at the left of the title, and the other one on the right side, below the title. I stacked some flowers with foam dots to add more dimension. The flowers in this collection are so gorgeous! I could make tons of pages using them!
As the final touch, I took the white pen gel and made a frame all around the page, with some faux stitching at the corners. I think it’s subtle but nice. I hope it gives you some inspiration for different ways to build your titles. I did it with my cameo, but you can easily do that with metal die cuts or by hand!
Thank you so much for stopping by today by the Cocoa Vanilla Studio blog. We’re so happy to share new ideas with you every day!
Hello Hello It’s Michelle here today with a new layout to share with you all as part of our current Product Focus theme. This week we’re showcasing fun ways to add our new Puffy Hearts, sequins and flowers to your crafty creations. I’ve used the Beautiful new Daydream Collection that features all of these sweet embellishments.
I’ve started the layout by using the paper ‘Sweet Serenity’ for the background as it gives the layout a mixed media look without having to get messy, plus its so so pretty. I’ve added a cutfile from CUT to YOU using some white cardstock, vellum and sequins, more on that below. There’s also another little hint of pink paper to make the super cute photo of Leila pop, this is the 6×8 version of ‘Stepping Stones’ from the 6×8 paper stack.
How cute is that little face. This photo, along with a few others, were taken by a local photographer to our area just before she turned One, oh how the years have flown. So many beautiful moments captured
Here’s a closer look at one of the areas that I went a little sequin crazy. I’ve used my trusty hot glue gun in areas of the cutfile that I had backed with cardstock and just dumped the entire packet of sequins over the top in hopes some of them would stick. I shook off the excess and repeated the process with the other open heart. I didn’t want the entire layout to look like a disco ball so I only went OTT with the sequins on 2 of the open hearts rather than all 3. I did also add a couple extras into the embellishment clusters.
The main embellishment cluster to the right of the photo came together pretty quickly by using some of the left over fussy cut flowers I had from the floral framed layout last fortnight, a puffy heart tucked in behind the layers and a sweet little flower.
To the left of the photo I’ve added a smaller cluster of florals to make it look like the two clusters are draped across the top of the cutfile with the photo sitting over the top.
The title nestled perfectly into the other sequin heart to the right of the layout, which I’ve adhered using foam tape so it didn’t sit too flat.
Here’s a final look at the whole layout..
Well that’s all from me today, thanks so much for stopping by to see what I created for our Sequins, Flowers and Puffy Hearts theme. Be sure to check out your favourite Scrapbook store for this amazing collection, its certainly one you don’t want to miss out on.
Hello Cocoa Vanilla fans! It’s Kylie back with you all today with another layout created with the ‘Daydream’ collection. For todays layout I am making a feature of hearts, sequins and flowers. My favourites! It’s so easy to create such soft and pretty pages with this collection and for something a little different I wanted to create some layered paper flowers.
To begin I cut some flowers using some lovely layered flower cut files from Neat and Crafty Cutz. Once they were all cut out, I pinched, folded and adhered them together to create lovely ruffled, dimensional blooms. I glued a few of the sequins from the sequin mix into the centre of some for a little extra sparkle and used the paper roses in the centre of others. For my background I chose the paper ‘SWEET SERENITY’ and cut down a piece of the ‘OVER THE RAINBOW’ paper to 18cm x 9cm, adhering it over the top.
My photos were printed smaller and adhered down the left side of my page with foam adhesive so they would sit up from the page and not become lost amongst all those blooms.Next I began positioning the flowers so they appeared to be cascading down the page around my photos. When I was happy with the balance I tucked in some of the foliage I cut out to fill the spaces between the flowers.
To complete my page I added some of the gorgeous fabric hearts and a large title from the die cut pack. I get asked a lot about storing a layout with a lot of dimension, like I have created with my paper flowers. I still add them to my albums without them becoming flattened too much or I hang them in my craft studio. You don’t necessarily have to fold your paper blooms too much either to be able to achieve a lovely dimension about them.
So that you can see exactly how my layout came together I have filmed a short process video for you that you can watch below:
It’s Tarrah back with you on the Cocoa Vanilla blog and today I am sharing another new layout featuring the amazing new Daydream collection!
This week some of the design team are focusing on using the super cute puffy hearts and gorgeous sequins included in the Daydream collection!
I started out by choosing a super cute house cut file from CUT to YOU, I cut it from white cardstock and then backed all the different parts of the house with the gorgeous papers from the 6′ x 8′ paper pad. The paper pad is perfect for backing cut files and for making cards with, it means you do not have to cut into a full sheet of 12′ x 12′ paper just to use a small section. Once the sections were all backed, I adhered the entire cut file to plain white cardstock using craft foam to give it some dimension and I then trimmed the white cardstock down and matted the entire page with the ‘B’ side of the Garden Variety paper. I then machine stitched around the white edge of the white cardstock for some extra texture and detail.
As I went for a home themed page design, I documented a photo of my gorgeous nieces at their home cuddling up with a doona together. I placed the photo to the right side of the house cut file so that you could still see the door of the house! I knew I wanted to add the ‘Happy Days With You’ banner sticker to the front door as you can see in the detail photo below. To the right of the photo, I tucked in one of the journal tabs, some cute flower die-cuts and a small tab that says ‘Sweet’. I also layered one of the moth die-cuts to the bottom right corner of the photo. Underneath the photo, I created a another small cluster including a small house die-cut with layered stickers over the top. Here I also stamped the date stamp of when the photo was taken.
The Daydream collection has the most gorgeous rainbows included in it so I added one of the rainbow stickers above the photo, it was the perfect size. I wanted to add the small yellow sequins to the windows of the cut file design to replicate a reflecting look like you would get from the glass of actual windows, I think these look cute placed here.
I also wanted to give the roof of the house cut file some texture like rooves have so the sequins were the perfect element to add here. They fit perfectly and give some texture to enhance the roof in the design. I also placed the mint green puffy heart to the heart in the cut file design – again the prefect embellishment to add here! The title is made up of the cardstock die-cut words, I added foam dots under the title to help pop it up off the page. I love the dimension it created. I added a few more phrase accessory stickers below the title here. The chimney at the top of the house was looking a little bare so I decided to add some of the small floral die-cuts tucked into it. I think these look cute too! Lastly I added another moth up near the chimney and a heart sticker too.
Thank you so much for stopping by the Cocoa Vanilla Studio blog, I hope you enjoyed seeing my layout today and that you are inspired in some way. If you don’t have the Daydream collection yet, be sure to keep an eye on the Cocoa Vanilla online store as the Daydream collection should be coming really soon! Trust me, YOU NEED IT!! It is amazing!!
Hi everyone! It’s Sue Plumb here today to share my latest design team page with you. This layout is actually the very first page I created with the brand new ‘Daydream’ collection, even though I am only sharing it now. When I cracked open this collection to create, I couldn’t help myself but reach for the adorable Over the Rainbow paper first. (I think there are lots of people who did the same – including our design team!) You may recall seeing lots of rainbow themed layouts over the past week from our team as part of our rainbow theme, so I thought what better time to share this page and join in the fun!
Now the funny thing about this layout, is I already knew I was going to make it before I even received the collection. (Very unlike me to plan a page ahead of time!) As soon as I saw Zoe’s reveal of this paper, I knew I wanted to use a silhouetted photo of my daughter standing under the rainbow (so I had her pose for the photo in advance).
I started my layout by adding a little bit of extra detail to the paper. I used a fine tip white paint pen to add faux stitched detail along the edges of some of the rainbow arches, and then faux hand stitched details onto the blue hearts.
I then cut around my photo to get rid of all the background and placed some messy white cotton thread for soft texture where my photo was going to go. I used some scrap cardboard behind the photo to pop it up from the page.
Once I had the photo in place I added a floral piece from the Die Cut Ephemera pack along the bottom edge of the page so it looked as though she was springing from a bunch of flowers. I also added a small floral sprig and the fantabulous banner piece to cover her hand.
Now it was time to add some extra detail around my page. In keeping with the whimsical scene I was creating, I added the die cut sun from the ephemera pack in the top right corner of the page using some foam tape to pop it up. I also used the happy days words from the ephemera pack as my page title.
With my daughter’s pose of her hand being held joyfully in the air, I wanted to create a look as though she was scattering some fun / happiness / rainbow vibes, so I used a selection of sequins from the Sequins & Flowers pack and stuck them as though they were being thrown from her hand.
I also added three fussy cut butterflies from the All Aflutterpaper, placing them so they were on the coordinating coloured arch on the rainbow.
I finished off with a few happy phrase stickers from the Accessory Sticker sheet placed onto the rainbow and my page was done. This whimsical scene was unlike my usual style of page, but I really had fun creating it and I am happy I could bring my vision to life. (And my daughter absolutely loves it, which is the most important thing, right?!)
Thanks so much for stopping by so I could share this with you. If you haven’t managed to find the ‘Daydream’ collection yet because your favorite store sold out, rest assured that plenty of re-stocks have been shipped, so check with them to see if they have it coming.
It’s Sophie with you today and I am so happy to share my very first layout created with the GORGEOUS Daydream collection !
I went for a rainbow-themed layout, inspired by all the rainbow pages we have on the CVS Facebook group !
I started my design by cutting a simple rainbow with my cutting machine on thick white cardstock.
I backed each ray of the rainbow with different patterned papers from the collection, namely “Happy Place“, “Sun Shower“, “All Aflutter” and “Sweet Serenity“. I also machine stitched between the rays with white thread.
I played with my water-colours to add just a little bit of interest on the white background, mostly around where I had planned to put my photo.
I used a photo of Sabrina and our dog to illustrate how lucky they are to have each other in those difficult Covid times. I placed it on one end of the rainbow, added tissue paper and adhesive foam behind it.
I cut a big strip of my white background paper on the bottom of the layout, punched a scalloped border and added the beautiful woodgrain patterned paper from Daydream called “Over the Rainbow” underneath the white cardstock.
I created a cluster of flowers on the bottom of my photo and tucked a few flowers underneath the scalloped border as well. They all come from the beautiful Die Cut Ephemera pack from the Daydream collection.
I used the Daydream Die Cut Titles for my “Big Heart” title, and hand wrote my journaling directly on the background.
Finally, I hand drew three clouds on which I applied a little bit of water-colour paint. I layered them with white cardstock and adhesive foam to make them stand out over the rainbow.
Isn’t this collection just AMAZING ?!!? I can’t get enough of everything about it !!
I hope you like the end result and that it will give you some ideas to get crafty and play with Daydream !


 I finished off with a few happy phrase stickers from the Accessory Sticker sheet placed onto the rainbow and my page was done. This whimsical scene was unlike my usual style of page, but I really had fun creating it and I am happy I could bring my vision to life. (And my daughter absolutely loves it, which is the most important thing, right?!)


