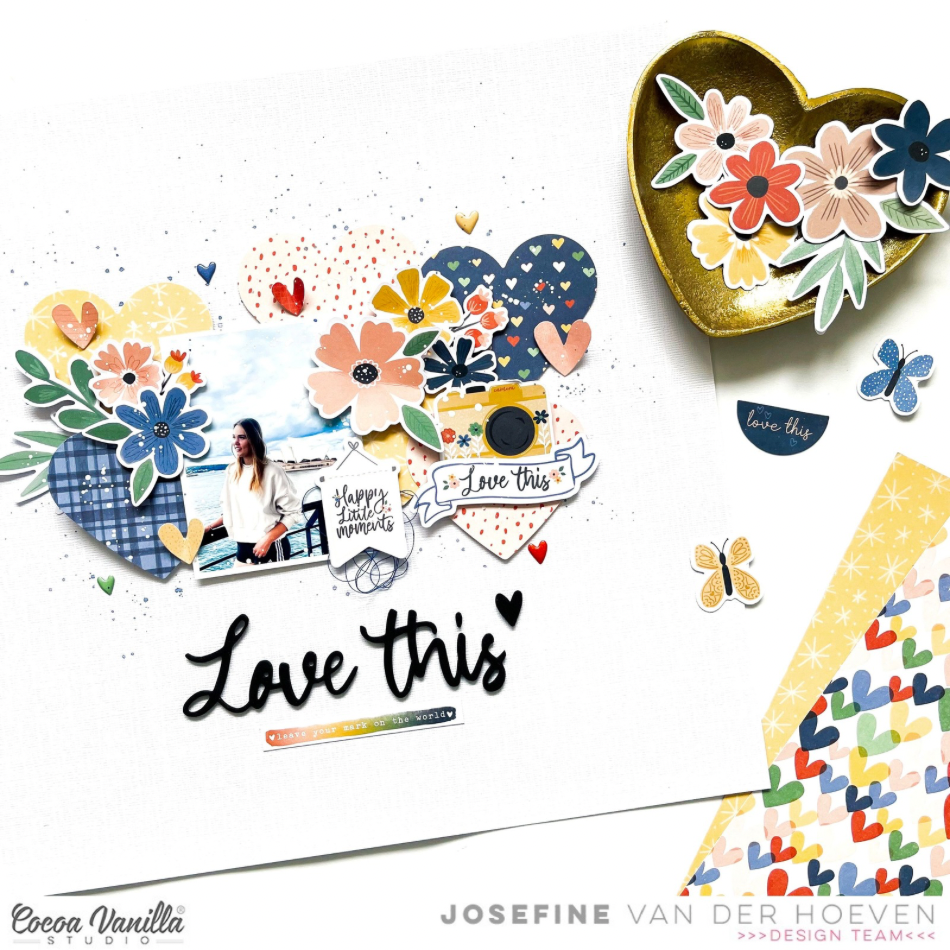
Welcome to the Cocoa Vanilla Studio blog! It’s great that you’re looking for new scrapbook inspiration. Today, I have a new scrapbook layout made with the beautiful “Storyteller” collection designed by Cocoa Vanilla Studio. These stunning fresh colors really bring your layout to life.
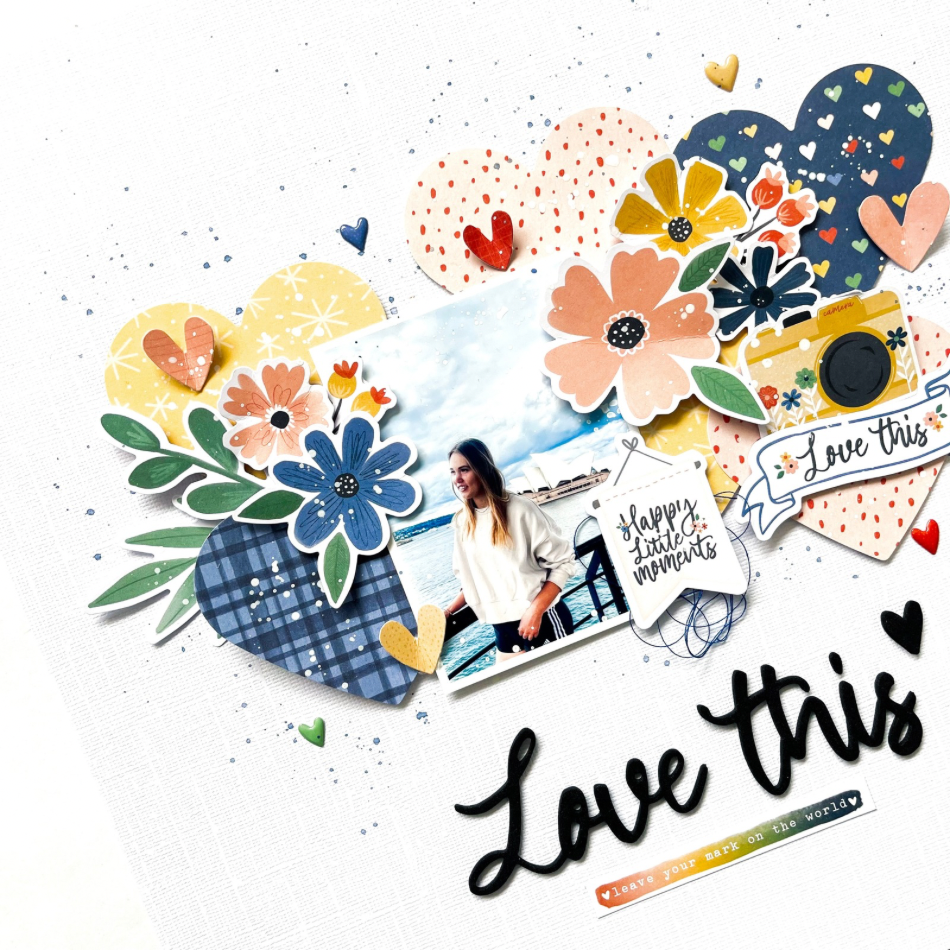
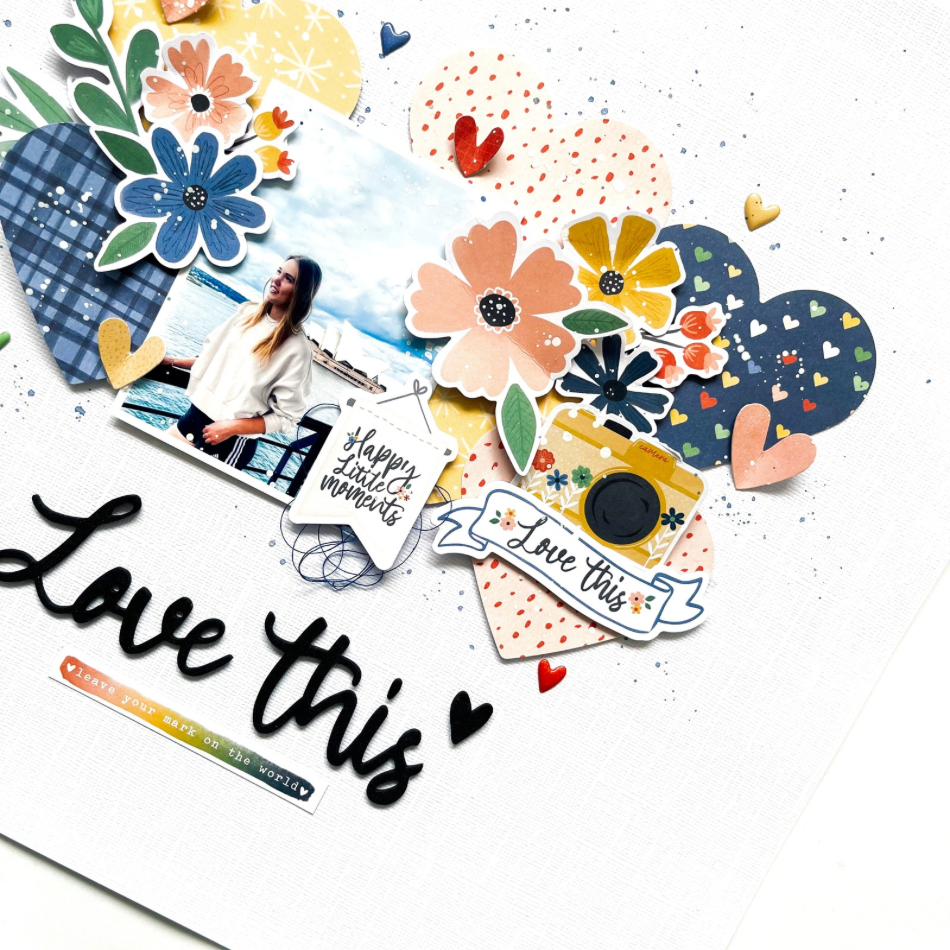
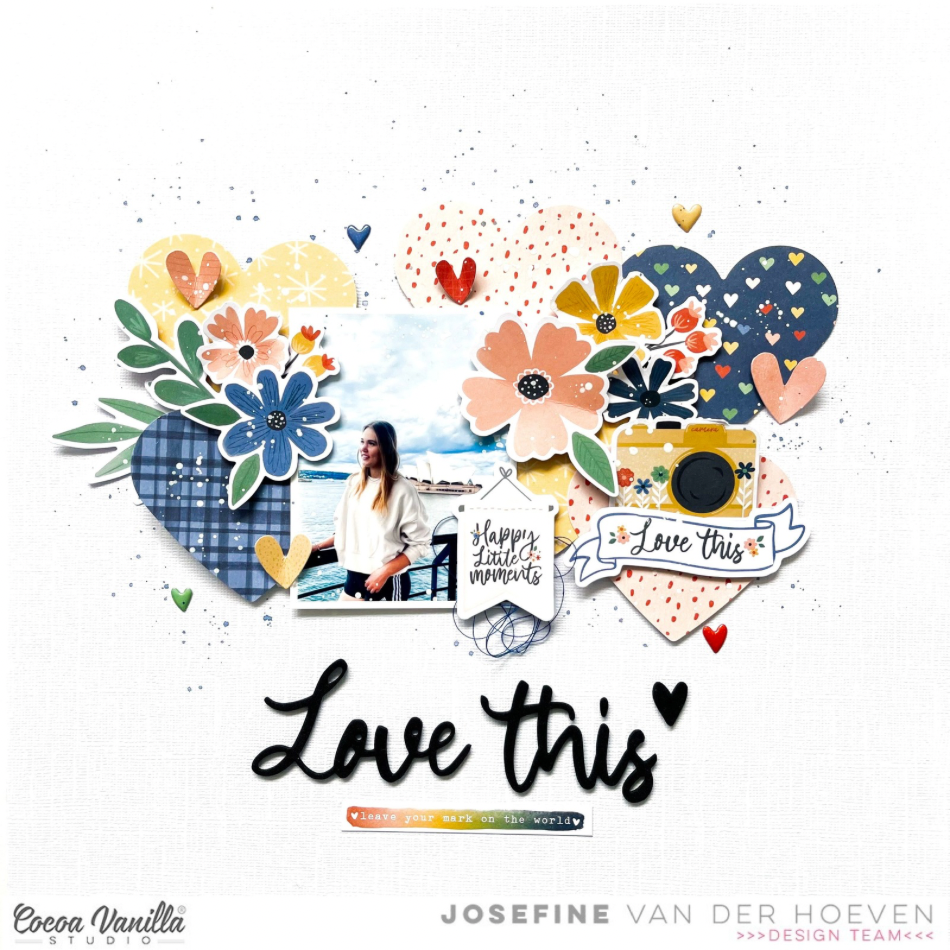
I wanted to use this photo of my daughter in Sydney. I decided to punch out various hearts using my heart punch and chose different patterned papers. I playfully arranged the hearts in the center of my white cardstock. On top, I placed the photo of my daughter posing in front of the beautiful Sydney Opera House.
I selected various paper die-cut flowers and created two lovely flower clusters. I also wanted to use the paper die-cut shapes, like the a cute camera, banner, and several mini hearts to give a place on this layout. For the title, I chose the elegant black foam titles. These black elegant words go wonderfully well with this amazing collection.
I added some splatters with white gesso, which I mixed with water, and also splattered some of my blue distress ink “Faded Jeans. I hope I have been able to inspire you with this layout and look forward to seeing you again next time on the Cocoa Vanilla Studio blog. Have a wonderful and creative day. XoXo, Jo
Hey Hey! It’s Michelle back here today with a new layout share for you all using the HappyDaysCollection. I was inspired by this months Floral Frenzy Challenge to create something with one of my most loved embellishments – Flowers, which reminded me of a layout I made a few years back. Lets take a peek shall we…
A layout full of colour and florals to celebrate this sweet kids 12th birthday back in 2022, when things were all sunshine and rainbows and we could get a smile out of her for a photo of 2 lol I used a bunch of florals from the Floralephemera pack, some fussy cut mini florals from the A5paperstack version of Lush Blooms and a handful of other fun ephemera embellishments to bring it all together.
I added the photos printed in black & white 3inch square size to some of the fun aqua Little Blossom paper layered with some of the brilliant blue floral Definitive paper
Here’s a look back at the original layout, full of florals in all shapes sizes and colours.
I replicated the same floral framing in both the top left and bottom right corners of the layout using a mix of flowers. These can be found in the FloralEphemera pack and the A5paper version of LushBlooms. I mixed in some ephemera pieces, enameldots, butterflies and accessory stickers using a mix of different adhesives for layering heights of dimension.
I added chipboard stars from the Titlestickerspack from the collection and some minipuffyalphas to the journal spot on the bottom cluster to create 1 of 2 titles on the layout. Yep you read that right, 2 titles. Is that even a thing?
The larger title on the layout consists of words from the ChipboardTitleStickers pack, a banner cut from an ephemera piece and some accessory word stickers. The perfect combination for a mixed font title.
Once I had all the pieces adhered in place I splattered the entire floral clusters with gold ink, added some extra gold glitter paint dots to fill in some gaps and called it done.
Here’s a final look at the entire layout..
Well friends thats all from me today. I hope you’ve enjoyed seeing this little scraplift of mine. Be sure to check out the other floral frenzy pages shared in the CocoaVanillaStudioCommunitygroup on Facebook. There’s plenty of inspiration to be found
Thanks so much for stopping by
Until next time, Happy Scrapping!
Michelle x
It’s Tarrah back with you today to share a new scrapbook layout featuring the gorgeous Happiness collection! I was given the Throwback Thursday theme for this week so I decided to revisit the gorgeous Happiness collectionand got creating! I don’t know about you but the Happiness collection would have to be one of my all-time favourite collections by Cocoa Vanilla, I am in love with it!
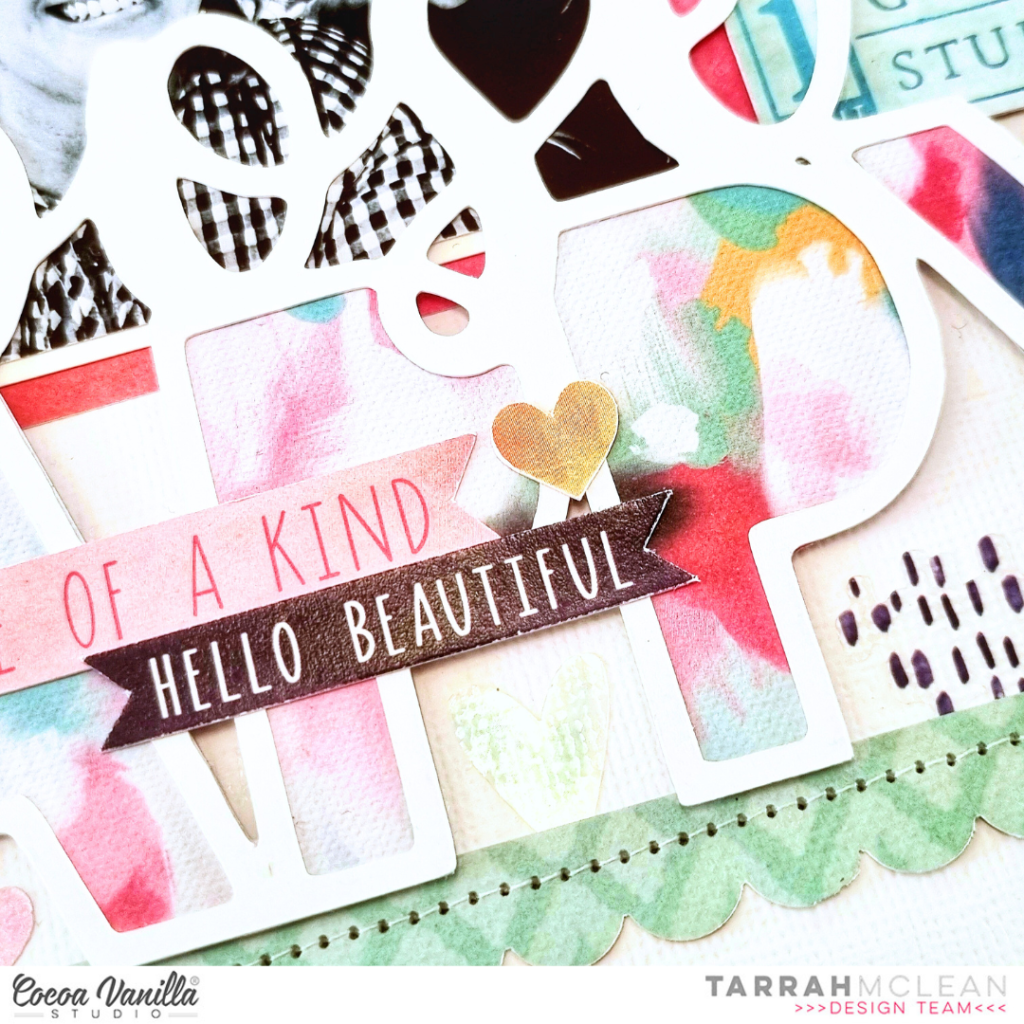
I chose to document a photo of my honey and I on a date a couple of months ago, opting to print the photo in black and white so that it would stand out amongst all the colour in the Happiness collection. I began by choosing a title cut file from CUT to YOU, cutting it out on white cardstock, I then took one of the papers from the A5 paper stack and backed the open letters in the cut file. I added craft foam to the underside of the larger letters and adhered it down in the centre of another sheet of plain white cardstock. I did leave adhesive off the top part of the cut file so that I could tuck in my photo and some embellishments and the cut file would be able to overlap these. I trimmed this white cardstock down to measure roughly 11′ x 11′ and adhered it to the ‘B’ side of the Botanical Bliss paper, I machine-stitched a border around the outside to add some texture and some interest.
I layered another of the papers from the A5 paper stack underneath the photo and also one of the frames from the ephemera pack. I also tucked one of the journal spots from the Accessory sticker sheet into the top of the frame and photo. Next, I cut out the ‘You Are My Happy’ from the A5 paper pad and adhered it to the right-hand side of the photo. I also tucked in the tag from the Accessory sticker sheet into the top of the You Are My Happy piece. I took some more ephemera pieces like the florals and butterflies and layered them around the cut file, I also layered the phrase banner die-cuts on top of the cut file.
The clear stickers in this collection are gorgeous so I added them around my page and also some of the phrase stickers from the Accessory sticker sheet as well. As I don’t journal on my pages all that much, I love how these phrase stickers help to tell the story behind my photo.
I cut a strip of the ‘B’ side of the ‘Frame of Mind’ paper and punched out a scalloped border using my border punch. I then adhered this piece below the cut file and machine-stitched through the centre to add some extra texture. Lastly I stamped the date stamp to finish my layout. A love how it turned out and hope you are inspired to get creative!
Thanks so much for stopping by the Cocoa Vanilla blog today!
Today I am sharing another layout using the fab! Great Escape collection! This layout has been created using only the A5 Paper Pad.
The only thing you have to remember is that anything you cut must be 6×8 inches. This is a great way to either save your 12×12 inch papers or when your supply of the 12×12 inches papers is running low. I cut 10 scallop strips using different colours and patterns to create my background. So they stood out I added some black machine stitching to each strip.
I next cut my title Wild & Free using a cut file from the Silhouette design store which I then offset using a darker colour to add contrast so my title really popped on the white background paper.
Using another cut file from the Silhouette Design store, polaroid Frames, which I back filled with the journal cards also from the A5 paper pad. I added my two photos and set about embellishing this with Puffy Stickers, Accessory stickers and ephemera die cuts.
I used chipboard pieces to add over my scallop paper strips to add dimension. I layered the stars and used foam tape to add dimension.
This layout was super easy to put together and you could do a 8 1/2 x 11 inch version. You could also add larger photos or more photos. I love the colours of this collection and the A5 paper pad has some colours/designs that are not in the 12×12 collection pack.
As always thank you for stopping by and I hope I have inspired you to get out your A5 paper pad and think of ways you can use it to create a layout.
Hi everyone, it’s Sue Plumb here to share another design team project with you. Today I am sharing a mixed media layout featuring the ‘Heart & Home’ collection. Inspired by this month’s “Flower Frenzy” challenge, I decided to document this family photo I took while we were out celebrating an early Mother’s Day lunch. (Family photos with all of us in them are rare, as I am usually the one behind the camera – I am sure many of you can relate!)
I began this layout with a sheet of white cardstock, which I cut down to measure 11×11″, and then backed with the sweet Leaf Litter paper to form a border. I then used pale pink Distress Oxide ink mixed with a little water to create a watercolour paint, which I brushed vertically onto the top half of the page using a wide brush. I then chose a yellow acrylic paint and applied it vertically to the bottom half of the page using a small brayer. This gave me a two-toned background that coordinated perfectly with the colours of the collection.
Now it was time for some paper! I chose a mix of patterned papers, including Fall Beauty, Harvest, and a couple of designs from the A5 Paper Stack to create layers in the central area of my page. I used a mix of both cut and torn edges for contrasting textures, and also added some frayed gauze and a paper doily. My photo was then mounted on top with a little cardboard behind it to help pop it up from the page.
I stuck a couple of stickers from the Accessory Sticker sheet directly onto my photo, then turned my attention to the journalling. I cut a journal card from the Gathercut apart paper, then popped it into my typewriter. (I find the easiest way to do this is to use some washi tape to tack it to a larger piece of paper or card, so it doesn’t get lost in the roller.) I then tucked my journal card under the edge of photo and added a handmade heart embellishment on top.
Then it was time for some flowers! I used a combination of fussy cut pieces from the Bountiful paper, and others from the Floral Ephemera pack to build my clusters. I used my tried and true method of creating a visual triangle around my photo to help me decide placement which in this case was top left / centre right / middle bottom. You can see how this frames naturally around the focal point of my page (my photo). I layered the floral pieces, bending up the leaves to create dimension off the page.
I finished my page with a Gold Foil Title in the lower right corner; some stamped words and the date; and tiny gold ink splatters scattered around. Love how this one came together!
If you love flowers, then make sure you enter our May “Flower Frenzy” challenge which is hosted in our Facebook Cocoa Vanilla Studio Community group. You can enter as many times as you wish (providing each entry is created specifically for our challenge) and there is a $25 store voucher to be won. Looking forward to seeing your floral masterpieces!
It’s Sophie with you today and I am happy to share this new layout created with the Great Escape collection !
I went with circles for my design and selected several different patterned papers from the collection and placed them in scalloped circles (created with a metal die from my stash).
I selected a beautiful photo from our trip to the Rocky Mountains and centered it on my page.
I embellished around the photo with all these coloured circles.
I cut about half an inch for both sides of my 12×12 white cardstock and placed it on the beautiful striped paper “Journey” from the collection. It recalls all the colours from the circles and ties everything together !
Finally, I embellished the layout with Die cuts from the Die Cut Ephemera pack, stars from the Puffy Stickers pack and used a Foam Title Sticker for my title.
Here are more close-ups:
It’s different and fun ! I love how it turned out !
I hope it can give you inspiration to get crafty !
Thank you for stopping by, I will see you again soon !
Hello crafty Friends! It’s Anna here with my layout inspired with MAY CHALLENGE. The topic for this month is FLOWER FRENZY and I think I did it a justice.
I made a page filled with flowers and almost nothing else. Go bold or go home right? It was such an easy job with Floral Ephemera products and almost each Cocoa Vanilla collection has them!
I actually combined two of my favourite things – flowers and rainbows. I just arranged the flowers in particular order creating horizontal stripes of color. As you can see, this background required a lot of flowers so I combined Floral Ephemera packs from both HAPPY DAYS and SUNKISSED collections. They both share similar, juicy color palette so flowers match together perfectly.
I started with shite cardstock and just added flowers in two layers. Some of them are glued down directly to the background and some with one layer of foam. Next step was to add extra leaves and flower buds. I didn’t have enough of single leaves to I just cut branches into smaller pieces.
After the background was done, I added my photo and title created with Chipboard Title Srickers. Each letter is a separate sticker so you can also treat those words as a source of letters and create new words with them.
I finished my project by adding tiny Puffy Stickers in a shape of hearts and few words from 6*12 Accessory Stickers. Flowers did the whole work here so I didn’t need much of an embellishing.
How do you like my idea for a custom made background? it will be a perfect idea to use up the leftovers from older collections too. You can also fussy cut flowers from 12*12 papers. Almost each CVS collection has one, that is perfect for this purpose!
That is all for today! Thank you so much for spending your time with me and see you in two weeks!
Welcome to the scrapbook blog of Cocoa Vanilla Studio. It’s great to see you here looking for some new scrapbook inspiration. It’s May, and this month it’s all about flowers. Have you seen the new challenge yet, the Flower Frenzy Challenge? For this challenge, we invite you to use flowers as the main design element of your layout.
I found this challenge really exciting, so I dived into it using the beautiful “Storyteller” collection. I started by fussy cutting flowers from the patterned paper. I combined these flowers with the die-cut floral ephemera. Then, I trimmed some blue patterned paper to size and placed it behind the photo of my daughter. This photo was a perfect fit for the theme. She was posing by a small restaurant in Mexico, hidden behind a stunning sea of flowers.
Placing the photo roughly in the center of the white cardstock, I began creating a gigantic cluster of flowers above it. I was pleasantly surprised by how it turned out. On either side of the photo, I added a few small flowers and leaves in a playful manner. For the title, I used the word “Lovely” in black foam, and for the word “you,” I used a green alpha from my own stash. I thought the red puffy heart was a lovely finishing touch for the title.
Finally, I added some circle puffy stickers around the flower cluster. I had so much fun with the Cocoa Vanilla Studio May challenge, and I’m really pleased with how this floral layout turned out. I hope I’ve inspired you with this layout, and I’m looking forward to seeing your beautiful flower layouts too! Wishing you a creative and wonderful day.
Happy Weekend Crafty friends, it’s Michelle back with you today. I’ve used the GreatEscapeCollection for this layout to document our crazy little adventurer from a couple years back. Lets get into it..
As you can see I’ve gone fussy cutting mad again, this time with the Flags paper HappyCamper. I spent many nights in front of the TV cutting up that entire page of flags without any idea of how I was going to use them all. Then it hit me, let’s create another wreath / sunburst style type of layout.
I started with a blank piece of white cardstock with a roughly drawn large circle centred in the page and all the flags set out in colour groups ready to go. The easiest way I found to get a good mix of the colours around the circle was to work with each colour individually. Thankfully each flag design/colour had 3 of each so it was easy to place evenly in thirds around the whole thing. I used foam tape to adhere each flag to the background which gives it that little pop of dimension. I added more texture to the layout by sewing all the pieces down using my machine and a straight stitch.
Our Happy yet Crazy Little Adventurer – LOVED this little trike and its a little sad that she no longer fits to ride it around. The speeds she would get up to on this little thing, flying round and round my parents little court.
I ended up cutting the entire circular flag piece off the white background and then adhering it to the bright Horizon paper. I felt this made the wreath pop so much more. Next up I added the photo layered with a piece of A5paper, then adhered to the left of the wreath using some foam to lift it up.
I created the title using the puffyminialphabet from the Heart&HomeCollection along with the chipboard sticker word from the Chipboardstickers sheet. I layered in some stars and ephemera pieces to create a cluster of sorts to add even more fun to this already chaotic layout.
I added more of the larger stars around the layout to create more embellishment clusters, with a mix of tiny stars, puffy stickers and accessory word stickers scattered around to finish it all off.
I also added the usual splatters of gold ink to tie it all together and called it done.
Here’s one final look at the entire layout..
Well friends, thats all from me for today. Thanks so much for stopping by
Hey y’all! Laura Alberts back again and I’m dipping into an OLD collection from 2016! After organizing my craft space, I found this collection and just had to dive in! It’s such a stunning mix of pastels and gray tones that were perfect for these first snow pictures. The title ephemera is from Midnight, but the rest is all from Love Always.
I started with this beautiful mixed media-style background paper, a strip of teal, then used ephemera pieces to create a border in between. The Nuvo drops and ephemera hearts along the right side gave this layout a fun pop of interest that it needed.
I cut out two tags from the patterned paper and layered them behind my photos, then built up two clusters that run diagonally through the photos. The cluster on the top leans to the right and the one on the bottom leans to the left. This guides the eye through the layout, and added to the butterflies, creates a sense of movement on the page.
If you’d like to see how “Shine” came together, be sure to check out the process video below!