The Sweet Life | Unforgettable | Amanda Baldwin
Hi Cocoa Vanilla Studio Friends!
Amanda here, joining you today with some super pretty UNFORGETTABLE inspiration! This week the Design Team have been asked to create scrapbook pages that feature pattern paper as the background – so no white cardstock! We’re aptly calling it ‘white out’ week! Here’s what I came up with…..
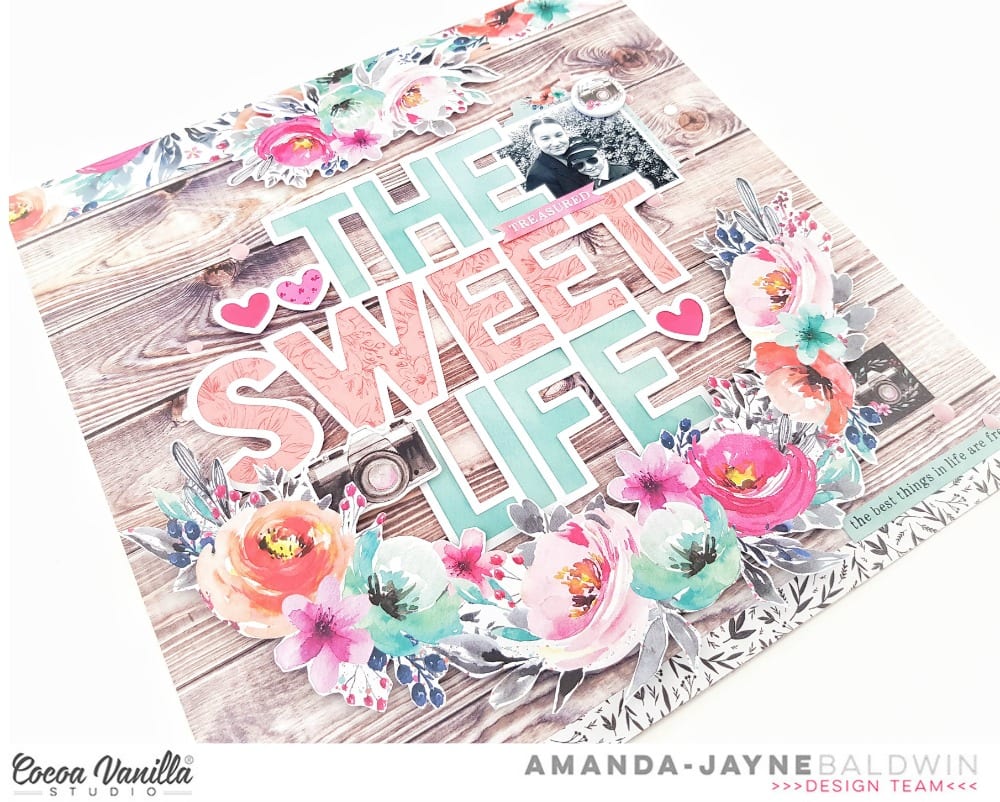
“The Sweet Life”
Sweet indeed! What a delightful page!
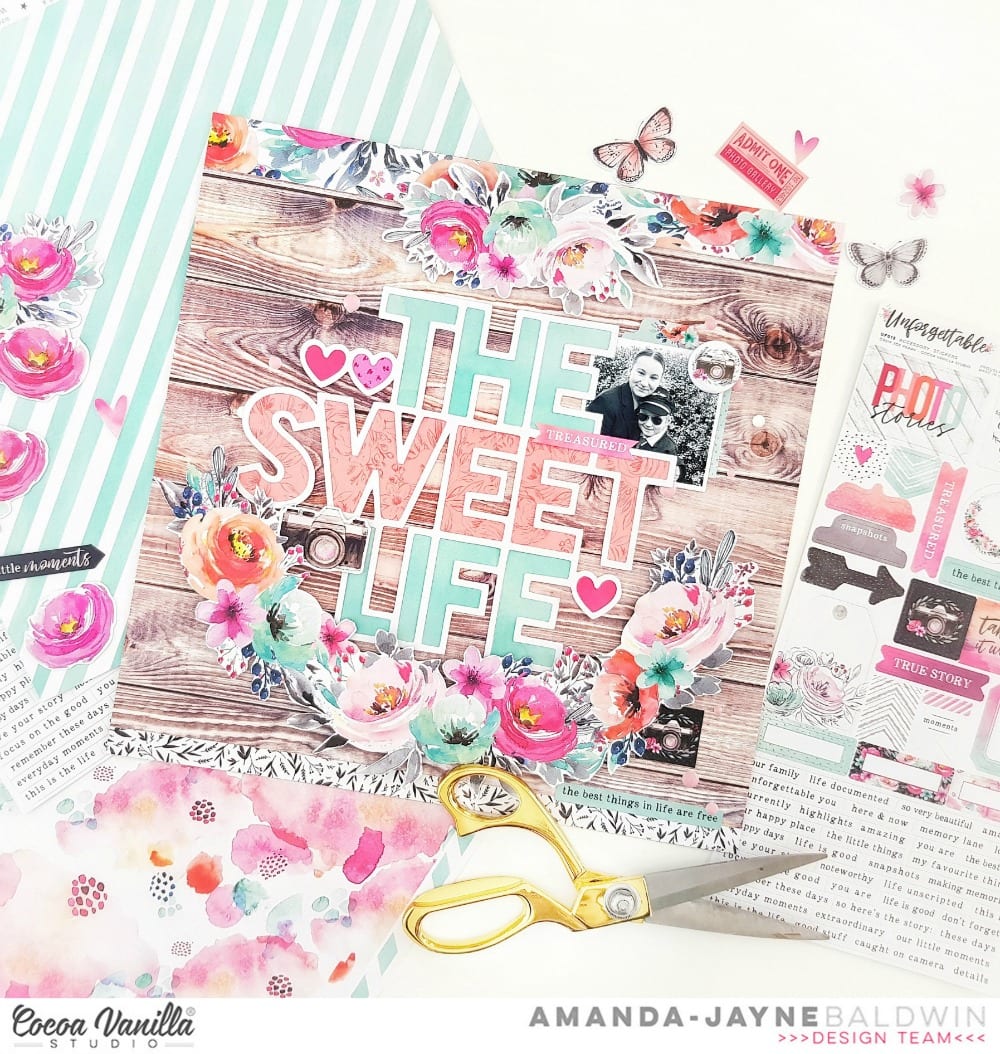
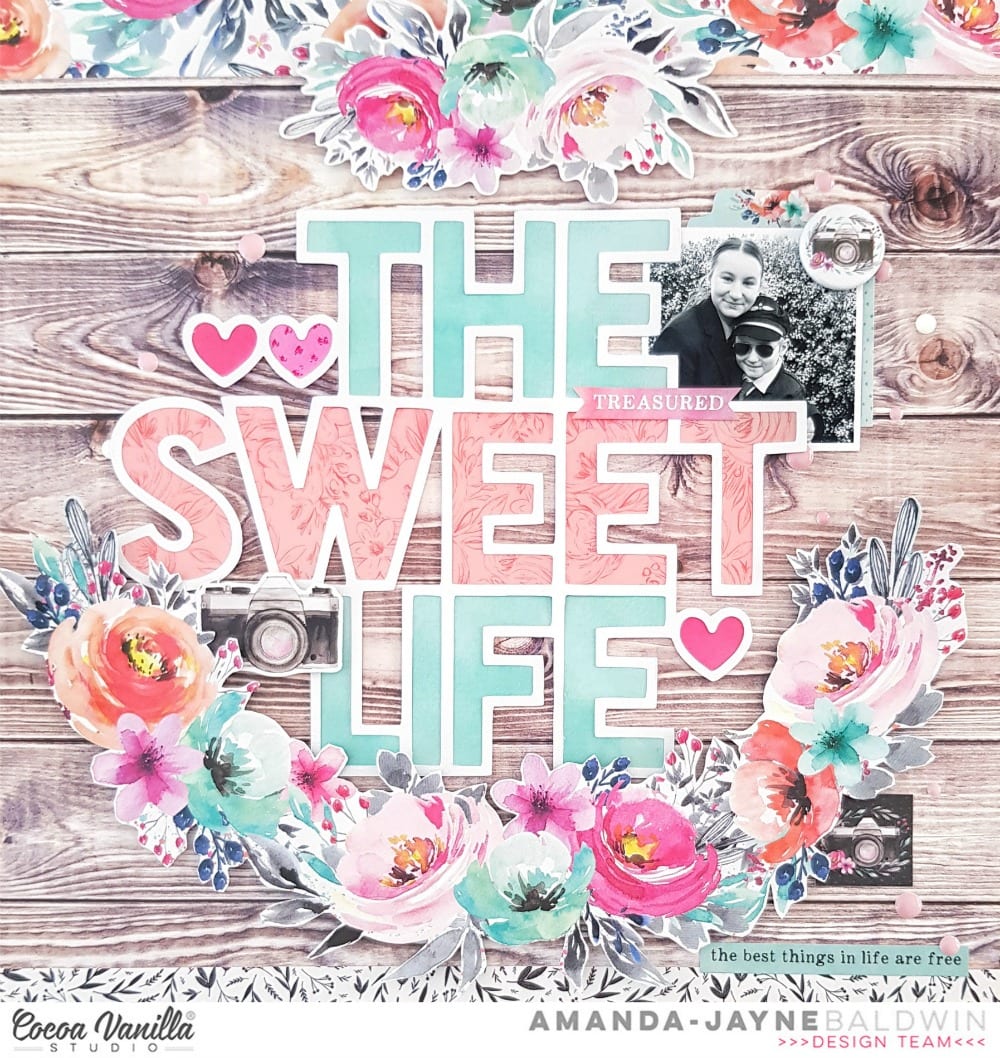
You’ll spy that I used the beautiful woodgrain paper, CV-UF008 NATURAL BEAUTY as my background paper. However, once I started looking at all those pretty papers I just couldn’t stop at one – so.much.gorgeousness! Naturally, there are lots of pretty pattern papers featured on my layout today! Let’s take a better look….
Isn’t this just gorgeous?!! And truly, life couldn’t be any sweeter with my two darlings!
To the top of my layout, I added a one inch strip of that divine floral, CV-UF001 GLORIOUS. This paper makes me swoon every single time I lay eyes on it! Such a stunning floral design! And speaking of florals, I used that coordinating floral swag DIE CUT EPHEMERA piece to embellish the GLORIOUS trim, and act as an anchor for my title and overall design.
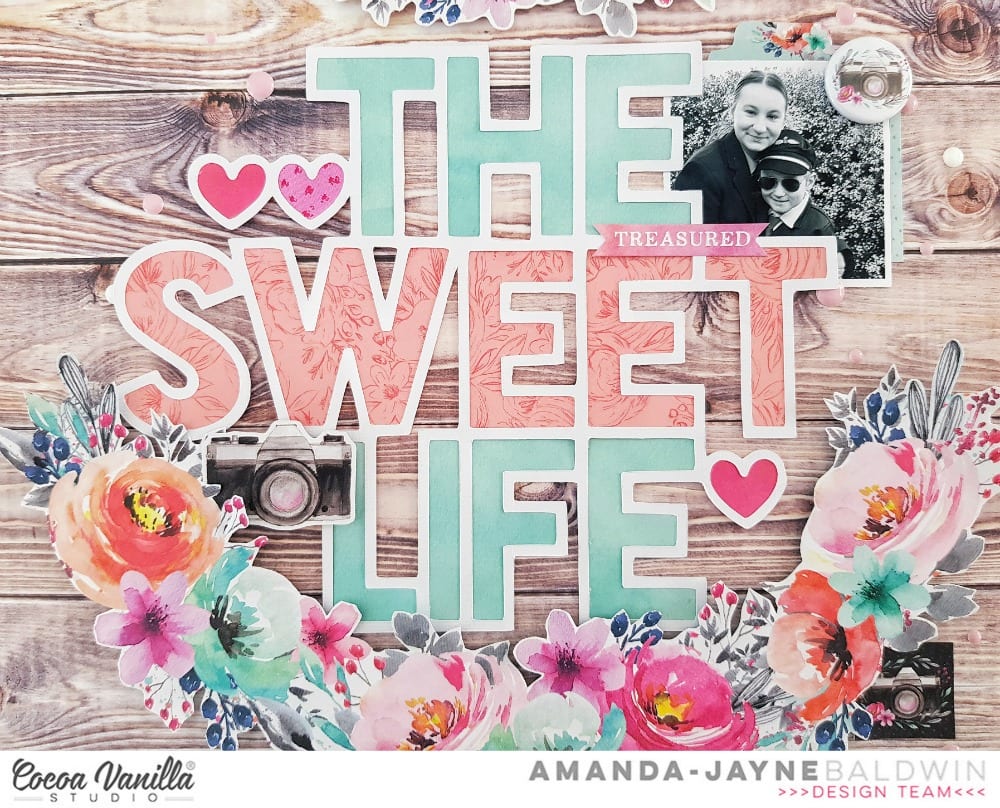
My large title is a digital cut file courtesy of Cut To You, and I have backed it with a few of the 6 x 8 PAPER PAD papers. ‘The Sweet Life’ papers happen to be the smaller variation of the B-side designs to CV-UF003 GARLAND and CV-UF005 LACEWING. Love!!! The 6 x 8 PAPER PAD is the perfect choice for backing cut files with!
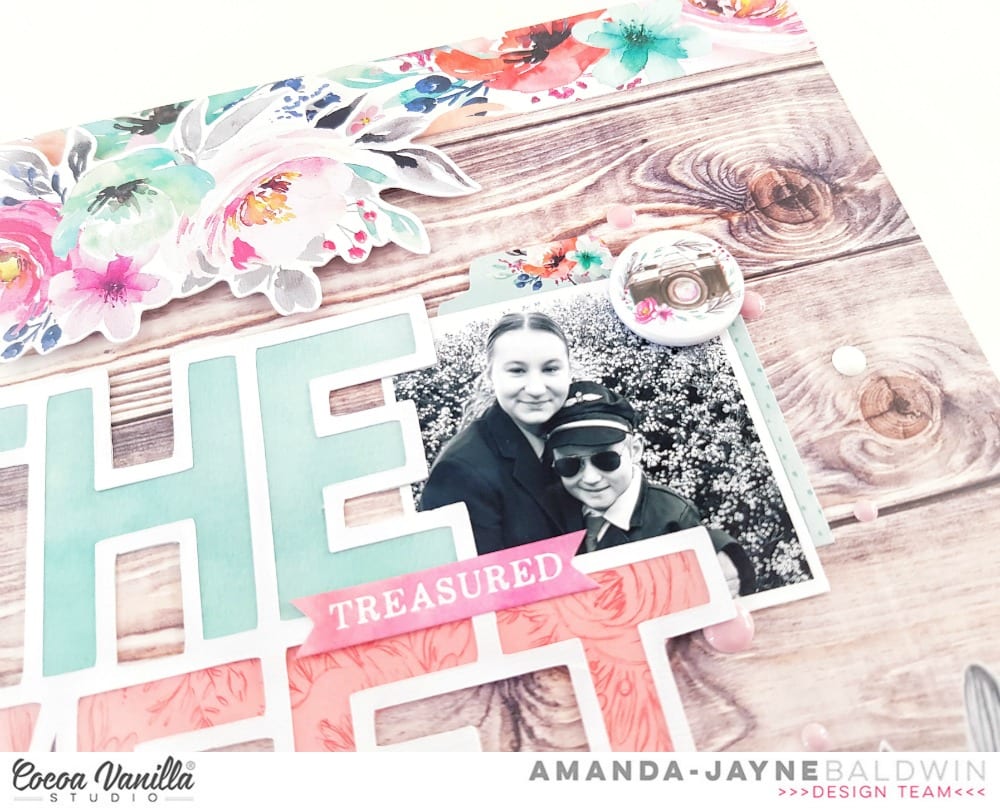
I embellished my larger title with a few carefully selected pieces, the first of which was my photo cluster. I tucked my photo just beneath the edge of my title and attached them together with the ‘treasured’ ACCESSORY STICKER. I used another sticker beneath my photo, as well as a DIE CUT EPHEMERA tab to support my photograph. Here’s a closer look for you…
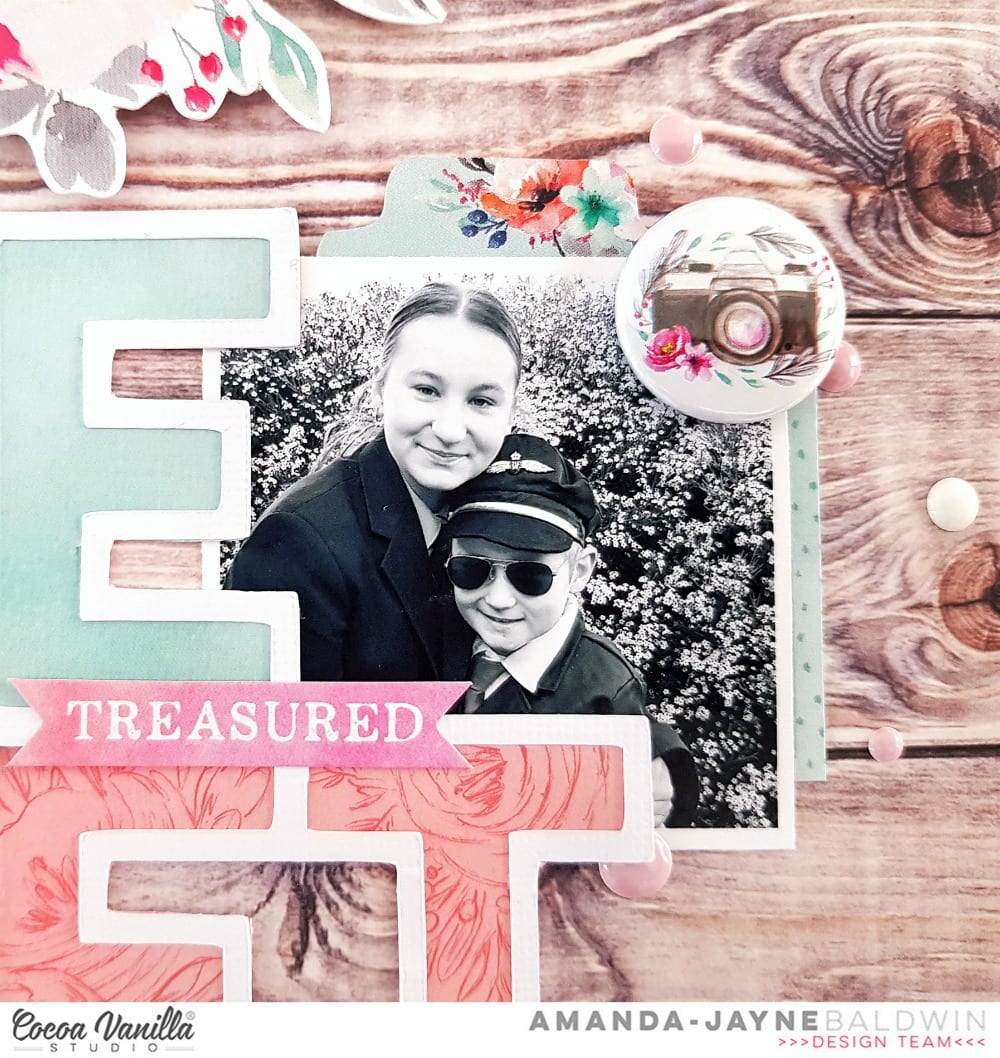
The Cocoa Vanilla Studio FLAIR BUTTONS are always amazing, and I added that sweet camera one to complete the look.

To balance my black & white photo on such a colourful page, and create that second point of interest to the title, I foam mounted that sweet DIE CUT EPHEMERA camera embellishment. Subtle, simple but so effective!
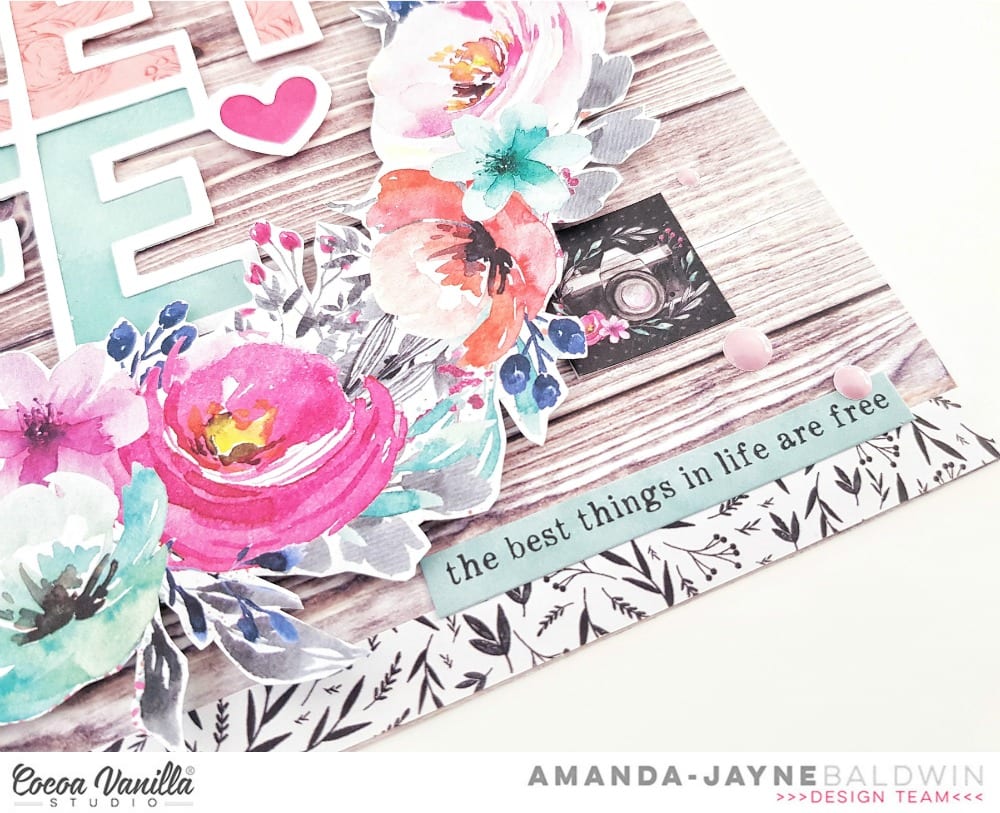
In keeping with the rule of three, and the sweet camera embellishments, I also featured the pretty black camera ACCESSORY STICKER. So cute!
The final adornment to that big title is the fussy cut the florals from pattern paper, CV-UF003 GARLAND. I foam mounted them just below the title, and ensured that they reflected the swag at the top of the page too. This really added that wow factor to my overall design.
The CV-UF008 NATURAL BEAUTY paper is so stunning that I had to use both sides of it. The pretty B-side (that striking black & white foliage print) trims the base of my layout. I ensured that the GARLAND floral arrangement overlapped this trim & in turn, created a more cohesive design. For a polished look I added the ‘best things in life…’ sentiment ACCESSORY STICKER and a good sprinkle of ENAMEL DOTS.
And there you have it! Beautiful, classic creating that highlights our gorgeous UNFORGETTABLE pattern papers!
I hope I have inspired you to use more pattern papers in your projects this week!
Thanks so much for stopping by today!


 Absolutely stunning!


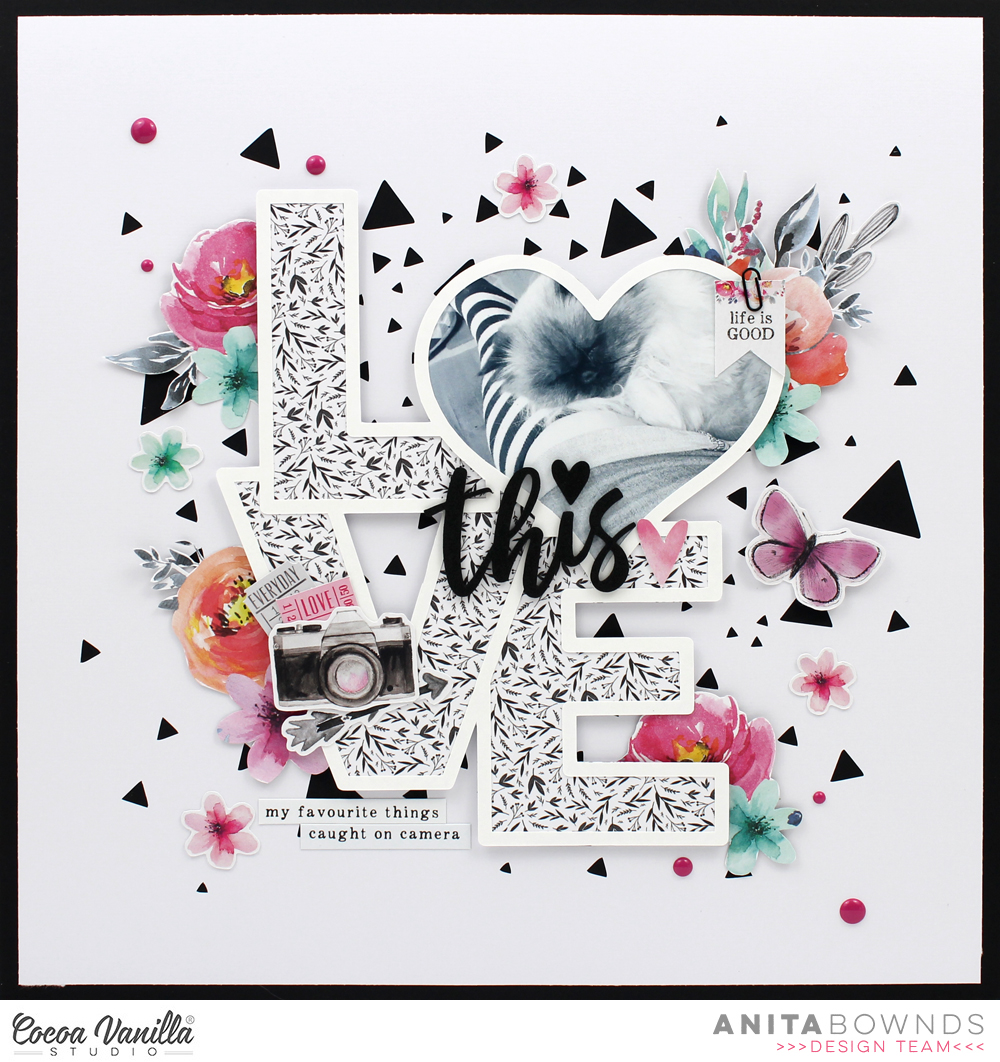
 And here. is version two! I decided to go bold and bright, ensuring my lettering really stood out which I felt it got a little lost in the first version of the layout. The only drawback was I had to convert my photo to black and white, which I think lessens the beauty of the shot.
 On both layouts I have used Story Teller paper as my base so there was a slight contrast with the black dots instead of a flat white. My second version I have used a turquoise cardstock, cutting the Story Teller paper down to 11×11 inches. I also used the same cardstock to cut Girl Squad cut file. on my Silhouette Cameo, in my first layout I used white to cut the Girl Squad cut file.
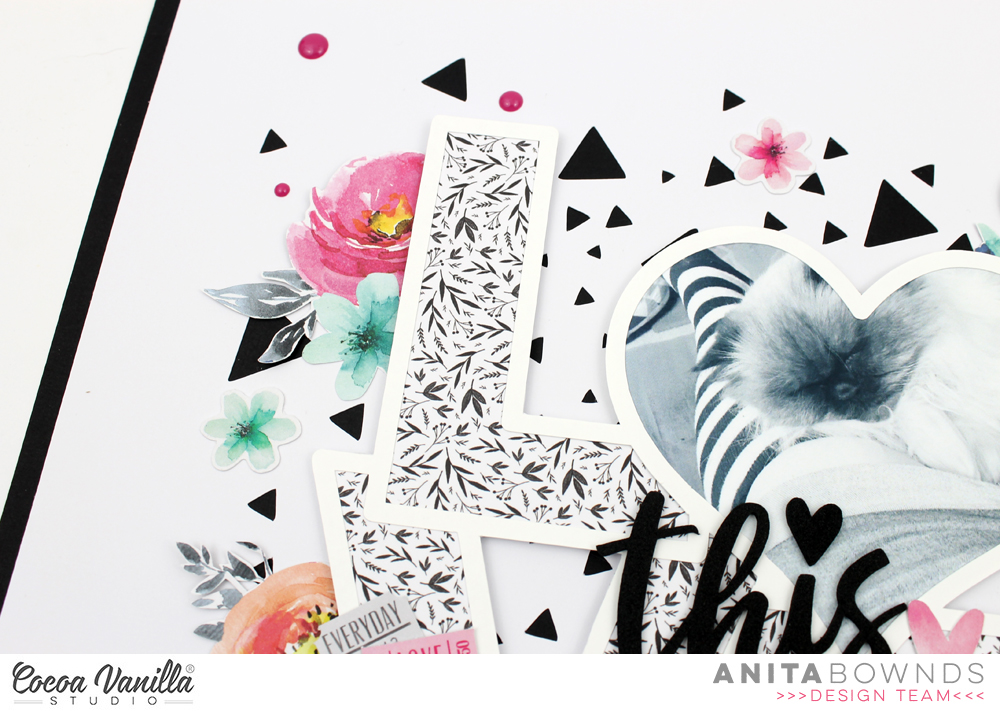
 I used the beautiful Forget Me Not paper to paper piece the Girl Squad cut file, wanting a smaller print so I could use some of the larger floral die cuts without them getting ‘lost’.
 From the 6×8 inch paper pad I used the Lacewing paper and fussy cut numerous butterflies. I wanted smaller butterflies hence why I used the sheet in the 6×8 inch pad and not the 12×12 paper. I added these with foam tape to create a 3d effect.
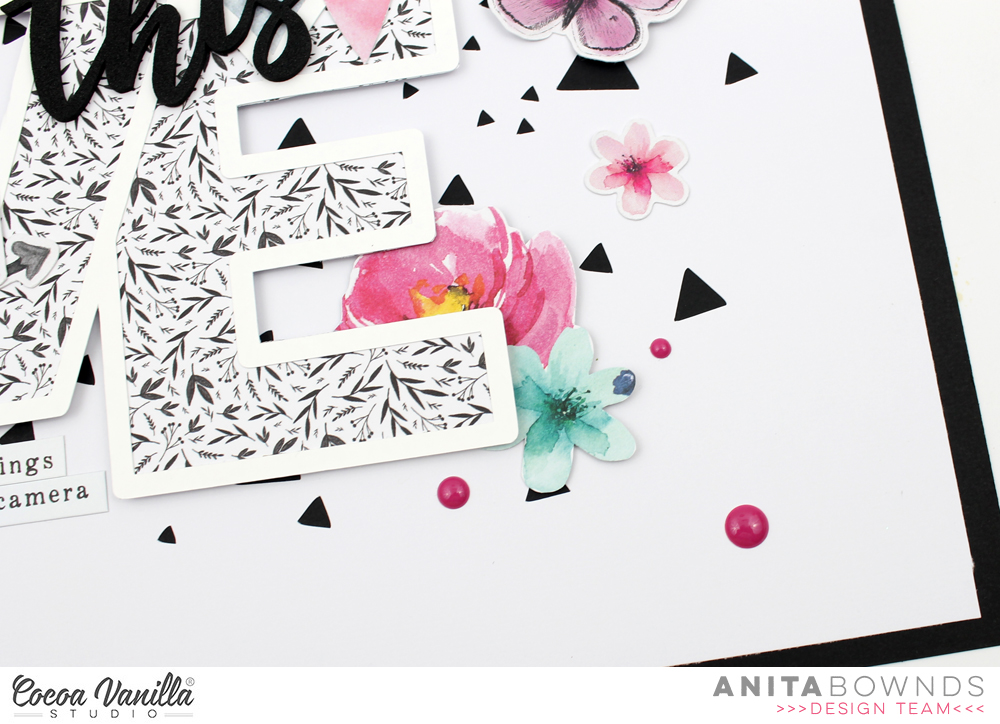
 I chose the largest floral bunch from the die cut ephemera pack and added in a way you could still see the lettering. Again I did this with foam tape to add dimension. I added some of the pink and turquoise enamel dots to flowers and under some of the butterfly wings.
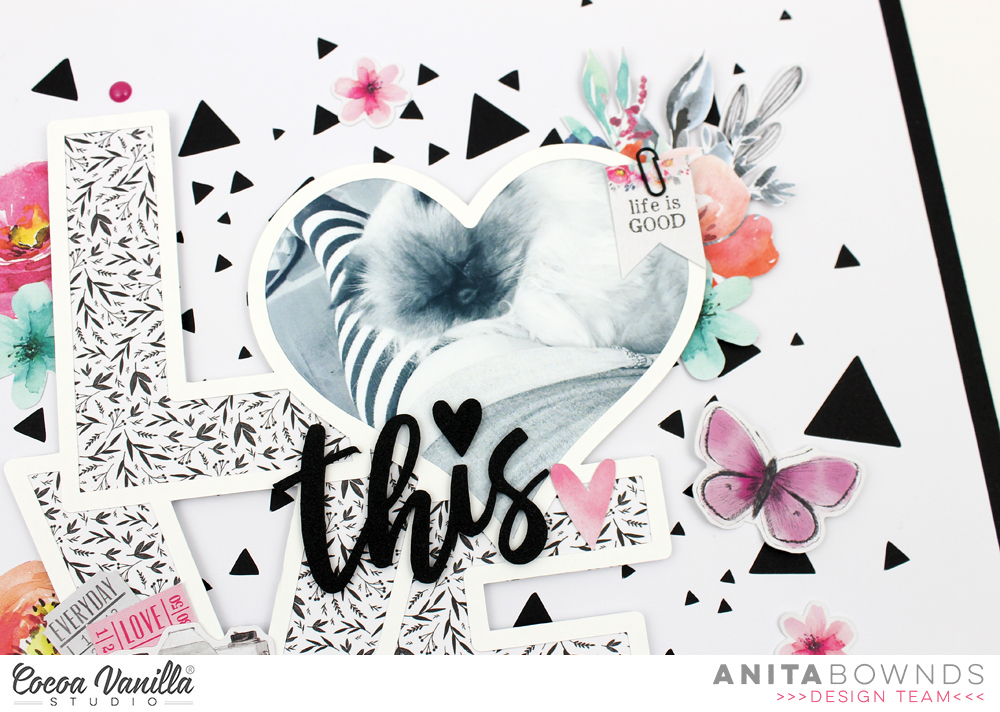
 Before adding my photo I used some of the paint blotches from the Clear Sticker Sheet (I adore the clear stickers so much!) to ‘frame’ my photo and draw your eye to it. I used foam tape to attach my photo. I finished off adding some phrase stickers from the Accessory Sticker Sheet.


