6’th grade | Mixed collections Layout | Anna Komenda
Hello Cocoa Vanilla maniacs. I have a pleasure to open a RAINBOW LOVE week over the CVS blog. I bet you can imagine my excitement when I saw this theme. I am hudge rainbow fan and I love mixing and matching many collections in one project. I ended up with very energetic page documenting first day of a brand new school year of my older daughter. She is already a sixth grader so it means only two more years before she will finish elementary school and move to high school. I am totally not ready for that moment.
![]()
I started making this page with a white watercolor paper sheet. I picked six Distress Oxide ink colors and made a rainbow rays with them, starting in the middle of the page. It’s a really easy and simple process. You can easily replace Oxides with any other inks. They just need to blend easily. After I applied the colors, I sprinkled everything with clean water to create few splatters. Ink reacted with water fading away which added some great texture to the background.
![]()
Next step was picking six papers in corresponding colors to layer them over mixed media background. I went through my CVS stash and picked orange and yellow papers from “Legendary”, green and blue from “Boys rule”, pink from “Happiness” and purple from “Bohemian dream”. I run them through my Silhouette Cameo and cut simple arrows in different sizes in each color.
![]()
I glued them over the backgroun color on color. Last step was to place the photo with some embellishments around it. This time I gathered 6*12 sticker sheet from many older and newer collections and picked few labels and tabs to add them under the photo. I didn’t want to cover too much of my background.
![]()
I went through my collection of enamel dots, also from the previous collections, and placed few of them between the arrows, also color on color.
It was such an easy and fun page to make. I can never say “no” to all those juicy colors. If you want to learn how it was done, you can watch a process video I recorded for you.
I hope you will join in this colorful madness and create your own rainbow. Thank you so much for stopping by and see you in two weeks. I will finally be able to share with you a project made with brand new “Daydream” collection. It just arrived to my doorstep and I am over the moon excited.
XO Anna
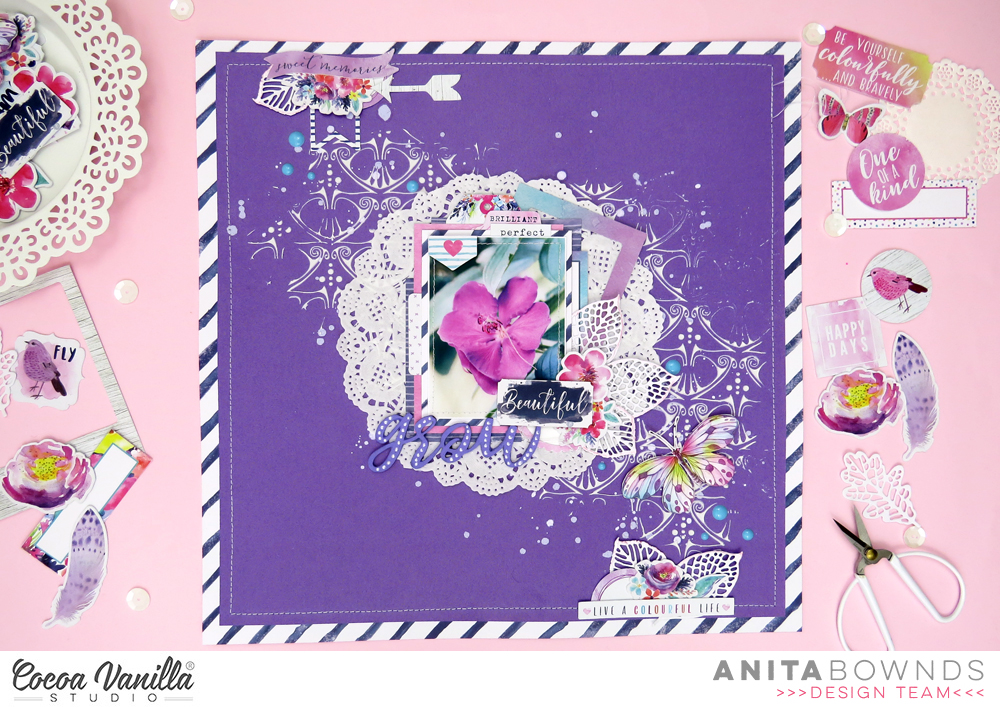
 I cut a piece of white cardstock to 10×10 inches. I added some turquoise paint brush strokes randomly across the page and splattered lightly with some black paint (this is as messy as I can get lol). I then added messy machine stitching in a turquoise colour. I also tore some of the white cardstock edges for texture.
 I attached this to the stunning Abundant paper as a stunning border. I used two floral cut files from the Silhouette Design to add to the sides of my pages. I used another busy paper
  I love using the
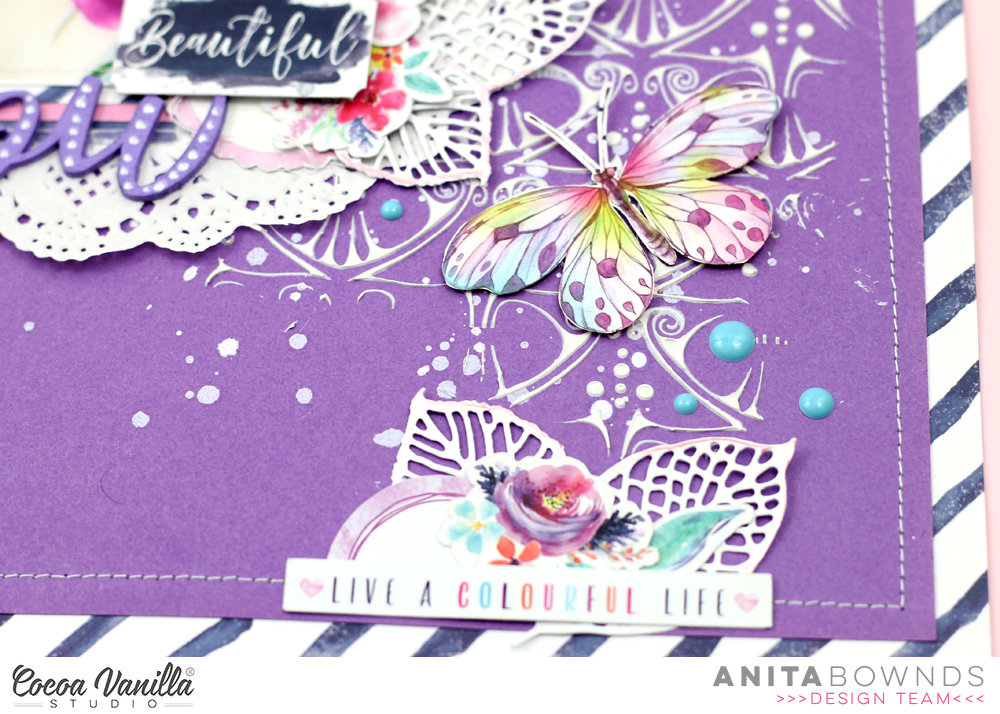
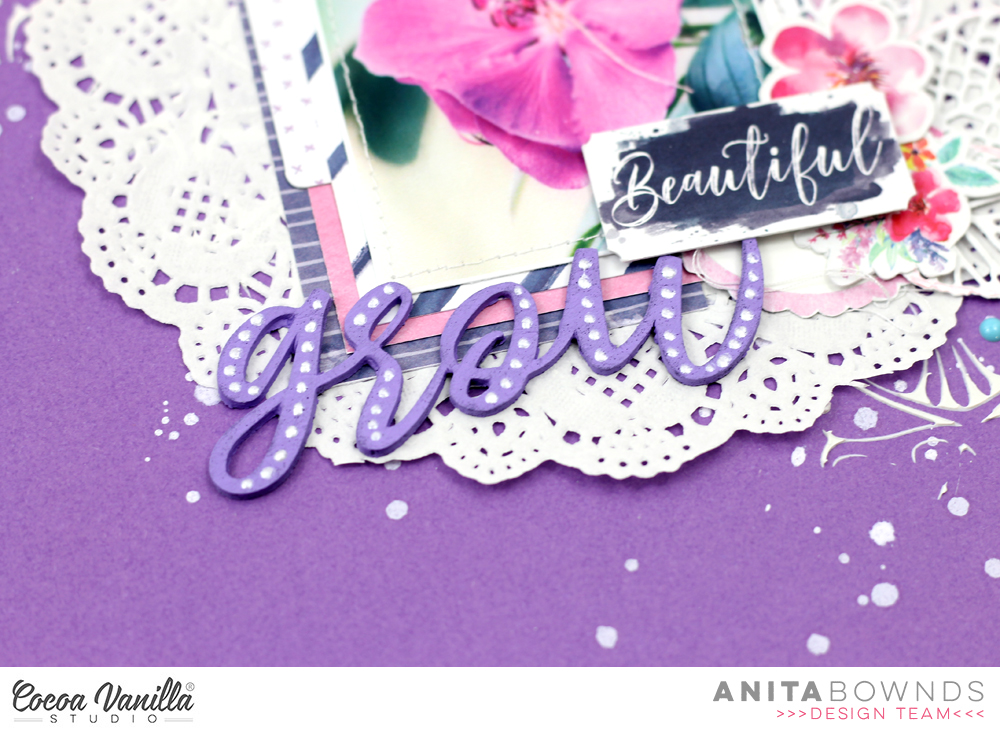
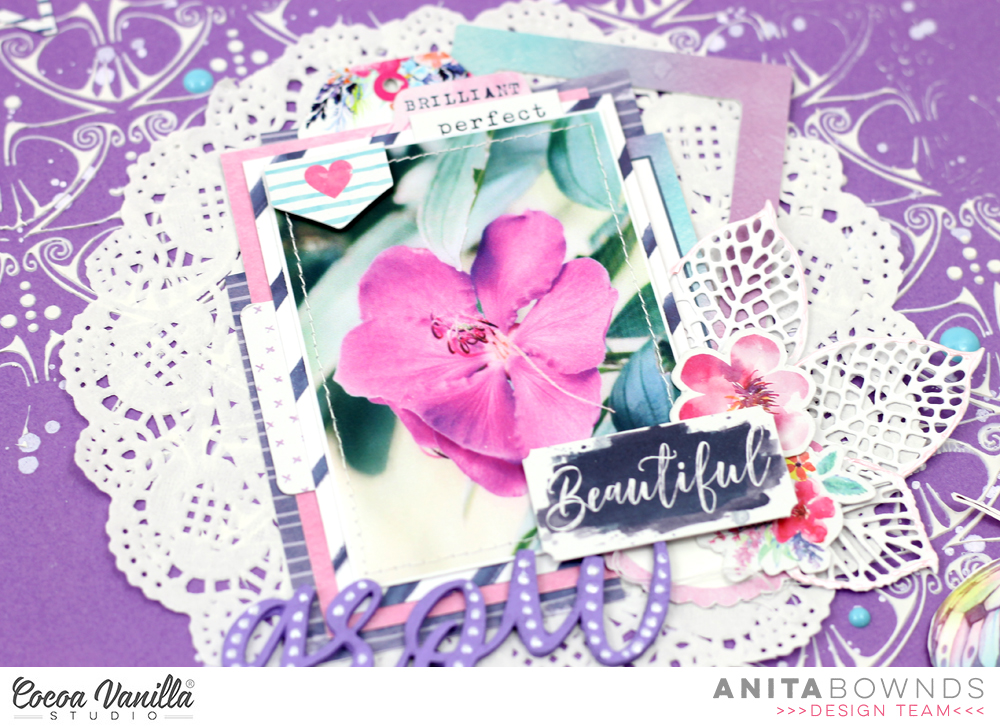
  I added my photo using s die cut frame and then added more florals to either side and finished off adding some phrase banners under my photo and not forgetting a gorgeous butterfly which I had to add because the colour was perfect! I also added my photo with foam tape which I always do when I am using a smaller photo so it has dimension.
 Lastly I added my title using a die cut and accessory sticker words, I love the contrast between big and small in a title. I went back and added some enamel dots to add more texture.
 This layout would be perfect for a teenage girl themed layout, it’s modern, bright, bold and lots of fun!
 Thank you so much for stopping by today and I am so excited to share my first layout using the stunning Day Dream collection, so see you all soon. Happy creating.


 I have used a mix of
  I next created the 3 embellishments clusters as Natalie did. I used the
  I have used enamel dots and some clear stickers to add a little mixed media feel and add more dimension.


