Hello everyone, and happy Wednesday! I’m here to announce the winners of our “Great Escape” themed Monthly Challenge for March!
There were so many wonderful entries for this challenge, and it was awesome to see so many lovely pages documenting your adventures!
It was hard to pick just one out of all of the great entries, so we have not one, but TWO winners this month:
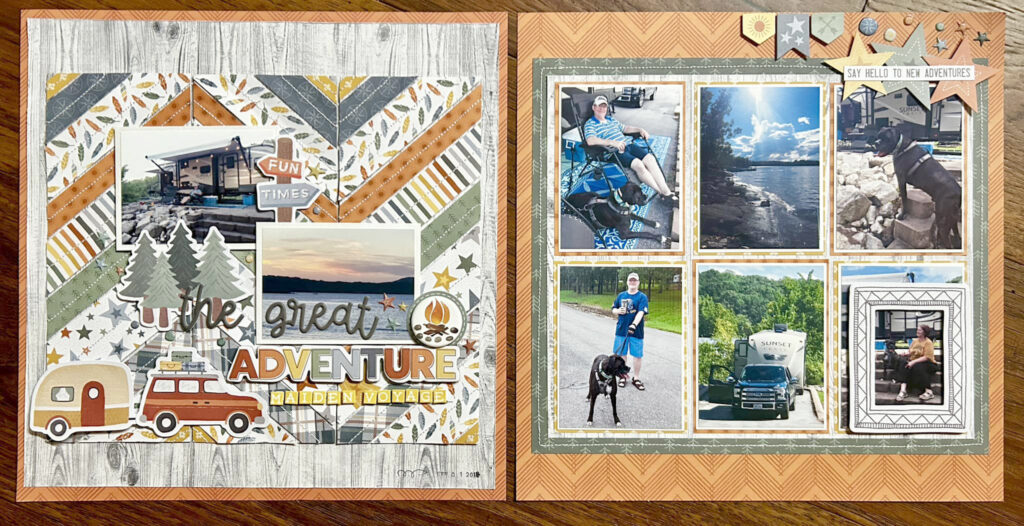
Fleur Milli went all out and scrapped six layouts for this challenge, but we couldn’t go past this grid design with all of those beautiful photos that matched the theme so perfectly!
Debbie Lollie Henningsen scrapped this super fun double page layout and made a gorgeous chevron pattern with the patterned papers for a really striking and unique page! We love that she fit so much in to this spread, and that cute little caravan and car was the perfect finishing touch!
Congratulations ladies, I will be in touch soon with your coupon! Thank you so much to everyone who played along in our challenge – I just love seeing everyone’s take on the inspiration!
_____________________________
If you want a chance to win a $25 coupon to our store, make sure you join the Cocoa Vanilla Studio Community Group on Facebook to join in on our monthly challenges!
Thanks for joining me today, and until next time… happy scrapping!
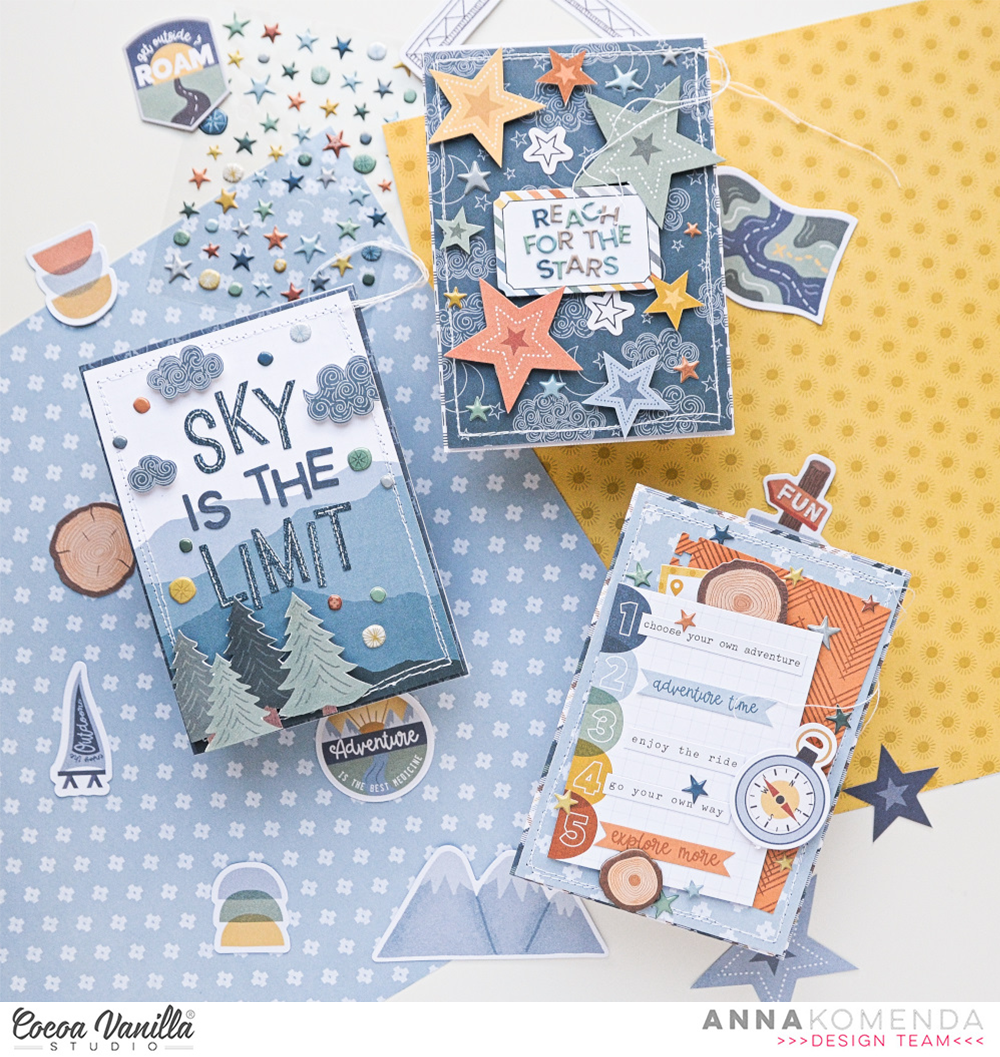
Hello everyone. It’s Anna here with another project made with brand new “The great escape” collection. This time I don’t have layout for you. Instead I wanted to share three simple, masculine cards. I don’t know how about you, but I always have problems making cards for men and I never have enough in my stash to give them away with gifts. I have plenty of pink and floral ones though… You all know I am not a master in making masculine projects at all so I like to keep thing as simple as possible. Simplicity is a key to success when you struggle!
Let’s start with the basics. To avoid looking for a matching card base, I like to make them with single sheets from A5 Paper Stack. I just fold them in half and it’s done! The best part is that pages are single sided so inside of the card is white and ready for your message. It’s not the first time that I am using this trick.
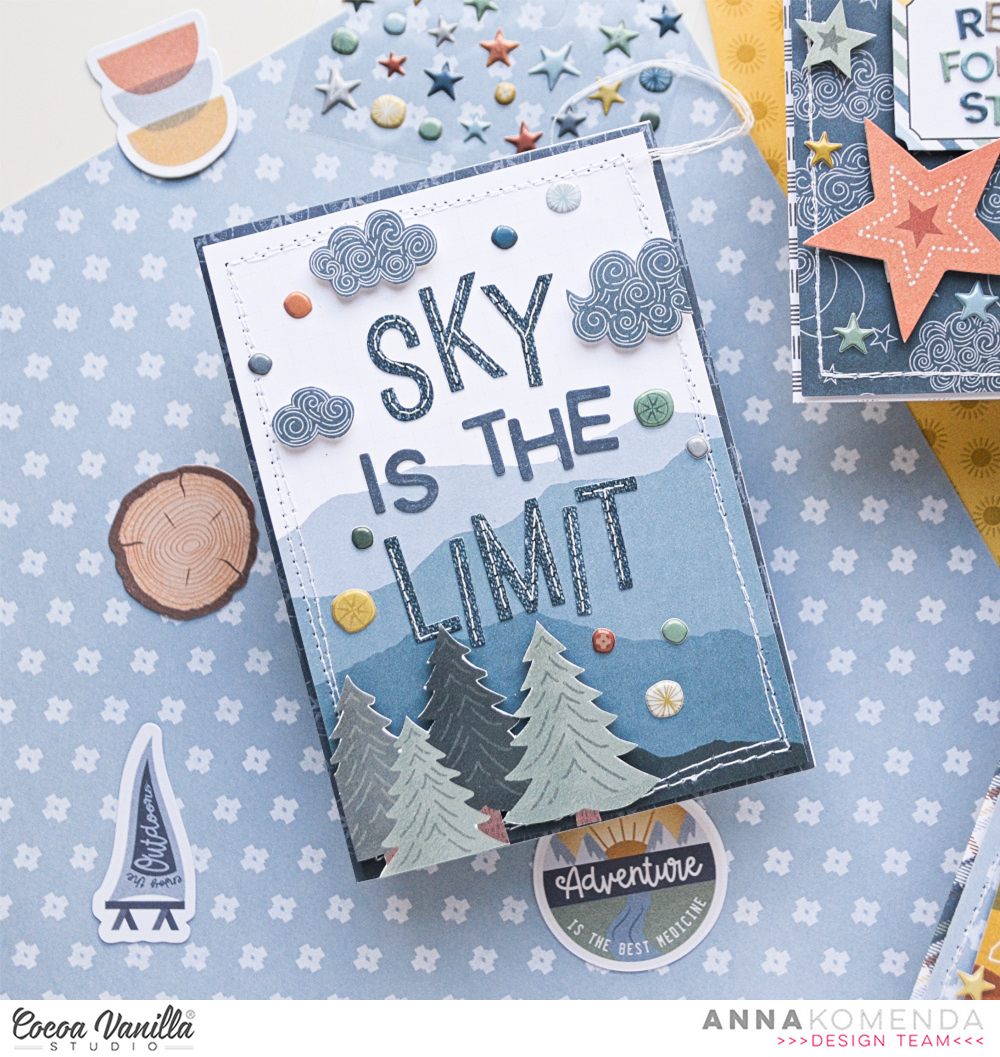
First card was inspired by one of the papers in A5 Paper Stack with a sort of a simple landscape. I trimmed it to the card size and added stitching around it. Next, I reached for my stash of old CVS Alpha Stickers from variety of collections and created a title “Sky is the limit”, which works great with the landscape. The last step was adding trees from Die Cut Ephemera pack on the bottom and clous fussy cut from one of the papers. Super cute and tine Puffy Stickers and the perfect finishing touch.
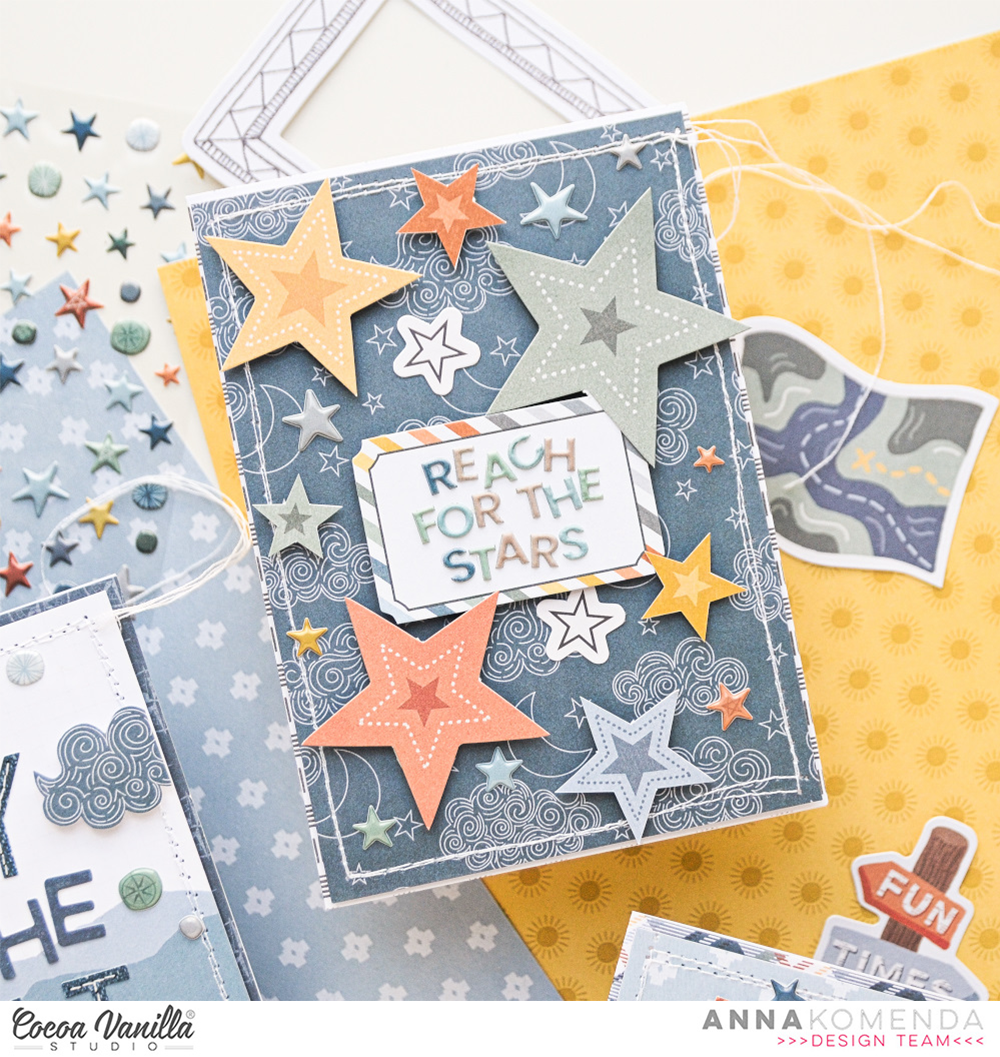
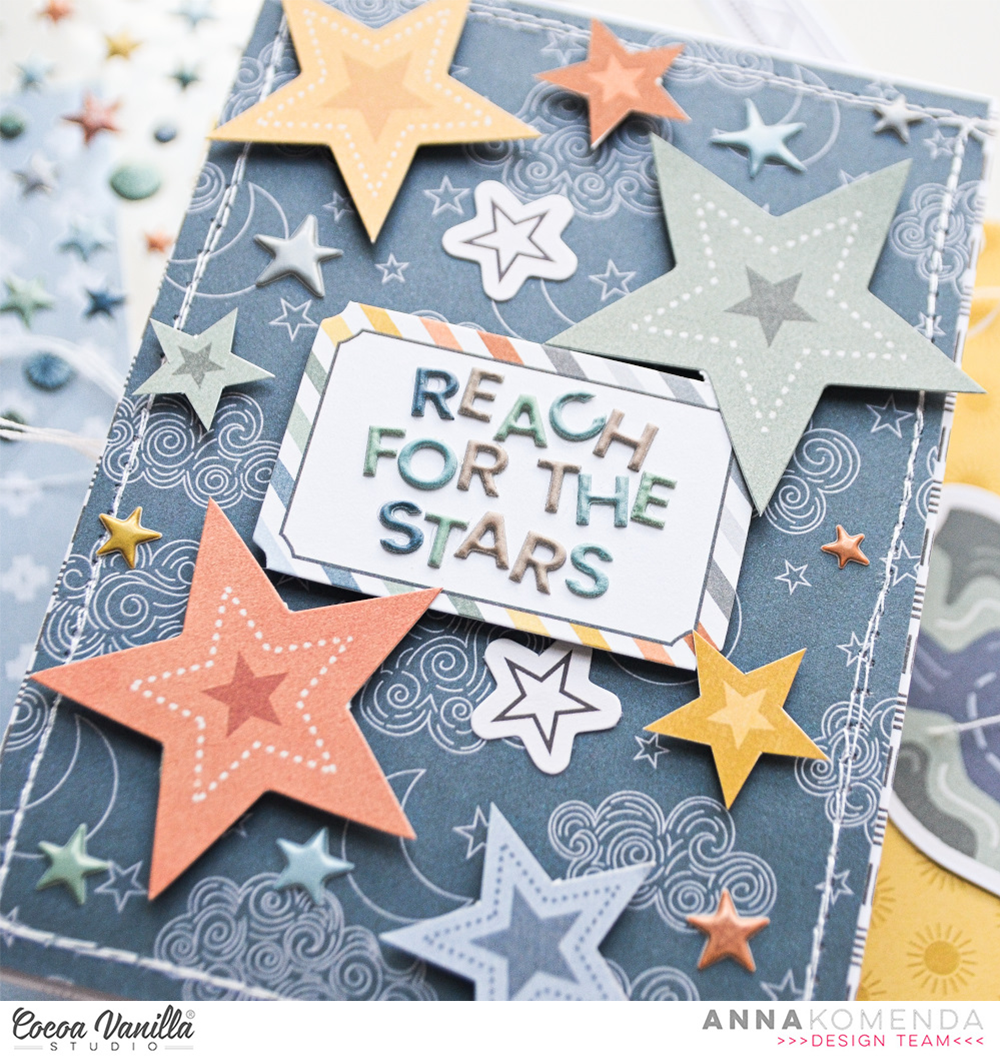
Second card was inspired by the navy paper with night sky. I trimmed it to the proper size, added stitching around it and created a card title using Puffy Alpha Stickers from a bit older “Heart & Home” collection. “Reach fo the stars” needed to be surrounded by stars of course. So I cut them out from one of the papers from A5 Paper Stack. I also picked few from Die Cut Ephemera pack. I finished my composition with tiny stars from Puffy Stickers sheet.
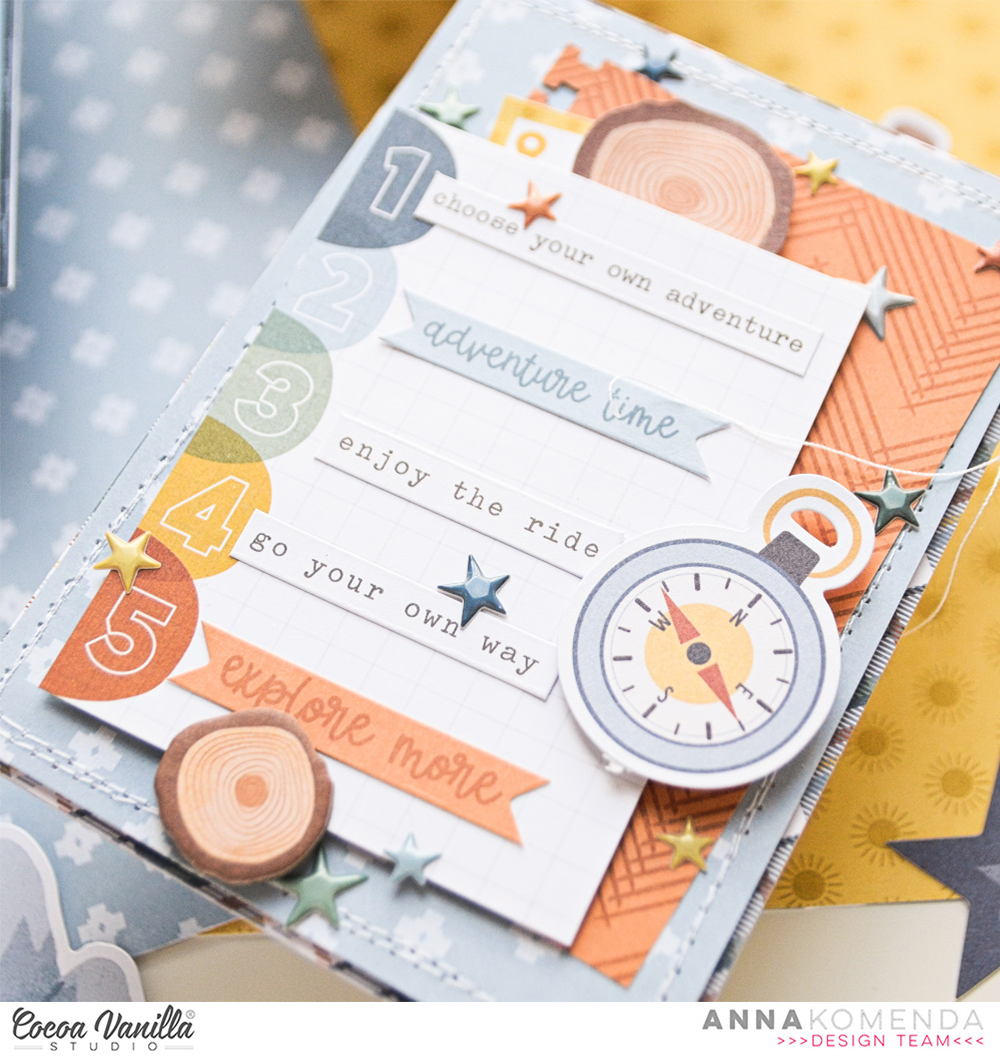
Inspiration for my third card came from this pocket card with numbers, cut out from “Wild life” paper. It looks like a bucket list, so I added incouraging words from 6*12 Accessory Stickers. I backed the card with a piece of “Happy camper” paper and embellished everything with bits and pieces from Die Cut Ephemera and Chipboard Stickers. Can you guess the final step? Yep. Super cute Puffy Stickers.
That is all for today my Friends. Do you also struggle with masculine projects or it’s a piece of cake for you?
Thank you so much for staying with me and see you in two weeks.
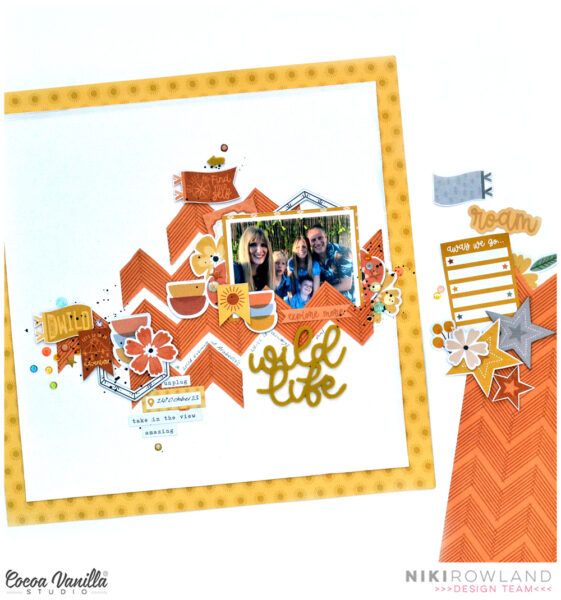
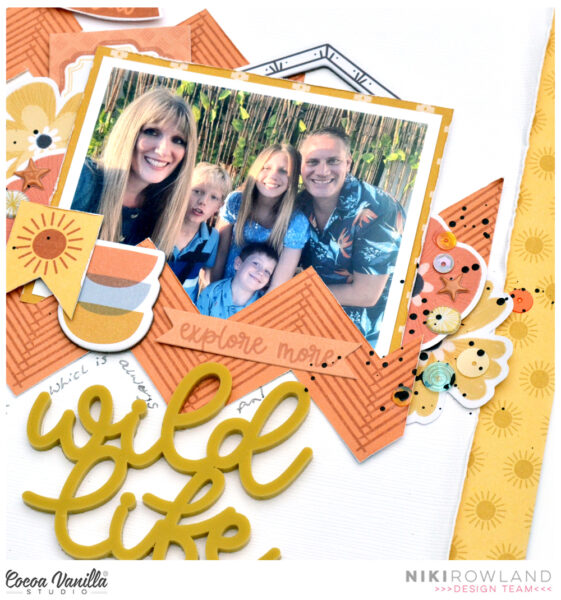
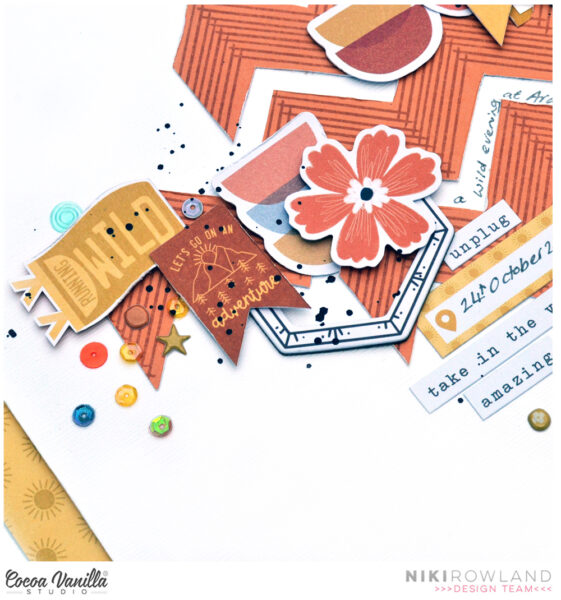
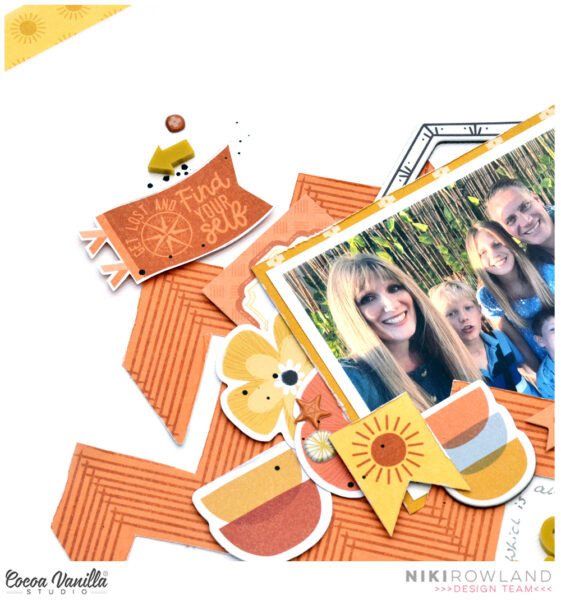
Live the Wild Life with the Great Escape collection! This is Niki (@nikiclairecreates) and for this layout and process video I have chosen an orange and yellow colour scheme. I therefore focused on picking out all the bits from the Great Escape collection that had those colours.
I started with a white background that I trimmed down and added to the yellow sun Great Escape paper. I then set to work using the orange zigzag side of the Happy Camper paper. I originally envisaged having a large block of this paper on my background but last minute decided to cut zigzag strips instead! I cut a few rows, trimmed them down so I had various lengths, distressed all the edges, and then arranged them onto my background.
I mounted my photo using one of the yellow papers from the A5 Paper Stack and tucked this into the zigzags. I then added all the embellishments I could find in the yellow and orange colours. I used some Floral Ephemera from the Heart & Home collection too, as well as Ephemera from the Great Escape, Chipboard Stickers, Accessory Stickers and some pieces from the Cut Apart sheet too.
For my title, I used an acrylic Perspextive title by Bramble Fox and a little yellow arrow that matches. I finished off with a few sequins and some splatters of black paint. I also hand wrote my journaling along one of the zigzag lines.
Thanks so much for joining me today and happy scrapping! The process video for this layout is below – enjoy x
Welcome to Cocoa Vanilla Studio’s blog, and I’m thrilled to have you here for some new scrapbook inspiration featuring the amazing “Great Escape” collection.
In a few weeks, we’ll be jetting off to New York City! Yay… I can hardly wait to create beautiful family memories together in this iconic city. My canvas for today is a 12×12 white cardstock. I’ve used blue distress ink to create watercolor circles. Using a breakfast plate, I inked the edges with the blue distress ink and water. Then, flipping the plate over, I made various prints on the 12×12 white cardstock. The shade of blue distress ink I used is “faded jeans”.
Now, it’s time for some fussy cutting. I’ve selected a patterned paper with stars and cut out several stars from it. I layer three stars on top of each other and sew them together using a sewing machine, then individually place them in a circle on my layout. In the center of the stars, I place a puffy sticker.
The photo capturing the breathtaking view of New York City is placed in the center and embellished with a cardstock circle die-cut and a word sticker. For the title, I’ve used the beautiful black ornate word titles and created the title “Let’s Explore”, which is exactly what we’ll be doing in New York!
I add some blue splatters with the distress ink and also create white splatters using white gesso, applying them with a watercolor brush. I scatter a few small stars in different places among the larger stars for a playful effect.
I hope I’ve inspired you with this Scrapbook Layout and look forward to seeing you next time. Have a wonderful and creative day today!
Hey y’all! Laura Alberts back again with a lovely layout using the Heart & Home collection to scrap these photos documenting my newest obsession, crochet! The colors in this collection worked beautifully with the yarn that I used in the very first project I made. This blanket is a bit of a mess, but I learned so much!
I used a simple shelf design for this layout with two 6 inch strips of wood grain patterned paper for each base. This was a great design for using up scraps and hiding the rough edges behind my photos. All of the layers made this simple background interesting and fun! In addition, I used the vellum flowers that I fussy cut from the Heart & Home specialty paper to create clusters behind my photos.
The details of these clusters really help my layout shine! I especially love the tiny florals that I scattered around my clusters and titles. These are all fussy cut from the stunning patterned papers in this collection. I also outlined each of the paper layers with a black gel pen to give them a hint of shadow for a 3D look!
To see how “With Love” came together, check out the process video below:
It’s Tarrah back with you and today I am sharing a new layout inspired by the new April challenge to include a big rainbow as the main element on your layout. I decided to go with a non-traditional rainbow and created my own using various papers from the Boys Rule collection.
The new monthly challenge for April is to include a BIG rainbow as the main design element on your layout.
To help create the arches of the rainbow, I used various sized dinner plates and traced around the tops of them on the different patterned papers I chose from the Boys Rule collection. I chose these following papers from the Boys Rule collection: ‘Fun and Games’, ‘Straight and Narrow’, ‘Entitled’, ‘Expressionist’ and ‘Star Fall’. I then arranged them on a plain white cardstock background and adhered them down. I trimmed the white cardstock down to measure roughly 11′ x 11′ and adhered it to the ‘Boys Stuff’ patterned paper. I then machine-stitched each individual colour in the rainbow with matching thread.
At the base of the rainbow, I adhered a strip of the ‘Straight and Narrow’ paper horizontally to add another layer to my layout. I added craft foam underneath my photo and placed it over on the right side of my page, I layered the frame and journal spot from the ephemera pack tucked in on the left hand side of the photo, on top of the photo I added one of the banner stickers from the Accessory Sticker sheet. My title is from the chipboard pack, I love these words! I added the ‘You’ and ‘Are’ words at the top of the rainbow and the ‘Awesome’ word under the photo. Either side of the ‘Awesome’ word, I added the scalloped border sticker from the Clear Sticker sheet. Above the photo, I added one of the banner stickers from the Accessory Sticker sheet. I punched out some stars from the ‘Happy Go Lucky’ paperand then layered some of the star stickers over the top. I placed a few of these around my page.
Once I was happy with how the larger elements were placed on my layout, I started adding some smaller embellishments including more clear stickers, more accessory stickers and some more ephemera also. One of my signature features on my layouts is to stamp the date of when the photo was taken and this layout is no exception, I stamped the date stamp using some black ink.
I don’t often journal on my pages so I love the phrase and word stickers from the accessory sticker sheet. I add them to all of my Cocoa Vanilla layouts, where I can, to help tell the story. Boy layouts are one of my favourite projects to create and this one was so much fun to create! I really love how it turned out too. Make sure you create a layout and add a big rainbow element as your main design feature and share it with us by uploading it to the Cocoa Vanilla Studio Community Facebook page.
Thank you so much for stopping by the Cocoa Vanilla blog today! I hope you enjoyed reading about how I created my layout as much as I enjoyed creating it!
Hello everyone, and welcome to our new challenge for the month of April!
If you’re not already a member of our Facebook Community, make sure you join us to be in the running to win a $25 store coupon each month!
If you’re a fan of our collections, it’s no secret that I love rainbows! This month we are challenging you to use a BIG rainbow as the main design element of the page… easy peasy!
As you can see from these awesome pages from our fabulous Design Team, we have lots of collections that feature big rainbows… or you can make your own! I’m excited to see your pages with this prompt!
To Enter:
Entries must be loaded into the April Challenge Album in the Cocoa Vanilla Studio Facebook Community prior to midnight (AEST) 30th April 2024 to be eligible for the prize
Cocoa Vanilla Studio products must be used. Yes, you can use other supplies as well, but the majority of products used should be CVS.
Entries must be created solely for this challenge and not combined with other challenges or design team projects
You may enter as many times as you wish and entry is open to participants worldwide
One winner will be randomly drawn from the entries to receive a $25 voucher to spend in the CVS online store
By entering the challenge you automatically give permission for your work to be shared via the Cocoa Vanilla Studio social media channels
The promotion is in no way sponsored, endorsed, administered by, or associated with Facebook
**Winners from the March 2024 challenge will be announced on the 17th April here on the blog!**
Thanks so much for joining me today, and I hope you have a wonderful week!
Hello CVS crafty friends Rachel here! Today I am sharing another layout created using the fab Great Escape collection scrapping an older photo of my youngest.
Boys and stars just go together! Firstly I cut the Star Gazing paper at 5×12 inches. I used the banner paper strip from the Wild Life paper and added to the bottom of the star paper piece. I used a note book border cut file from the Silhouette Design store and cut this using the blue part of the Horizon paper and added to the top of the star paper piece.
I chose a dark blue to ensure I had contrast against the busy star paper. I next cut two stars using both sides of the Starry Night paper, 5 1/2 and 5 inches. I layered these off centre to the left.
I next added my 3×5 inch photo, matting it on the yellow side of the Horizon paper and then adding a strip of the Journey paper, green side. I added my photo with foam tape to create dimension. I love the Chipboard pieces and created an embellishment cluster to the left side of my photo finishing of it with a phrase sentiment die cut.
I used the Adventure Awaits journal strip from the Wild Life paper and added under my photo, this being my title of my layout. I added the compass die cut with foam tape so this element didn’t look ‘flat’.
I always use the Accessory Sticker Sheet to add sub journalling and these phrase sentiments suite my boy so much!
To balance my layout I added a embellishment to the top left of my page, using the tag and ‘play’ banner from the Accessory Sticker sheet, adding the Puffy Star stickers and then some twine.
You could add a larger photo on this layout or even two smaller landscape photos. I did go back and add some Chipboard Stickers and Puffy Star Stickers over some of the stars of the Starry Night paper to add more dimension.
And there you have it another boy layout that is fun and fabulous!
Hi everyone, it’s Sue Plumb here to share my latest design team project with you. Today I am sharing another layout using the fabulous ‘Great Escape’ collection that documents a photo of Zoe and I on our trip to the USA back in 2019. This pic was taken the day we went to the Grand Canyon, and it definitely rates as one of my favourite days EVER – I am so happy we got to share it together.
I started this page with a sheet of white cardstock and added some ‘Naples Yellow’ acrylic paint to it using a brayer. I chose this colour because of it was a lovely earthy yellow, and I knew it would work well with the other colours of the collection. I then chose a selection of patterned papers for my papery layers, including the green compass print from the Direction paper; the mustard yellow crosses from the A5 Paper Stack; and the orange chevron pattern from the Happy Camper paper. I distressed the edges of the green one to add some texture, before layering the other two on top.
Once the papers were in place I then added some frayed gauze before placing my photo on top of the layers. You can see how I cut the orange chevron print into an arrow shape to run behind my photo from left to right, which helps draw the viewer’s eye in and across the panoramic photo.
For my embellishments, I started by adding three main pieces around my photo – the compass on the left edge from the Die Cut Ephemera pack; the get outside and roam badge (also from the same pack) at the top; and the group of trees from the Chipboard Sticker sheet in the bottom right corner. These three pieces created my visual triangle around my photo and gave me anchor points to work from for the remainder of my embellishments. The other reason I started with these embellishments is because they were all larger pieces and it is always easier to get the biggest things on a page first.
The next piece I added was the ADVENTURE title from the Chipboard Sticker sheet. I knew I wanted to run this piece along the bottom edge of the photo because it is quite a long title and it mirrored the shape of my photo. With all those large elements in place it was then easy to go back and add a few extra embellishments to finish it off. I used the so much fun banner piece and a few stars from the Chipboard Sticker sheet, along with some tiny words and a label from the Accessory Sticker sheet.
I was determined not to over-embellish this page and detract from the photo, so I finished it off with only a few tiny black ink splatters and my handwritten journalling on the label.
I am loving creating with this collection so much, and I have another project with it in the works at the moment that I can’t wait to share! I’ll be back in two weeks with some more inspiration for you.
It’s Sophie here today with a new layout using the Great Escape collection!
When I saw this 3×4 card “The outdoors is calling” on the “Wild Life” paper, I knew exactly what photo to use and it was my starting point for the whole page!
I framed the photo and card on the wood grain “Starry Night” paper, framed everything on white cardstock and placed it on the “Star Gazing” paper.
I teared a big chunk of the “Adventurer” paper and placed it beneath the white rectangle, adding a fussy cut scalloped border from the “Wild Life” paper.
I hand stitched around the white rectangle and added a few cross stitches on the wood grain frame as well.
I used a label from the “Wild Life” paper to handwrite my date and placed Chipboard Stickers around my pocket card and photo to embellish the page.
Here are more close-ups:
This is a simple and more masculine page, and it makes the photo stand out so well!!