2019 Favourites | Tarrah McLean
Hi creative friends!
It’s Tarrah back with you and today its my turn to share some of my favourite layouts from 2019.
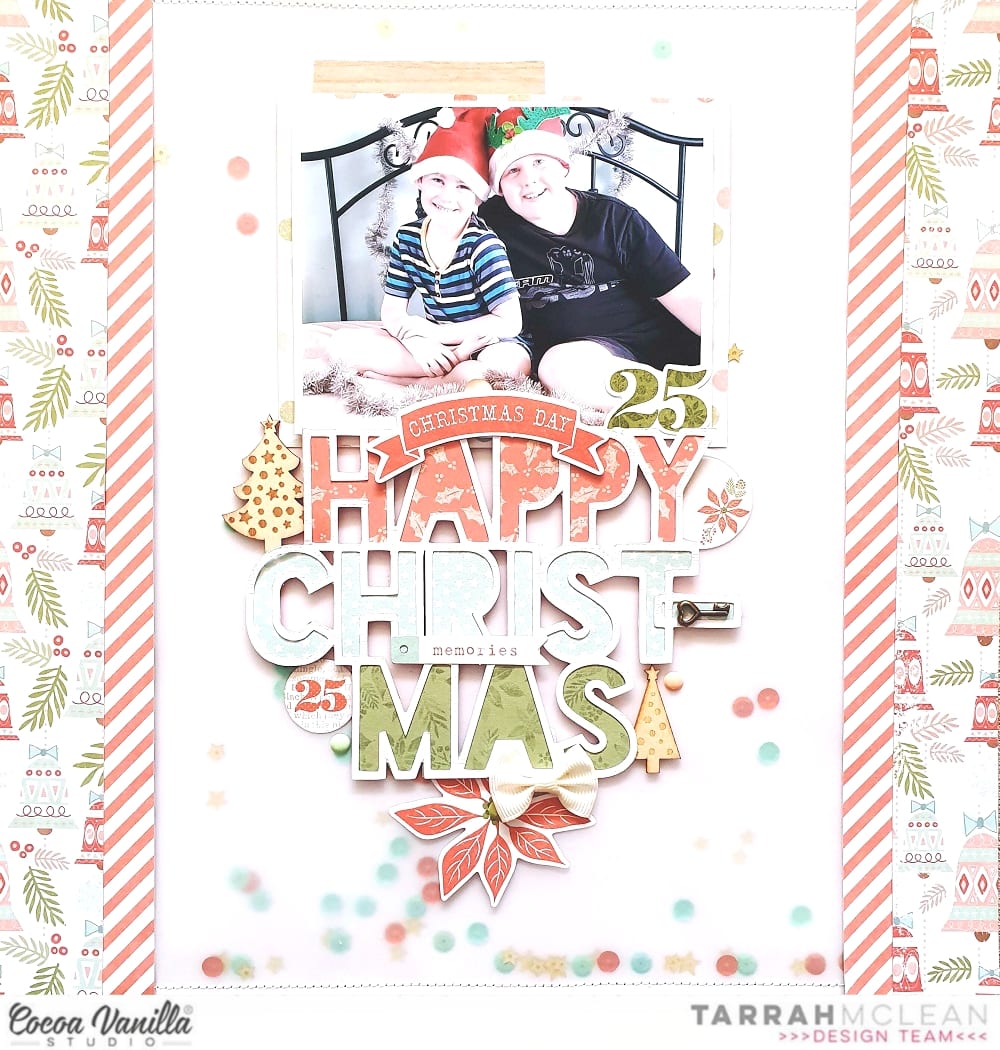
First up is this one I created recently using some of my last pieces of the gorgeous Tis the Season collection that I had been holding on to! This layout is one of my favourites because it has lots of my favourite things included on it, a photo of my boys, Christmas, a cut file, machine stitching and I also love the super cute shaker pocket that I filled with lots of the sequins from this collection.
Thankfully I can now have an endless supply of this stunning collection with the release of this collection in digital format! Never have to run out of it again! You can get your hands on the Tis the season digital collection in the Cocoa Vanilla store here.
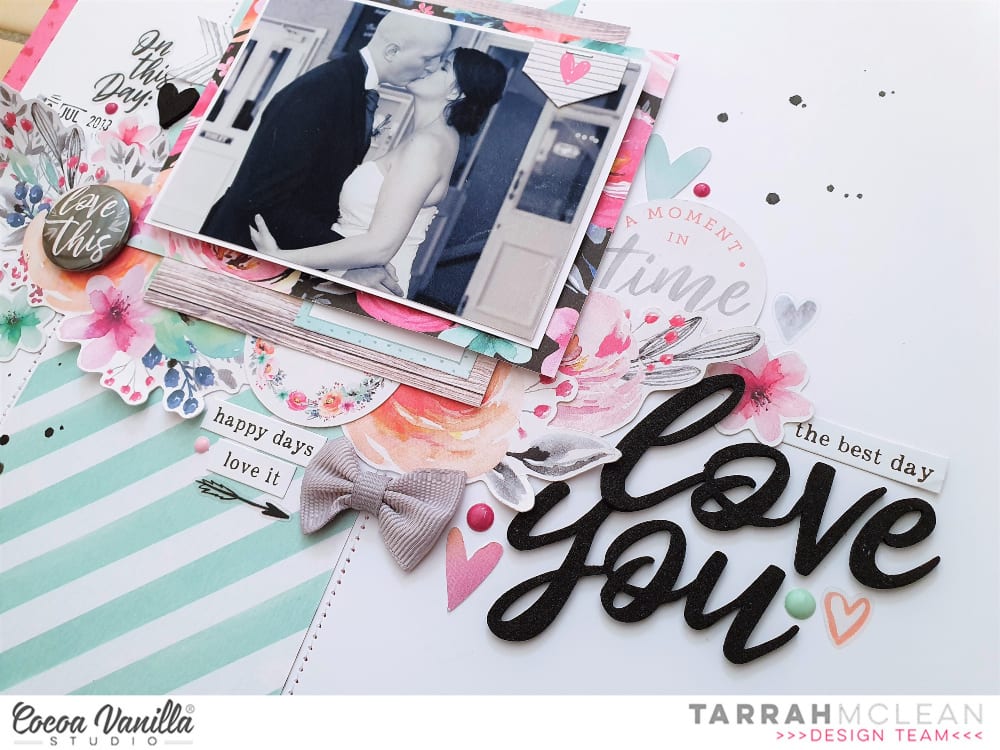
My next favourite is this one I created using the amazing Unforgettable collection. I just Love all the florals in this collection and the colour palette is so beautiful too. I chose this one as a favourite because I love the design and how the soft colours of the collection make the darker black and white photo really pop. I also love all the layers of florals, papers and embellishments. The gorgeous foam titles in this collection are awesome to use too and the re-introduction of the bitty bows and tassels makes my bow heart happy!

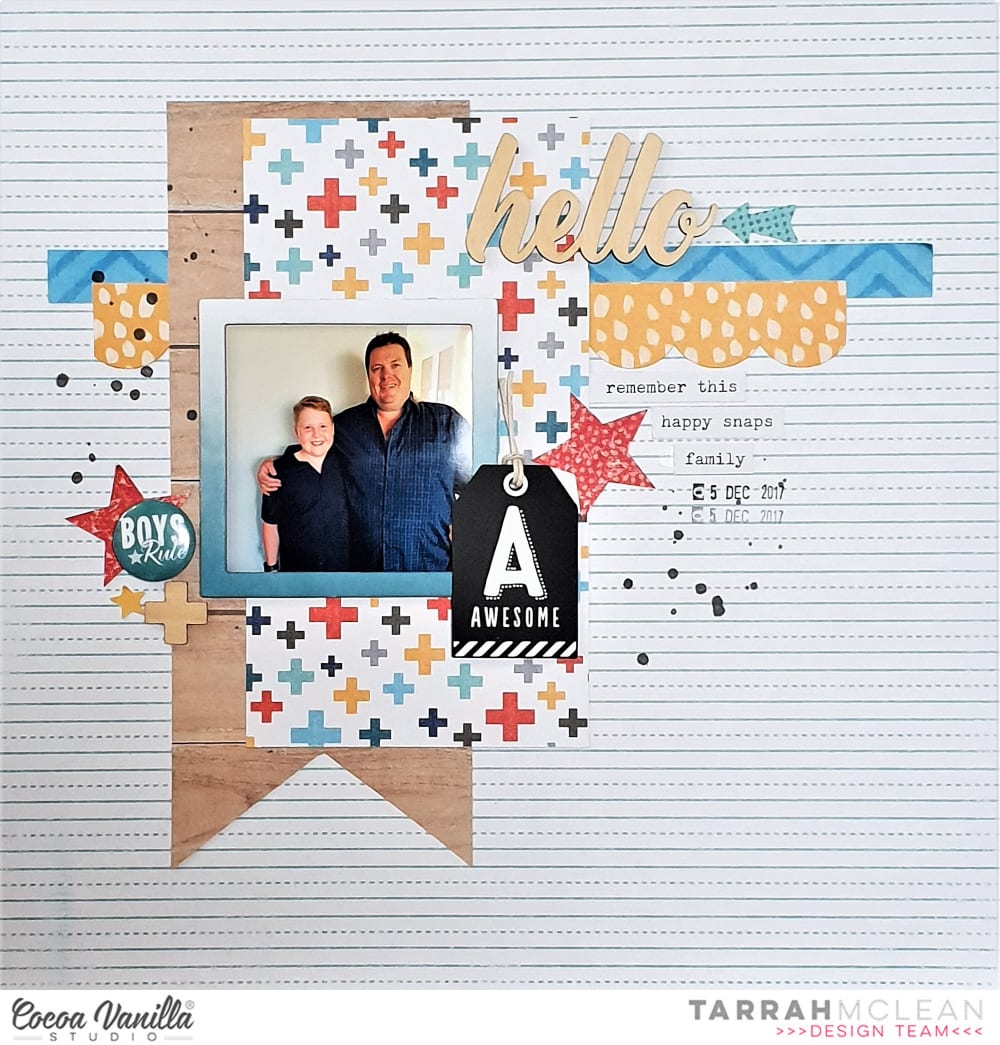
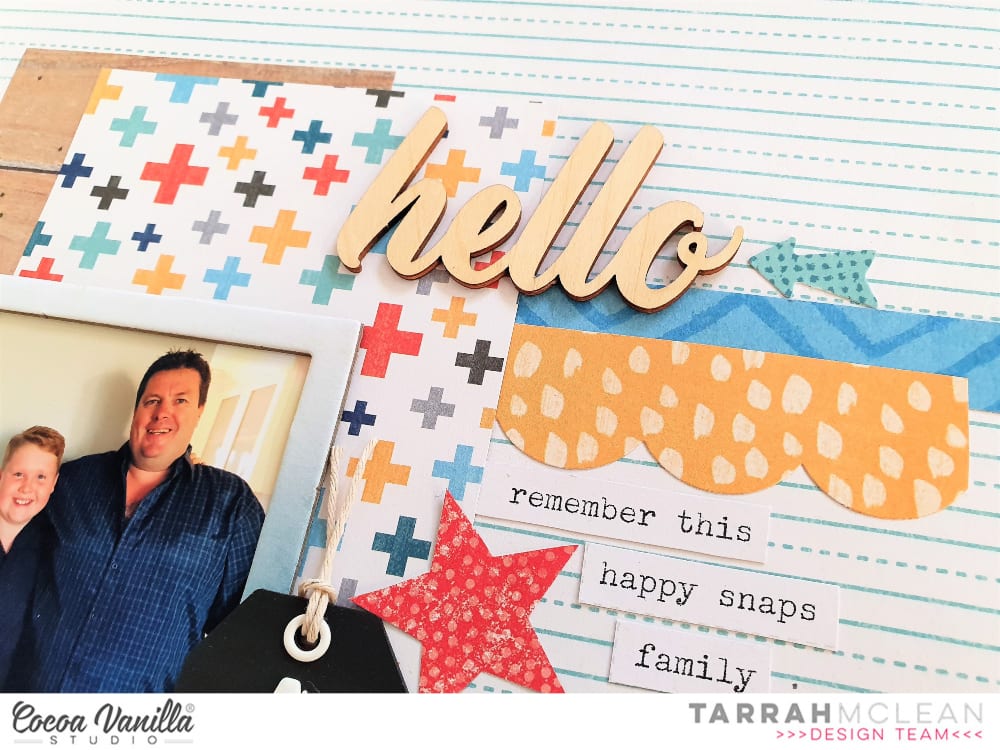
Of course there has to be a boy themed layout in the mix having 2 sons and a husband! I used the awesome You Rock collection and used a sketch as inspiration to create my layout about my eldest son and hubby.
This layout is a favourite because I love the simple design and that I was able to use up some of my stash of the You Rock collection. The You Rock collection is probably my favourite Cocoa Vanilla boy collection. Unfortunately there are not too many pieces left from this collection and as yet its not a digital collection so if you have some left, lucky you!
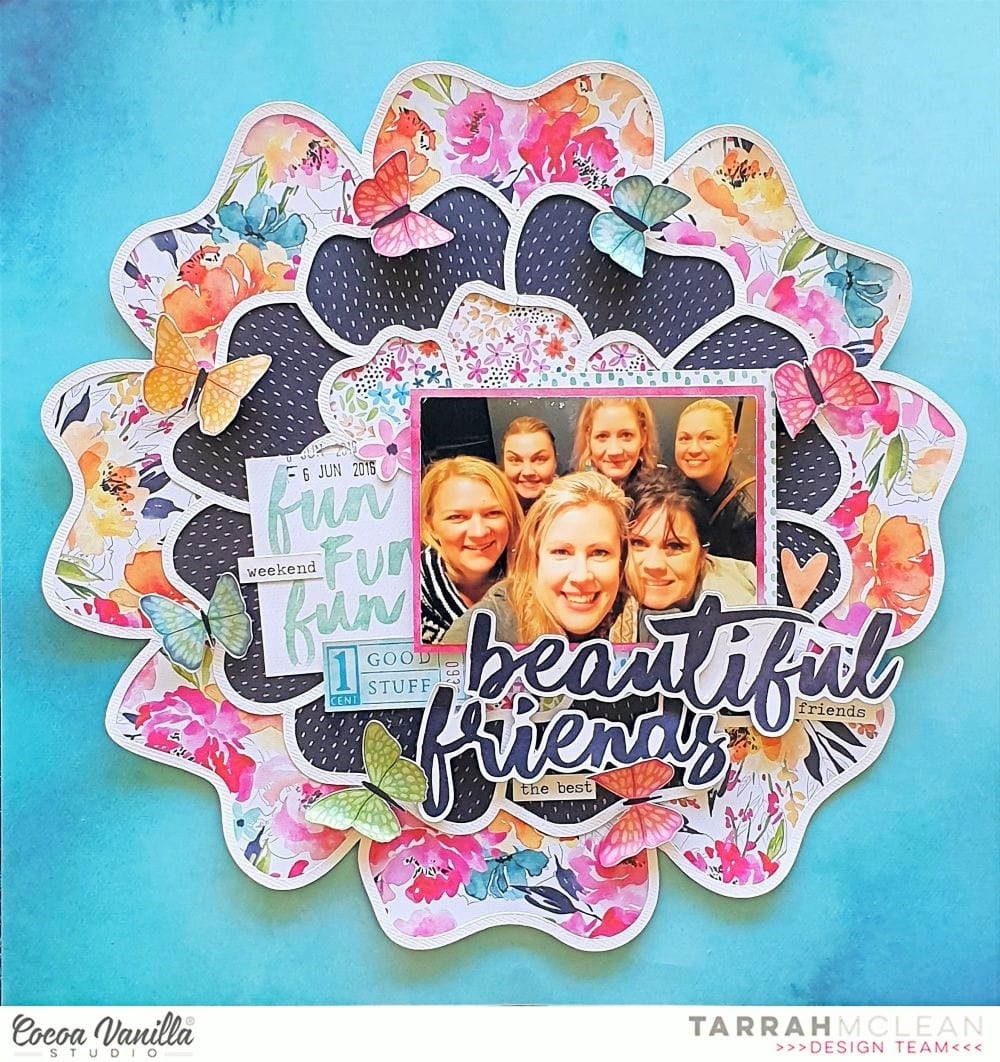
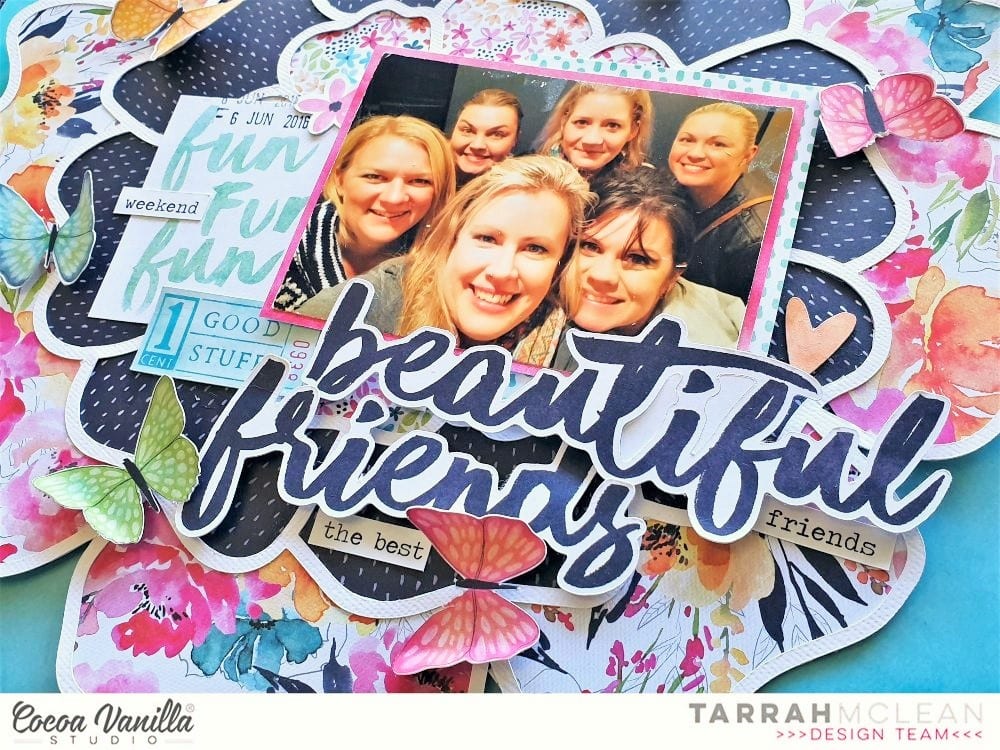
Last but not least is this pretty layout using the stunning Happiness collection. This layout is one of my favourites because I absolutely LOVE the Happiness collection! This collection gets my colour loving heart skipping a beat! I mean just look at those stunning colours!!
I love that I was able to include lots of the different papers and I also fussy cut the colourful butterflies and scattered them around the layout.
Its also one of my favourite layouts because of the photo I added to the page, this photo features some of my people and they include boss lady Zoe, fellow team member and good friend, Sue and her gorgeous sister Mandy as well as former team member, Raquel and another friend Amy. I love spending time with ‘my people’ who get my passion for creating with pretty things!
Thank you so much for all your support this past year! I hope I inspired you in some way?!
Wishing you and your families all a very safe and Merry Christmas, I hope you get to spend time with the people you love the most and cherish those times with them.
All the best for a prosperous new year!
Happy creating!
Tarrah x
 I don’t have much of the traditional collection left now but I am so happy to be able to get everything I need in digital form! I will never run out again! If your stash is getting low of
  I chose a photo of my youngest taken on Christmas Day when he was about 3 weeks old, he just turned 9 yesterday so the photo is quite old but its one of my favourites! I changed the colour of the photo to a soft black and white as the colours in the photo would have clashed with the soft colours in the collection. Underneath the photo I layered a small paper doily and a smaller piece of the red and white stripe paper to the right of the photo. I also layered a wood veneer frame on top of the photo, I like how this draws your eye to the photo. I popped up the photo using craft foam and then placed embellishments around the photo. The ticket that says ‘Child’ die-cut definitely had to be added, it was perfect tucked at the bottom of my photo.
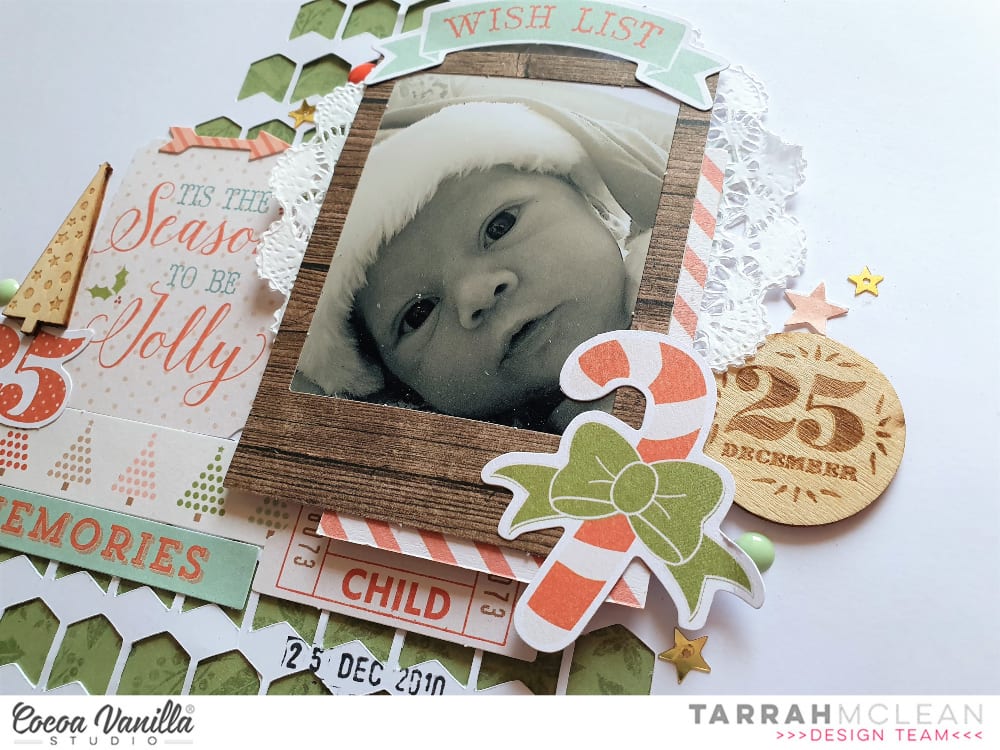 I used accessory stickers, enamel dots, die-cuts, wood veneer, sequins and a bitty bow to embellish. I have tons of the sequins left, I love the gold stars so I scattered a few of those around to add some sparkle. I placed the white bitty bow at the base of the tree to separate the tree from the pot. To finish the page, I added the date stamp of when the photo was taken. I love how my page turned out even with only minimal pieces from the
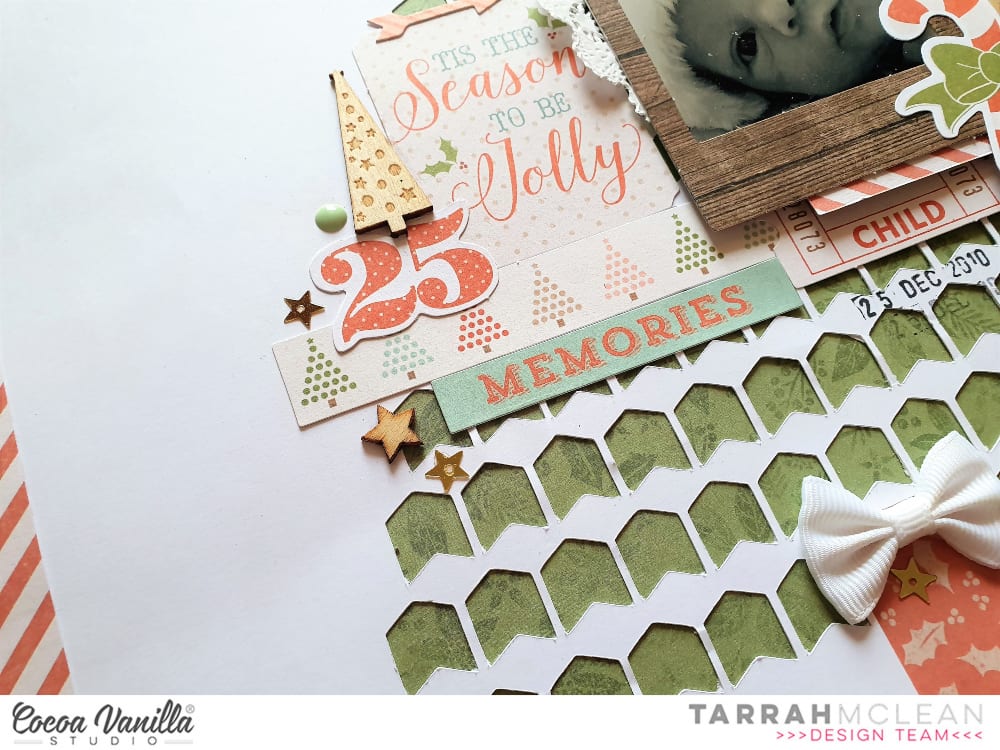
 I started my page by taking a sheet of white cardstock and adding a piece of vellum over the top to mute the white a little bit, as I had lots of the sequins left from the
  I took two of the 12 x 12 papers and cut some vertical strips from them and placed them down each side of the layout. then chose a gorgeous cut file title design by Cut To You and added some of the patterned papers behind each of the words. I added craft foam to the underneath and placed it in the centre of my page. I also popped up the photo of my sons on Christmas Day with craft foam so that it was at the same level as the title on my page. I love the shadows and dimension this creates on my page.
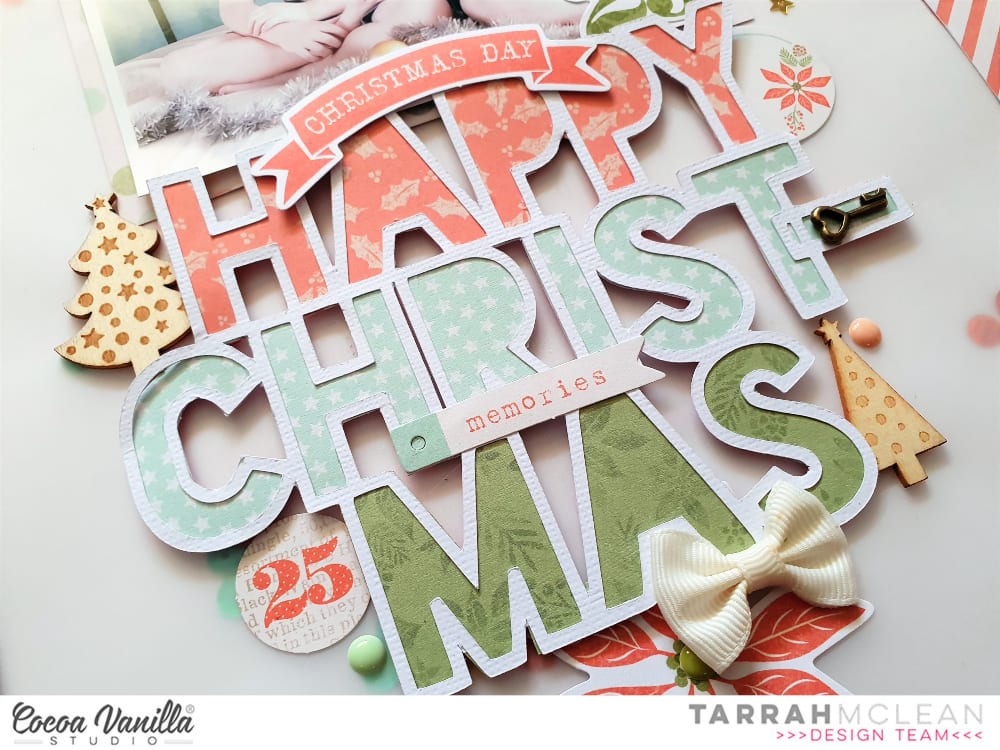
 I then began to embellish my page using some of the accessory stickers (that are still available in the store) some of the die-cuts, wood veneers and of course a bitty bow and the tiny metal key! I only had 1 of the poinsettia flowers in the die-cut pack left so I added just the one to the very bottom of the title and layered the bow over the top. Lastly I added some of the enamel dots from the Tis The Season collection.
  Have you got any of the
  Once the heart design was backed, I added craft foam underneath and adhered it to the black and white spot paper also from the Unforgettable collection. I decided to trim down the black and white spot paper so that I could add the grey chevron paper is a border right around the page. I trimmed this paper down slightly also so that I could add a black cardstock border also.
 I added my photo of my 2 beautiful nieces slightly to the right of the heart and added a couple pf layers underneath including a paper doily and some more of the 6′ x 8′ papers from the paper pad. I also added one of the tags from the die-cut pack to the left of the photo and I popped up the photo and paper layers to give even more dimension. I pulled out the ‘Hello’ foam title and added it to the bottom of my photo and added a flair button and a phrase die-cut on the left of the photo.
 The butterflies in this collection are beautiful, quite a few of those made it onto my page also. To further embellish, I added 2 of the black foam hearts, some die-cut hearts and florals, some enamel dots and some of the stickers from the accessory sheet.


 I took inspiration from the skull and cross bones design in the image and also the colours. I cut out a skull and cross bone design from black cardstock using my Silhouette Cameo and used is one of the main focal points on my layout. I popped up the skull using craft foam and adhered the cross bones flat to the page. In the eyes of the skull, I backed one of them with one of the paper s from the
  The Totally Rad collection has lots of pieces with the skull and crossbones so I pulled out what I had left and used them as embellishments. The large white and black skull and cross bones was fussy cut from the
 To finish off, I added the chippie crown in the chipboard pieces pack from the
  I chose a pink, grey and white colour scheme for my layout today, I pulled some of the papers and lots of embellishments that were in that colour scheme and started out by cutting the cut file on white cardstock, I cut the file out with the intention of leaving some of the design inside the cardstock. I loved how I could pop out the hearts and create a dimensional look with them. I backed the cut file design with the pink paper and then machine stitched around the circle – you can see more detail in the photo below. I then matted the cut file and pink paper onto one of the grey patterned papers.
  The photo is of my sister and I at our brothers wedding a couple of years ago, not often we get photos together with both my sister and brother living in England now. I added lots of paper layers underneath my photo and used foam tape to pop up my photo from the page. In the photo below, you can see I added a cluster of embellishments including some die-cuts and accessory stickers, I used foam dots again to lift up the camera die-cut and I also added one of the enamel dots to the centre – hooray for enamel dots making a come back in this collection! I love them! Over one the right hand side is another cluster featuring some of the floral and butterfly die-cuts. I also added one of the cute bows to the right of my title.
 My title is one of the gorgeous foam word titles, these are brilliant to add to any project, they make a statement and they really pop off the page too! I added one of the larger butterfly die-cuts to the left of the title to balance out the with the smaller one on the right hand side. A couple more enamel dots and a couple pf the gorgeous clear stickers were also added for some extra interest and texture.


 I decided to cut a strip of the stripe side of the ‘Sprightly’ paper and placed it vertically down a plain white cardstock background. I then trimmed the white cardstock down so that I could use the pink side of the ‘Unscripted’ paper as a border. I added some machine stitching down each side of the vertical strip. I added some layers under my photo including the floral paper from the ‘Pretty Bits’ paper and one of the die-cut frames, I popped these all up using craft foam.
  I tucked in one of the tab stickers both at the top and bottom of my photo from the Accessory sticker sheet. As you can see in the detail photo above, I used some of the gorgeous new foam words as my title! They are gorgeous and aren’t too sticky, perfect if you aren’t sure of placement, they are easily repositionable which is very handy for me! I also added one of the gorgeous bows and a few other embellishments finish off this side of the layout.
 On the left hand side, I added one of the cute banner stickers and tucked in some of the gorgeous floral die-cuts. I also layered one of the flair buttons to the top of one of the florals. A few other small embellishments like the clear stickers and enamel dots finish off this side. One thing I wanted to point out in the floral die-cuts is that gorgeous texture you can see in the detail photo below. I just love that not only are there beautiful colours in this collection but the texture is awesome too.


 I matted my photo with one of the papers from the Free Spirit collection and also layered another one above to replace the 2nd photo as I mentioned earlier. I also added some of the journal spots as a layering piece. I added one of the scalloped border stickers above the photo of my sister and I also added a few embellishments to this area also. I fussy cut the ‘You and Me’ title from one of the journal cards included on one of the papers from the Free Spirit collection and positioned it where the sketch suggested.
  I cut out the pink phrase ‘Hello Happiness’ and added that tucked in under my photo and also layered the ‘Wonderful’ die-cut phrases over the photo also. One of the cute flair buttons and a die-cut heart were added to the left of the photo. On the sketch, the suggestion is to place a large embellishment like a jar of flowers, I added one of the floral stickers from the accessory sticker sheet here instead and I really like how it looks.
  Lastly I added the die cut banner popped up using pop dots to the top left corner touching the machine stitching, I also sprinkled some white sequins around and some navy Heidi shine mist. The date stamp was the very last thing added and that completes my layout.
 To begin my layout, I chose a fun cut file design from The Cut Shoppe and cut it out from yellow cardstock. I then adhered the cut file to plain white cardstock. I love the contrast of the bright yellow against the white cardstock, reminds me so much of summer! For the very centre of the design of layout, I picked the ‘In the Summer Time’ sticker from the accessory sheet and popped it up on foam dots and placed it in the centre of my page.
 Like I said earlier, I matted my photo using just the one piece of patterned paper, this photo is a very recent one of my sister and her eldest daughter in the waters of the Jurassic Coast in England! How gorgeous is that archway and water?! So inviting! I popped my photo up to create some dimension and shadows and then the next step was to embellish.
  I chose some of the die-cuts from the ephemera pack including the coloured star strip, the iceblock rectangle piece and the journal tab. These 3 pieces I tucked it below the photo and to the right side of the photo. I created a focal point towards the centre of the page by adding a cute flair button, a wood veneer heart and another sticker. I also had to add that Sunshine puffy sticker, I just love the puffy stickers from this collection!
 Lastly I added some of the super cute enamel shape stars around the edges of the sun to add some colour and interest. I also splattered a few splats of black mist and added the date stamp to finish off my Summer page!