Super Star | Legendary Collection | Tarrah McLean
Hi Cocoa Vanilla friends!
It’s Tarrah back with you and today I am sharing another new layout featuring the awesome new Legendary collection!
![]()
Hi Cocoa Vanilla friends!
It’s Tarrah back with you and today I am sharing another new layout featuring the awesome new Legendary collection!
Hi friends,
It’s Tarrah back with you and today I am sharing a new layout for our Mother’s Day theme we have going on this week on the blog! I decided to document a special photo of my beautiful Mum and myself on Sydney Harbour when we went to the ballet a year ago. I pulled out the gorgeous Midnight collection to help me document this special memory.
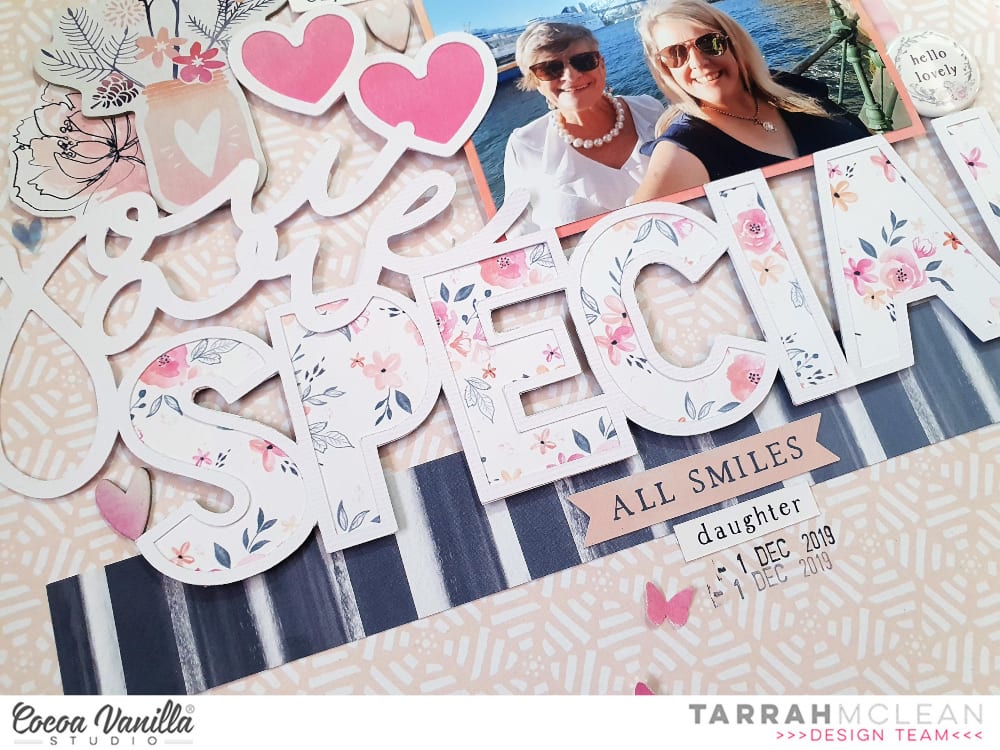
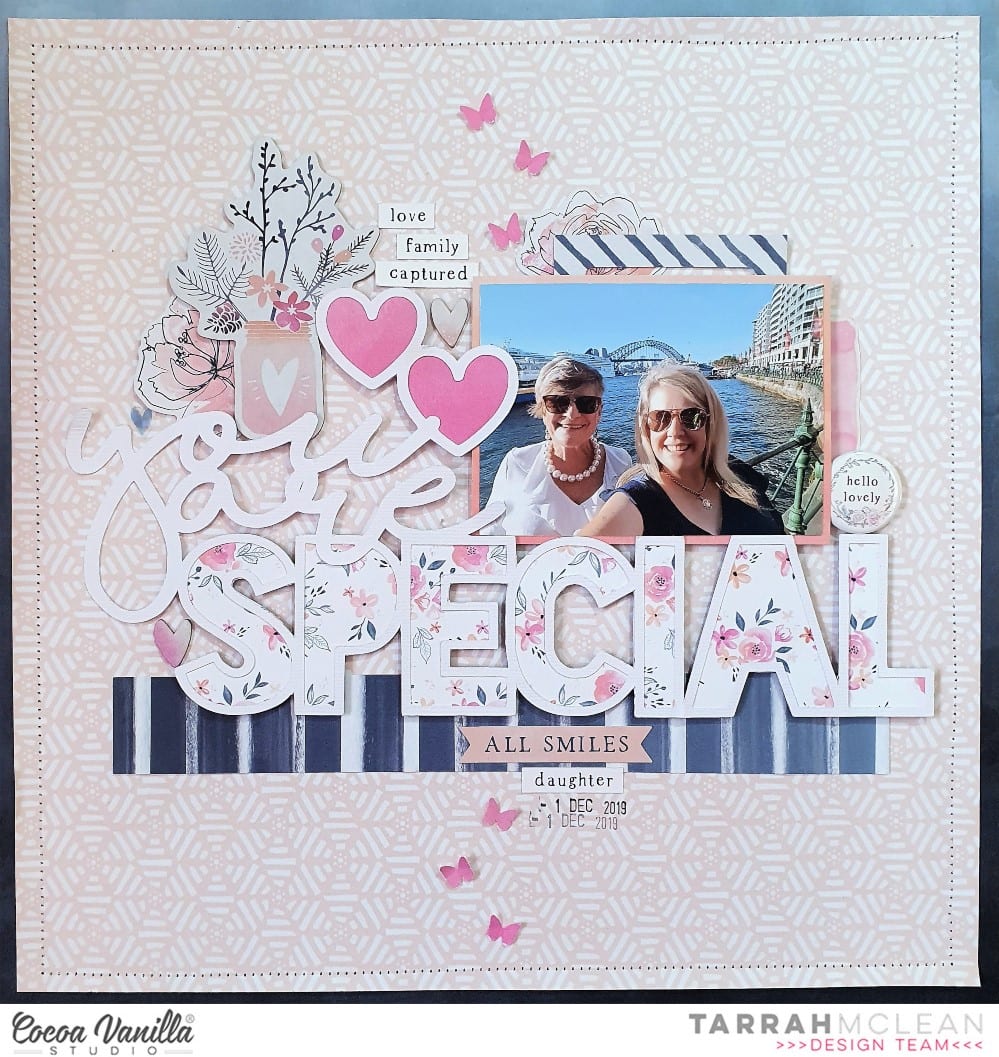 I found a really lovely cut file designed by fellow team member Gwen from Cut To You, I cut it out from white cardstock and then backed the hearts at the top of the cut file with the pink side of the Shine Bright paper the Special word in the cut file, I backed with the ‘B’ side of the Inky Depths paper, I love that small soft floral side. Once it was all backed, I placed craft foam underneath both the hearts and the ‘Special’ word.
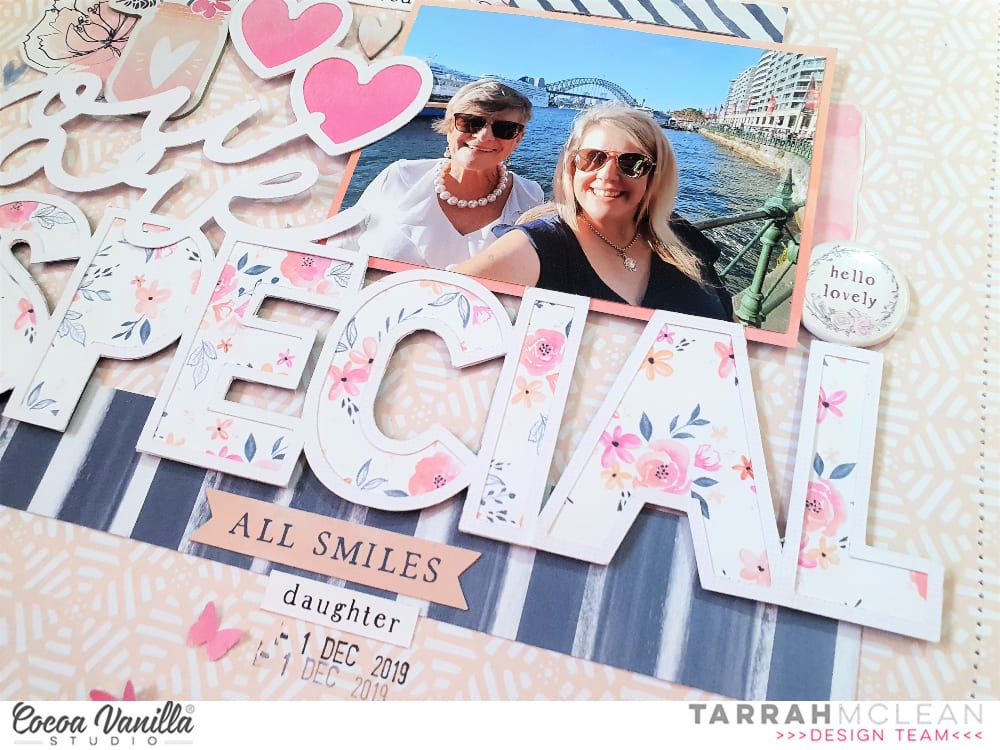
 I chose the ‘B’ side of the Mixed Blessing paper for my background and also matted that piece with another sheet of the Inky Depths paper. I machine stitched around the entire edge to add some texture and interest. I placed the cut file title in the centre of the page and I cut a strip of the Bloom and Grow paper and placed it underneath the bottom of the cut file before I adhered it all down. I matted my photo in the orange part of the Shine Bright paper and added craft foam underneath the photo and mat, it fit perfectly just above the word ‘Special’ with one of the hearts from the cut file overlapping onto the photo also.
 I tucked in one of the cute die-cut frames from the die-cut ephemera pack into the top of my photo, I then took one of the paint strip clear stickers and added it to white cardstock, I then fussy cut it out and tucked it into the right side of my photo. I also added one of the cute flair buttons here. The jar and flower chipboard piece fit perfectly there just above the ‘You’ in the cut file, I love how this looks here. I also tucked in one of the floral die-cuts to the left of the jar to bring in some more of the florals to the page. I also added a few chipboard hearts and also a clear sticker heart too. Lastly I added some of the accessory word and phrase stickers and the date stamp to finish off!
Thank you so much for stopping by the Cocoa Vanilla blog today! I hope you have plenty of Mother’s Day memories you can document!
Happy Mother’s Day for Sunday, happy creating!
Tarrah x
Hi friends,
It’s Tarrah back with you and today I am sharing a new layout for the stitching theme we are featuring here on the CVS blog this week using the awesome new Legendary collection. The photo I am documenting is a recent one of myself and my boys getting out for some exercise and fresh air during Covid-19 isolation!
![]()
I have wanted to try doing an 8.5′ x 11′ sized layout for some time now, I have created a few in my time but not many that I have shared before. I loved the smaller space to work with! I decided to incorporate machine stitching right around the entire perimeter of the blue star background paper, bending up the edges to create some texture.
![]()
I decided to cut out an arrow design cut file (free from Paper Issues) from white cardstock and backed all the arrows with different patterned papers. I love how it looks with all the colours. I added craft foam underneath to give it dimension and placed it to the centre of the page.
![]()
Once the cut file was adhered, I placed my photo towards the top right corner, adding craft foam and 2 of the stickers from the accessory sticker sheet underneath the photo. My title is made up of the cardstock titles, I added craft foam underneath the title also and placed that opposite the photo at the top.
![]()
Some of the embellishments I included on my page are all from the Legendary collection, including the clear stickers, die-cuts, enamel dots, a flair button and some of the small phrase and word stickers from the accessory sheet. Lastly I added the date stamp to the ‘Best Ever’ sticker at the bottom.
![]()
The Legendary collection is perfect for documenting both the boys and girls in your life! Make sure you get your hands on some!
Thank you so much for taking the time to stop by the Cocoa Vanilla blog during these uncertain and crazy times. I hope you all stay safe and healthy.
Tarrah x
Hi friends,
It’s Tarrah back with you and today I am sharing a layout for Throwback Thursday. I decided to go back and pull out the gorgeous More Than Words collection for my Throwback Thursday project. I decided to cut a scallop design cut file that is from Cut To You first and backed some of the open spaces with some of the gorgeous papers from the collection.
 I chose the Noteworthy paper as my background paper and arranged all the scallop pieces on the background how I liked them. I chose to document a lovely photo of my Mum and my son together at my Nan’s 90th birthday at the end of last year. I added one of the cardstock frames behind my photo and popped it up with foam tape to raise it up off the page. I placed some embellishments around the photo, including the flair button, a few die-cut phrases, a chipboard heart and some enamel dots and shapes.
 My title is made up of the chipboard ‘Moments’ word from the chipboard elements pack and also the word ‘Sweet’ from the black chipboard titles pack. I placed both of these on the left of my photo, I like how they look overlapping the scalloped papers underneath. I added some of the floral cluster die-cuts around the page also, I like how they add some more colour and another element to the page.

The most time consuming part of the layout was backing all the scallop pieces and getting them arranged. Once that was all done and I had them glued down, the rest of the layout came together quite quickly. I find backing cut files very therapeutic, a bit like fussy cutting….however I know its not everyone’s cup of tea lol! A few of the last bits I added were the small phrase stickers from the Accessory Sticker sheet.

Thank you so much for stopping by today, I hope you enjoyed my Throwback Thursday project and that you are inspired in some way to create with your More Than Words goodies.
Happy creating and stay well everyone!
Tarrah x
Hi friends,
It’s Tarrah back with you today to share a new layout using the awesome Legendary collection!
I love how versatile this collection is, it can be used for boy projects, travel projects and even girl projects! Make sure to check your local or favourite online scrapbook store and get your hands on it!

I started out by trimming some of the papers into a few different sizes and arranged them on a white cardstock background. I chose the white arrow paper to feature my photo and some of the main embellishments. My photo is one of my eldest son looking handsome and going to his Year 6 farewell night a few years back.
 I love the star die-cuts in the ephemera pack, I added the grey ones in 3 places to create a visual triangle on my page. I like how this takes your eye around the page. In between 2 of the stars I added some of the clear sticker stars, I like how this adds a bit more impact to the die-cut ones.
 Inside the large grey star, I added one of the large circle Authentic die-cuts, I used craft foam underneath it to raise it up, I like how it gives it shadow and dimension. I also added the ‘Epic’ die-cut title below my photo, this became my title for my page. The flairs are awesome in this collection so I added the ‘Let’s Go’ one on this page since the photo is my son getting into the car! I also added the ‘Admit One Adventure Pass’ ticket just above the flair also.

Thank you so much for stopping by today. I hope my layout inspires you in some way! Make sure to keep an eye on the Cocoa Vanilla online store as the Legendary collection will be in the online store in the next few weeks!
Happy creating!
Tarrah x
Hi Cocoa Vanilla friends,
It’s Tarrah McLean back with you today to share my second layout using the awesome Legendary collection! Having 2 sons and a hubby, I get so excited when the boy collections are released! It makes it so easy to create pages about the boys with all this amazing product!
As you can see I stuck with a sort of mono tone colour scheme for this layout, pulling out pieces that were blue, grey and black.

For this layout I chose one of the muted background papers to begin my page with and then I added the dark blue paper behind to lift it and act as a frame for the entire page. The photo I have chosen to document, is one of my youngest son when we last traveled 3 years ago, there are lots of exploring references in this collection so this was the perfect photo! I matted my photo in one of the papers from the large 12′ x 12′ cut out sheet and adhered it flat the background in the centre, only adding adhesive to the centre and top and bottom of the under side of the photo. This allowed me tuck in those die-cut pieces either side of the photo with ease.
 My title is one of the awesome cardstock titles and I added foam dots under this to pop it up at the bottom of my photo, I also layered one of the accessory phrase stickers over the top of the title. I absolutely adore that bear face die-cut so that had to make it on to this page! He looks super cute just above the title on the left overlapping on to my photo. Some more die-cuts were added including the mountains, the stars, hot air balloon, Limited Edition ticket, compass and Stay Wild banner at the top. Some of the stars are popped up using foam dots, I love how this creates shadows and height on my page.

Under the title I tucked in the round compass die cut and added a navy enamel dot to the centre, I also tucked in one of the tabs from the accessory sticker sheet and the large grey star here too. The ‘Epic’ clear sticker was also added here to enhance the adventure theme. I added a few more of the navy enamel dots around my page and also one of the gorgeous flair buttons. I chose the one with the mountains so that it could be layered over the mountain die-cut on the right. Lastly a few more accessory phrase stickers were added and some black mist splatters to finish off.

Thanks so much for stopping by today! I hope you are inspired in some way by my layout and that you can take an idea or 2 from this page and create your own layout!
Happy creating!
Tarrah x
Hi creative friends,
It’s Tarrah back with you and today I am excited to be sharing my first layout using the AWESOME Legendary collection!
As the mother of 2 boys and hubby, I am slightly outvoted in my house and love all the boy collections to document their antics with! The Legendary collection is absolutely perfect for their pages, on this page I have documented a photo of my handsome youngest son hanging out at the shops one day! One of my favourite papers from the collection is the rainbow one called ‘Wild One’, I love how it is in a diagonal design! I trimmed it down slightly and added it to the ‘Explorer’ paper, I like the navy as a mat for the page. I then cut out a diagonal triangle cut file design from The Cut Shoppe from white cardstock and placed it over the top of the paper. I love how the white breaks up some of the rainbow paper. I machine stitched around the outside edge of the layout.
 The large stars in the ephemera pack have a line drawn on them so they were perfect to machine stitch, see the detail on 2 of the larger stars in the photo below. I matted my photo using the wood grain frame die-cut and one of the small cut out papers from the ‘Total Legend’ paper, I also stapled one of banner die-cuts to the top left corner of my photo. I adhered the largest star in the top left corner and the smaller one in the bottom right corner and then adhered my photo over the top.
 The Die-Cut title pack are awesome and I love the font of these! I chose the words ‘Cool Dude’ for my title and popped it up with pop dots underneath and placed to the right of my photo. I took lots of the coloured stars from the die-cut pack and popped them up in rainbow fashion like the paper. I love the height and shadows this creates! I also added one of the awesome flair buttons with the star on it to the right of the ‘Cool’ word in my title. Lastly I added a few of the clear stickers, accessory stickers and enamel dots to finish my layout.

Make sure you keep an eye out for this amazing new boy collection, it is now in your favourite retailer stores and will be coming to the Cocoa Vanilla Studio online store really soon!
Thanks for stopping by today!
Happy creating!
Tarrah x
Hi creative friends!
It’s Tarrah back with you today, as Valentine’s Day is fast approaching I decided to create a Iove themed layout using both the Bohemian Dream collection and the Wild At Heart collection. I love how these two gorgeous collections combine together!

I cut out the XO twice from the Colour Me Happy cut file set using white cardstock. Once cut, I backed it with the ‘B’ side of the Fussy Cuts paper from the Wild at Heart collection. I placed some craft foam under the cut file and adhered it to a 6.5′ x 12′ piece of the ‘B’ side of the Abundant paper from the Bohemian Dream collection. I then adhered the whole piece to the Gypsy Heart paper that I chose for my background, this piece is also from the Bohemian Dream collection.


My photo is a fairly recent one of myself and my hubby chilling out on some deck chairs, its not often that he will get in photos with me so when I can a snap some selfies! Under the photo, I layered a piece from the Beautiful Mess paper and one of the die-cut frames from the Wild At Heart ephemera pack. I then tucked my photo and layers into the left side of the bottom XO and also having the top ‘X’ overlap onto the photo.

On the top ‘O’ I added the round purple sticker from the Bohemian Dream Accessory sticker sheet and also added one of the Wild At Heart flairs to the centre of the sticker. On the other ‘O’ I added one of the die-cuts from the Bohemian Dream ephemera pack. To the right of the top ‘XO’ I added one of the tags and arrows from the Wild at Heart ephemera pack. Lastly, I added some of the wood veneer hearts also from Wild At Heart and some of the white and black phrase stickers from the Accessory sticker sheet.

Thank you so much for stopping by the Cocoa Vanilla Studio blog today! I do hope you can take some inspiration from my layout today.
Happy creating!
Tarrah x
Hi creative friends!
It’s Tarrah here with you and today I have a Back To School themed layout to share with you. I have used mostly the awesome ‘You Rock’ collection along with a few bits from ‘Made of Awesome’ and ‘Totally Rad’!

I started out by cutting the Back To School title cut file design from The Cut Shoppe using white cardstock, I then picked some papers from the You Rock, Made of Awesome, Totally Rad and Colour Me Happy collections and backed them all behind the letters in the title. I love how all the papers look behind the title. Once the letters were all backed, I adhered it to the ‘In Line’ paper from the You Rock collection. I added a photo each of my sons on their first day back to school last year. I was lucky with the design in that it was suited to 2 photos either side of the word ‘To.  I added a variety of embellishments including accessory stickers, a rubber charm, wood veneers, wood buttons, a flair button, a die-cut and chipboard stickers from the various boy collections mentioned above. The wood buttons I added to the centres of the letter ‘C’ in the words ‘Back’ and ‘School’. The 100% Awesome sticker in the centre of the ‘O’ in ‘To’ I popped up with craft foam for some dimension. I just love the world globe die-cut from the Totally Rad collection, it was perfect for my school themed layout!

The star underneath the star flair button, I fussy cut out of one of the papers from the Made Of Awesome collection. I like how it it looks underneath the star flair which is also from the Made Of Awesome collection. I just love the rubber charms from the You Rock collection, I added the one that says ‘So Much Fun’ to the top of the ‘B’ in the word ‘Back’. To finish, I added some of the phrase stickers from the ‘You Rock’ accessory sticker sheet to the middle of the ‘A’ in the word ‘Back’ and I also stamped the date stamp at the bottom of the ‘2 Cool’ sticker.

Thank you so much for stopping by today! I hope you are inspired by my layout in some way! Be sure to check out the Cocoa Vanilla Studio store for all the amazing collections available!
Happy creating!
Tarrah x
Hi there creative friends!
It’s Tarrah back with you and today I am sharing a new layout using the stunning Cocoa Vanilla Studio More Than Words collection.
This week the design team were asked to create a project all about holidays and vacations. I have had some of my Paris holiday photos printed for some time so I choose 3 of my favourite to feature on my layout today.
I wanted to highlight the middle photo a little more so I raised it up off the page by adding a small chipboard frame underneath it and also added one of the black chipboard hearts to the photo. The other two photos I adhered flat to the paper, however I tucked in one of the tabs to the left and one of the small journal spots to the right. 
My title is actually made up of the black letter stickers from the Made of Awesome collection and the ‘Love’ is one of the black chipboard titles from the More Than Words collection. I absolutely LOVE the vellum flowers in this collection and almost used a whole pack of them just on this layout! They were perfect tucked in either end of my photo cluster. I did add a few of the die-cut ones too for some pops of colour. 
The XOXO flair was perfect to go with the ‘City of Love’ theme of my layout, I added it to the end of the ‘Love’ word. The ‘Remember This’ banner I popped up and placed above the ‘Love’ word. I added lots of words and phrases suited to our trip to Paris. I used accessory stickers, die-cuts and cut apart paper for this. To finish off, I added some of the super cute heart enamel shapes. 
Thank you so much for stopping by today! I hope this gets you inspired to create a holiday themed layout using one of the Cocoa Vanilla Studio pretty girly collections!
Happy creating!
Tarrah x