Sue lives amongst the beautiful Glasshouse Mountains in Queensland, Australia with her partner Shannon, their three children and a cat.
Sue has been scrapbooking for over 13 years, having begun shortly after the birth of her daughter. She describes her style as "varied" - creating everything from clean, paper-based layouts; to grungy mixed media pages. She creates both feminine and masculine projects, and loves working with colour. Besides traditional layouts, she also enjoys creating in traveler's notebooks; mini albums; pocket pages; art journals; canvases and the occasional card too.
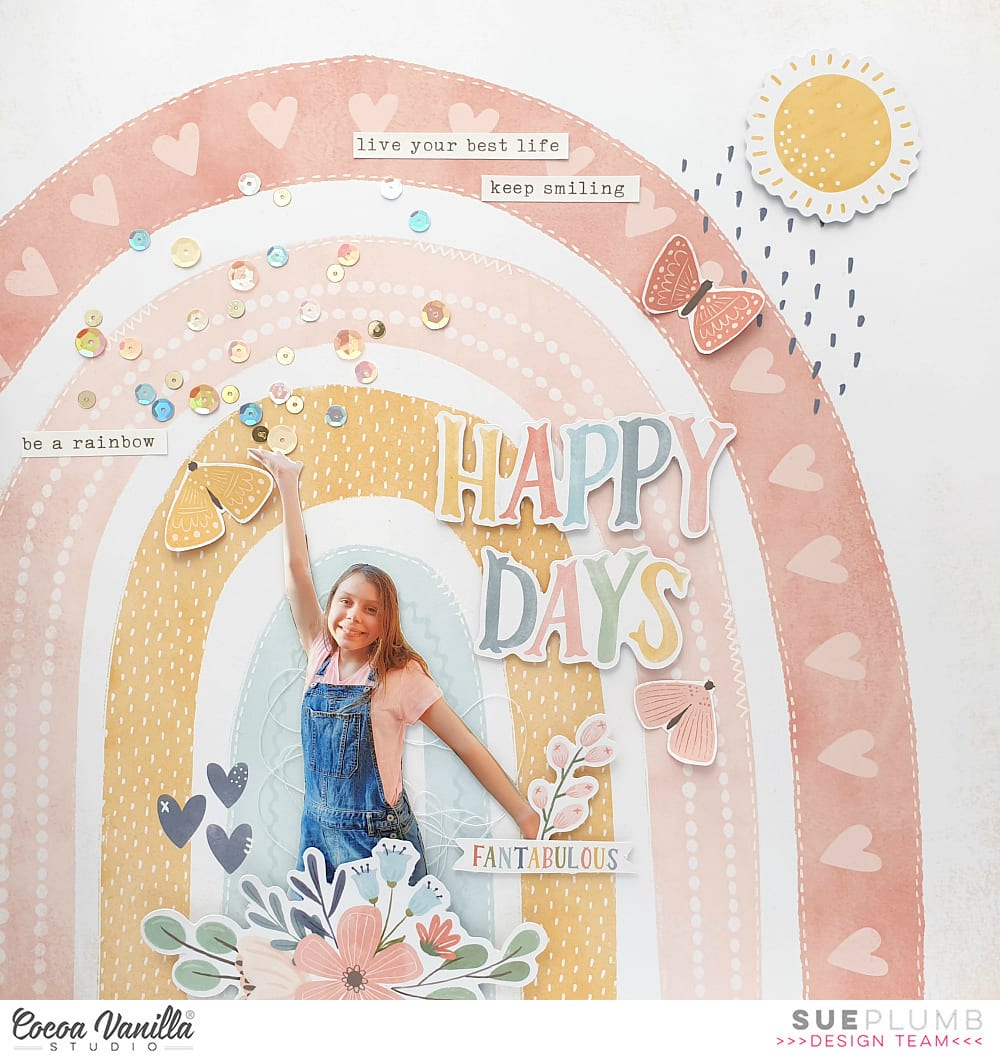
Hi everyone! It’s Sue Plumb here today to share my latest design team page with you. This layout is actually the very first page I created with the brand new ‘Daydream’ collection, even though I am only sharing it now. When I cracked open this collection to create, I couldn’t help myself but reach for the adorable Over the Rainbow paper first. (I think there are lots of people who did the same – including our design team!) You may recall seeing lots of rainbow themed layouts over the past week from our team as part of our rainbow theme, so I thought what better time to share this page and join in the fun!
Now the funny thing about this layout, is I already knew I was going to make it before I even received the collection. (Very unlike me to plan a page ahead of time!) As soon as I saw Zoe’s reveal of this paper, I knew I wanted to use a silhouetted photo of my daughter standing under the rainbow (so I had her pose for the photo in advance).
I started my layout by adding a little bit of extra detail to the paper. I used a fine tip white paint pen to add faux stitched detail along the edges of some of the rainbow arches, and then faux hand stitched details onto the blue hearts.
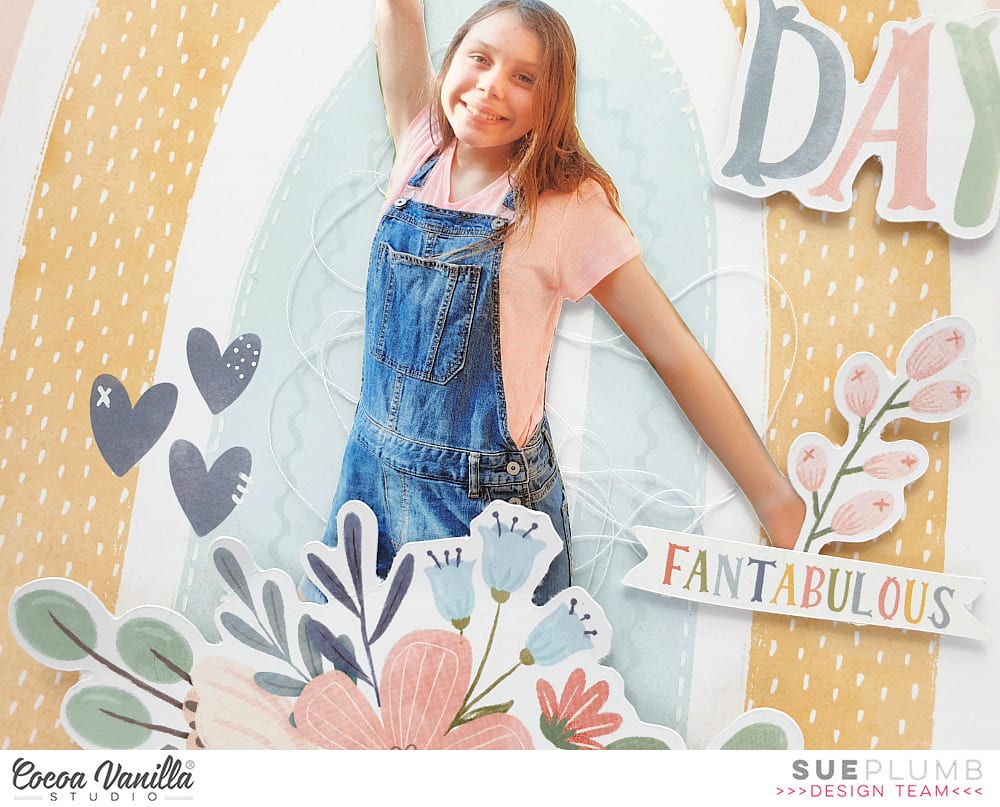
I then cut around my photo to get rid of all the background and placed some messy white cotton thread for soft texture where my photo was going to go. I used some scrap cardboard behind the photo to pop it up from the page.
Once I had the photo in place I added a floral piece from the Die Cut Ephemera pack along the bottom edge of the page so it looked as though she was springing from a bunch of flowers. I also added a small floral sprig and the fantabulous banner piece to cover her hand.
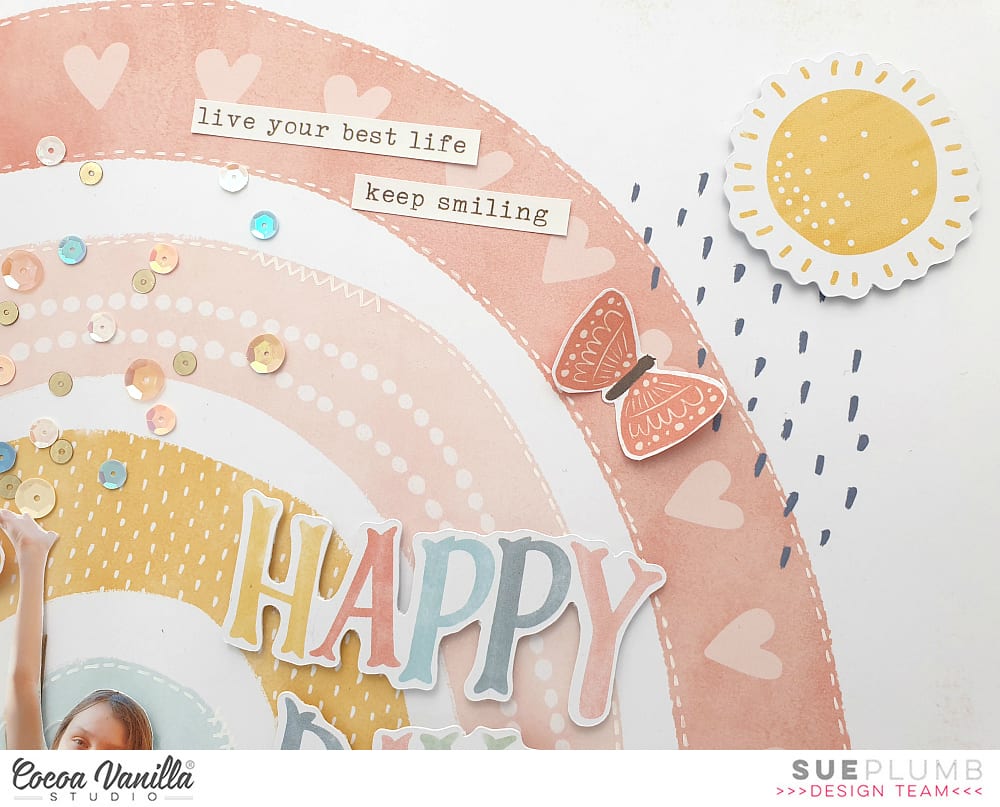
Now it was time to add some extra detail around my page. In keeping with the whimsical scene I was creating, I added the die cut sun from the ephemera pack in the top right corner of the page using some foam tape to pop it up. I also used the happy days words from the ephemera pack as my page title.
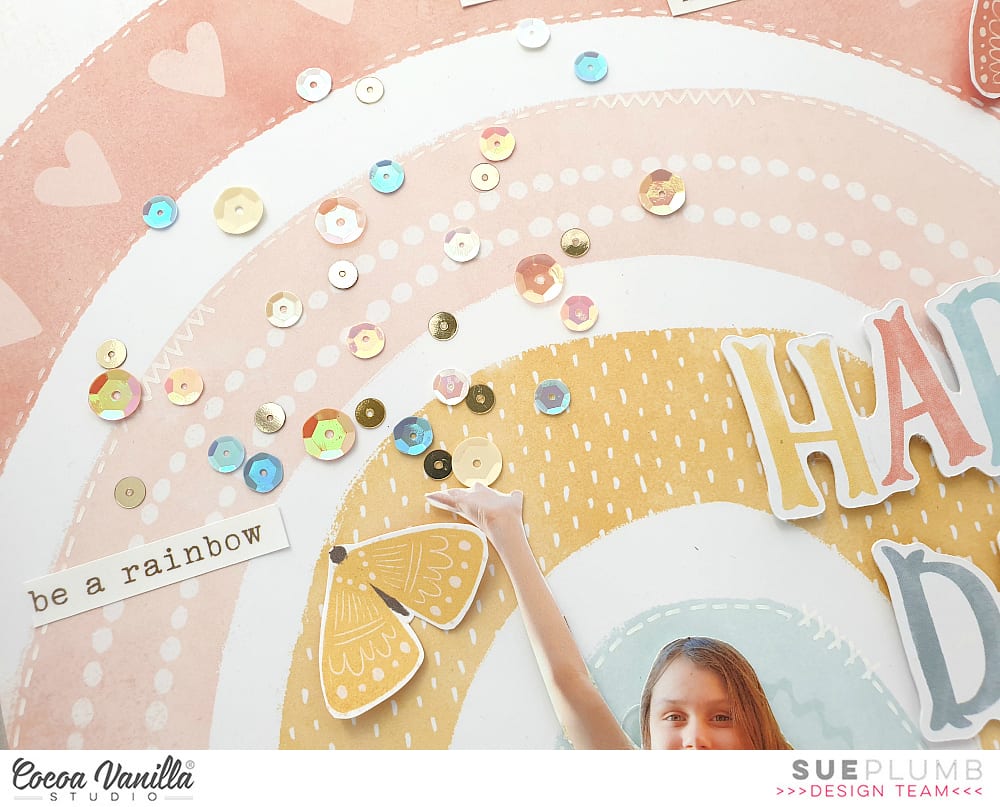
With my daughter’s pose of her hand being held joyfully in the air, I wanted to create a look as though she was scattering some fun / happiness / rainbow vibes, so I used a selection of sequins from the Sequins & Flowers pack and stuck them as though they were being thrown from her hand.
I also added three fussy cut butterflies from the All Aflutterpaper, placing them so they were on the coordinating coloured arch on the rainbow.
I finished off with a few happy phrase stickers from the Accessory Sticker sheet placed onto the rainbow and my page was done. This whimsical scene was unlike my usual style of page, but I really had fun creating it and I am happy I could bring my vision to life. (And my daughter absolutely loves it, which is the most important thing, right?!)
Thanks so much for stopping by so I could share this with you. If you haven’t managed to find the ‘Daydream’ collection yet because your favorite store sold out, rest assured that plenty of re-stocks have been shipped, so check with them to see if they have it coming.
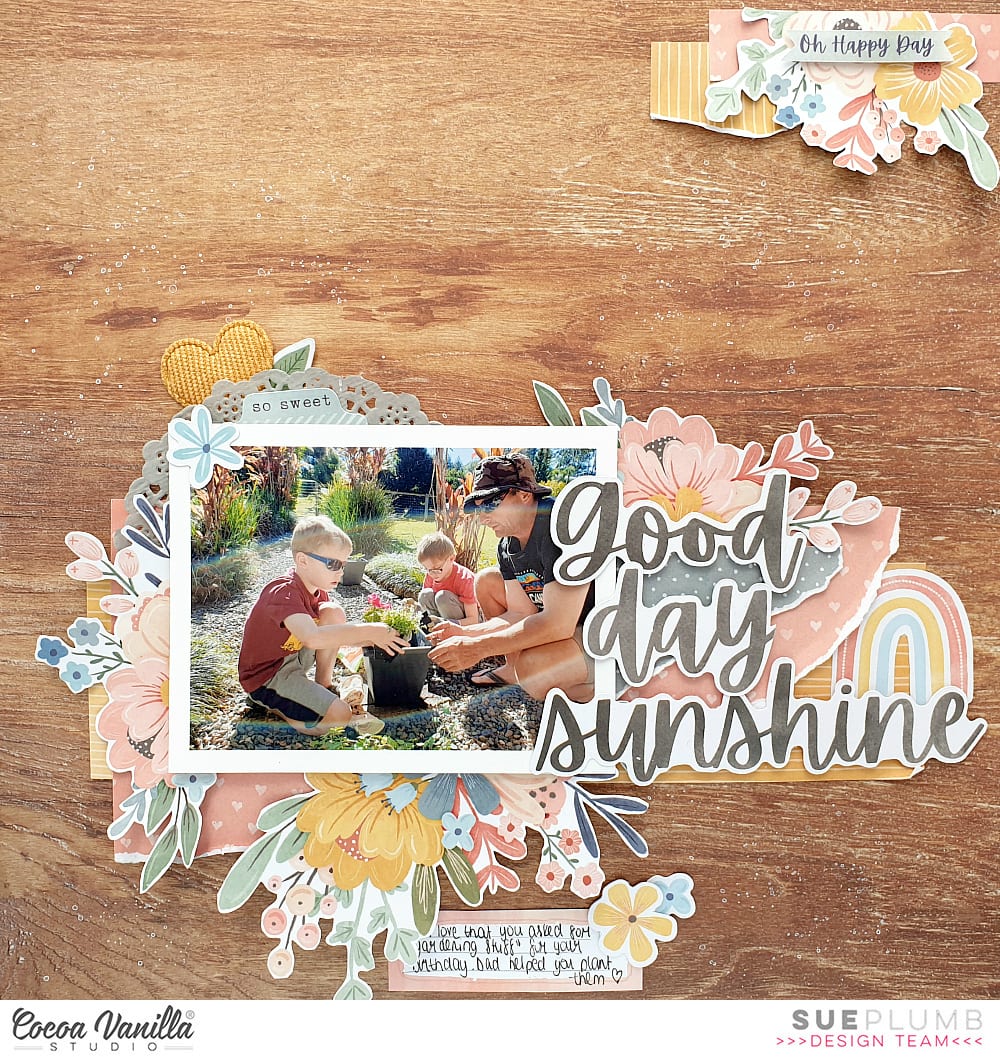
Hi everyone! It’s Sue here today to share my very first layout using the brand new, and oh-SO-beautiful, ‘Daydream’ collection. This was created for our current ‘Outdoor Adventures’ theme, and I was very excited that the collection arrived in time for me to use it for this page.
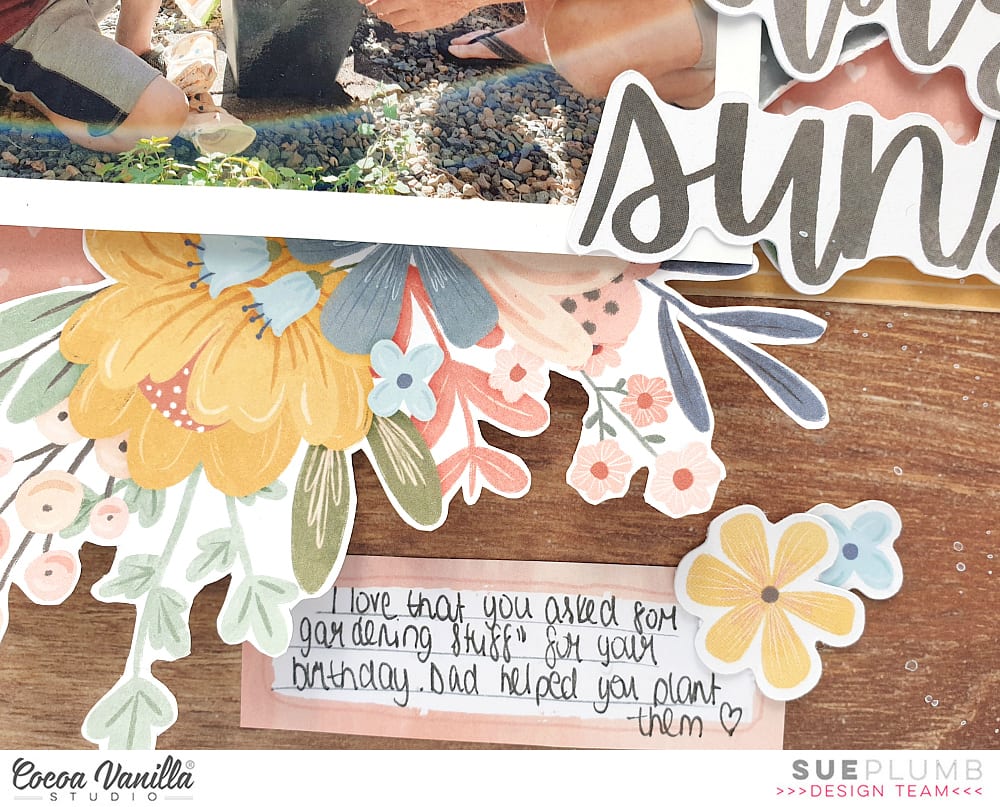
The photo I chose to document was one that I took of my hubby and our boys doing some gardening together. My sons recently celebrated their 8th birthday, and one of them had requested “gardening stuff” as a present. (Isn’t that the cutest?) I couldn’t resist his lovely request, so I went and got him his own gloves, tools, seedlings, pots and potting mix. He was so happy, and has been lovingly caring for them ever since.
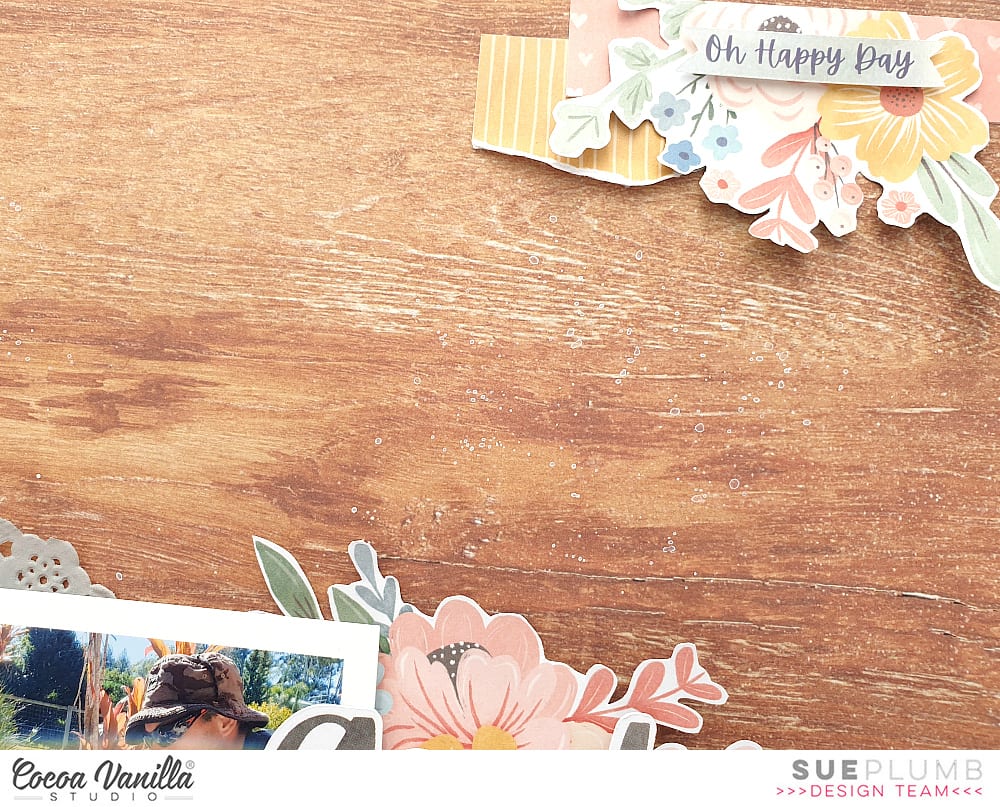
In keeping with the outdoor theme, I decided to use the wood grain print on the reverse side of the Over the Rainbow paper as my background. This gave the page a good “earthy” base, and because it’s such a beautiful detailed grain, it also made my job much easier as it really didn’t need anything added to it.
I then created the focal point for my page using layered pieces from the B sides of the patterned papers Sun Shower (a delicious rich yellow with stripes); All Aflutter(a lovely coral with a sweet heart print); and Garden Variety (a sweet blue-grey tiny spot).
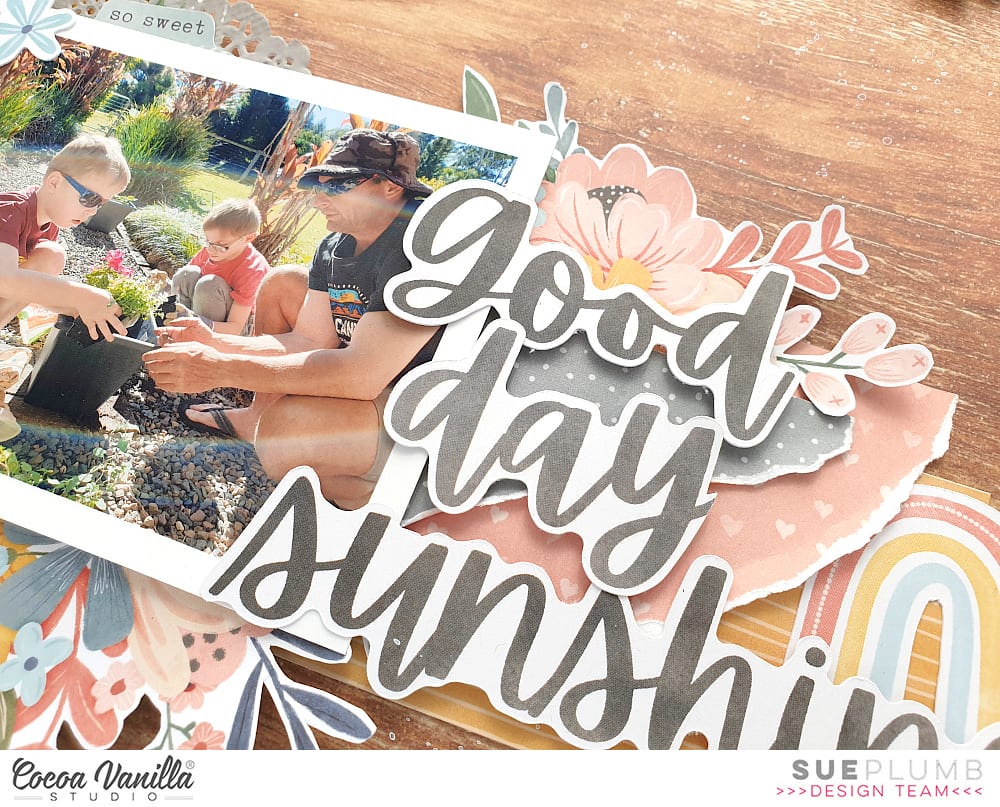
I then added a small grey paper doily from my stash, before sticking my photo down using some scrap cardboard to pop it up from the page. (Did you notice the rainbow lens flare in my photo? I think it looks cool, which is one of the reasons I chose this shot.)
With my photo now in place, it was time to add some embellishments. The first thing I reached for to go with my gardening theme, was the stunning floral print on the Garden Variety paper. The flowers on this sheet were just begging to be fussy cut! I cut several clusters and tucked them in around my photo, bending the edges up away from the page to provide dimension.
I created a small cluster around the top left corner of my photo using the so sweet tab sticker from the Accessory Sticker sheet; a small flower and leaf from the Die Cut Ephemera pack; and one of the new embellishments on the block – a Puffy Heart. These fabric hearts are super cute, and they have beautiful, delicate gold thread woven through them.
Next, I added my page title to the right of my photo; using three words from the Die Cut Titles pack. (I actually cut the “s” off the word “days” so it fit the phrase I wanted.) I used foam tape under my title words so that they would sit up at the same height as the photo and allow me to overlap the edge. Above my title I added the sweet little die cut rainbow from the ephemera pack.
With my layout so bottom heavy at this point, I created a small cluster in the top right corner to help balance it out. I wanted to mimic the focal area of my page, so I used small pieces of the same papers, then topped it with the oh happy day banner from the sticker sheet.
To finish off my page, I used a label cut from the Happy Placecut apart paper to write my journalling, then added two small die cut flowers. A light splatter of some white mist around my page, and I was done!
This collection is just so easy, and such a pleasure to work with that I was able to create four pages before I even really came up for air. It has just started hitting the shelves of retailers, so make sure you check with your local store or favourite online retailer to see if they have it available. It really is one you need in your stash!
Hi everyone, it’s Sue Plumb here to share my latest design team project with you. As we all excitedly await the gorgeous new ‘Daydream’ collection, I have been inspired by some of my fellow team members who have been getting ready by doing some stash-busting. So I decided to have a dig into my own stash and see what I could find to use up. I finally settled on the ‘Totally Rad’ collection. For those of you who have been Cocoa Vanilla fans for a long time, you might have some of this hiding in your stash too; and for everyone who missed this range the first time around, you can now purchase it as a digital collection HERE
Here is my layout “Super Totally Rad”…
When it came to the background, I was limited with paper choices so I chose to use the sun burst style pattern on the “Good Times” paper from the ‘Boys Rule’ collection instead. I had a couple of photos from my boys recent 8th birthday, and I thought the colours of the cake would make it a fun subject to pair with the colourful ‘Totally Rad’ collection.
Based on the limited paper I had left to work with, I decided to go with a vertical design using a piece of the cute camera print “Happy Snaps” paper for the focal area of my page. Alongside that, I added a strip of the yellow chevron print which was the reverse side of the cameras. I also added a second strip of the chevrons along he right edge of my page. Because the photos I was working with were different orientations, I wanted to keep them contained on the vertical strip of paper and then fill around them.
The key to keeping this busy design cohesive, was to ensure that all the different elements I planned to use needed to be touching each other. This cascading arrangement meant that the viewer’s eye was automatically drawn down through the design. I used a mix of die cut ephemera pieces, as well as pieces that I had fussy cut from the “Mix Tape” cut apart sheet. I also used a flair button and some enamel shapes.
I am not a huge fan of symmetry in my work, so to balance out how heavy my design was along the central line of the page, I added a small embellishment cluster in the bottom right corner of my page, along with my hand written journalling.
I finished off with some black ink splatters and by stamping the phrase happy birthday to you a few times around the page. I am really happy with the clean simplicity of this page, but also with the fact I got to bust some stash and re-visit a collection that I loved.
I will be back again with another share in a couple of weeks time…and expect a certain new collection to be the star of the show! Until then, happy scrapping!
Hi everyone! It’s Sue here to share my latest design team project with you. Today I am sharing a 12×12″ layout I created featuring the beautiful ‘Unforgettable’ collection and some recent photos of my daughter at the beach. As my daughter gets older (she’s now 12), I am finding it increasingly difficult to get photos of her, as she doesn’t enjoy posing for me as much as she used to. (Unless she is dressed up in a costume, but that’s a whole other story!) So you can imagine my delight when I managed to capture these photos of her, and I couldn’t wait to scrap them.
I chose to use the ‘Unforgettable’ collection because I just can’t pass up the chance to create something gorgeous and girly whenever I have the chance. I began my page with one of my favourite papers from the collection – the fabulous aqua diagonal stripe print on the reverse of the Sprightly paper. Instead of keeping the sheet as a whole, I decided to add some extra interest by cutting off a strip along the left edge and flipping it over to reveal the abstract watercolour pattern on the other side. Before re-joining the two, I also added a narrow strip of the Unscripted paper between them. I also distressed the edges of the joins slightly to add some extra texture.
With my page base constructed, it was then time to create a focal area for my layout. I layered several smaller pieces of paper (Sprightly; Garland; and Pretty Bits) to form a mat for my photos, adding some cardboard behind the left photo to lift it up a little higher than the other. Then it was time to play with some pretties!
I decided on three main embellishment clusters placed in the bottom left, top right and bottom right corners of my photo mat. Beginning with the top right cluster, I used a die cut circular frame and a large floral piece from the Die Cut Ephemera pack as the anchors for the cluster. It was at this point that I realised I really needed to draw in the stunning blue colour of the water in my photos. Unfortunately, this colour didn’t feature in the collection so I had to come up with another solution. I found a small floral cut file called Flower Bunch (designed by Paige Evans) that I had cut previously, and coloured it using watercolour paints.
Once dry, I cut it into three pieces so that I could use a portion of it in each cluster. I tucked the largest of the three pieces in underneath the die cuts I had started my first cluster with. I then added two smaller die cut flowers; and a small tab and phrase from the Accessory Sticker sheet. I then finished the cluster with a beautiful die cut butterfly.
For my second cluster in the bottom left corner, I again used a large die cut floral piece from the ephemera pack combined with another section of the painted cut file. In behind the floral piece I tucked a pretty little tag (also from the ephemera pack), which I tied with a little twine. I then added the little moments labelled arrow, which I popped up with little foam tape to give it some dimension.
My third and final cluster was to be my title cluster. I had already picked out the living the dream die cut from the ephemera pack for my title piece (it was an easy choice – just look at that beach on a perfect Queensland winter day). I added another die cut flower and leafy branch, as well as the remainder of the painted cut file. I used foam tape under the title, which allowed me enough room to add a watercolour style Clear Sticker under the edge.
I finished off with a small die cut heart alongside my title cluster and then some tiny splatters of blue ink scattered around my page.
Thanks so much for stopping by today so I could share this with you. I hope I have inspired you to get some supplies out and create something pretty too. (Besides, we all need to make room for the new ‘Daydream’ collection coming soon, right?!)
It’s Sue Plumb here to share my take on the current scraplift theme that the entire team have been working on. For this theme we were all challenged to choose a layout that inspired us from the International Scrapbook Day challenge entries and create our own version. There were so many amazing layouts I found it really hard to choose, but I kept coming back to this super cool page by Rachel Dutko…
There were so many elements I just loved about this page – the textures of the torn, layered papers; the eclectic mix of embellishments; the use of white space; and the touch of mixed media – it just drew me in. For my scraplift, I really wanted to capture some of Rachel’s main design features, whilst still creating a layout that was my own style. I even decided to re-visit one of my all-time favourite collections, ‘Bohemian Dream’.
Here is my layout (I hope you think I did yours justice Rachel!)…
I decided to create my page with a similar theme to Rachel’s, by documenting a selfie and focusing on the message of being yourself and unique. (This pic probably accurately represents me…haha) I then grabbed some white cardstock and added a splash of colour, just as Rachel had on hers. I used blue and purple inks, which I mixed with a little water and then applied to my cardstock to achieve an abstract watercolour background.
Next, I chose three patterned papers, which I tore and layered across my page. The papers I used were Dreamer; Gypsy Heart; and Abstract. I also added a few torn pieces of a washi tape sticker from the ‘You Rock’ collection and an extra paper strip cut from the reverse of the Dreamer paper.
Just as Rachel did, I used two layers of paper to mat my photo (these were from the ‘Bohemian Dream’ 6×6″ paper pad); along with a small yellow paper doily and some frayed gauze for texture. I then began working on the embellishments to cluster around my photo.
I had a sheet of the gorgeous floral print Abundant paper that I had already cut into previously, so I fussy cut three floral pieces to tuck into the layers around my photo, adding a couple of extra little leafy branches from the Die Cut Ephemera pack.
Then it was time for a little stash-busting treasure hunt as I looked through my stash of Cocoa Vanilla embellishments for some extra bits and pieces. I found a couple of gorgeous blue paper flowers I had left over from the ‘Hello Sunshine’ collection that matched with my blue ink perfectly, so I added those to my clusters, tucking the edges under my photo. I also found some cute little blue puffy stickers from the same collection, so onto the page they went too.
The one of a kindFlair Button that I added to the corner of my photo was from the ‘Bohemian Dream’ pack, and was perfect for my page theme! The small mint acrylic heart was left-over from the ‘Free Spirit’ collection; and I also used some blue enamel dots from ‘Life is Beautiful’.
Rachel had some pretty little butterflies on her page, so I had to include some on mine too. (I know, since when do I need an excuse for butterflies, right?!) I added a blue one from the ‘Bohemian Dream’ chipboard near the top of the page; then a smaller pink one from the Die Cut Ephemera pack near to the bottom.
To finish off, I added the live in the moment sticker for my page title (popped up on a little foam tape), and a few small phrases from the Accessory Sticker sheet. A little splatter of some navy mist and I was done.
A big thanks to Rachel for inspiring me with her fabulous layout, I am really happy with how mine came out. (Even though I am clearly incapable of showing the same level of restraint that I so admired about Rachel’s page…haha)
Hi everyone! It’s Sue Plumb here to share another design team project with you. For today’s layout I decided to re-visit one of my favourite collections – ‘Happiness’. (I think this is one of everyone’s favourites isn’t it?) I had some photos of my daughter that were taken a couple of years ago with her new bike, and I knew there was a super cute bicycle on the cut apart sheet in this collection that I could use to embellish my page.
I decided to use the fun spotty design of the Sprinklespaper as my page background – perfect for a page documenting a birthday present! I wanted a border through, so I cut the paper to measure 11×11″, distressed the edges, then mounted it on a sheet of blue cardstock.
I then took a scrap of pale blue and white striped paper I had left-over from the ‘Life is Beautiful’ collection (now available as a digital collection HERE); tore along the edge of it and added it horizontally across my page about 2/3 of the way up to act as the anchor point for my design. Underneath the torn edge I tucked some paper lace I had punched from the pink side of the Expressive paper, which I also added along the bottom edge in the right corner.
I then created some extra paper layers where I was going to place my photos using more of the Expressive paper, as well as pieces of the Good Vibes and Little Thingspapers. I also added a paper doily to add some extra texture. Once all my layers were in place I added my photos on top using some scrap cardboard to pop them up from the page. I then moved onto my embellishments.
I started by adding my title alongside my photo. (This is not the order I usually work in, but I knew I needed to get the title words down in the space before I filled it up with other things.) I chose the words good vibes from the Die Cut Titles pack, and also added a small heart from the Die Cut Ephemera pack. I then used a variety of floral pieces from the ephemera pack to create two clusters in the diagonally opposing corners of my photos. I also added a few small paper flowers I had left-over from the ‘Love Always’ collection.
Next I worked on my journalling cluster in the bottom right corner of my page. I added a torn scrap of the Good Vibes paper, more floral ephemera pieces and paper flowers, and the sweet little bicycle that I had fussy cut from the Little Things paper. I then added my journalling, a small die cut heart, and a phrase sticker from the Accessory Sticker sheet.
I finished off my page by adding a Flair Button and another heart to the left of my photo; a couple more phrase stickers placed above my title and finally, a butterfly that I fussy cut from the Bright & Beautiful paper.
Thanks so much for stopping by so I could share this with you. I hope I have inspired you to pull out some supplies and get creative today. Until next time, happy scrapping!
Hi everyone! Today is our final day of sharing the projects our design team created for our International Scrapbook Day celebration. We are starting with Gwen, who designed a “Grab 5” challenge for everyone and her criteria were – a chipboard element; a die cut title; flair button; enamel dots; and something fussy cut. She created a beautiful page of her daughter for her sample using our ‘Wild at Heart’ collection and a cut file from Cut to You.
Oh how we loved the gorgeous rich tones of this collection! It was so nice to see it showcased a couple of times during the weekend by our team.
Next up, we had another LIVE scrap stream into the group, with Tazhi using Gwen’s challenge criteria to create this beautiful page. (Lucky for Tazhi, she had her hubby do all the butterfly fussy cutting for her before she began.) She used our ‘Unforgettable’ collection and created her watercolour style background from her home in New York while we all watched on.
Our final challenge for the weekend was one that was set by Anna Blades, and she challenged everyone to create a monochromatic layout using tones of only one colour (plus black, white and grey were allowed). She used our ‘Bohemian Dream’ collection and decided to focus on the stunning purple from the range and came up with this sample that included soft, subtle mixed media on her background.
Also sharing a sample for our monochromatic challenge was Rachel, who decided pink was going to be her colour of choice and she nailed it! She mixed elements from several of our collections to create a delicate, feminine page. We love the floral cluster she created and the way those hearts draw the eye straight through the photo.
The final layout we have to share comes from Michelle, who also tackled the monochromatic challenge and chose pink as her colour of choice. Michelle decided to mix things up a bit by also combining this challenge with Anna’s heart themed sketch and a sweet photo of her daughter. She chose pink elements from across a variety of collections and pulled them all together to create this darling layout.
Look at how beautifully the different collections combined by choosing a single colour to unite them.
And that wraps up all the INSD inspiration from our awesome team. I am sure you will agree they all created some stunning, and very inspiring work. What a wonderful weekend we all had to celebrate this fabulous craft that we all love. Tomorrow we return to our “regular programming” so stop by and see what Danni has to share. Happy scrapping to you all!
Hi everyone! Today we are once more turning the spotlight on some of the layouts our design team created during our International Scrapbook Day celebration a few weeks ago.
The first layout we are sharing belongs to Anna, who created a fabulous sketch challenge for us, and this stunning sample layout using our ‘Happiness’ collection to go along with it…
If you would like to see how Anna put this beauty together, she has a process video available on our YouTube channel. You can watch it here:
Anna’s sketch challenge proved to be very popular, with many gorgeous layouts being shared as a result, including from our own team members. Raquel decided to play along using Anna’s sketch to create this layout of her and her son using our ‘Unforgettable’ collection which we absolutely love!
Raquel also created a process video for this layout, and you can watch it on our YouTube channel here:
The final layout we have to share using Anna’s sketch was from Melissa, who created this one LIVE in our INSD group from her home in New Zealand. She used our ‘Legendary’ collection and we are crushing on that big yellow heart and those die cut patterned paper leaves.
The next challenge we had on offer was Tarrah’s multi photo and mixed font challenge. Tarrah used our ‘Wild at Heart’ collection and was inspired by the work of fellow DT member Raquel to create an 8.5×11″ layout.
The next layout we have to share was also created for Tarrah’s challenge, but this time from Laura using our ‘More Than Words’ collection. She went all-out on the multi photo criteria, and managed to add FIVE photos on her page whilst still maintaining a clean, uncluttered look.
The final layout we have to share today comes from Sue, who created this mixed media layout during her LIVE scrap stream in the INSD group. She used our ‘Legendary’ collection which was a perfect match for the fun photos of her kids.
That’s all for today, but stay tuned because we have another serve of inspirational layouts from our team to come tomorrow. Until then, happy scrapping!
Hi everyone! What an awesome weekend of fun, friendship and inspiration our International Scrapbook Day celebration weekend turned out to be. You may have seen that we shared all the challenge winner layouts on here a few days ago, so we thought this time we would turn the spotlight on some of the layouts our design team created for the weekend.
First up, for Anita’s mood board challenge, was this stunning layout – “Happy Little Moments” that was created by Anita as her challenge sample.
We are totally crushing on the gorgeous colour palette she used and those beautiful cut file flowers that she designed herself for Neat n Crafty Cutz. Anita also generously offered these as a free download, which you can grab for yourself HERE
Here’s a closer look at some of the details from Anita’s layout…
Anita also created a process video for her page, which you can watch on our YouTube channel here:
Continuing on with some inspiration for the same mood board challenge was Danni, who created this adorable layout “You Are Lovely” via a LIVE scrap that was held in the group.
It was so awesome to watch Danni work her magic with watercolours and see this layout unfold right before our eyes. If you missed all the action of Danni’s livestream and would like to see her put this page together, you can view the video in the INSD Celebration group HERE
Here’s a closer look at Danni’s gorgeous watercolour work combined with die cut blooms from our ‘Happiness’ collection. *swoon*
Next up on our challenge agenda, was Raquel’s Scraplift the DT challenge, with Raquel sharing a fabulous layout she created using a page by Kylie as her inspiration.
Here is Raquel’s “Memories” layout, featuring our ‘Unforgettable’ collection…
And here is the layout by Kylie that Raquel used as her inspiration…
You can see how Raquel took some of the main components of Kylie’s page structure and then used them as the building blocks for her own interpretation. So many beautiful layers!
And last but not least, Kylie also created a layout for Raquel’s scraplift challenge. This time, she turned the tables on Raquel and used one of Raquel’s layouts to inspire her own.
Here is the layout that Kylie created, “Sweet Memories”…
Kylie said about her layout “for my interpretation I used the Midnight collection. I really loved the heart overlay in Raquel’s layout and that is probably what inspired me to create my page similar.”
Here is Raquel’s original layout using our ‘Happiness’ collection…
Kylie also created a process video for her stunning page, so you can watch her put it all together on our YouTube channel here:
And there you have it – lots of INSD challenge inspiration from our design team with more to come! See you tomorrow with the next installment.
Hi everyone! It’s FINALLY time to announce the winners from our InterNational Scrapbook Day celebration challenges – thank you so much for your patience. We had so many amazing entries, our team really had their work cut out for them narrowing each challenge down to only one winner. But can I just say, I really think we were ALL winners. In what can only be described as “difficult” times being experienced right around the world, the opportunity for us all to unite and celebrate our passion for our craft was really heartwarming. Thank you to everyone who contributed to making it such a success.
Now onto some winners! Each challenge winner will receive a $25 voucher to spend in our online store.
Challenge 1: Anita’s Mood Board
Congratulations Sue! You captured the vibe of the mood board perfectly and you won the hearts of our team with your beautiful watercolour work.
Challenge 2: Raquel’s Scraplift the DT Challenge
Congratulations Tahlia! We loved your take on one of Danni Visser’s recent layouts using the ‘Legendary’ collection, a perfect page for the photo of your boys.
Challenge 3: Anna K’s Sketch Challenge
Congratulations Jessica! The colours of your layout were gorgeous and eye-catching, and it was so lovely to see the ‘Hello Sunshine’ collection being used.
Challenge 4: Tarrah’s Multi Photo & Mixed Font Challenge
Congratulations Ashleigh! It’s no secret that we all love stars around here, and your star-filled layout had great flow and looked simply awesome!
Challenge 5: Gwen’s Grab 5 Challenge
Congratulations Lisa! Your layout was definitely another starry creation that captured our team’s eye. We loved all the layers you created on this page and the way you colour matched perfectly to the photo.
Challenge 6: Anna B’s Monochromatic Challenge
Congratulations Tamara! You created such a pretty page. Your page design and use of all those blue elements was fabulous!
And last but not least, our major prize winner…
Congratulations Carolyn! Completing all 6 challenges clearly paid off – you had 7 lucky entries into the draw. You have won your choice of either our ‘Unforgettable’ or ‘Legendary’ collections. (Thank you everyone who uploaded entries into the challenges, I spent a decent amount of time writing all those names out and folding all those pieces of paper this week! hehe)
Congratulations also to Ros Coutts who won Zoe’s guessing game and scores a digital collection of her choice.
Could all winners please send me a private message via our Facebook page and I will get your prizes organised for you.
Thank you again to everyone who joined our celebration – we hope you gained plenty of inspiration, information, and most of all – happiness and a feeling of camaraderie for this wonderful crafting community that we all belong to! X
 I finished off with a few happy phrase stickers from the Accessory Sticker sheet placed onto the rainbow and my page was done. This whimsical scene was unlike my usual style of page, but I really had fun creating it and I am happy I could bring my vision to life. (And my daughter absolutely loves it, which is the most important thing, right?!)