Days Spent with You | Happy Days collection | Mandy Melville
Hello everyone!
Mandy here today to share a new layout showcasing the fabulous new Happy Days collection. This week our design team are sharing projects that feature the Puffy Alpha Stickers. My favourite way to use these sweet little alphas is to combine them with a larger alpha to create a longer title. This is exactly what I did on this page that documents a selfie of my hubby and I.
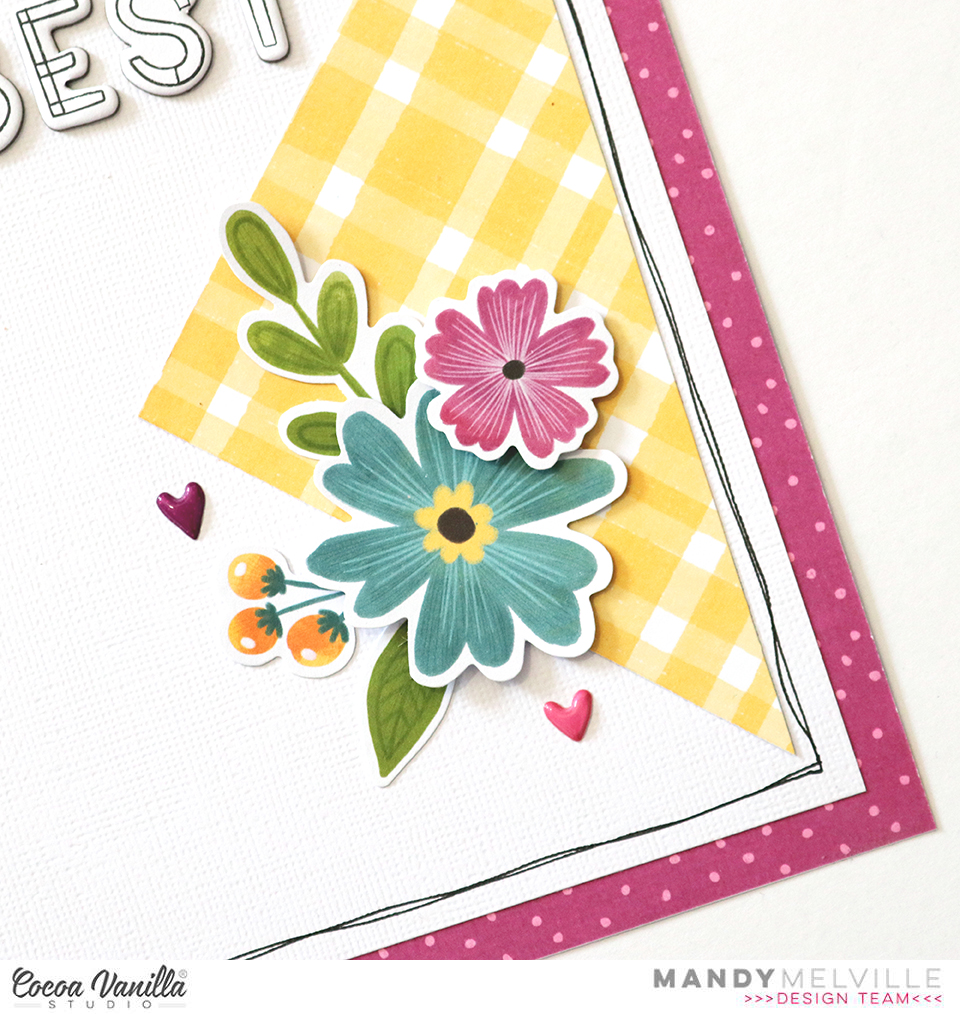
 I started this layout off by trimming down a sheet of white cardstock and matting it on the gorgeous magenta Flutterby paper. I added a doodled border around the white cardstock to add some further definition and interest. Next I cut two triangles, one larger than the other, out of the beautiful yellow Feel Good paper, and adhered these on each side of the page. I matted my photo with a paper from the A5 Paper Stack and adhered that over the larger triangle on the left hand side of the page.

I love all of the different colour combinations that can be used from this one collection, and for this layout I decided to focus on the teal, magenta and yellow. I chose flowers in these three colours from the Floral Ephemera pack to create my floral clusters. To create interest and dimension I love to layer some flowers under the photo and others on top. I added one cluster to the top right hand corner of the photo, and another to the bottom left.

I created a third cluster in the bottom right hand corner of the page, over lapping the smaller yellow triangle. Again I created dimension within the cluster by adhering some elements with foam tape.
As I said, I love to combine the Mini Puffy Alpha Stickers with words from the Chipboard Titles. By using the mini puffy alphas, it enables me to create a longer title that also doubles as my journalling. These sweet little alphas are so fun and colourful and add so much interest to the page!
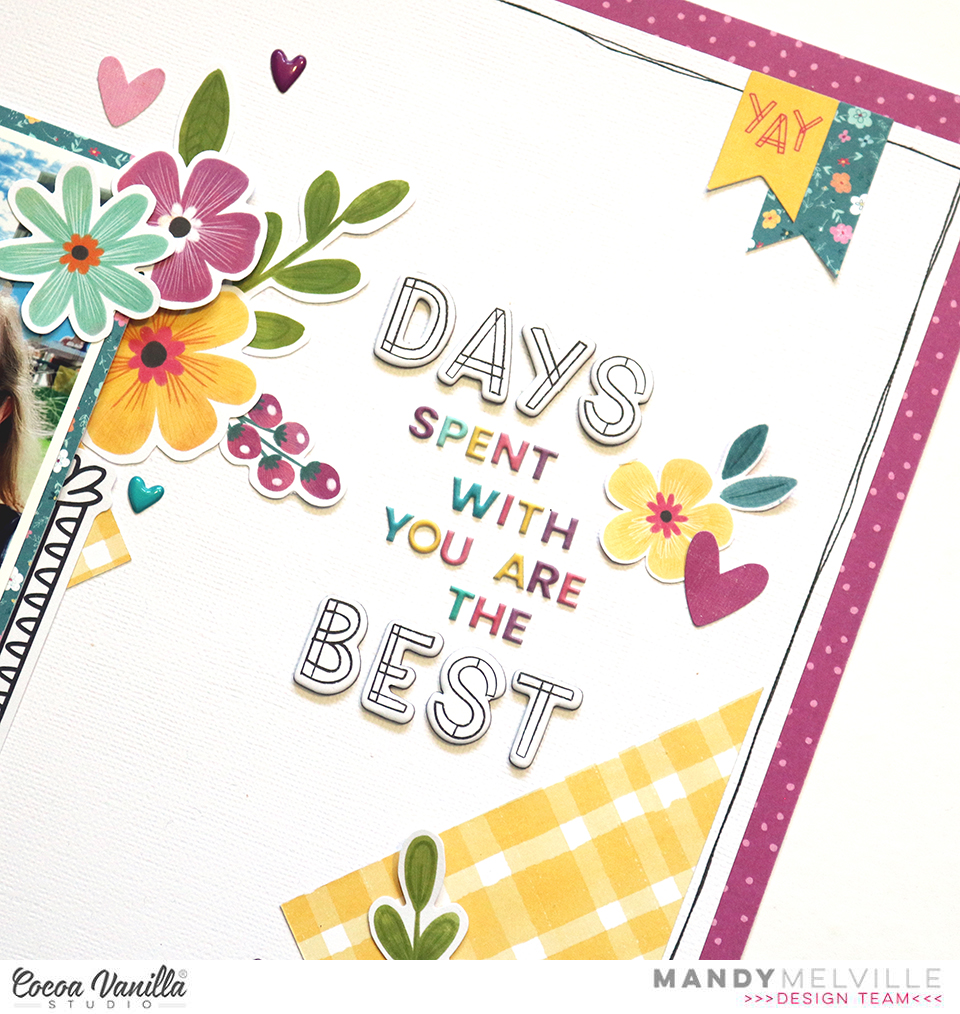 I finished the layout off with some cute banners in the top right hand corner of the page, a couple of little phrase stickers from the Accessory Sticker Sheet, and of course a sprinkling of hearts from the Die Cut Ephemera and the Puffy Sticker Pack.
I hope that you enjoyed taking a look at my layout and seeing how I used the Mini Puffy Alpha Stickers on my page. Thanks so much for stopping by.
Mandy x


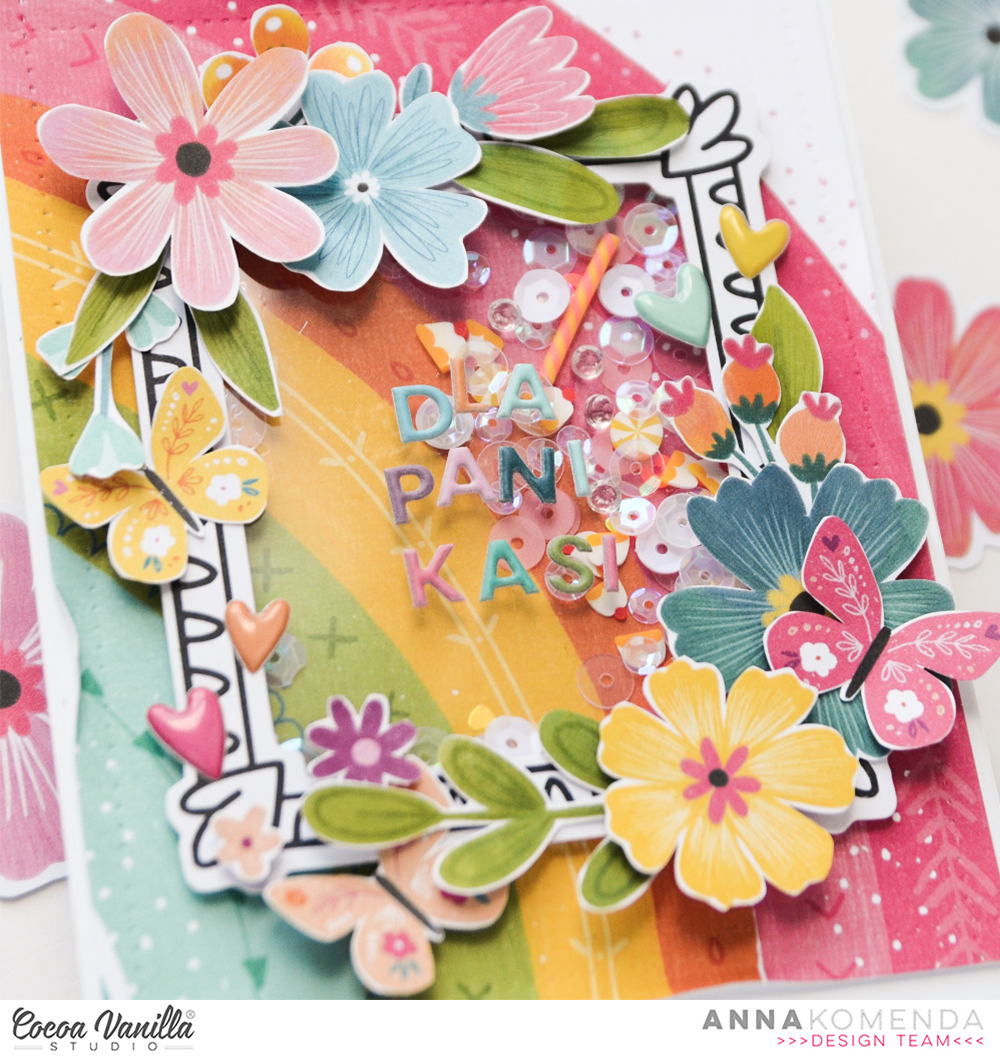


 The Rainbow Bright paper made such a gorgeous background for this photo and really brought the layout to life! Once I had decided on this paper, I then matted my photo with one of the papers from the A5 Paper Stack. I adhered it to the page using craft foam in order to give it some nice dimension and to help it stand out against all of the bright colours in the background.
 For my embellishing I decided to keep it mostly tone-on-tone. So on the pink section of the rainbow I added pink embellishments, on the yellow I added yellow embellishments, and so on. I started with a fun little cluster on the bottom right hand corner of the photo. As this was on the blue and purple section, those were the colours that I chose for this cluster. I included some florals from the Floral Ephemera pack, as well as some that I fussy cut out of the Lush Blooms paper. I also added a couple of Die Cuts to the cluster.
 Moving over to the left hand side of photo, I added another embellishment cluster using similar items that I used in the first. I tucked some of the flowers under the edge of the photo and some on top to give the cluster some dimension. How gorgeous are the Puffy Hearts?! I couldn’t resist adding one to each of my floral clusters!

