Graduation | Storyteller Collection | Danni Visser
Hello Cocoa Vanilla Studio fans! Danni here with my very first layout using the incredible new Storyteller collection! We have been completely spoiled for choice with this amazing collection, so it was difficult for me to decide where to begin. Then I remembered that I have been biding my time to scrap my university graduation pics, waiting for just the right collection to come along…and here we are!
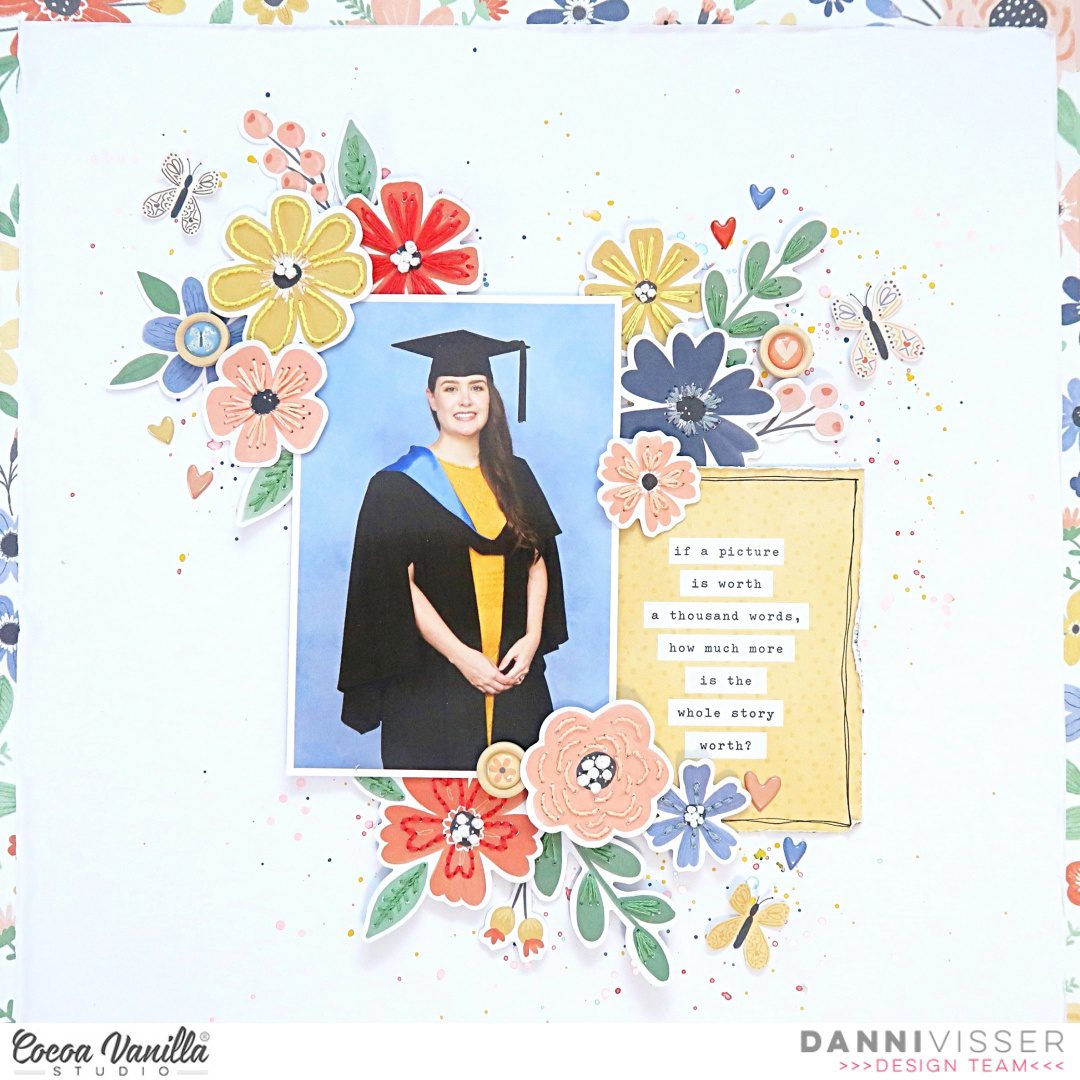
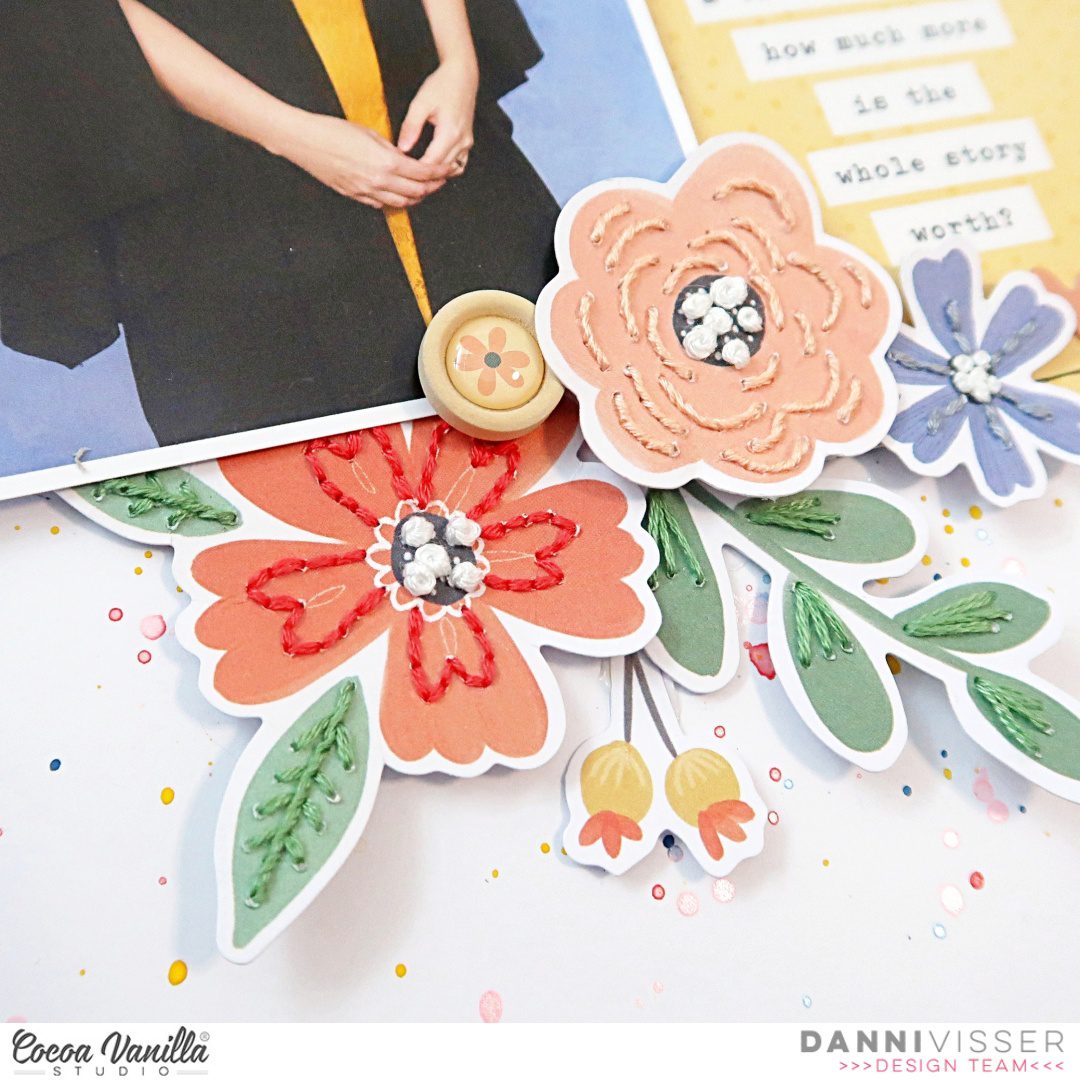
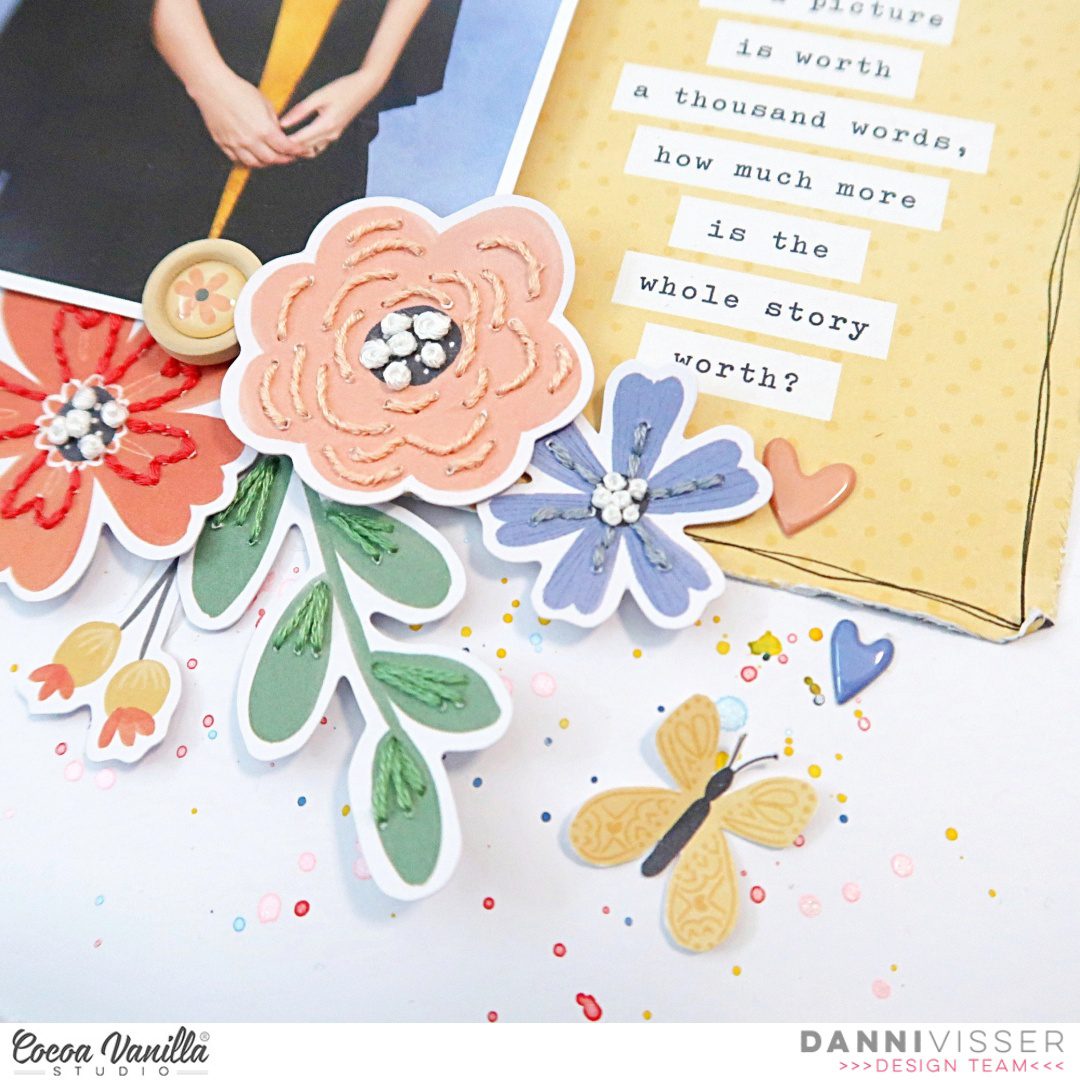
The yellows and blues in this collection match my dress and hood in this photo perfectly. I was so inspired by all the gorgeous colours, I decided to pull out my vast collection of embroidery threads and begin stitching. I selected several of the flowers and leaves from the floral ephemera and added a variety of different stitches and knots to add lots of texture.
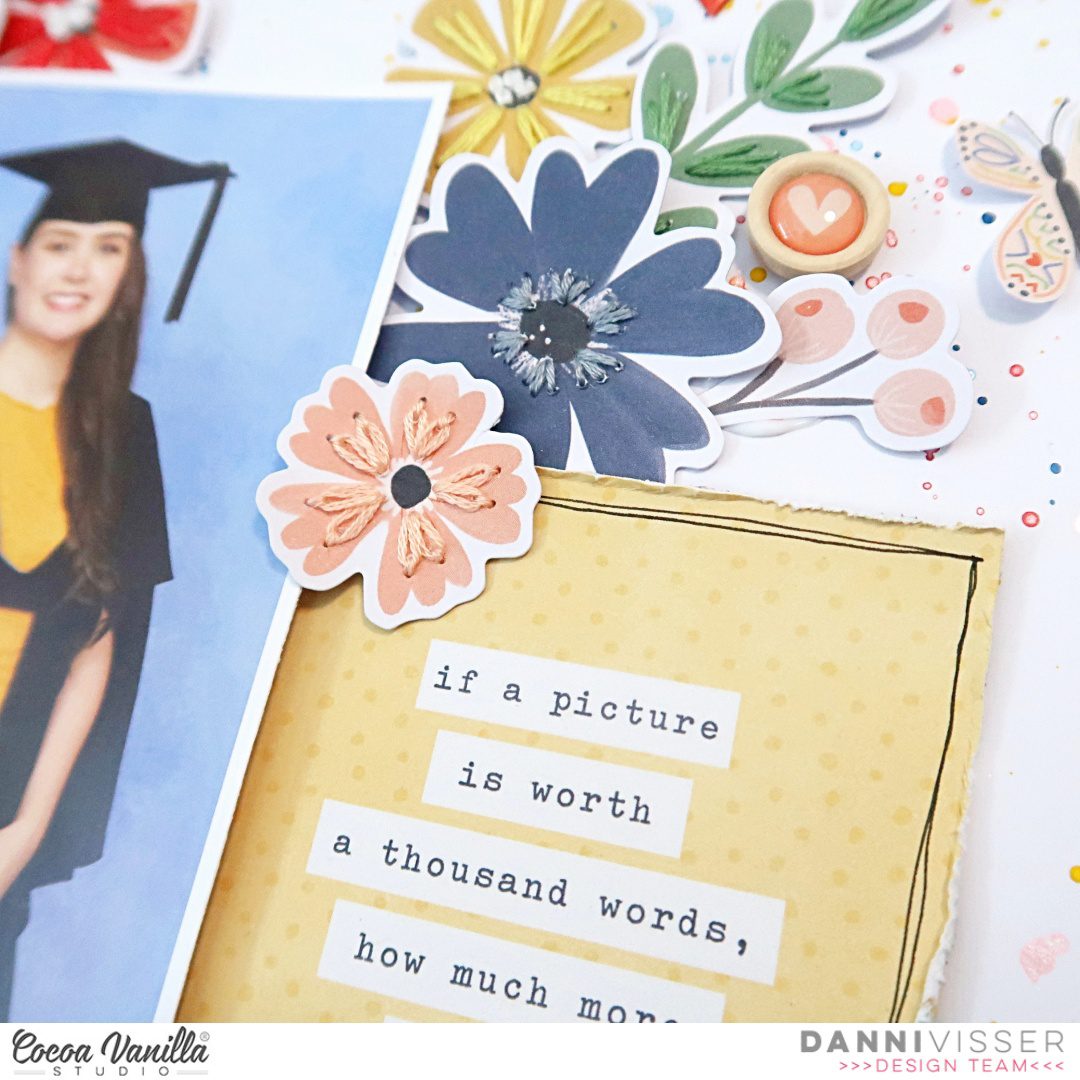
I had trouble choosing a title for this page because this was such a huge and important moment in my life, so I ended up going with a card from the 3×4 pocket cards instead of a traditional title. The longer sentiment on it really sums up the importance and gravity of this special moment better than a short title. I also love how the yellow ties in with the colour of my dress. I gently distressed the edges and outlined the card with a hand drawn border.
Next I popped my photo up on dimensional foam and layered it with the 3×4 card. Before I added my stitched florals to the page, I wanted to jazz up the white background. I added a border using Spring Fling 12×12 patterned paper, then added some delicate watercolour splatters in the same colours as the florals. I included some pearlescent watercolour splatters to add some shine.
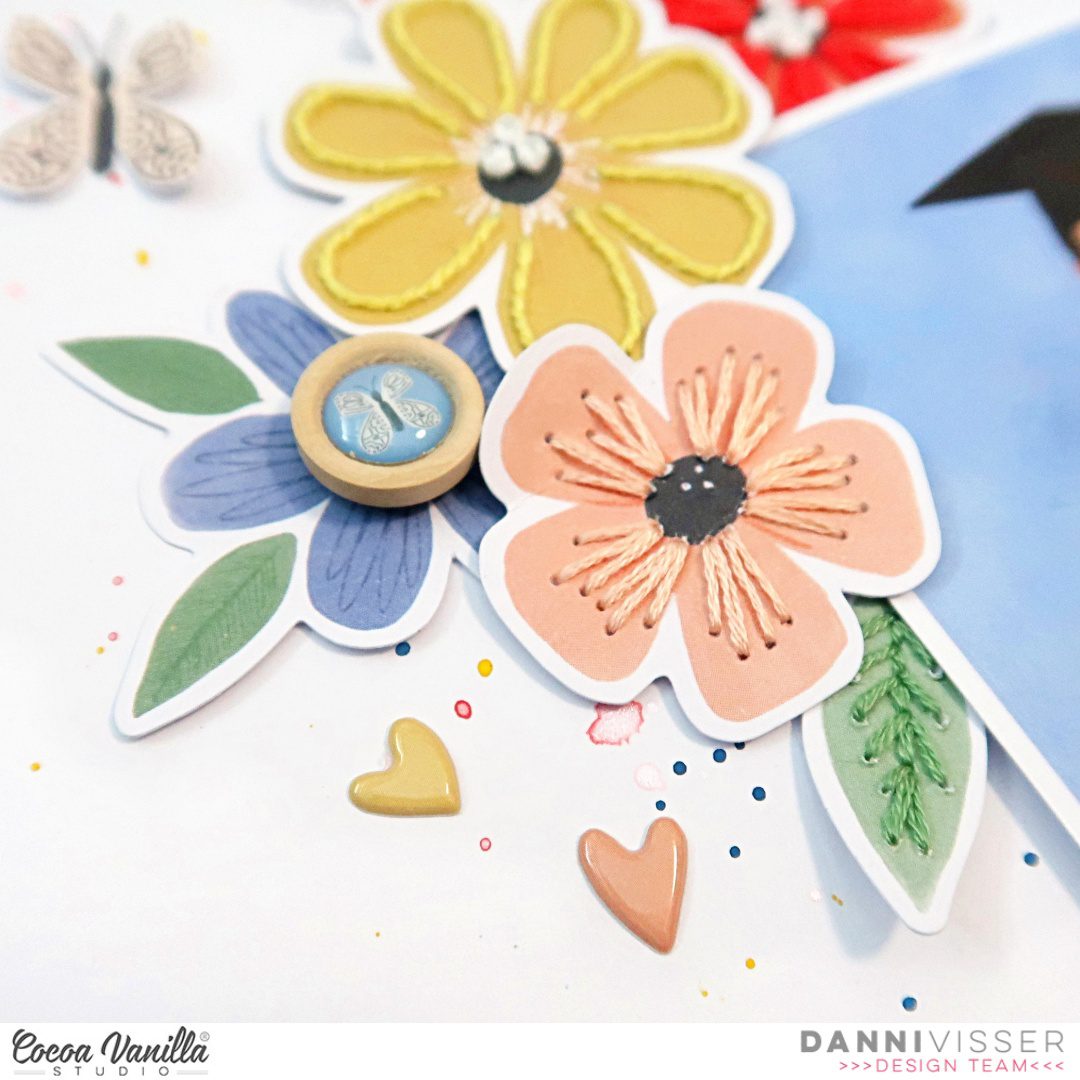
Once the background was done, it was simply a matter of adding my florals around my photo and title card, creating three main clusters. I tucked some underneath the photo and overlaid others, creating a sense of dimension and realism on the page. Using the A5 paper stack, I fussy cut three tiny butterflies from the butterfly patterned paper and added one of these to each cluster, bending the wings up to create a feeling of movement. I also added a tiny wood button to each cluster, followed by two small puffy sticker hearts in varying colours.
I love how this layout turned out and I hope you did too. I have so many wonderful ideas for this collection! There is a process video for this one on the Cocoa Vanilla Studio YouTube channel linked below, if you would like to see this come together in more detail. Thanks for watching and happy scrapping!
Danni x


 I placed my photo slightly to the right of the page using craft foam to add dimension. I layered some papers from the A5 paper stack underneath the photo and distressed the edges slightly to add some texture and to help make the photo pop! I searched through the pocket cards and found the perfect one to suit the photo of my son as photographer! I used craft foam to adhere the pocket card to the left of the photo. When I am placing elements on my page and I am not 100% certain about their position, I will mostly always only use a very small amount of adhesive in case I need to reposition anything or add an extra layer underneath. Once I am happy with where everything ends up on my layout, I add extra adhesive for reinforcement.
 Now I have the main focus of the layout sorted out, next I added a title. I went through the gorgeous black Foam Titles and chose the word ‘Smile’. I placed this word at the bottom of the pocket card to help tie the photo, pocket card and title together. At either end of the photo and pocket card, I tucked in some pretty flower ephemera pieces, I also added the little piece that says ‘Snap Happy’ to the right of my photo.
 On top of my photo, I adhered the ephemera piece that says, ‘The Story Behind the Photo’ and also a small phrase sticker from the Accessory Sticker sheet in the top right corner. I also added some more of the phrase stickers above the photo and below the photo, these are great additions to a page to help tell a story! Above the pocket card, I added the camera die-cut using craft foam. From this point, I decided to add my embellishments in a tone on tone look…I took some of the super cute heart die-cuts, enamel hearts and wood epoxy buttons and placed them on their corresponding colours.


