You Got This | No Limits collection | Sue Plumb
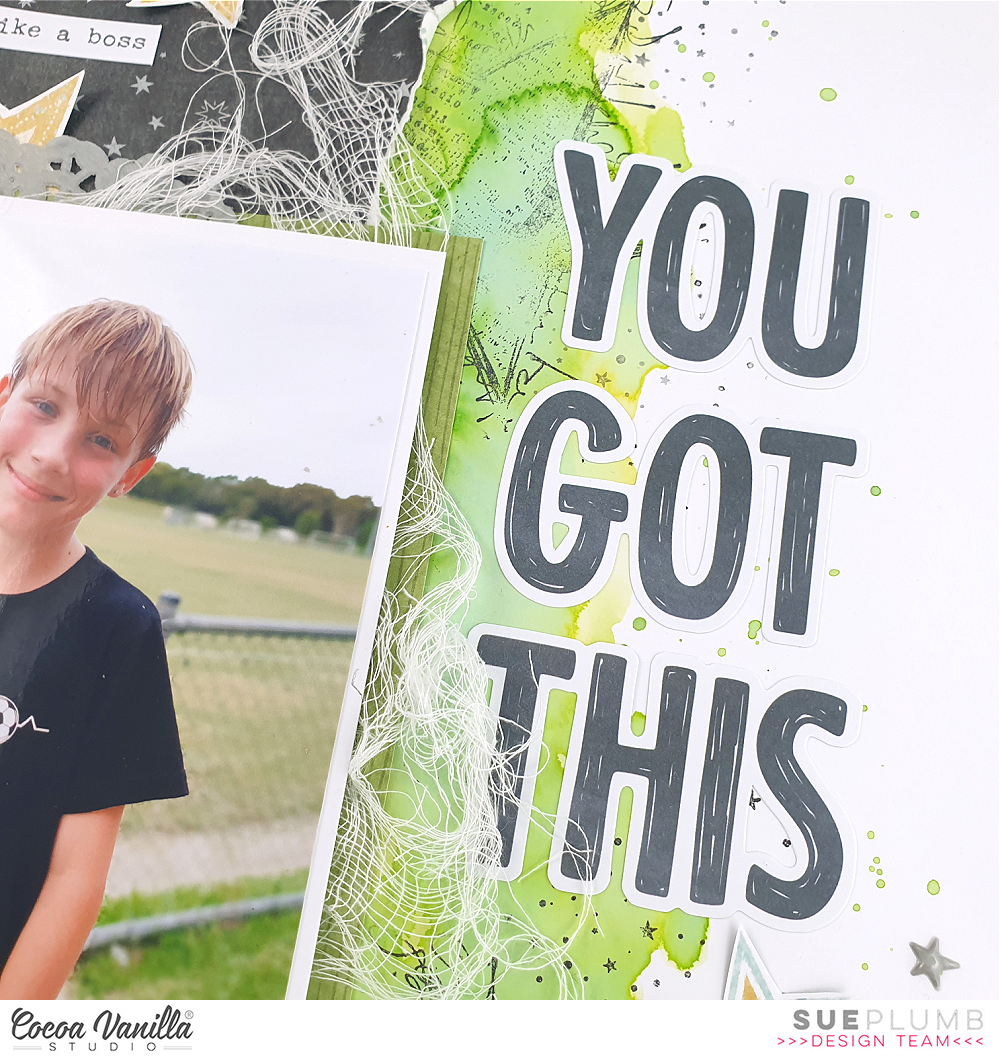
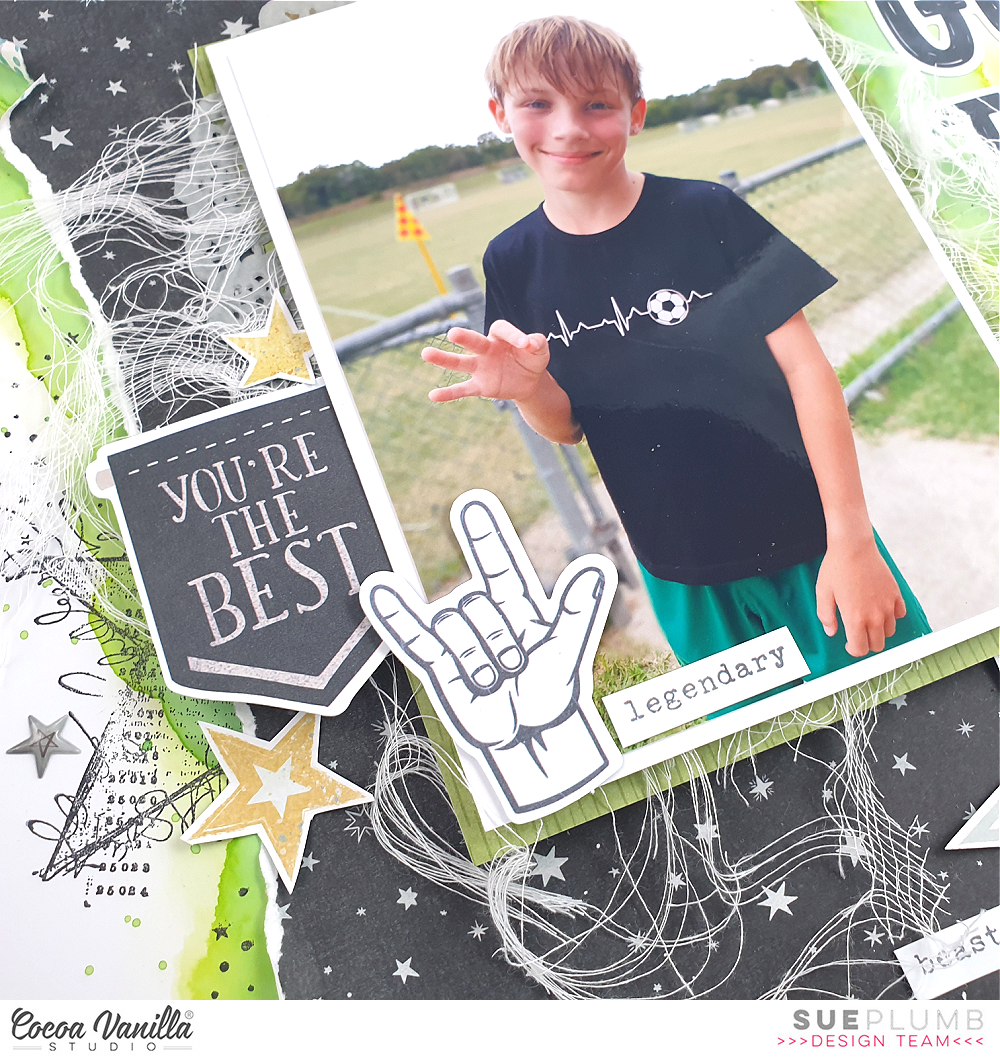
Hi everyone, it’s Sue Plumb here with another design team project for you. Today I am sharing a mixed media layout that has been inspired by this month’s “Seeing Stars” challenge. As an avid boy scrapper, stars are one of my absolute favourite things to put on my pages, so I couldn’t help myself but join in on the fun. The first thing I did was choose which collection I was going to work with, and I couldn’t go past the ‘No Limits’ collection, which is filled with all kinds of celestial themed elements. I paired it with a photo of my son at soccer, who was definitely a star on this particular day.

I began this layout with a sheet of white cardstock and a piece of the star print Orbit patterned paper that I had left over from another project. As it wasn’t a whole sheet, I decided to tear along the edges of it and have it run vertically on my page. Before sticking it down, I used a pencil to mark out where the paper would sit, then turned my attention to the background.
I wanted to add a splash of colour first, so I used my Mowed Lawn green Distress Oxide to add some loose watercolour underneath where the paper would sit. Once dry, I used some star-themed rubber stamps from my stash to add extra detail over the top. I used a large star first, which I stamped three times to form a triangle; then a background stamp featuring tiny stars to scatter around. I then stuck the starry patterned paper down on top.
With the large piece of paper in place, my background was complete, so I turned my attention to the photo and embellishments. I cut a mat for my photo using a green sheet from the A5 Paper Stack and secured it to the page. I topped it with a grey paper doily, frayed gauze, and then my photo which had some cardboard underneath to help pop it up from the page.
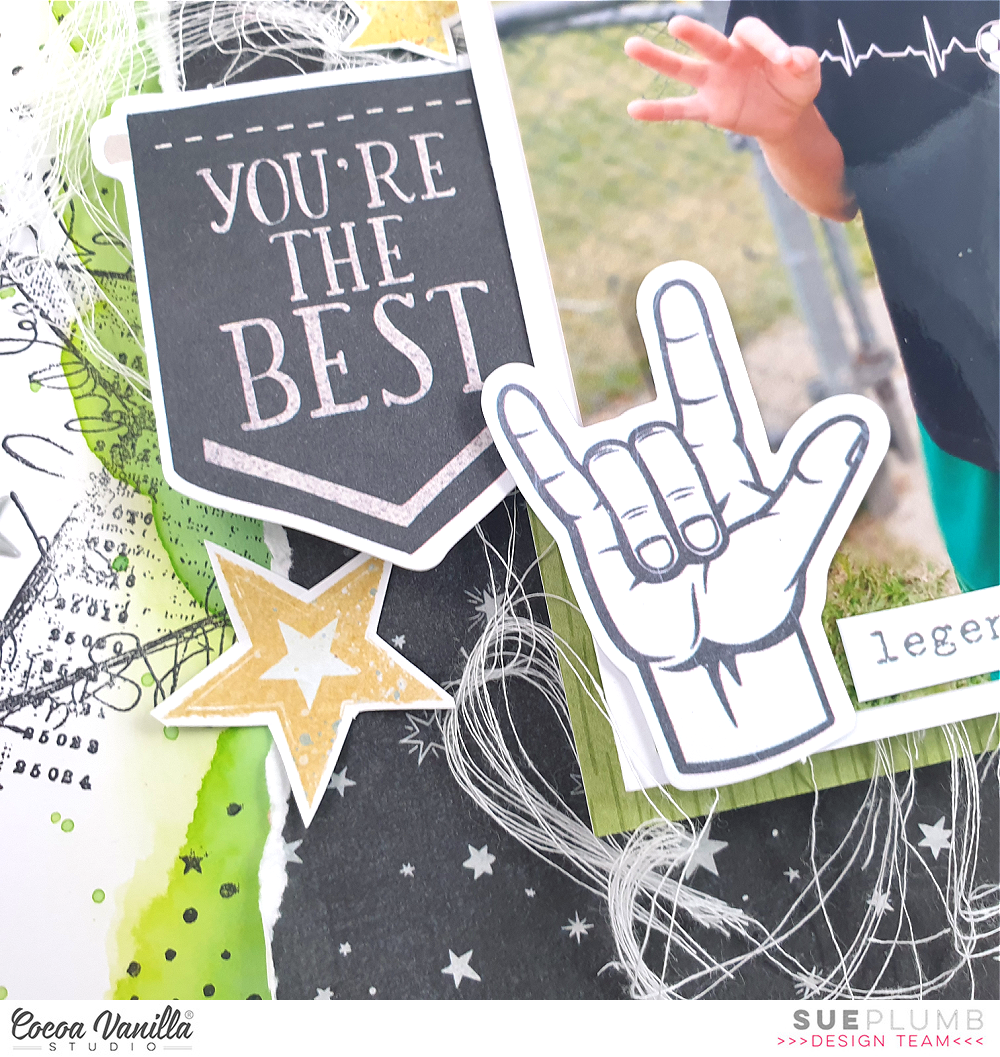
I then added my embellishments, focusing on creating three clusters – above, to the left and to the bottom right of the photo. On the left side I used the you’re the best banner from the Die Cut Ephemera pack. I also added the hand from the same pack, and placed it directly onto the photo. I finished off this cluster with a couple of stars nearby, that were fussy cut from the Nebula paper.
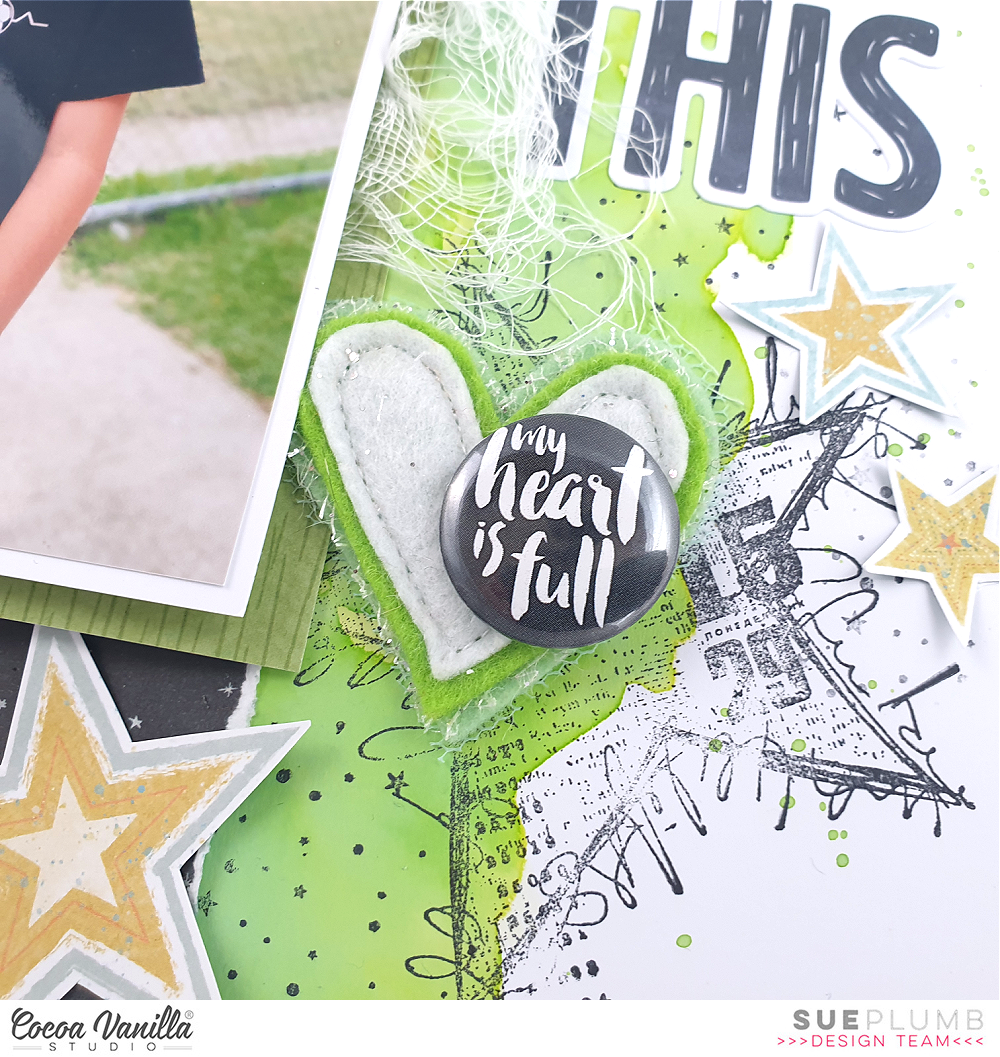
To the right of my photo I created another embellishment cluster, this time using a handmade heart embellishment from my stash, which I topped with a CVS limited edition flair button (from many moons ago). Both of these embellishments were to tie in with the print on my son’s t-shirt. As with the previous cluster, I also added some fussy cut stars nearby. I balanced the stars out by adding a couple more above the photo as well as my third “cluster”.
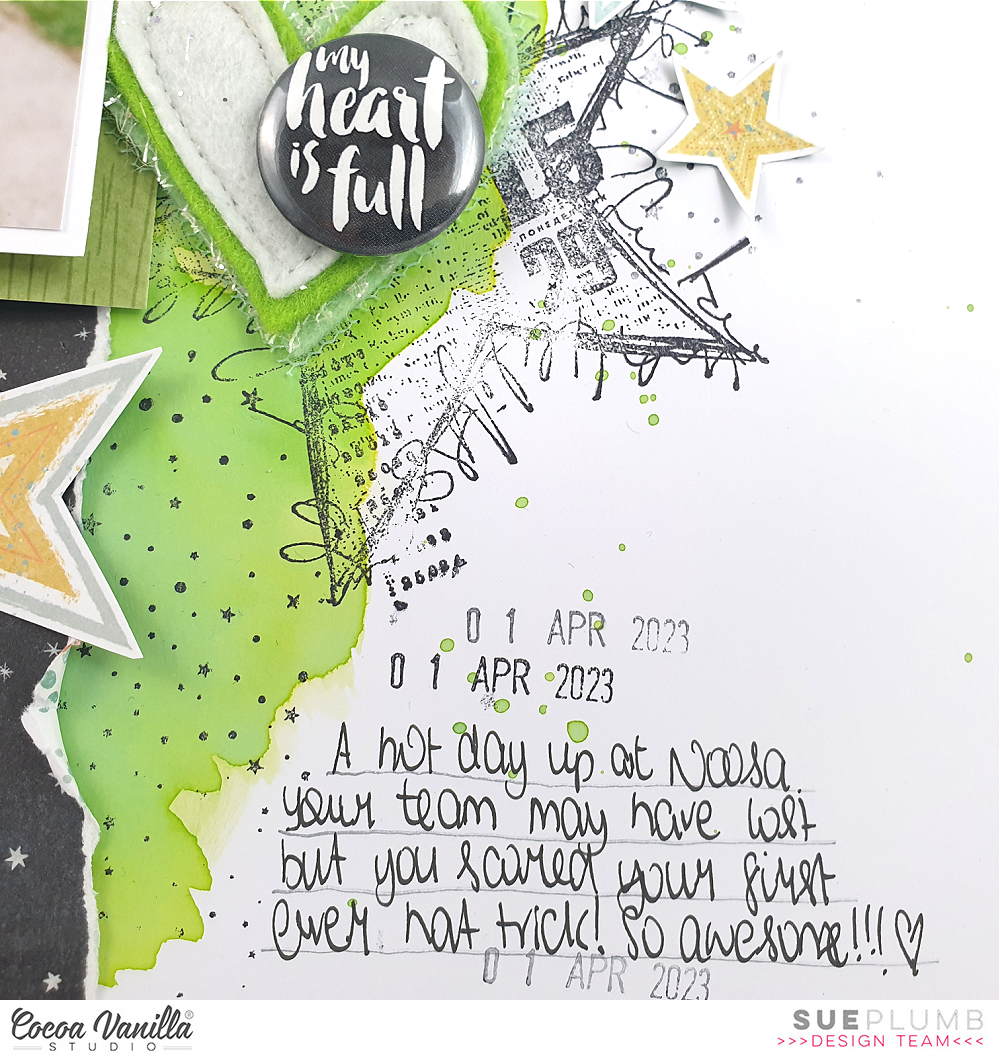
There were only a few elements left to complete at this point – my title, using the Die Cut Title words alongside the photo. A few more small stars from the Puffy Sticker pack and some small word stickers from the Accessory Sticker sheet. And finally, my handwritten journalling and I was done!
If you love stars as much as I do, then make sure you enter our June “Seeing Stars” challenge which is hosted in our Facebook Cocoa Vanilla Studio Community group. You can enter as many times as you wish (providing each entry is created specifically for our challenge) and there is a $25 store voucher to be won. Looking forward to seeing all those starry projects!
Until next time, happy scrapping!