
So Awesome | Happy Days collection | Sue Plumb
Hi everyone, it’s Sue Plumb here and I am SO excited to be sharing my first design team project using the brand new ‘Happy Days’ collection. I am sure by now you have seen the collection in full (either here on the blog or in person), so I know you will agree with me when I say how gorgeous it is! All those bright, vibrant colours really do make me happy.
For my first layout I decided to document some recent happy photos I took – my daughter on her 15th birthday. She was ecstatic to receive her first pair of “Docs” (Dr Marten boots) as a gift – definitely a happy day for her.
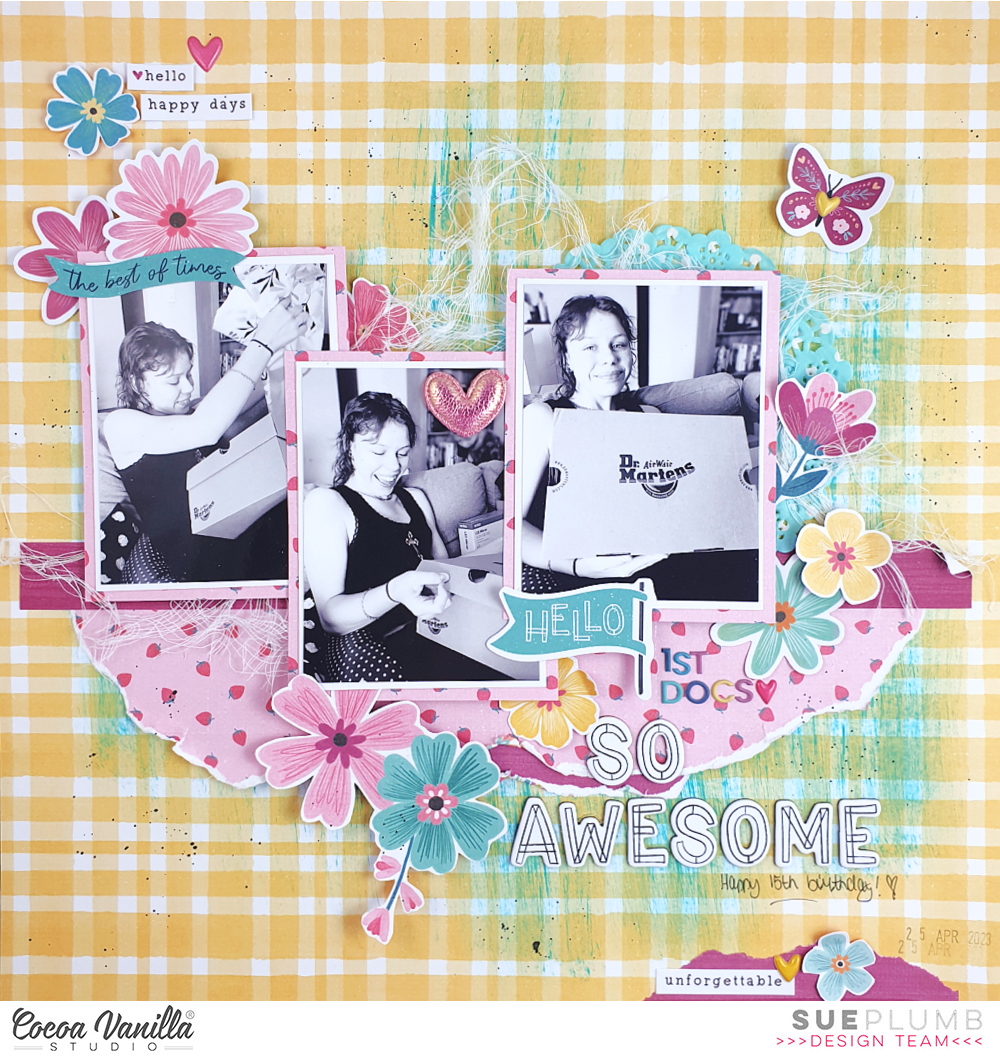
I chose to start with the yellow plaid pattern on the B side of the “Feel Good” paper, which is the cut apart sheet for this collection. I didn’t really want to sacrifice the cut apart first up, but I could not resist that gorgeous happy yellow for my background. To add a little extra colour I added some teal acrylic paint using 2″ wide brush and the dry brush technique. Initially I had planned for the brush strokes to be horizontal on the page, but after spinning the page, I decided I like them better vertical.
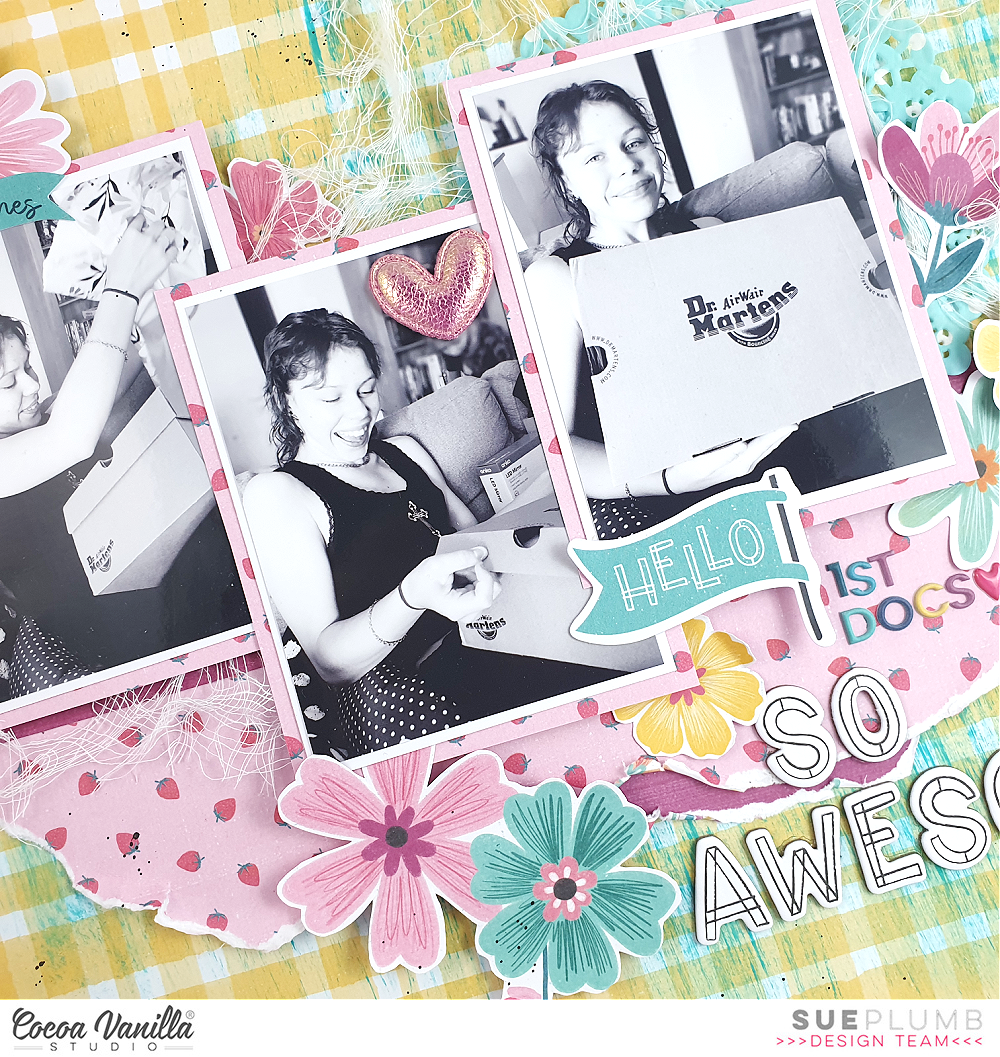
Next, I started building my paper layers. I matted each of my three photos using the sweet strawberry print on the B side of the “Lush Blooms” paper. I also used an extra piece of this paper to place horizontally across the page as an anchor point for my photos. I tore along one edge to add a textural element. I topped the strawberry paper with a thin stripe of plum purple, which was cut from the top edge of the striped pattern on the “Sunshine Lollipops” paper. I then added some frayed gauze and an aqua paper doily before adding my photos on top.
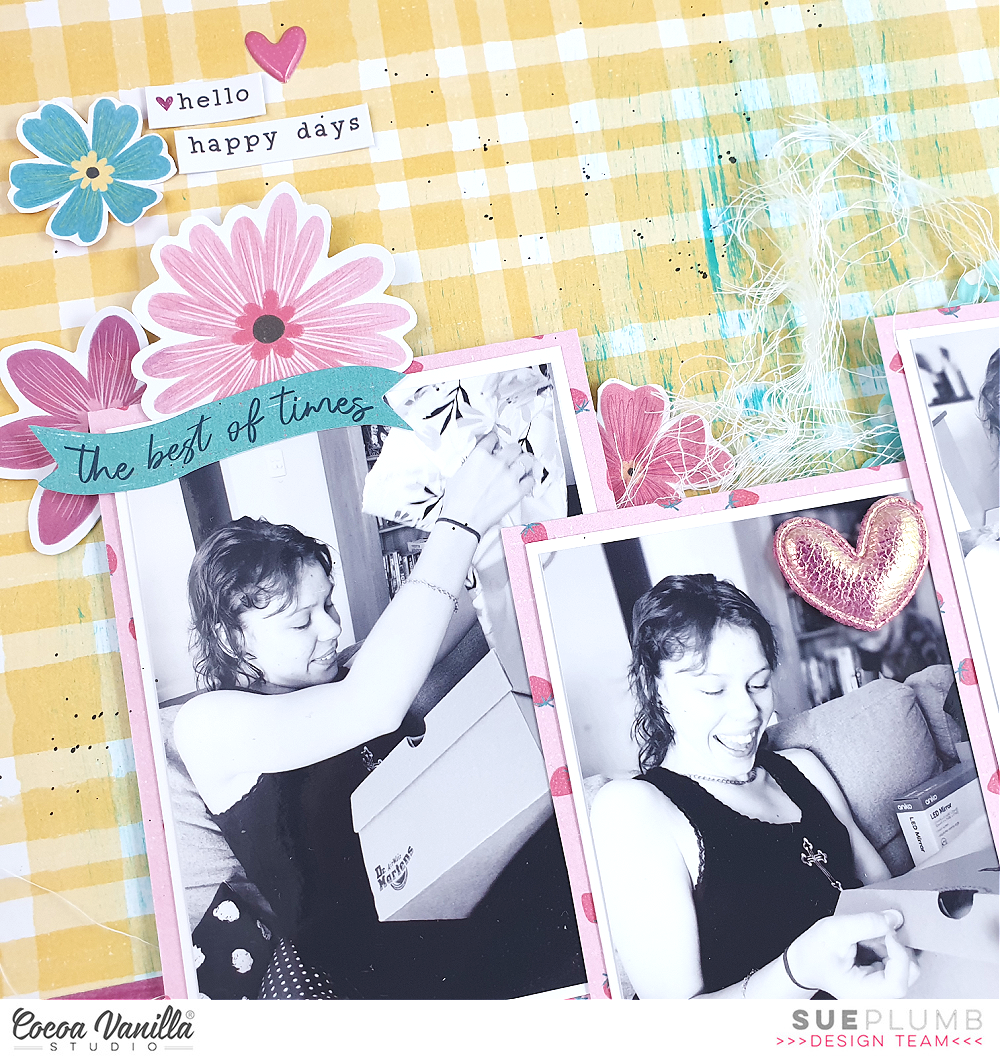
Now it was time to start embellishing my page. I couldn’t resist reaching for the gorgeous florals from the collection; so I used a mix of flowers fussy cut from the “Lush Blooms” paper and pieces from the Floral Ephemera pack. The first cluster I created was around the top left corner of my photos. I also used a small banner piece from the Die Cut Ephemera pack across the top edge of my photo.
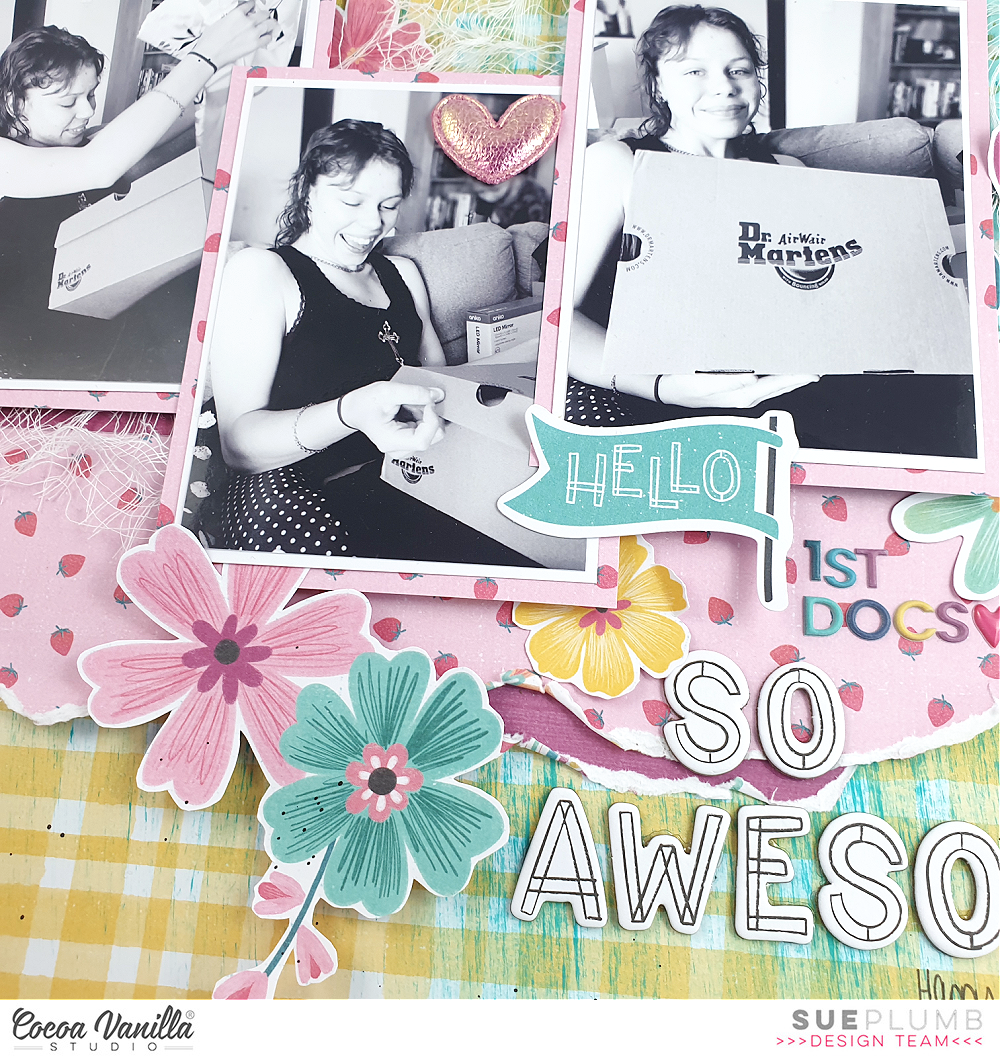
The second cluster I created was below the centre photo and here I used a larger fussy cut floral piece with foam tape behind it to add a little height. (I had already planned at this point that my title was going to go alongside it, even though I hadn’t added it yet.) With two clusters in place, it was time to add my third cluster to balance my page.
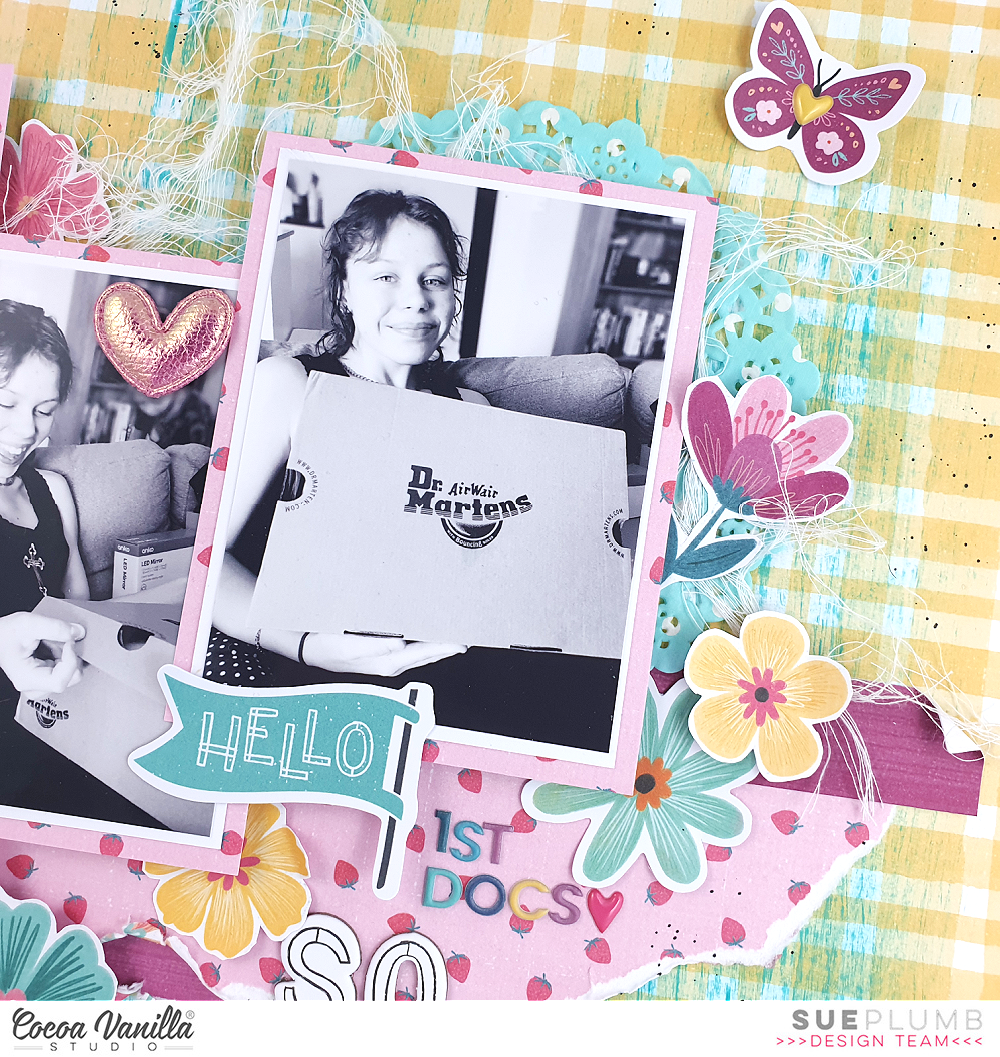
The position of the last floral cluster was alongside the photos on the right edge. The positioning of this final cluster completed my visual triangle around the focal point of my page. Again, I used some foam tape to create dimension.
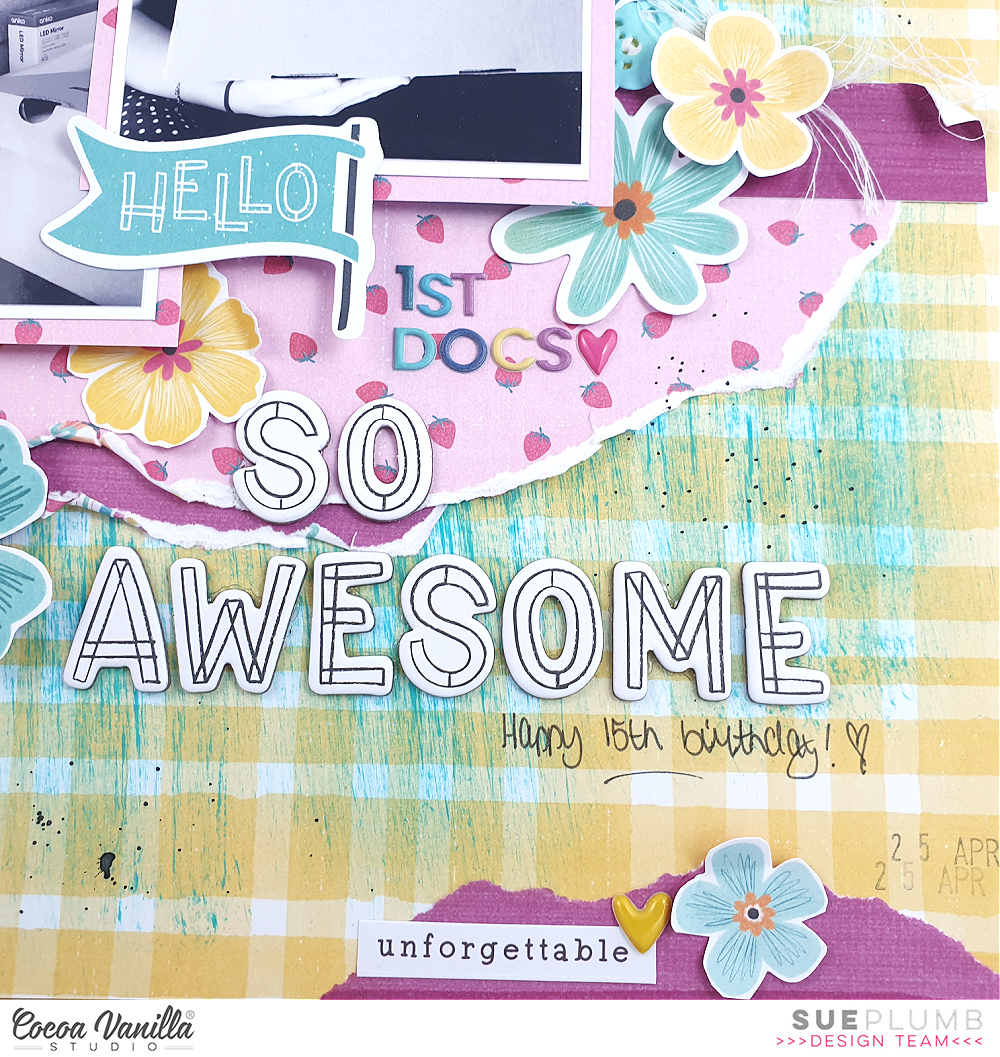
With all the flowers in place, I then set about adding some text to the page. I chose the die cut hello flag from the ephemera pack to place along the bottom edge of my main photo. This formed the first part of my subtitle, which was Hello 1st Docs, with the letters for the second part coming from the Mini Puffy Alphabet Stickers pack. The main part of my title, So Awesome, was using words from the Chipboard Titles pack.
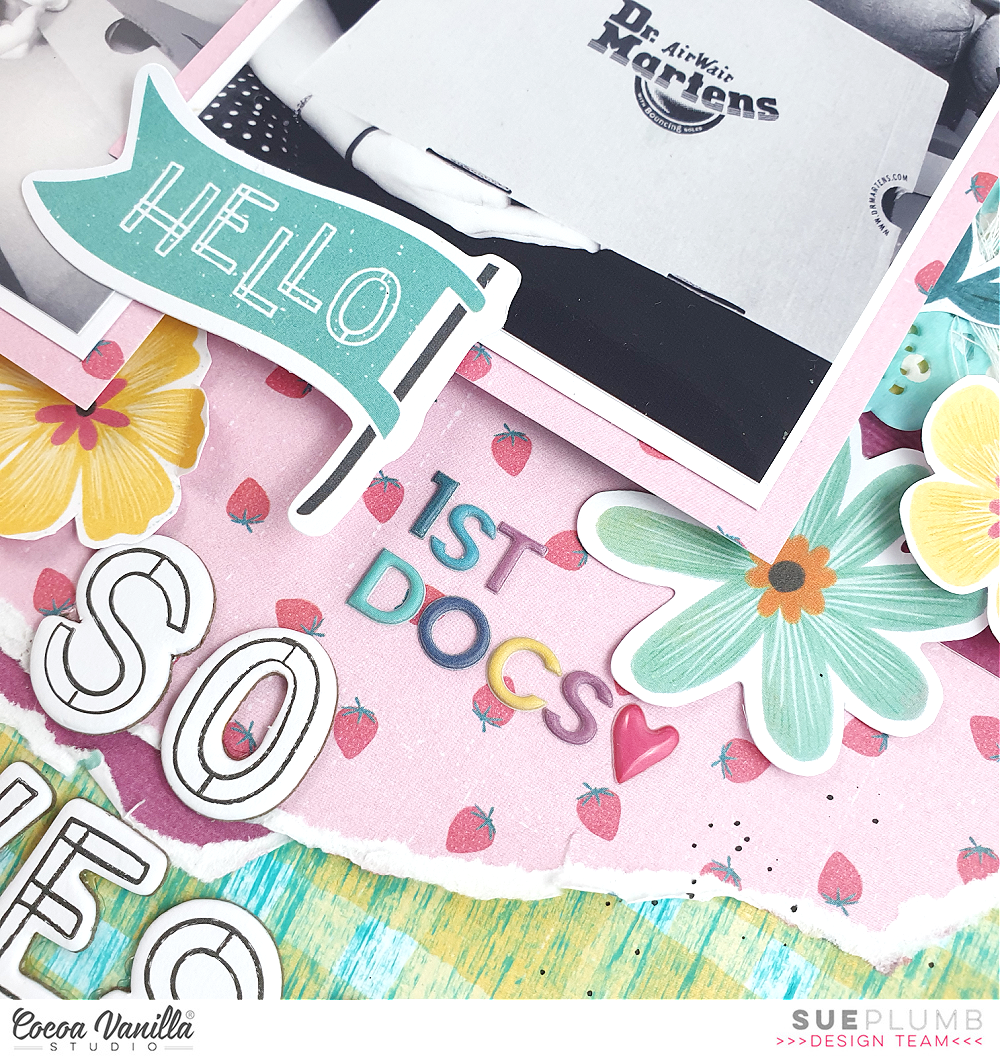
At this point it was simply a matter of a few finishing touches. I created a small cluster along the bottom edge of the page using a scrap of paper, a flower, a phrase stickers from the Accessory Sticker sheet and a sweet little heart shaped Puffy Sticker. I added a couple of extra phrase stickers and heart puffy stickers to the page as well. I also added a die cut butterfly (I am sure you already know how much I love them) and the final finishing touch was one of the gorgeous Puffy Hearts stuck directly onto my centre photo. Oh, and a little black ink splatter.
And that was it!! I hope you love my layout and it inspires you to get creative too. Even if you don’t have the ‘Happy Days’ collection yet, grab out some other Cocoa Vanilla goodies and get busy! ‘Happy Days’ is already shipping to retailers so keep an eye out at your favourite store.
Until next time, happy scrapping!