Love You | No Limits collection | Sue Plumb
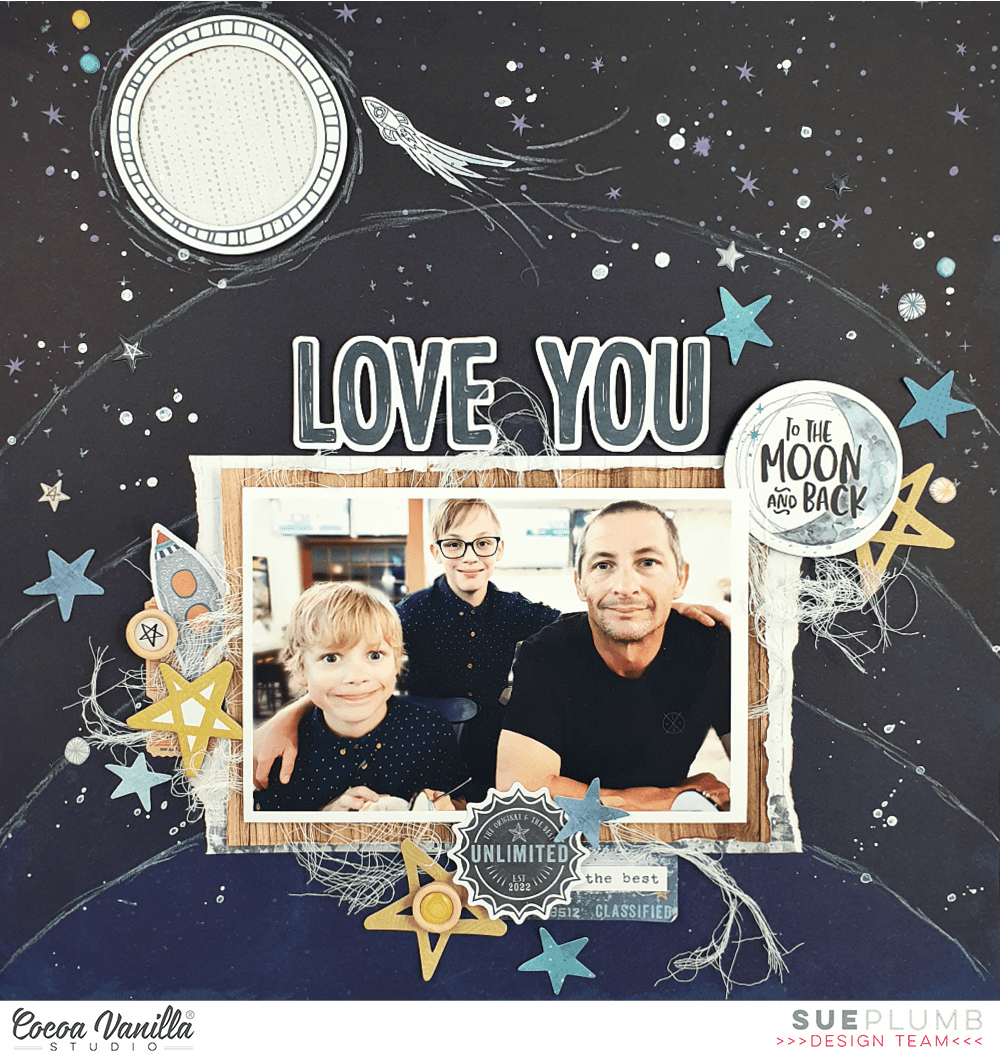
Hi everyone, it’s Sue Plumb here to share my latest design team project with you. For today’s layout, I couldn’t resist using the fabulous No Limits collection to document a recent photo of my hubby and sons that I took when we were out to dinner. In fact, it was the navy shirts my sons were wearing that inspired me to choose the gorgeous Eclipse patterned paper as my page background. I just love how dramatic this paper is!
I have a process video for this layout at the bottom of this post – feel free to scroll straight to it, or read on for a brief explanation of my process.
I began by adding a little bit of doodled detail by highlighting the lines of the arches on the paper using a white pencil. (Which I later picked back up to add further details to my page.) I then added some patterned paper layers behind my photo a scrap of the brick patterned Spark left over from a previous project, combined with the wood grain print from the A5 Paper Stack. I also added frayed gauze for texture.
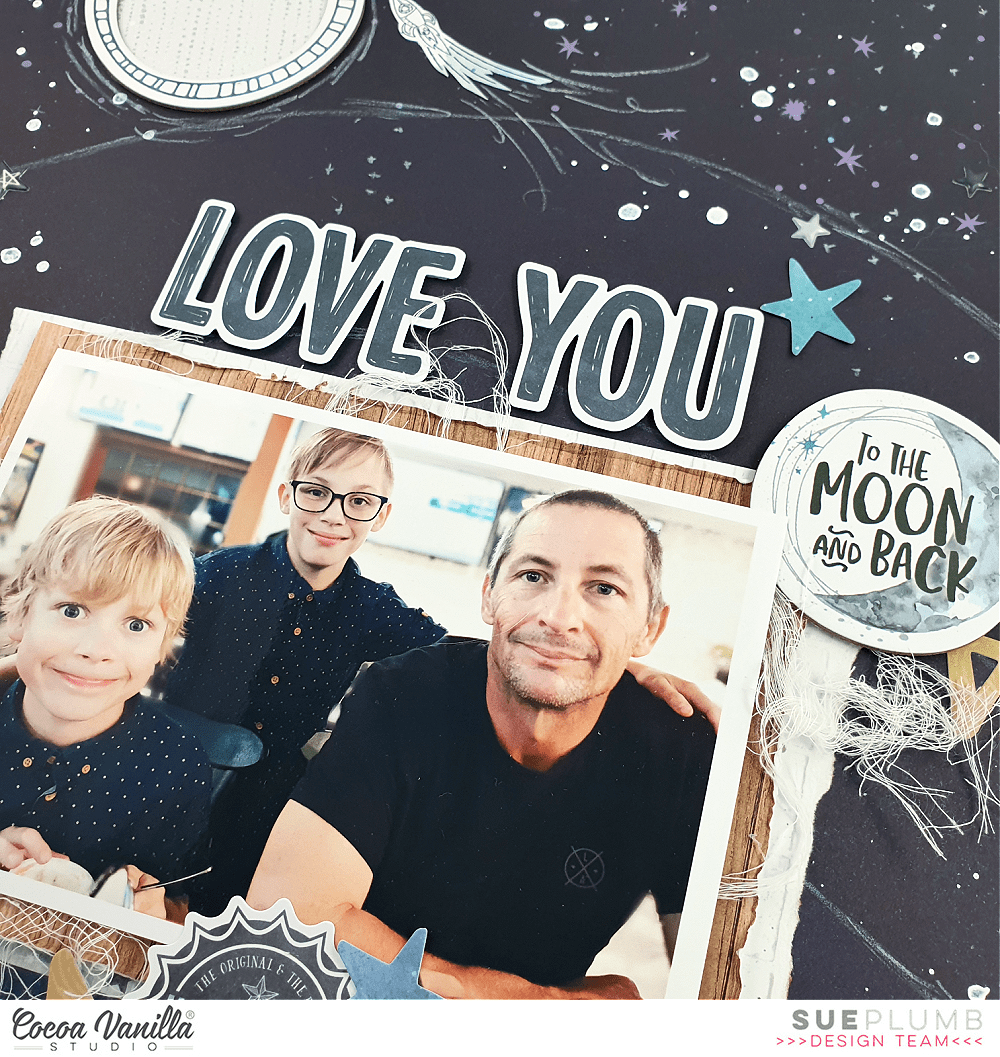
For my page title, I chose love you from the Die Cut Titles pack as my main title which I positioned along the top edge of my photo and popped up with some foam tape. I then used a Chipboard Sticker with the phrase to the moon and back as my sub-title, which I positioned nearby and used as the start of my first embellishment cluster.

I also created two more embellishment clusters, which were positioned along the left and bottom edges of my photo to help create a visual triangle around the focal point of my page (which of course, is my photo).

I used a mix of embellishments in each of my layered clusters including Chipboard Stickers, Die Cut Ephemera, Accessory Stickers, and Wood Epoxy Buttons. I tried to focus on having some common elements such as stars and circles included in each one to help tie them together.

The other main element on my page was the large moon I created using a frame from the Chipboard Sticker sheet, backed with patterned paper. I added some sketchy doodling around the outer edge of it (to give my moon a “glow”) and nearby I placed a small rocket that I had fussy cut from the Accessory Sticker sheet. I also added some doodled “trails” behind my rocket.

I finished off my page with some white ink splatters and a liberal scattering of Puffy Stickers.
If you would like to see how this layout came together, you can watch my process here:
Thanks so much for stopping by today. Until next time, happy scrapping!