Super Star | Legendary Collection | Tarrah McLean
Hi Cocoa Vanilla friends!
It’s Tarrah back with you and today I am sharing another new layout featuring the awesome new Legendary collection!
Hi Cocoa Vanilla friends!
It’s Tarrah back with you and today I am sharing another new layout featuring the awesome new Legendary collection!
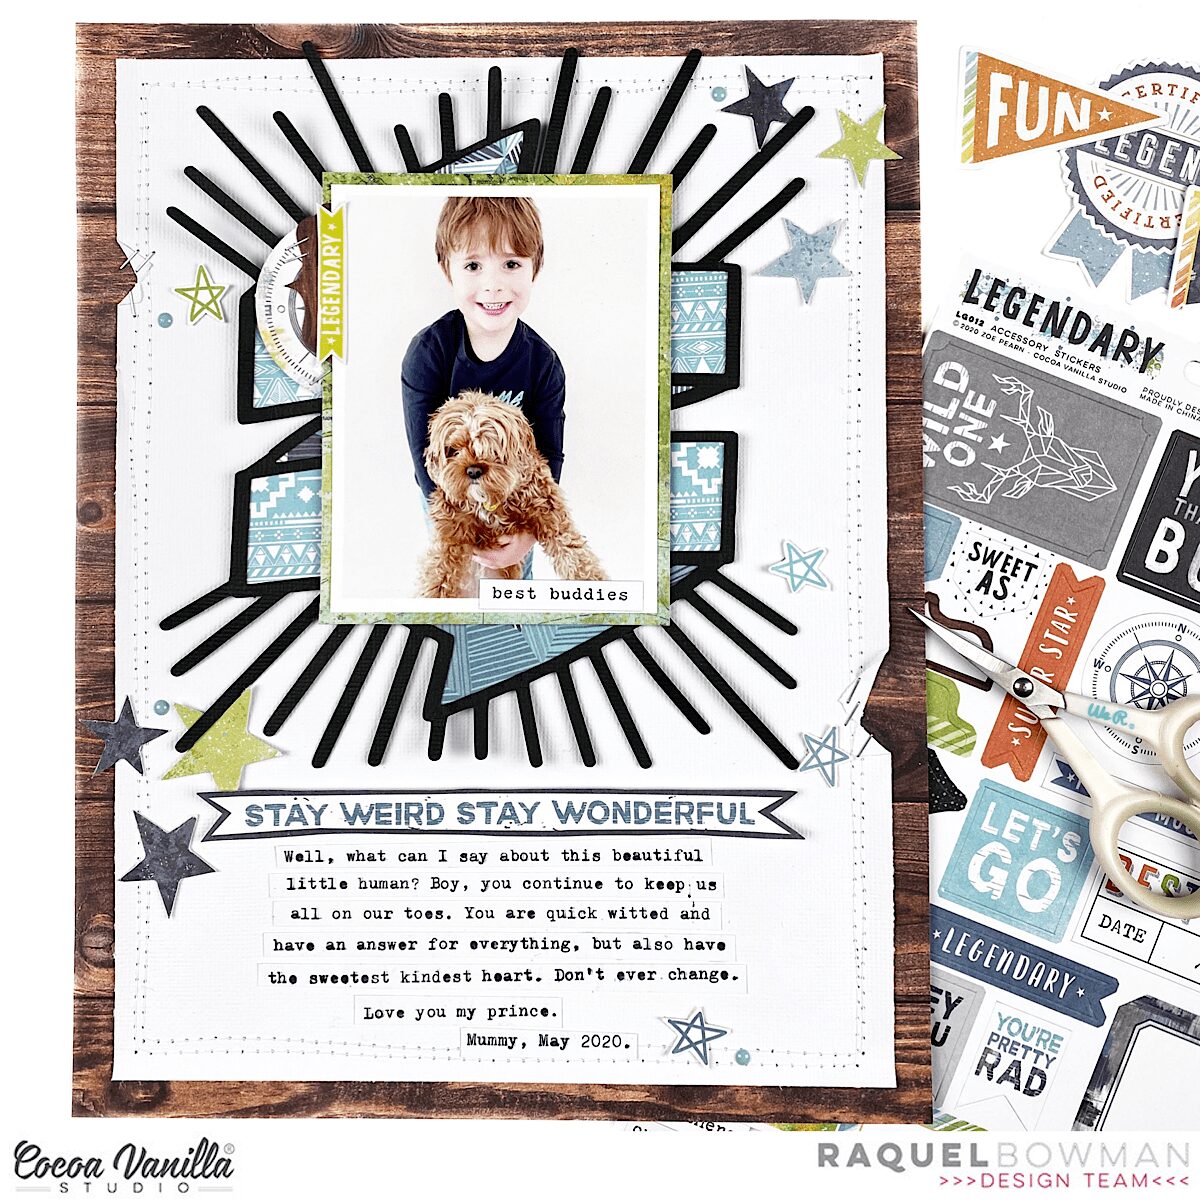
Hi everyone, it’s Raquel here today sharing a new layout featuring the amazing new Legendary collection and the freebie cut file designed by Gwen at Cut to You exclusive to CVS. This layout today features my little man, who is not so little anymore, and our gorgeous puppy Lola.
Here is the layout that I created:
Here is a process video for how this layout came together:
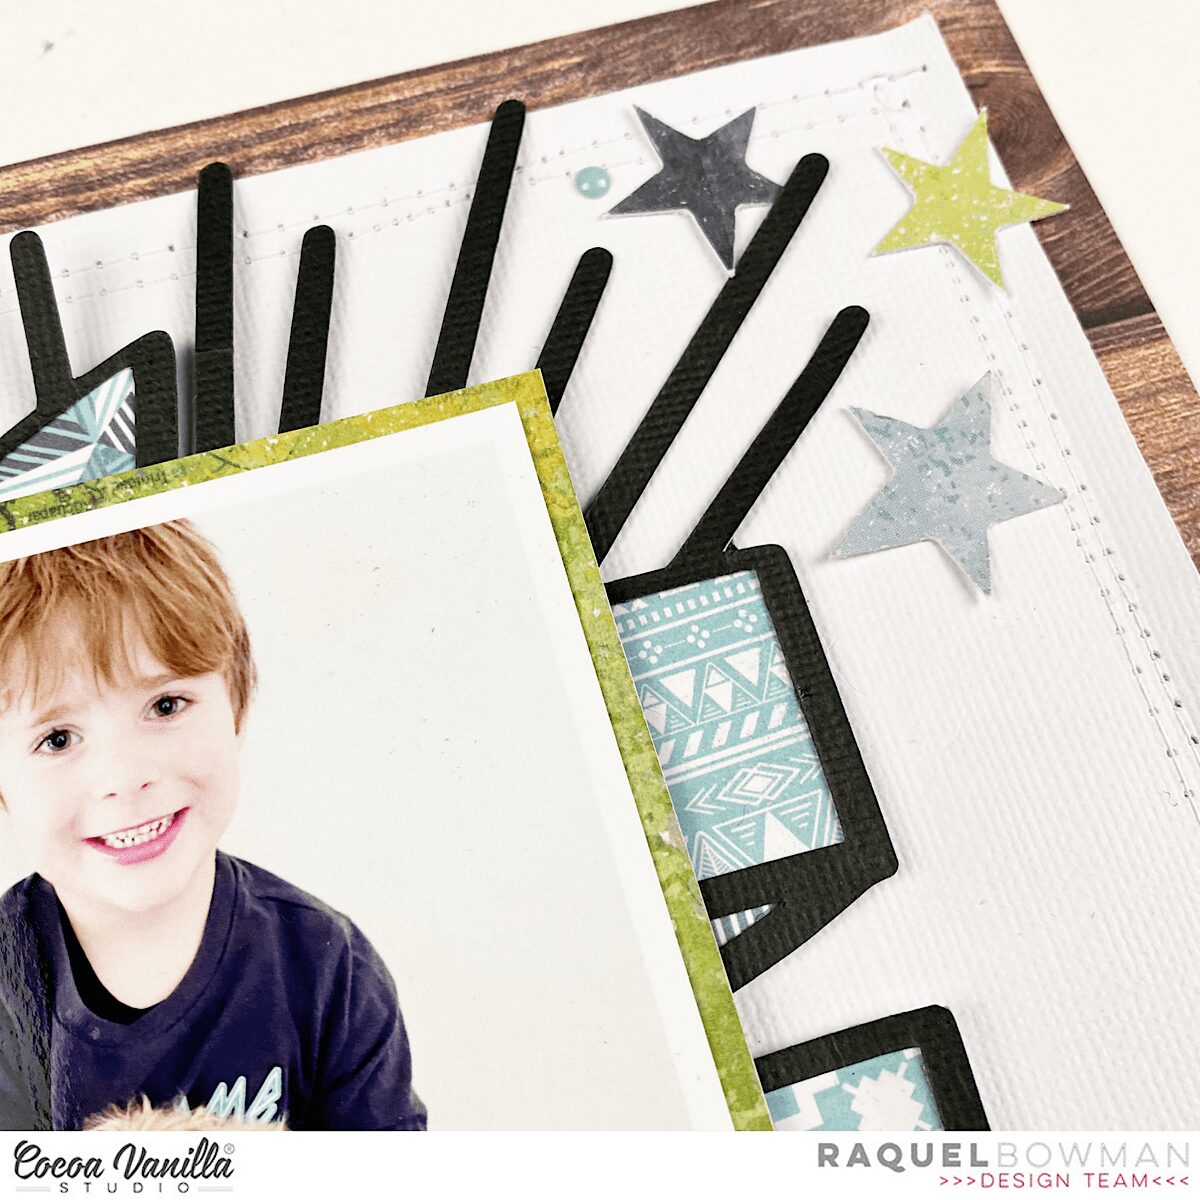
The main feature of this layout, along with the photo of course, is the banner cut file which I have cut on black textured card stock. I normally cut all my cut files on a white so choosing the black was a big change for me. I have to say though I love the masculinity that this adds to the layout and that striking pop of contrast. To back the cut file I used both sides of the ‘Total Legend‘ patterned paper. My colour palette for this layout was to stick to the woodgrain, green, blues and greys which I was able to do with the embellishments and papers within the collection. These colours really complimented the colours in the photo of Jack and Lola.
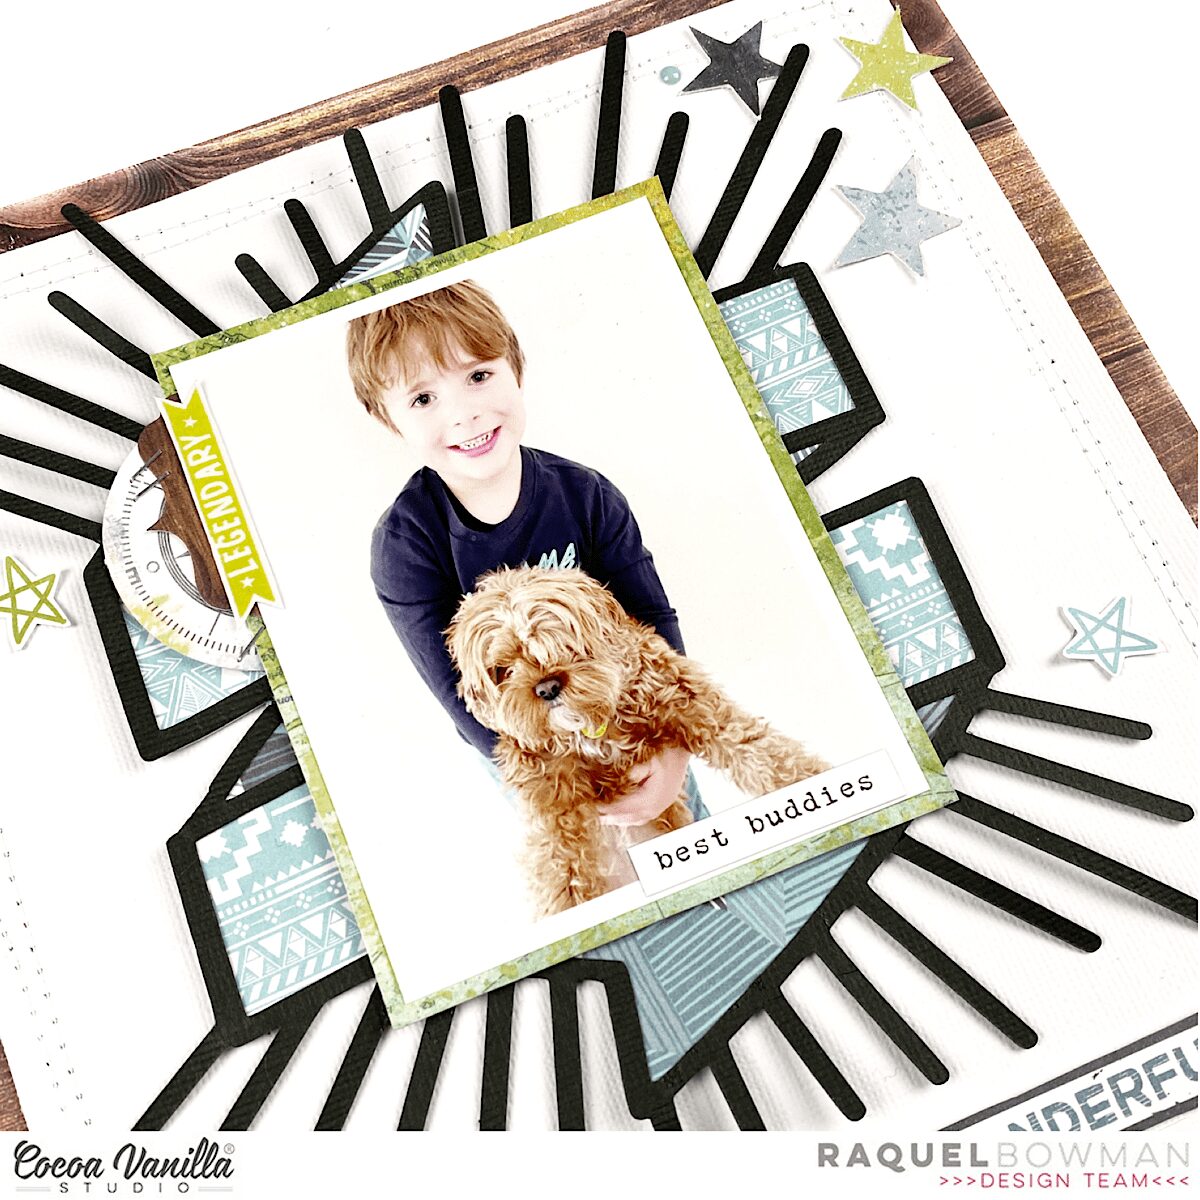
The photo was matted on the green of the ‘Outdoors Type‘ patterned paper. I then added a cute woodgrain tab and a compass ephemera piece to the top left of the photo. The green legendary embellishment that you can see is actually a clear sticker, adhered to a piece of white card stock and cut out. I tend to do this a lot with the clear stickers as that gives me the freedom to move them around. Plus adhering them on white allows them to really feature and pop as an embellishment. I used my tiny attacher to add a few staples to the embellishments – more for a design purpose than for the use of adhesion. 
Stars feature on this layout heavily and were mainly chosen from the ephemera pack. There is nothing better than a scattering of stars on a layout, wouldn’t you agree? Of course, I added them in a number of 3. I always tend to work in threes when I embellish.

The enamel dots in this collection have this beautiful shade of blue. I scattered a few on this layout too.
For the title today, it did take me a while to figure out what I wanted to add. When going through my Legendary stash I came across the phrase ‘Stay weird, stay wonderful” on the ‘Epic Tales‘ paper and I just knew this was perfect. I fussy cut the heading out and then added my typewritten journaling in strip form underneath. 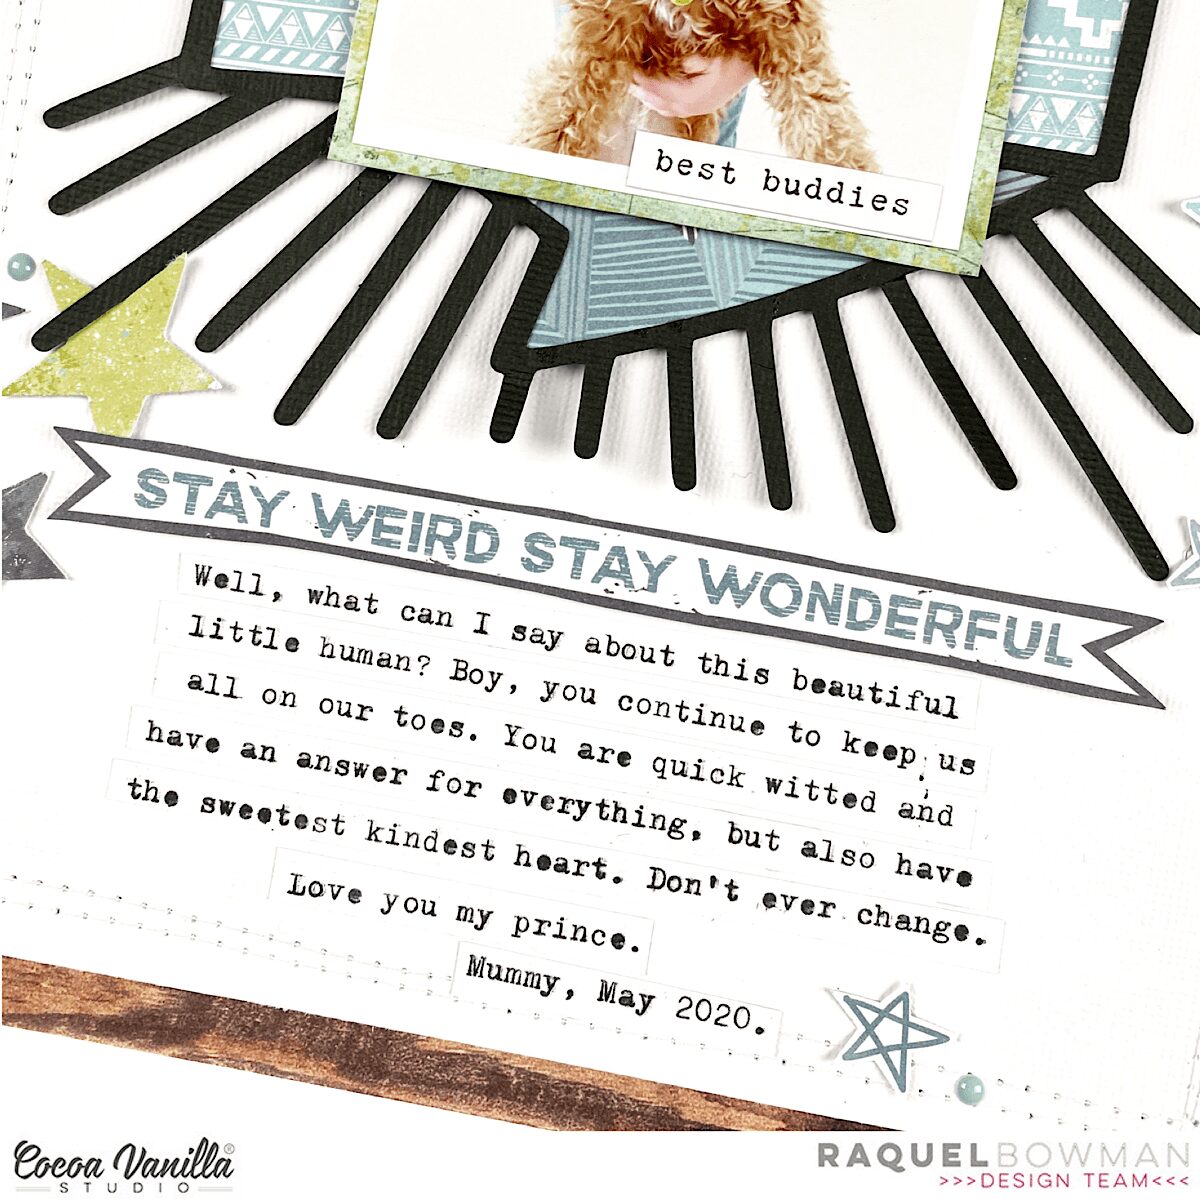
The line style stars scattered amongst the page are a fussy cut star from the ‘Epic Tales‘ paper. I love the look of these as an added embellishment. 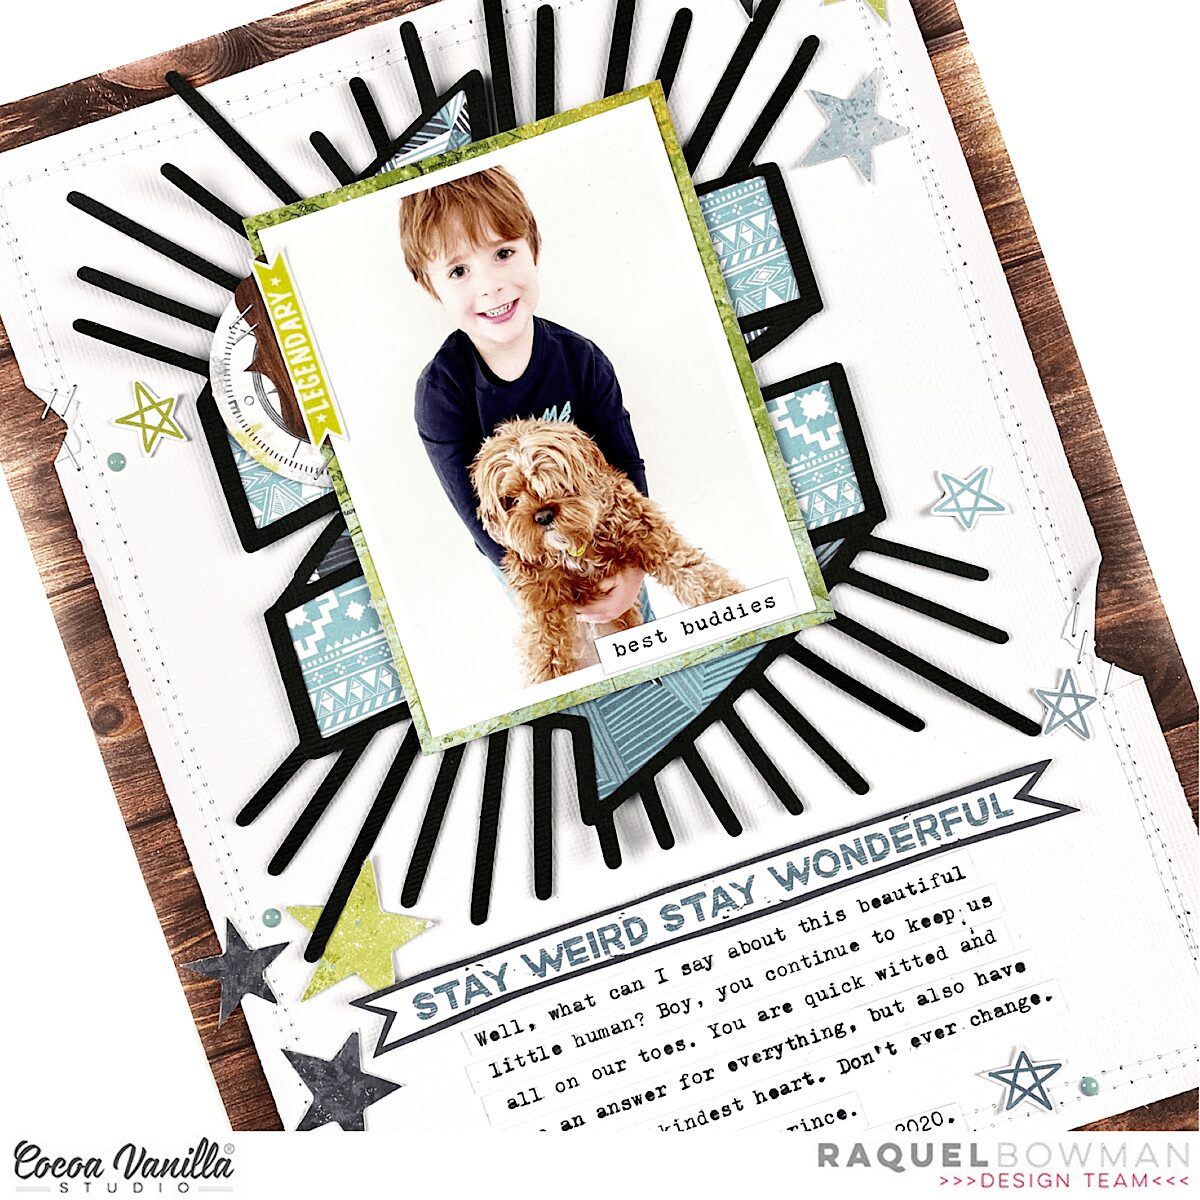
I framed this layout with the woodgrain from the ‘Outdoors Type‘ paper. I love the woodgrain in this collection. So so amazing. I added extra detain to the border using machine stitching and also some staples.
I hope you have been inspired by todays layout. Thanks so much for stopping by the CVS blog.
Stay safe,
Raquel xxx
Hi everyone! Danni here, back again playing with the beautiful Legendary collection. Once again, I am scrapping an outdoors photo and I chose this adorable photo of my son playing at a local park. This week we were challenged to feature the incredible Legendary free cutfiles that are available for download, and I decided to use the Adventure word as my title. I cut it once from the yellow side of Wild One patterned paper, then used the offset tool in Silhouette studio to cut a slightly larger backing piece from Offbeat patterned paper. I then went ahead and hand-stitched a single line of chain stitch following each of the letters. I am on a big hand-stitching kick lately, I just love the texture it provides, and I find the process very relaxing! Once I finished the stitching, I adhered the title to the backing piece using tacky glue.

Next I got to work on creating my background by using Offbeat and Epic Tales patterned papers to frame a piece of white mixed equipoise.online media cardstock and machine stitching around the edge using a combination of straight and zig zag stitch for added interest. I went through and distressed all the edges with my fingers to really emphasise the layers. Too jazz up the white background I added some colour in blue and yellow using watered-down artist acrylics and the packaging technique, followed by lots of splatters. I added some of the paint splatters from the Clear Stickers too, these are perfect for adding that mixed media effect.

I matted my photo in white followed by the orange One Way patterned paper to really draw the eye to the photo. I flipped One Way over and used the reverse side as a larger layering piece behind my photo, creating a space for embellishments to sit. I added some torn strips of Wild One paper as well for some extra colour.

To complete my title, I fussy-cut the ‘The Best’ banner from Epic Tales cut-apart patterned paper and layered it behind my main ‘Adventure’ title. I embellished either side of my photo using a combination of Accessory Stickers and Die Cut Ephemera, using several circular elements to tie in with the ‘The Best’ banner. The green ‘Let’s Go’ Flair Button was the perfect addition to this theme.

My few lines of journaling I added in strips of typeface font in that perfect little space below my title. I added in one of the tiny word stickers from the Accessory Stickers at the top of my photo to help frame it and finished the layout with a sprinkling of the Enamel Dots in all the colours. I’m really pleased with this one! It wasn’t planned out and definitely came together during the creative process, and those are definitely some of my favourite layouts.

There is a process video linked below if you would like to watch this one come together.
Happy scrapping!
Danni x
Hi friends!!
Anna here today with you sharing a new layout. Have you ever used a digital kit? I must say that it’s my first time, and I’m so happy with the result. On this page, I’m featuring the Hello Lovely collection that you can find on the Digital Products section from the shop.

I have a standard A4 printer, so for my background, I decided to use two 12×12 patterned papers from the More than words collection. I used the Precious paper and backed it with the Gossamer paper. I think both go very well with the Hello Lovely collection.

The focal point of my layout is this cut file from Paige Taylor Evans. I think it describes perfectly the look of my youngest daughter in the pictures. I cut it from white cardstock and placed the photos behind the letters “O”.

Instead of backing all the letters, what I did methenolone enanthate primobolan depot was use the inner part of the letters as a template. I draw them on the patterned paper that I printed and fussy cut them. I raised the cut file with foam dots, but I glued the inner part of the letters to the background.

In the digital collection bundle, you can find printable element sheets. They’re so easy to cut, and I used them to embellish my page. I also die cut a couple of white bows with my Big Shot.

Thank you so much for stopping by today! I hope you like how I used this digital collection and encourage you to try it!
Have a happy scrappy week!
Anna xx
Hi friends,
It’s Tarrah back with you and today I am sharing a new layout for our Mother’s Day theme we have going on this week on the blog! I decided to document a special photo of my beautiful Mum and myself on Sydney Harbour when we went to the ballet a year ago. I pulled out the gorgeous Midnight collection to help me document this special memory.
 I found a really lovely cut file designed by fellow team member Gwen from Cut To You, I cut it out from white cardstock and then backed the hearts at the top of the cut file with the pink side of the Shine Bright paper the Special word in the cut file, I backed with the ‘B’ side of the Inky Depths paper, I love that small soft floral side. Once it was all backed, I placed craft foam underneath both the hearts and the ‘Special’ word.
 I chose the ‘B’ side of the Mixed Blessing paper for my background and also matted that piece with another sheet of the Inky Depths paper. I machine stitched around the entire edge to add some texture and interest. I placed the cut file title in the centre of the page and I cut a strip of the Bloom and Grow paper and placed it underneath the bottom of the cut file before I adhered it all down. I matted my photo in the orange part of the Shine Bright paper and added craft foam underneath the photo and mat, it fit perfectly just above the word ‘Special’ with one of the hearts from the cut file overlapping onto the photo also.
 I tucked in one of the cute die-cut frames from the die-cut ephemera pack into the top of my photo, I then took one of the paint strip clear stickers and added it to white cardstock, I then fussy cut it out and tucked it into the right side of my photo. I also added one of the cute flair buttons here. The jar and flower chipboard piece fit perfectly there just above the ‘You’ in the cut file, I love how this looks here. I also tucked in one of the floral die-cuts to the left of the jar to bring in some more of the florals to the page. I also added a few chipboard hearts and also a clear sticker heart too. Lastly I added some of the accessory word and phrase stickers and the date stamp to finish off!

Thank you so much for stopping by the Cocoa Vanilla blog today! I hope you have plenty of Mother’s Day memories you can document!
Happy Mother’s Day for Sunday, happy creating!
Tarrah x
Hi Cocoa Vanilla fans! Today I am sharing a simple layout with a big impact featuring lots of patterned papers from the stunning Legendary collection! I was inspired to make a very organic nature-themed layout because this photo of my son and I was taken in the Australian bush, and you can see the trees in the background.

I began by freehand cutting some leaf shapes from Outdoors Type and Epic Tales patterned papers, making sure to vary the size and shape. I wasn’t too careful about making these neat; people really don’t notice any flaws in the finished layout. I wanted to add some interesting details to the leaves, so I hand stitched some veins on the larger ones with white thread and used white gel pen for faux stitching on others.

I decided to use this sweet cutfile as the main part of my title, so I went ahead and backed the letters with blue and grey from Epic Tales, Offbeat and All Star papers. To finish off my title I took the word ‘BOYS’ from the Die Cut Titles and trimmed off the ‘S’ with my scissors. Remember if the words aren’t quite what you need, it is so easy to alter them slightly! I kept my photo mats simple with a plain white followed by the light blue from Total Legend paper.

I absolutely adore the woodgrain in Outdoors Type paper, so I decide to use that as a background. Because it is a dark tone, white accents look very striking in contrast, so I added some white modelling paste thought a quilted stencil and plenty of splatters with my white and gold inks. This kind of mixed media is simple to do but makes a huge impact!

I added some dimensional foam to my photo and title then arranged my leaves in clusters around them. I made sure to vary the placement of the green and white leaves to break up the colour and add more dimension. For a finishing touch I added three clusters of light blue, grey and white Enamel Dots and three tiny words stickers from the Accessory Stickers. I can’t help but put enamel dots and tiny word stickers on almost all my layouts; it just doesn’t feel finished without them!

I included a couple of simple lines of journaling and the date in white pen below my title. I just adore this layout – it was really quite simple and didn’t take too long at all, but it looks so lovely all finished. I’m so happy with it! There is a process video linked below if you would like to watch it all come together. Happy scrapping!
Danni x
Hello Friends. I am always anxious to see and use new lines beautifully designed by Zoe but after making few projects with them I start missing some older goodies. I like revisiting and rediscovering them again and again. This time I decided come back to “Wild at heart” line. You can still purchase some papers and embellishments from this collection to supplement your stash. I was running out of untouched neutral papers so I reached for wooden pattern from “You rock” collection.

I started with making 6 simple pockets out of papers with 3*4 cards. I even found a piece of vellum. I used sewing machine to mount the pockets to the base. They are not glued so you can still put elements inside them, including hidden journaling.

I used a selfie of myself but the whole page is about how my life looks when I am 36 hears old and how I was imagining it will look like when I was much younger. I tried to sum up if the expectations and plans I had 15 years ago and make some sort of check list. To be honest I was thinking my life will be different now but it’s still awesome. I live good and happy life and I am gratefull for that.

I decorated each pocket with ephemera pieces and some chipboard stickers leftovers. I also added butterflies fussy cut from one of the patterned papers. Title was made with foam stickers that were included into the “Unforgettable” collection.

Grid design is so fun to work with and I love coming back to it over and over again. And you? Do you like revisiting older lines are you work with them till the last piece and then you move to newer ones? Maybe you put leftovers to one bag and use the mix of collections to supplement other lines? I bet I sould still make at least one page with the very first CVS collections :D I am a hoarder for sure. Maybe it’s time to move back in time even more :)
Thank you for stopping by and see you soon during International Scrapbooking Day.
XO Anna
Hello again, it’s Melissa here and I can’t believe it’s nearly the end of April!! I hope you’re all well and finding some time to be creative.
I have another layout to share with the amazing ‘Legendary’ collection today, and its the toughest photo I’ve ever scrapped! This photo is of my brother in law Blair and our youngest daughter Ava a week after he was diagnosed with terminal cancer in 2018. Blair passed away in October 2019, and I’ve held off documenting any photos from his journey until now, mostly because I felt that I couldn’t do his memory justice. But the Legendary collection speaks to me, and is perfect for documenting this special photo.

I knew that I wanted to fussy cut some of the stars from the ALL STAR paper and make a wreath to represent what a star Blair was during his nearly 1 year battle with cancer. I used a cut file from Paige Evans, and backed the stars with several papers from the collection (including WILD ONE, TOTAL LEGEND and Brave Heart) that had small repeating patterns. I also added some velum from my stash for some lightness. I matted my photo with ALL STAR and EPIC TALES and distressed the edges.

The OFFBEAT paper was perfect for my background as it helps direct the eye towards the centre of my page, and of course towards the photo. I did some subtle machine stitching in white thread, and just drew a circle with pencil and stitched around it abut 5 times. Its always easier to machine stitch when it doesn’t have to be perfect!!

I didn’t do much embellishing on this layout, mostly because all of the stars are embellishment! But I did add a tab sticker, word sticker, die cut ephemera tab, and some of the clear stickers. My title was easily made with two of the die cut words which I popped up on foam.

I will admit that I found this layout hard to make emotionally, but I’m so happy I finally managed to start scrapbooking Blair’s Epic Journey. Blair was an amazing bother in law who was able to present to the New Zealand Government the largest cancer petition in history, and made significant changes to cancer care in my country before he passed away. I’m so grateful for our wonderful memory keeping hobby, and I hope I’ve inspired you to scrapbook the photos and memories you find difficult too.
You can watch my process video for this layout here.
Much love
Melissa xx
Hi everyone and welcome back to the Cocoa Vanilla Blog! Today’s topic is sewing, so for this layout, I used my sewing machine and also did some hand stitching. Today I’m featuring the wonderful and colorful Bohemian Dream collection.

I chose the B side of the Flower Child paper for my background. Then I ripped a wide strip from the Dreamer paper and a thinner one from the Gypsy Heart paper and stacked them together at the center of my page. In this layout I showcased two pictures of my younger daughter on the beach. These days I’m missing open spaces so much. Behind these two photos, I placed 4 of the 3″x4 “cards from the Beautiful Mess paper and I sewed all the edges with different types of stitches.

For my title, I used my Silhouette Cameo. I cut out the word happy from the Abundant paper and hand stitched it with white thread. I also cut a bigger outline of the word from vellum. I adhered the word to the vellum with foam dots and placed it under the photos.

I embellished the page with some flowers and a butterfly from the die cut shapes and also a flower from the vellum flowers. The rest of the embellishments are from the sicker sheet.


And finally some enamels dots… almost a must-have for me. I think they add such a nice touch to any project, don’t you agree?

I really love to add some kind of stitched to my projects, because it gives interest and texture. Do you usually do that? I hope you like this layout and inspires you to create something beautiful today!
Have a wonderful day and see you soon!
Anna xx
Hello friends and welcome back to another focus on stitching layout! I was so ready for the challenge of finding a way to include the texture of stitching and thread on my page because it is a technique I love to see on other’s work but not one I reach for very often and I have to say, I am pleased with the result.

Before I pulled out any embellishments or paper, I started by stitching a loose 3×3 grid. I’ve recently really been enjoying using more geometric and orderly designs on my page and they are a nice change from my more messy and loose layouts that I normally reach for. I used a light pink and a light blue thread to stitch semi straight lines to create my grid and left my threads on top to add a bit of messy factor to an otherwise not very messy layout. I am pleased to report that my sewing machine relatively cooperated and only made me curse existence once so I am calling that an improvement.

After I had my stitching finished and my bobbin threads neatly tucked away on the backside of my layout, I went to work on creating my base layer of embellishments. I printed my photo at 4 inches by 4 inches, which is a bit larger than I am used to using and set it in the middle of the page so I could build my clusters around it. Using the Midnight collection, I pulled out the die cut ephemera pack, the chipboard, the flair and the clear stickers and tried to mix all the textures in each section of my grid.

Once all of my smaller clusters were finished, I created a larger cluster around my photo of my husband and I and added my title underneath it using pieces from the chipboard pack. I love using the Midnight collection to scrapbook photos of my husband and I – the colors and sentiments in this line are perfect for photos like these. Finally, I cut and distressed the top and bottom edges of my page and added a strip of pattered paper for that Tazhi vibe and a bit of messiness.

That’s the page done! I hope you enjoyed this layout and it inspired you to pull out your sewing machine and to add some thread and texture to your own pages! Till next time, friends.