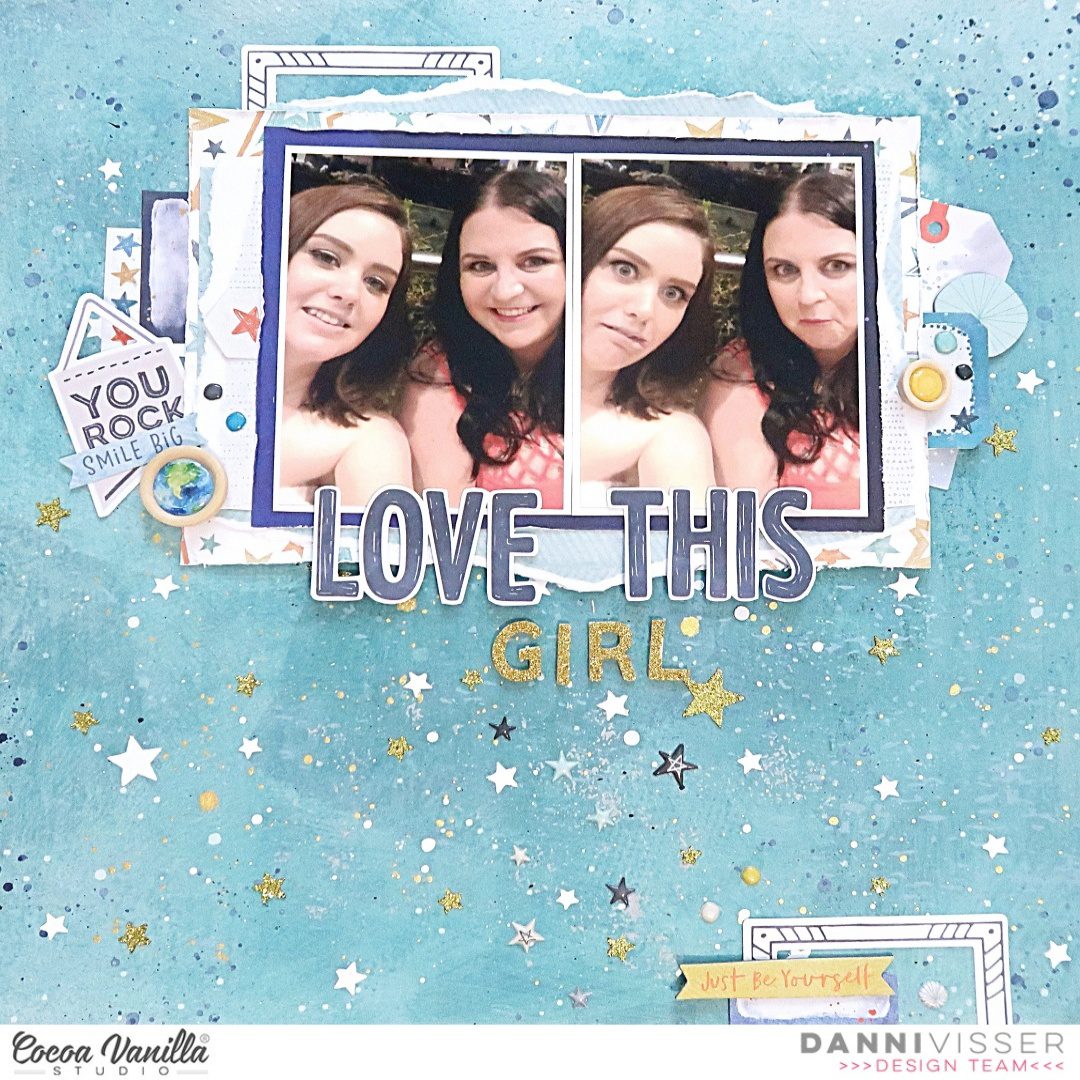
Hi Cocoa Vanilla Studio fans! Danni here, back to share with you another fabulous No Limits collection layout. I have been eyeing off the gorgeous teal mixed media-inspired pattern on Stardust 12×12 patterned paper ever since I received the collection, so I decided to start with that as a base.
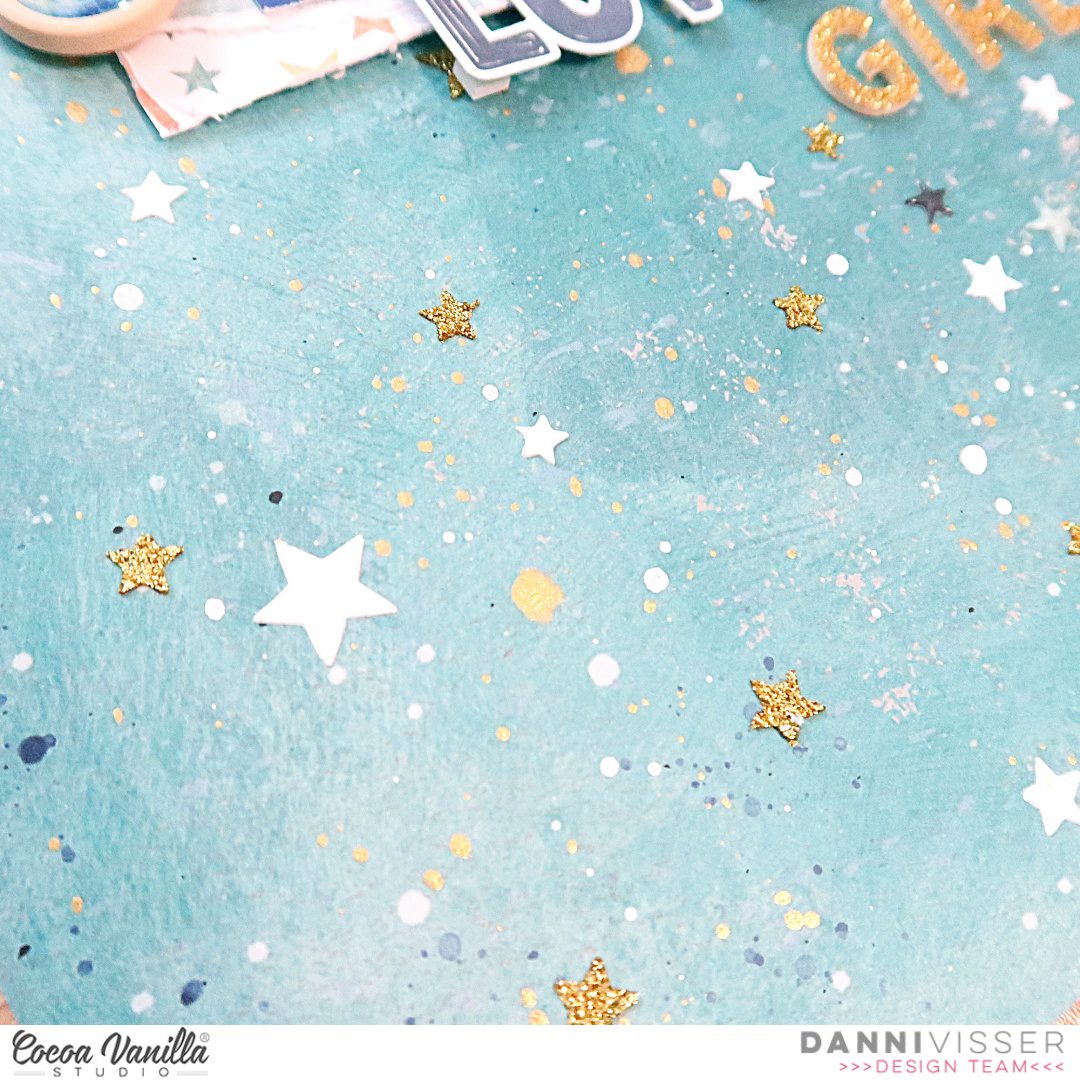
The first thing I did was add a sprinkling of stars using some different texture media. I used a 12×12 star stencil from my stash for the pattern, using a spatula to add first a sparkly gold glitter gel medium, then a white modelling paste. This added beautiful three-dimensional stars with lots of textural interest. I then added a bunch of ink splatters in gold and white all over the page.
Next I added two photos of myself and a very dear friend at dinner several years ago. Sometimes it’s lovely to look back and document a memory that happened a while ago! I added a white border to both photos and used the A5 paper stack to create a layered photo mat.
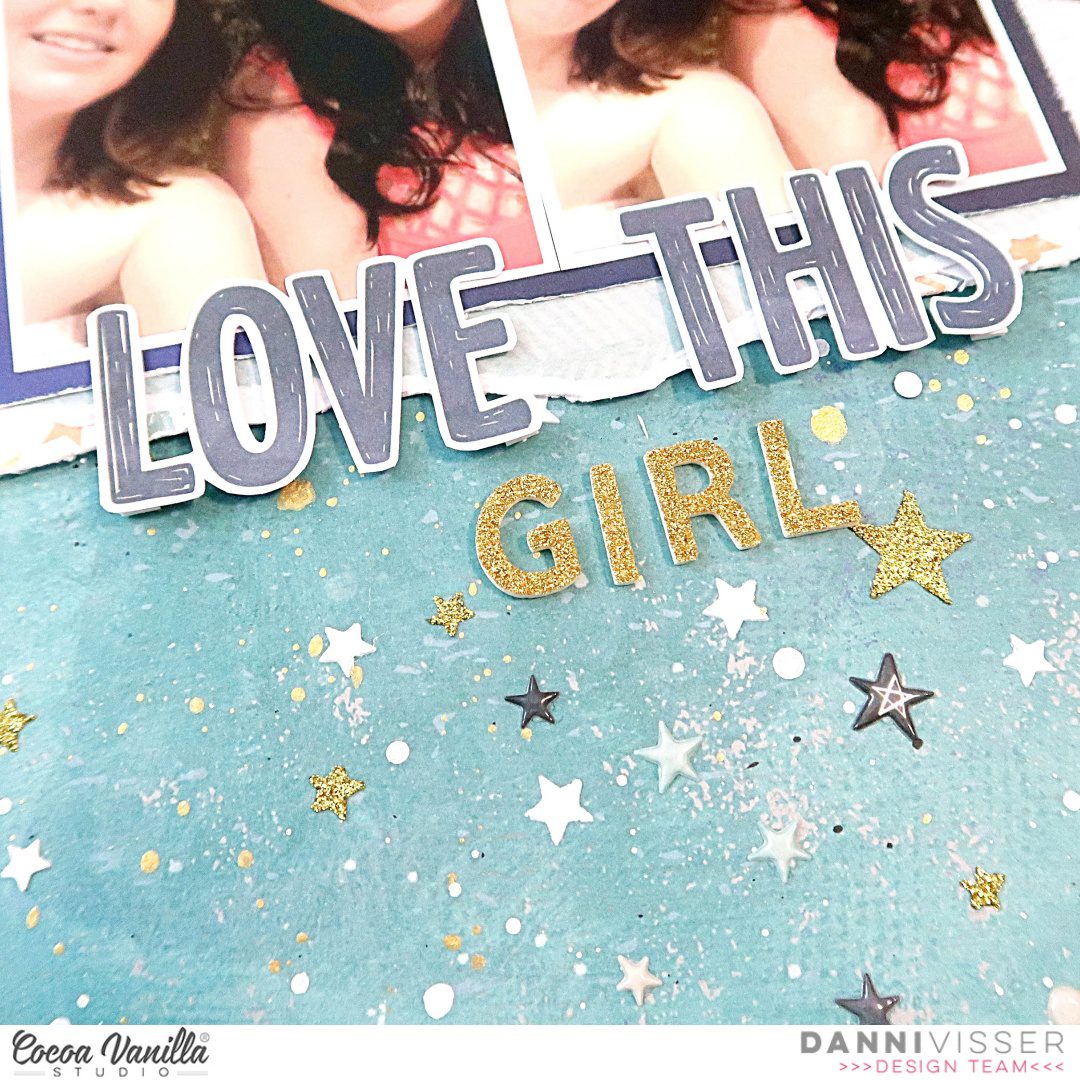
I used the die cut titles and some glittery alphas from my stash to spell out my title, layering it at the bottom of my photos.
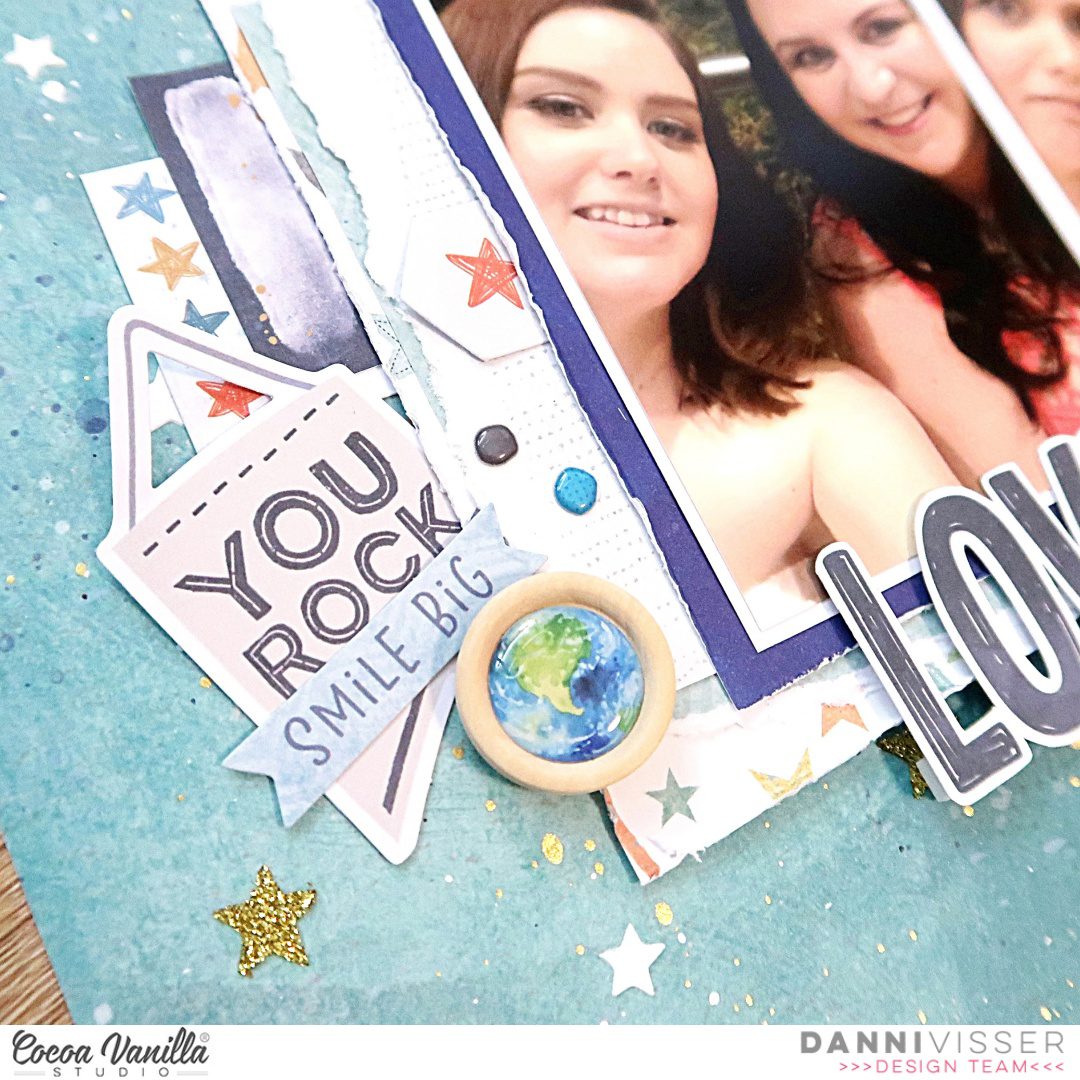
For embellishments I went for a combo of the die cut ephemera, the accessory stickers and the chipboard stickers, layering them either side of my photo mat. I made sure to vary the heights of the embellishments, using foam squares in between where needed to create dimension.
I also added two epoxy wood buttons to finish off the packet, yay! I always feels SO good to use up a packet of scrapbooking supplies. I added a small embellishment cluster to the bottom of the page to balance out the top-heaviness of the layout.
Finally I added some puffy sticker dots to each of my embellishment clusters and a bunch of puffy sticker stars cascading down my page below the title. I love how this turned out and I hope you do too. There is a process video on the Cocoa Vanilla Studio YouTube channel if you would like to watch, link below. Happy scrapping!
Hello, hello! Welcome everyone. It’s Anna here with a brand new page to share with you. I know that you poor Aussie people are just few days only until winter starts but we, on the top of the world, are just entering summer, which makes me soooo happy. It was time to pull out summer lines, including wonderful “Sunkissed” collection. I must admit, I am running a little low on some elements from it, but I still have plenty to make few more pages! I had a perfect photo in mind to scrapbook – beautiful sunset over the Atlantic Ocean. Colors of the photo are very warm and water doesn’t seem blue anymore, more like grey with a purple tint. I wanted to scrapbook it with a very warm color palette choosing mix of yellow, orange, pink and red. Perfect color combo for any sunset!
I had a perfect paper in mind called “Summer lights”! I cut it into smaller rectangles and turned them into a bunch of tags using corner puncher and tag hole puncher. I wanted to create a frame around the page with them. My initial idea was that a background paper will be white to contrast better with saturated tags, but after I tried it, I decided it’s just too much difference. I reached for tried and true Distress Oxide inks in Mustard seed, Spiced marmalade, Ripe persimmon, Pink Raspberry and Candied apple colors and blended them into the strips of colors creating similar patter to the one I just cut into tags. Weird move, I know, but my mixed media background was still lighter than the printed paper and I could add some water splatters for more texture.
Next step was to glue down the tags on the edges of the paper arranging them in similar color pattern than the background. I only applied glue as a thin strip on the bottom of the tags so I was able to lift the top part, creating extra dimension. I could also tuck ephemera pieces behind them!
After all of the tags were in their designated spots, I trimmed down the excess part, that was peaking behind the edge of the background and I started creating a composition. First, glueing down the photo in the bottom right corner, surrounded with palm trees from Ephemera Pack and some flowers from Flower Pack.
Next I added a title. Thanks to the beautiful Glitter foam titles, I didn’t have to think much about it and I simply chose one of the phrases. Yellow color stands out nicely on red and pink background. I also added two cute glitter hearts that are added to the title stickers. Few flowers, hidden behind the tags and some sun and clouds on the top of the page and my composition was almost done!
Last step was to add few puffy stickers here and there (I had a hard time using them as I just want to hoard them forever) and word strip from 6*12 stickers sheet. Few white splatters were the perfect finishing touches. And voila! Page is done. I love the warm colors of it.
That is all for today! Thank you so much for spending this time with me. I hope you like my project and it inspired you to make your own background. You can choose any theme with this kind of design!
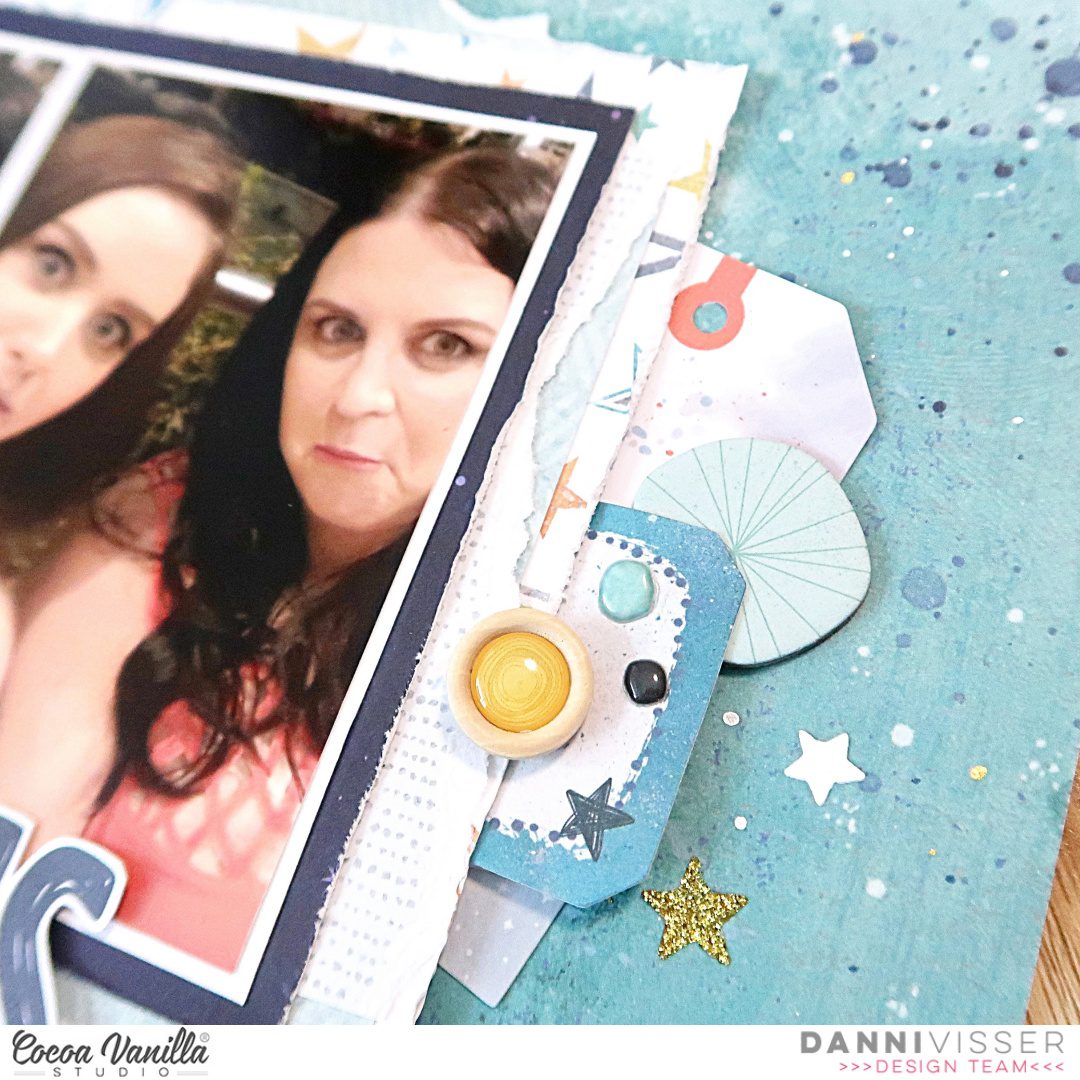
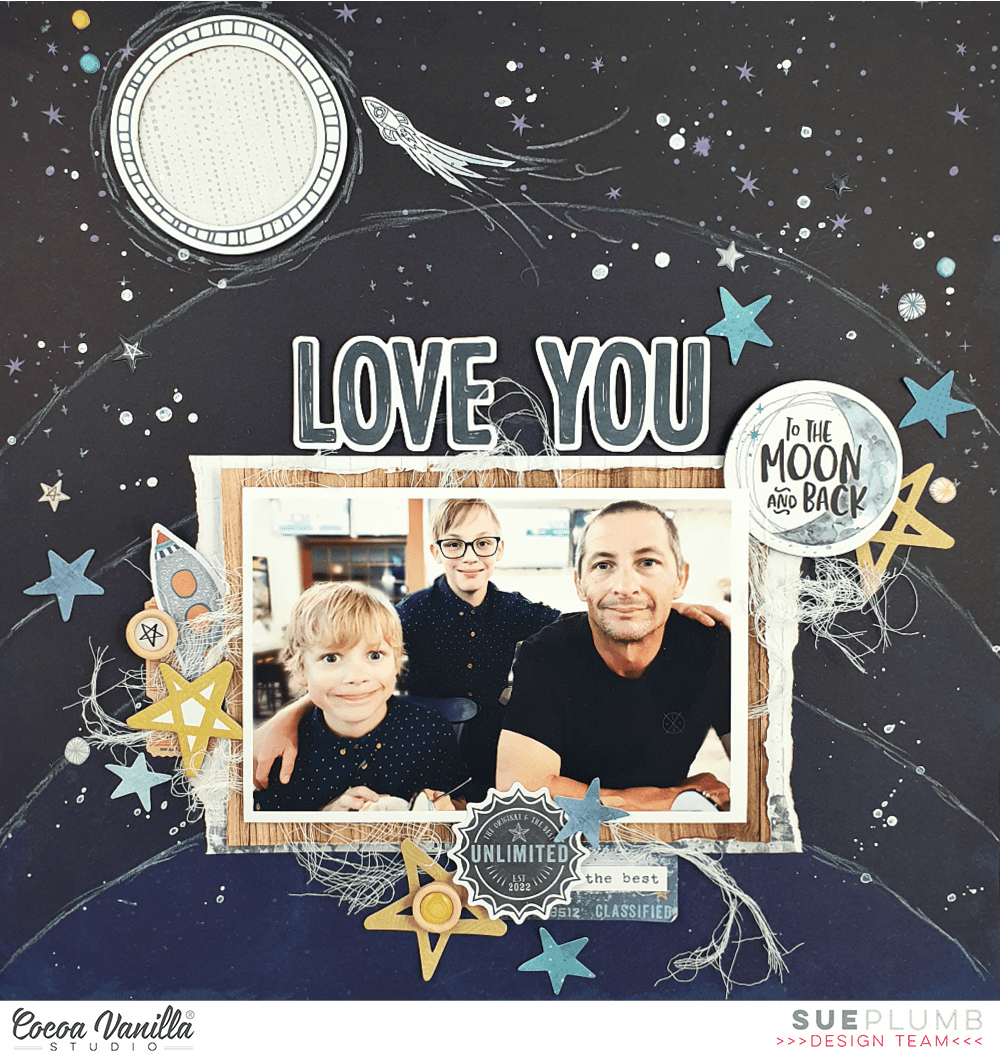
Hi everyone, it’s Sue Plumb here to share my latest design team project with you. For today’s layout, I couldn’t resist using the fabulous No Limits collection to document a recent photo of my hubby and sons that I took when we were out to dinner. In fact, it was the navy shirts my sons were wearing that inspired me to choose the gorgeous Eclipse patterned paper as my page background. I just love how dramatic this paper is!
I have a process video for this layout at the bottom of this post – feel free to scroll straight to it, or read on for a brief explanation of my process.
I began by adding a little bit of doodled detail by highlighting the lines of the arches on the paper using a white pencil. (Which I later picked back up to add further details to my page.) I then added some patterned paper layers behind my photo a scrap of the brick patterned Spark left over from a previous project, combined with the wood grain print from the A5 Paper Stack. I also added frayed gauze for texture.
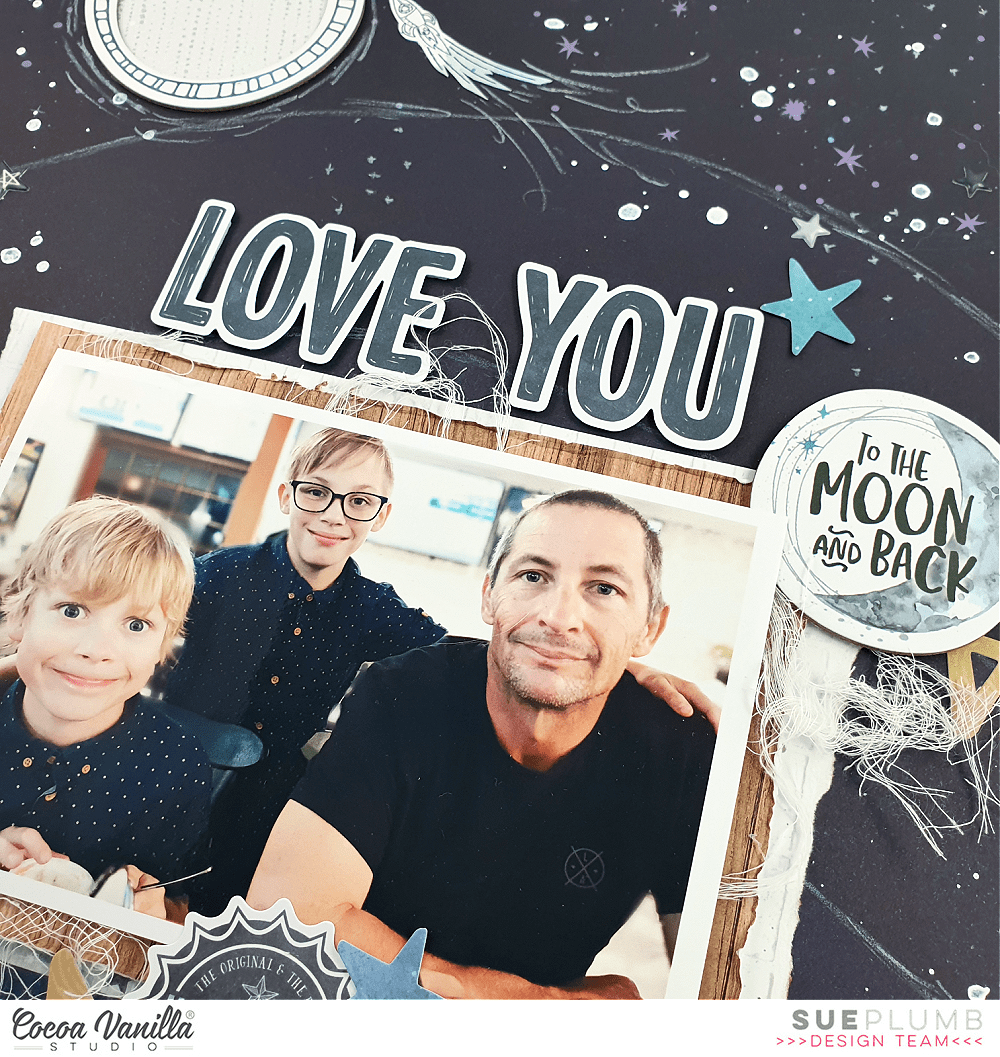
For my page title, I chose love you from the Die Cut Titles pack as my main title which I positioned along the top edge of my photo and popped up with some foam tape. I then used a Chipboard Sticker with the phrase to the moon and back as my sub-title, which I positioned nearby and used as the start of my first embellishment cluster.
I also created two more embellishment clusters, which were positioned along the left and bottom edges of my photo to help create a visual triangle around the focal point of my page (which of course, is my photo).
I used a mix of embellishments in each of my layered clusters including Chipboard Stickers, Die Cut Ephemera, Accessory Stickers, and Wood Epoxy Buttons. I tried to focus on having some common elements such as stars and circles included in each one to help tie them together.
The other main element on my page was the large moon I created using a frame from the Chipboard Sticker sheet, backed with patterned paper. I added some sketchy doodling around the outer edge of it (to give my moon a “glow”) and nearby I placed a small rocket that I had fussy cut from the Accessory Sticker sheet. I also added some doodled “trails” behind my rocket.
I finished off my page with some white ink splatters and a liberal scattering of Puffy Stickers.
If you would like to see how this layout came together, you can watch my process here:
Thanks so much for stopping by today. Until next time, happy scrapping!
It’s Sophie on the blog today with a new layout to share !
I used the Sunkissed collection for this bright and colorful page !
I used a thick white cardstock for the background and applied dry ink on a stencil from my stash with a brush.
I layered two pieces of patterned papers from the A5 paper stack behind my black and white photo, and cut a big envelope with a metal die to insert a tag cut out of the Good Vibrations paper for my journaling.
I fussy cut beautiful florals from the Growing Wild paper to decorate around the photo and cut out cute little clouds from the Just Chillin’ paper that I placed above the photo.
I used a 3×4 card for my title and added a few Accessory Stickers as the finishing touch.
Here are more close-ups:
Ahhh Summer…! There isn’t a better collection than Sunkissed to highlight those beautiful memories!
It’s time to announce the winner of our May mood board challenge!
If you haven’t played along with any of our challenges yet, make sure you head over to our Facebook Community group. You can find all the details of how to enter to be in the running for a $25 voucher for our online store.
Here’s a reminder of what the gorgeous “Peachy Keen” May mood board designed by Mandy Melville looked like…
And our randomly selected winning layout was this pretty page…
Congratulations Tahlia Knightly!
Tahlia used our ‘These Days’ collection and says she was “very literally inspired by the raindrop pillow in the mood board image and I’ve used the themed colours too.” Tahlia also said this design was perfect to document some bath time fun photos and we have to agree! Congrats Tahlia – you have won yourself a $25 voucher to spend in our online store.
If you would like the chance to be our next winner, our new challenge is the “A Taste of Summer” mood board designed by Josefine Van Der Hoeven. This vibrant board features a colour palette that includes orange, blue, teal and mint; there are also multiple patterns and shapes; and besides the over-arching theme of summer, could also inspire you to document something about the beach, a sweet treat, or even an occasion that included delicious cocktails. The choice is yours!
To enter:
Entries must be loaded into the June challenge album in the Cocoa Vanilla Studio Facebook Community group prior to midnight (AEST) 30th June to be eligible for the prize. (If you aren’t already a member, make sure you click the link to join.)
Cocoa Vanilla Studio products must be used. Yes, you can use other supplies as well, but the majority of products used should be CVS.
Entries must be created solely for this challenge and not combined with other challenges or design team work.
You may enter as many times as you wish and entry is open to participants worldwide.
The randomly chosen winner will receive a $25 store voucher to the Cocoa Vanilla Studio online store.
By entering the challenge you automatically give permission for your work to be shared by Cocoa Vanilla Studio via any of our social media channels.
Happy scrapping everyone, we can’t wait to see your creations inspired by this one!
Hey y’all! Laura Alberts here again with a fun multi-photo layout featuring the gorgeous new No Limits collection. This layout has a combination grid and column design, with two photos gridded into the Latitude pattern paper on the left and one photo showcased on the right. I loved including pocket cards on this layout too! One I used for a journaling spot, one behind to the photo on the right side and one in the center of the grid on the left. Such a great way to add a little extra detailing!
My clusters on the grid are pretty simple, so that the photos still remain the focus. A simple arrow with a circle, star, and word phrase on the top photo. An arrow with a hand sign and star on the bottom photo. In addition, a chipboard word phrase across the center of the pocket card made for a fun detail. Something a little unexpected.
The center of the layout is certainly the ‘star’! This photo was taken in the middle of my son’s explanation of what he was holding (the dipstick). I wanted to showcase the skills he’s learned over the years in his personal albums and this seemed like a perfect series of photos to include. My journaling is hand-written, a detail that I personally love to see on layouts! To finish off my center section, I tucked ephemera stars behind the photo and sprinkled puffy stickers and ephemera stars around the edges. A bit of nuvo and gold ink splatter as a final touch.
I hope this layout inspires you to take a new look at your multi-photo layouts! Thanks for stopping by!
Hello Friends. We all love Cocoa Vanilla for their masculine collections, right? Zoe is a master of designing them and she never disappoints with each new line. They are very versatile and can be used not only for boys or men photos and I am a proof of that. I am a mom of two girls and a beagle boy and I use those lines to scrapbook my puppy photos mostly. But, from time to time, I put my girls on the display too. They are way less cute than a puppy but I need to be fair with dividing my scrappy attention 🙂 I framed their photo using new “No limits” collection and it turned out great.
I was inspired by the pack of title die cuts that comes with this collection and wanted to use as many as possible on one page. That’s why I printed by photo big and square to be frames by the words. I also changed it’s colors to black and white and it will better fit the vibe of “No limits”.
My layout base is made out of “Spark” paper. It has very light and calm pattern in the middle and fun, mixed media like frame on the edges. I also fussy cut some stars from “Nebula” paper. I love patterns like this – with elements big enough to be cut. It helps to stretch your collection way further than a pack of ephemera pieces.
With a photo glued flat in the middle of the page, I started arranging the words around it. It was tricky to find right combinations – they needed to fit on the side of the square and make some sense as a phrase. Each word is glued down with a layer of foam tape for more dimension. I also added some fussy cut starts in the composition.
If you have some empty spaces left – don’t worry. You can fill them with stickers, ephemera pieces or other elements. I reached for cardboard stickers mostly, as they add great texture to every project. You can also spot few wooden buttons (my big love!). Big words look great accompanied by small phrases in different font so I added few word strips from stickers sheet. I finished my project by adding few super cute puffy stars here and there as a stronger color accents.
That is all for today. I hope I inspired you to use those die cut titles. You can arrange longer title with them, use single words and I even fussy cut single letters to make totally new words with them! Sky is the limit here.
Thank you so much for stopping by and see you in June! Let’s hope I will have some project made with brand new line to share with you.
Hey Everyone! It’s Michelle back here today with another instalment of our regular ‘Throwback Thursday’ theme. I dipped into the remnants of my Legendary Collection stash for this layout to document my awesome nephews recent birthday. This kid is such a rad rockstar, he absolutely deserves to shine bright on the Cocoa Vanilla Studio blog!
Our little family have recently been struck down with the dreaded ‘spicy cough’ as some may call it, and during one of the many days that I didn’t move much from bed I ended up fussy cutting an entire sheet of stars from the ALL STAR 12×12 paper in the Legendary Collection. A lot of tiny scraps of paper left in the bed and a fully cramped hand but I’m absolutely thrilled with the end result, a vision that came together in my head while sick in bed a few days prior.
To create the layout I started with a star shape clip art found easily in a google search, resized in Silhouette studio so that it filled as much of the 12×12 background paper as possible and cut it out on white cardstock. I separated the large star shape from the negative outer edge piece without tearing any edges and kept both pieces for future steps. Next I created the star outline that overlays the top of the pattern stars, this was done with a simple cut, paste and resize of the original star shape to create the outline piece. Again, both pieces separated once cut and sat to the side.
Now it was time for the fun part. I used the larger star piece from the original cut to add all the different coloured and sized stars using both foam tape and glue adhesive for different heights of dimension. This took a couple of hours to get it all right to ensure both colours and sizes were evenly distributed. Once this step was complete I was able to assemble the layers to make the background pop.
To get the layers exactly right I started with a fresh sheet of white cardstock on the very bottom, on top of this I added the negative outer edge piece of cardstock from the first cut adhered flat on top. This helped to assist with the correct placement of the bright stars piece which was added straight after. The final ‘layer’ to this star spangled sanga was the second negative outer edge cardstock piece which I lined up with the first and adhered using foam tape to create shadow lines and dimension down into the star pieces, if thats what you would call it. Lastly I added the star outline piece over all the layers, rotated around so that it sits different to the pieces below it and adhered with more foam tape for a little extra pop off the page.
I added the sweet photo of my super cool nephew to the left of centre and layered complimenting pattern papers underneath with the addition of a sticker and ephemera piece tucked in for good measure. I printed the photo in black and white to avoid any colour clashing, as there was a lot of similar colours in both.
Under the photo I added the mixed font title, made using the word EPIC from a 3×4 card on the EPIC TALES paper and some of my most favourite white alphas that I’ve stitched into place, finished off with a mini cluster of fussy cut stars
Over on the top right of the layout I added another little cluster of stars along with some ephemera pieces and a word sticker from the accessory stickersheet
and in the bottom right side of the star I added a note about the photo and even more fussy cut stars.
Here’s a final look at the layout with all its brightly coloured stars and a splattering of black ink. I really enjoyed creating this layout using the LegendaryCollection. It’s certainly fun creating things that are different to the usual pretty florals that I tend to be drawn to. Plus the fussy cutting of the stars felt quite therapeutic and was a good little activity to make the day pass quicker while stuck in iso.
Well thats all from me today, thanks so much for stopping by! I hope this layout has inspired you in some way to get a little creative with fussy cutting, as theres so many papers within the Cocoa Vanilla Studio Collections that are perfect for chopping up and recreating with. I hope to see some of your creations shared within our Community Group real soon.
Hi everyone, it’s Sue Plumb here to share another design team project with you. For today’s post I was tasked with scraplifting the amazingly talented Sophie Delorme, which was simultaneously exciting, but terrifying. It’s no secret I have a huge scrappy crush on Sophie’s work, so to be asked to scraplift one of her layouts was no easy feat. How would I ever choose? Or do it justice? In the end, I chose a stunning autumnal themed layout that she created a few months ago using the ‘These Days’ collection.
Here is Sophie’s layout…
And here is my take on it using the ‘Happiness’ collection…
I have to admit, the clincher that made me choose this particular layout of Sophie’s was the butterflies. And I couldn’t help but reach for the collection with my all-time favourite Cocoa Vanilla butterflies – ‘Happiness’. I think I will actually cry the day I use my last scraps of this collection.
Sophie and I have daughters that are very close in age, so just like Sophie did for her layout, I wanted to document a photo of my gorgeous girl too. Due to her position, where she was facing towards the left side of the photo I chose to mirror the design so I could position my photo closer to the left edge of the page and having her facing inwards. (Tip: always position your photos so the main subject is facing towards the larger space on your page.)
Just like Sophie’s original, I added torn paper along the bottom edge of the page; and instead of the Pocket Cards that she had used across the middle, I used pieces of patterned paper cut to size. I chose the piece with the two large butterflies and hello beautiful on it to act as my title card, which was cut from the cut apart paper. On top of the the heart paper I added some of the phrase stickers from the Accessory Sticker sheet, which I had mounted onto some pink paper to give them a little definition against the background.
From the torn paper along the bottom edge, I added fussy cut flowers spilling out and winding their way up along the right edge of the photo. these were layered to give them depth and I used foam tape under the one on the corner of the photo for even more dimension. I couldn’t help but add a little frayed gauze for some texture too.
The only item I used on my page that wasn’t from the ‘Happiness’ collection, was the small wood button that was actually from the ‘Sunkissed’ collection. ‘Happiness’ did not have wood buttons, and as Sophie had used one on her page I wanted to include one too. I also wanted to add a couple of embellishments to my photo, so I chose a small heart flag and a phrase banner from the Die Cut Ephemera pack.
I substituted the journalling from Sophie’s layout with a couple of paint swatch stickers from the Clear Sticker sheet and I like the mixed media touch they gave the page. The star of the embellishment show however, was the glorious burst of fussy cut butterflies spilling upwards from the title card. I bent their wings up from the page to give them dimension and a sense of movement. The final touch was some small splatters of navy mist (because I couldn’t have my layout too clean, could I?)
If you would like to see how I put it all together, you can watch my process video here:
Thanks for stopping by today, I’ll be back with another project again soon. Until then, happy scrapping!
It’s Sophie here and I have something fun to share with you!
Today is a scraplift swap !
I had to pick a layout from the lovely and talented Sue Plumb and scraplift it! Ohhh there were so many GORGEOUS ones to choose from…!
Here is her page:
And here is mine:
I used the beautiful These Days collection for my page. I started with a white background and added a little bit of mixed media (I used Distress Oxides) on the lower portion of the page, where my title was going to be.
I used three layers of patterned papers, just like she did, teared the central part of the upper layer and tied it to the page with a few stitches. I also hand stitched on the top of the page.
I centered three colored photos of Sabrina and Farine, mounted on tissue paper and foam adhesive, and tucked a few frames from the embellishment pack under them.
My title is a combination of the Mini Puffy Alphabet pack and letter dies from my stash.
Finally, I created a floral cluster around the photos and titles, instead of hearts, added a few butterflies and a Wood Button, and handwrote my journaling.
Here are more close-ups:
That’s a pretty faithful scraplift from the original, isn’t it? Even though the end-result, with another color scheme and collection, turns out quite different…! That’s the beauty of scraplifting !!
I hope this was inspiring for you and that you like our pages!