
Happy Easter | Happy Days collection | Tarrah McLean
Hi creative friends!
It’s Tarrah back with you today, I am very excited to be sharing my first layout featuring the gorgeous new Happy Days collection!
I was tasked with using the gorgeous April mood board as my inspiration for my project this week, the Happy Days collection has so many elements in it that match perfectly with the mood board!
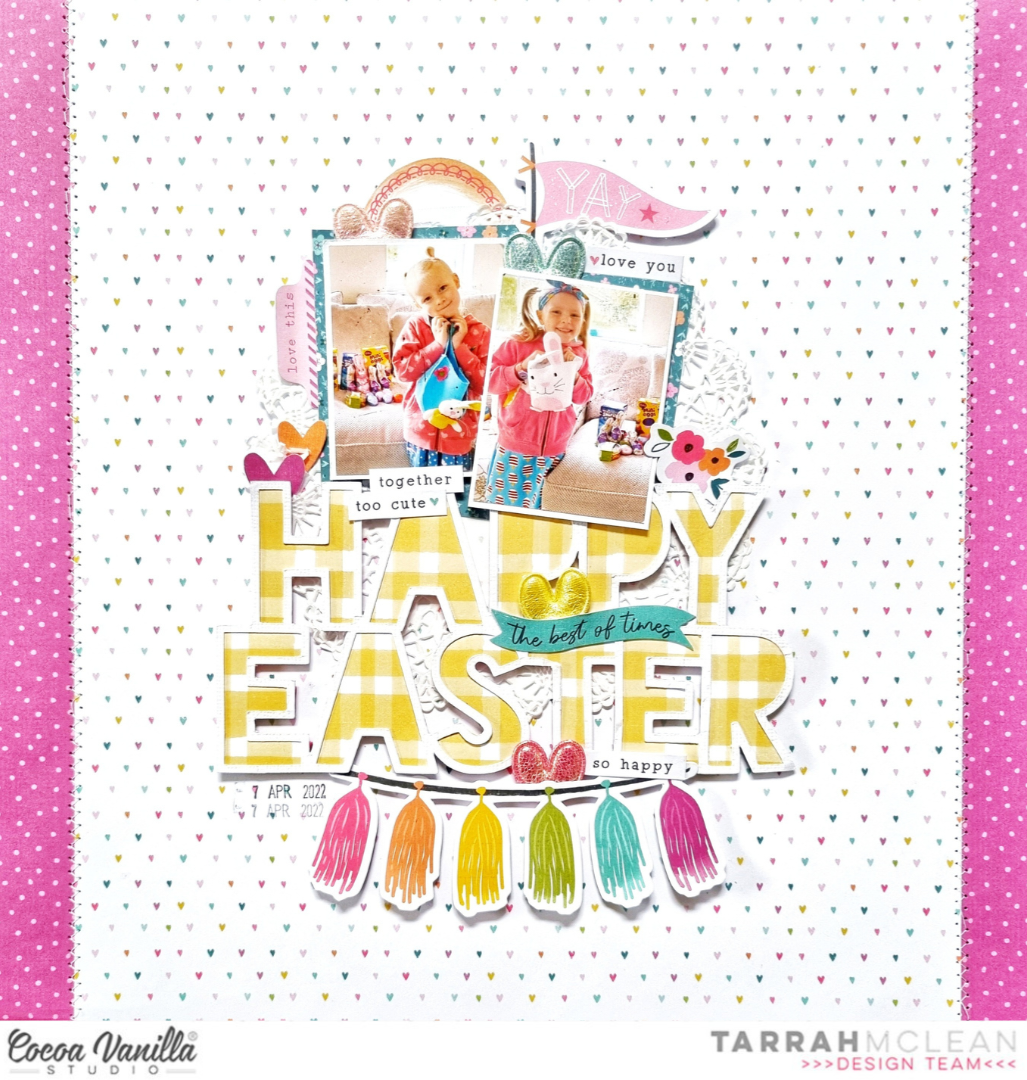
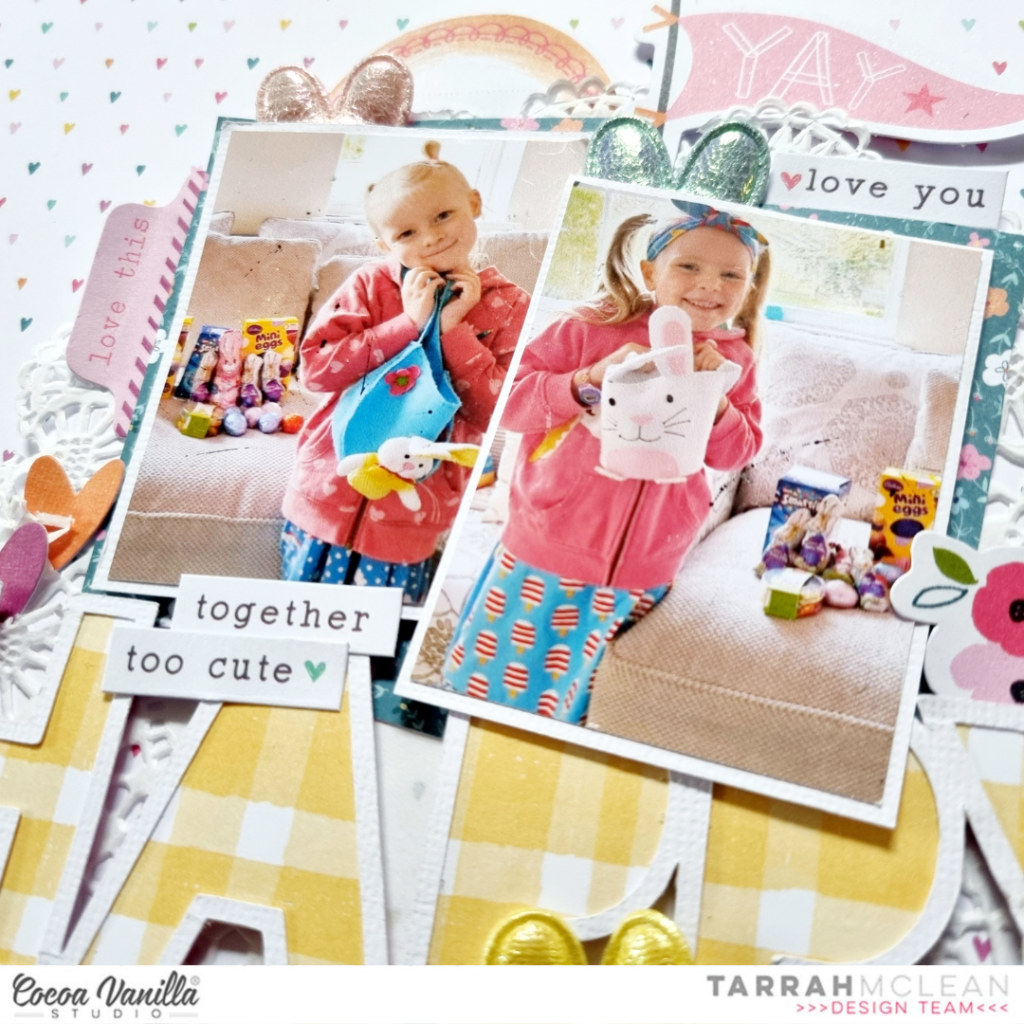
I am documenting 2 photos of my nieces from Easter last year, I love their sweet faces so much!
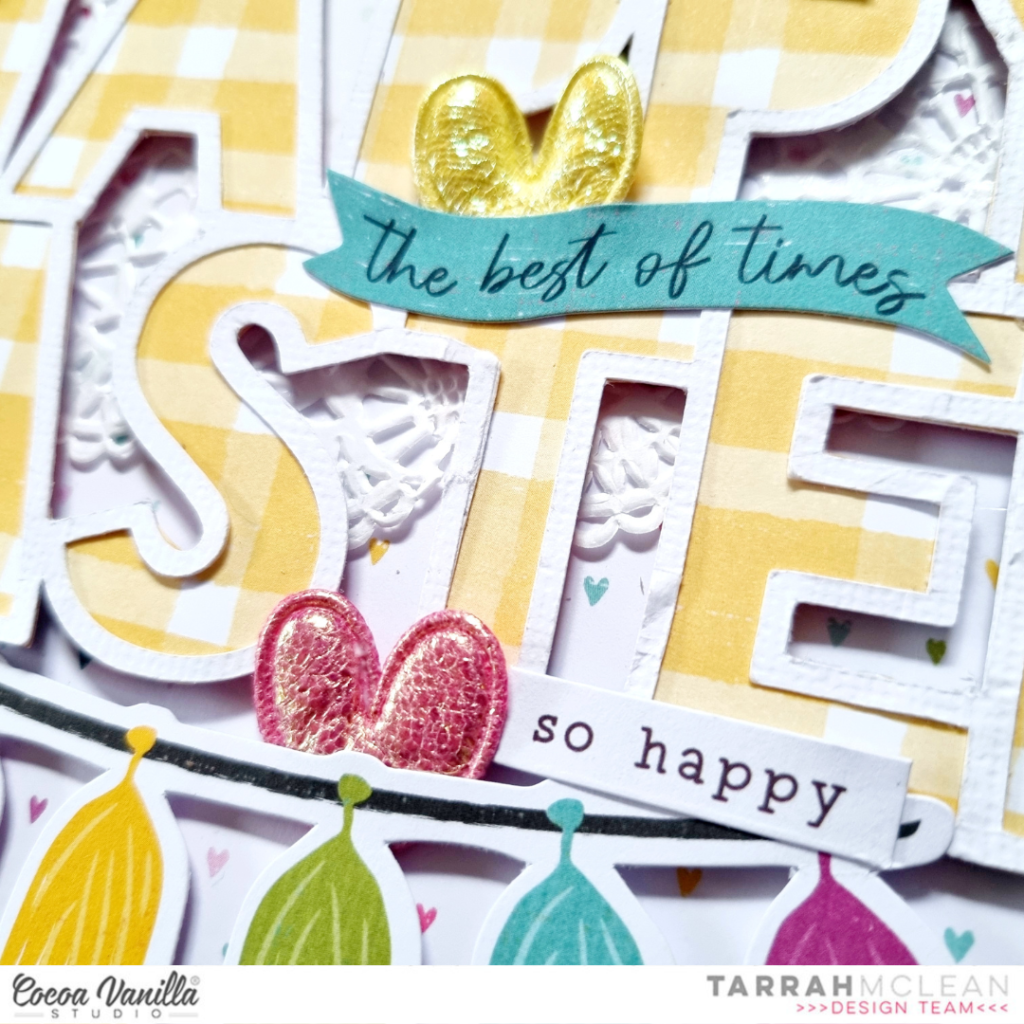
As the mood board is mostly Easter themed, I chose an Easter title cut file from CUT to YOU and backed it with one of the large 12′ x 12′ papers. I love the yellow plaid patterned paper!
You can see from the mood board image below that I was inspired by many things from the mood board! The Happy Days ephemera pack has the gorgeous tassel banner included in it, I knew I was definitely going to add that to this layout! It is perfect!
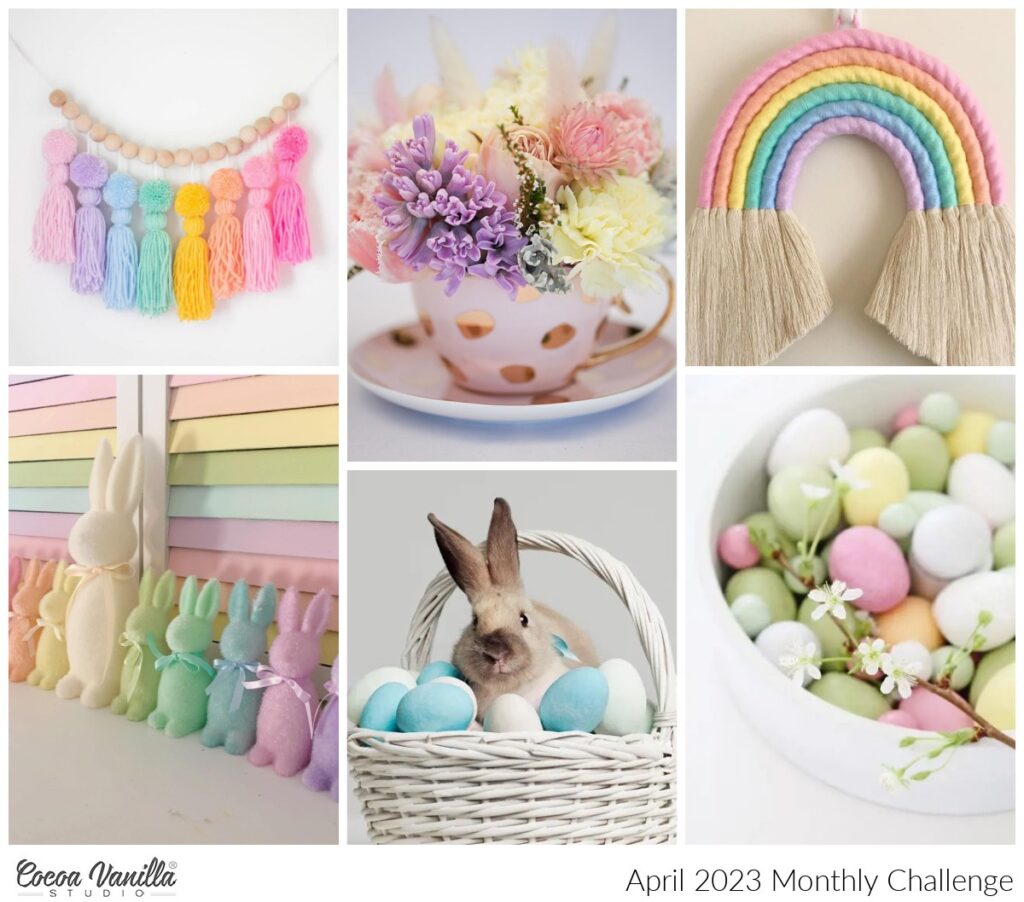
I absolutely love this mood board! There are so many things you can inspired from this board!
I placed a large white paper doily down on the heart background patterned paper and then adhered the cut file down using craft foam, leaving some room for my photos above the title. I did trim down the heart patterned paper and adhered it to the pink/purple spotted paper. I then machine stitched a zig zag border down the edges where the papers meet. I love the texture that the machine stitching adds to a layout!
I layered one of the papers from the A5 paper stack underneath my photos to help lift them a little bit. I added craft foam underneath the photos as well and also added craft foam under the tassel banner and adhered this at the bottom of the title. Now that I am happy with the placement of the largest elements on my layout, its time to embellish and tell some of the story!
Do you ever look at embellishments and think about how you can use them for something they aren’t originally intended for?
I do this a lot! When I saw the fabric puffy hearts in the Happy Days collection, I just knew I had to add them to this page to mimic bunny ears! Really hoping that you picked out the bunny ears before I pointed them out to you hehe! Aren’t they the cutest?! I added 4 of these in the end, tucking them in enough so that they peek out of the tops of what they are adhered behind.
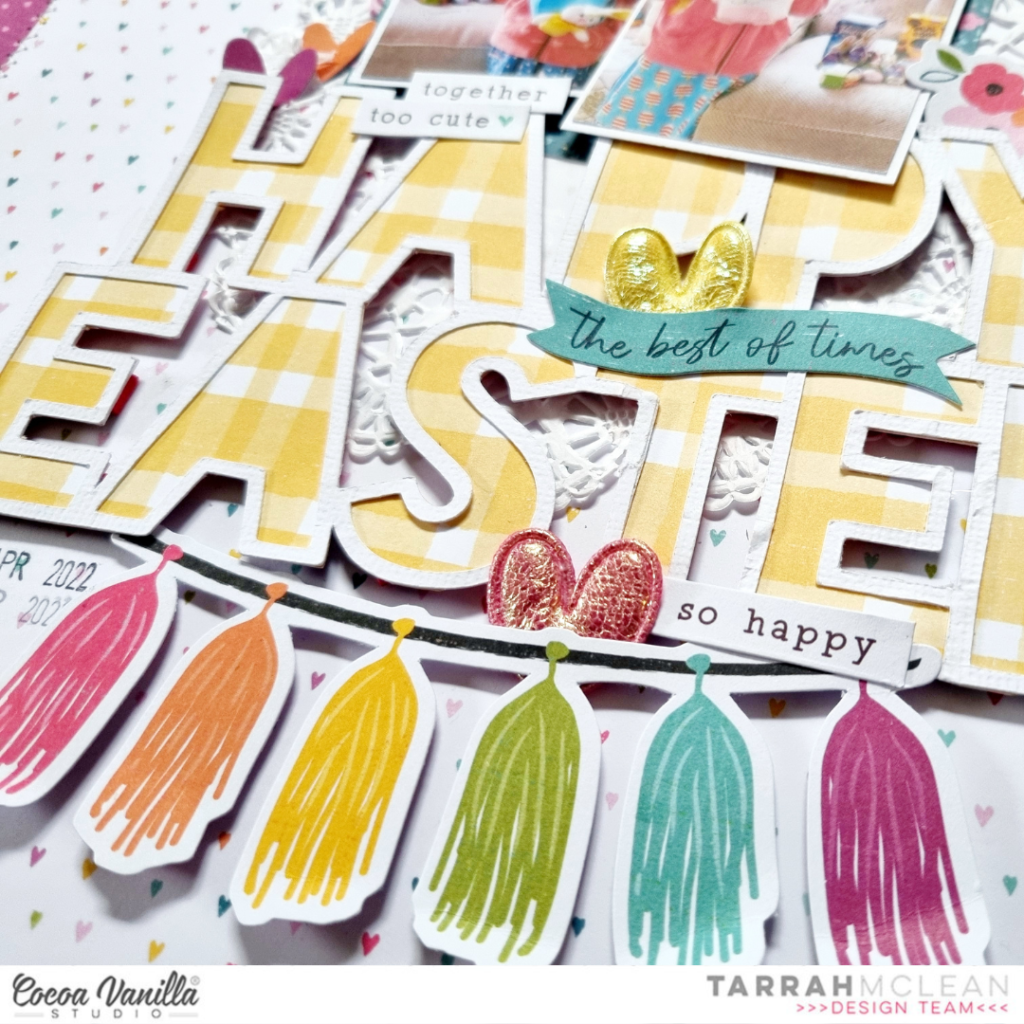
By using craft foam underneath some of the larger elements on my page, it creates some shadows and dimension to my page which I love! You can see in the photo above the shadows created under the tassel banner. I didn’t add too many embellishments to this layout as sometimes less is more when it comes to embellishing. I did add a few die-cuts from the ephemera pack like the Yay banner, the small flower to the right of my photos and the round journal spot above the photos. I also added the phrase across the cut file, to help break up all that yellow! I also added the cute Love This tab to the left of my photos as well.

Lastly I helped tell the story of my layout by adding the small phrase and word stickers from the Accessory sticker sheet. One of my signature things I do on almost all of my layouts is to stamp the date stamp, the date is of when the photo was taken. Another thing I like to do is, and you don’t see this but I like to sign the back of my layouts and I write the date that I created it as well. I have doing this for years now! Do you have something you like to include on all of your projects? Please share with us!
Thank you so much for stopping by the Cocoa Vanilla Studio blog today! I hope you enjoyed reading how I created my layout as much as I enjoyed creating it!
Make sure you get your hands on the gorgeous NEW Happy Days collection from your local scrapbook store or favourite online store!
Happy creating!
Tarrah x